Estimated reading time: 5 minutes
Table of contents
The Benefits of Chain Piecing
As a new quilter, the method of chain piecing seemed magical to me! Not only was I surprised by the time savings, I really liked how soothing this technique made my stitching time.
Firstly, when piecing a sampler quilt (for example, the River Heritage Block-of-the-Month Mystery Quilt), chain piecing individual blocks can save you time and help you stay organized.
Chain piecing is a great technique for all quilters to know.
Secondly, since we have all levels of quilters participating in the free mystery quilt offered here, I decided to share a technique with our newer quilters in mind.
Moreover, chain-piecing is something seasoned quilters do without thought. I remember the lightbulb going on when I was first taught to chain-piece.
My approach to this method.
Actual chain-piecing is not nearly as hard as describing it in words.
me (author)
Have you ever given road directions to someone and said, “It’s not nearly as confusing as it sounds.”? That’s how describing chain-piecing is. Hand’s on, it’s easy to grasp. In words, it seems confusing. Take it a step at a time the first few times and soon you’ll be chain-piecing without even thinking about it.
Here’s how I approach chain-piecing an individual block.

The goal when chain piecing is to do as much continuous sewing as possible.
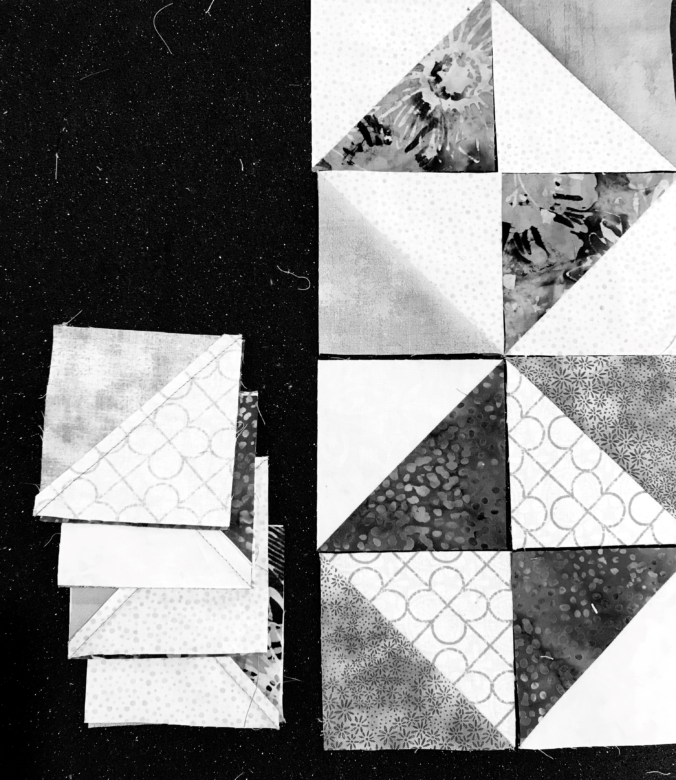
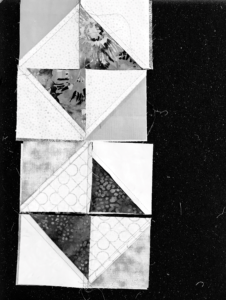
- Cut and prepare block pieces. Sample shows all half-square triangle units (HST).
- Arrange block pieces according to block design.
- Notice your columns and rows. Here there are four columns and four rows. The unit on the top left is in Row 1 and Column 1.
- Turn each HST in Column 2 onto the HST to the left, in Column 1, right sides together (RST).
- Likewise, turn each HST from Column 4 onto the HST to the left, in Column 3, RST.
- Stack the Column sets to move to your machine for stitching, taking care not to lose their proper order.
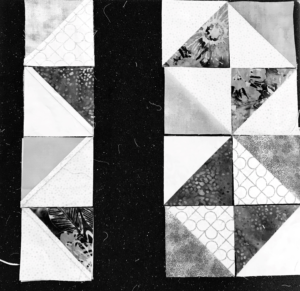
- Starting with the top set ( the unit from Row 1, Columns 1 & 2), stitch down the right edge with your normal 1/4 inch seam allowance.
- In the same fashion, feed all of your units, one after another into the machine without clipping their threads. A machine with a knee bar makes this easier, but it is not necessary.
- Trim threads. (See a great thread cutter here, made specifically for chain-piecing.)
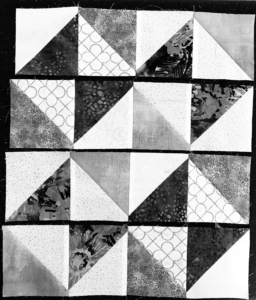
- Press according to pattern. Arrange the units again in proper order You should have two columns.
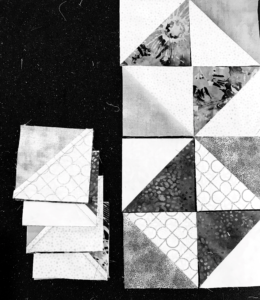
- Similarly, turn Column 3/4 Units onto Column 1/2 Units. Stitch, trim & press. You are now left with four completed rows.
- Finally, stitch the rows together.
Organization and order is essential.
The Progress.
Granted, the process of chain piecing may seem never-ending. However, once you’ve constructed the rows, your progress really shows itself.
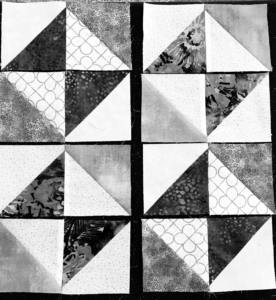
Trim and Square
Importantly, remember to square and trim your block after it is pressed.
Enjoy your quilting journey!
See and shop more than 50 quilt patterns that use BOTH beautiful sides of fabric!


Love the tutorials! Thanks