Karla shares her tips and techniques for a variety of topics.
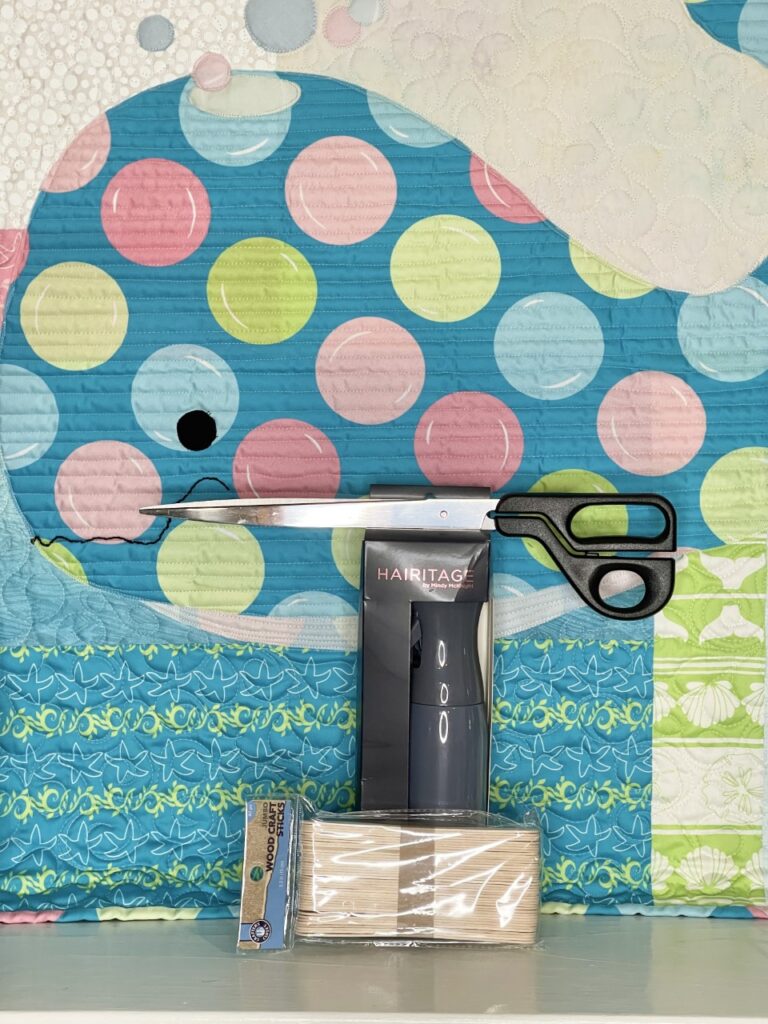
Learn tips and techniques for everything from favorite quilting tools to choosing color palettes from nature for your quilts. You’ll even find some “Unlikely Quilting Tools” like shown above with BUBBLES.
(BUBBLES is made with both beautiful sides of “Bubbles Geometric” fabric designed by Karla. He is shown here with popsicle sticks, a hair mister, and some very long scissors from the automotive store.)
Tips
Firstly, from blog posts to YouTube videos, you can pick up easy tips that you can use right away in your quilt projects.
For example, learn how to have your quilts ready to hang with the last stitch of your binding with the Prairie Point Hanging Method. See Karla’s segment on YouTube or read her blog posts. It’s easy to do and makes finishing quilts very satisfying!
Techniques
Next, you’ll find basic quilting techniques that are especially helpful for beginner quilters. Quilters can find a variety of instruction. For instance, learn how to use yarn to fill your binding or how to chain piece blocks for one of Karla’s free designs.
In conclusion, you’ll find a variety of instruction and inspiration to enhance YOUR quilting journey!
Some quilters use bias binding all the time, for everything. I understand it is a cleaner finish, molds to the edge of the quilt, and provides more fibers on the edge of the binding. For all of these attributes, I must admit, I don’t use it all that often.
Bias binding, for me, is something I consider when I want to use a bias stripe or if I’m binding a quilt with unusual edges. Since those two things don’t occur all that often for me, I usually need a refresher on bias binding before I begin cutting.
I liken it to the first two steps in paper piecing, when I haven’t done paper piecing in a while. Mastering those first two pieces can take me the LONGEST time. Once my brain grasps it, I’m good to go – but it takes me some time.
Since I AM from the Show-Me state, I do like a good tutorial. It doesn’t have to be a video, but I usually like pictures. How about you?
So if you are need of a refresher in cutting and using the bias binding, here is what you’ll learn:
How to cut bias strips
How to cut one continuous bias strip
The difference between single and double bias
Check out these tutorials about bias binding on Pinterest:
Need a fast straight binding solution for your quilt? Check out Lickety-Split Binding HERE!
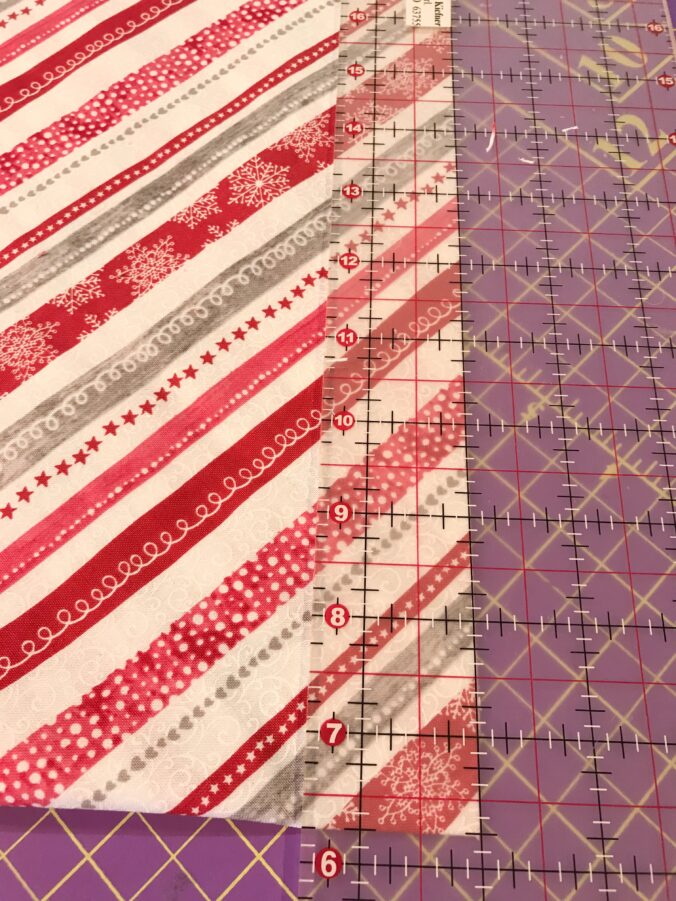
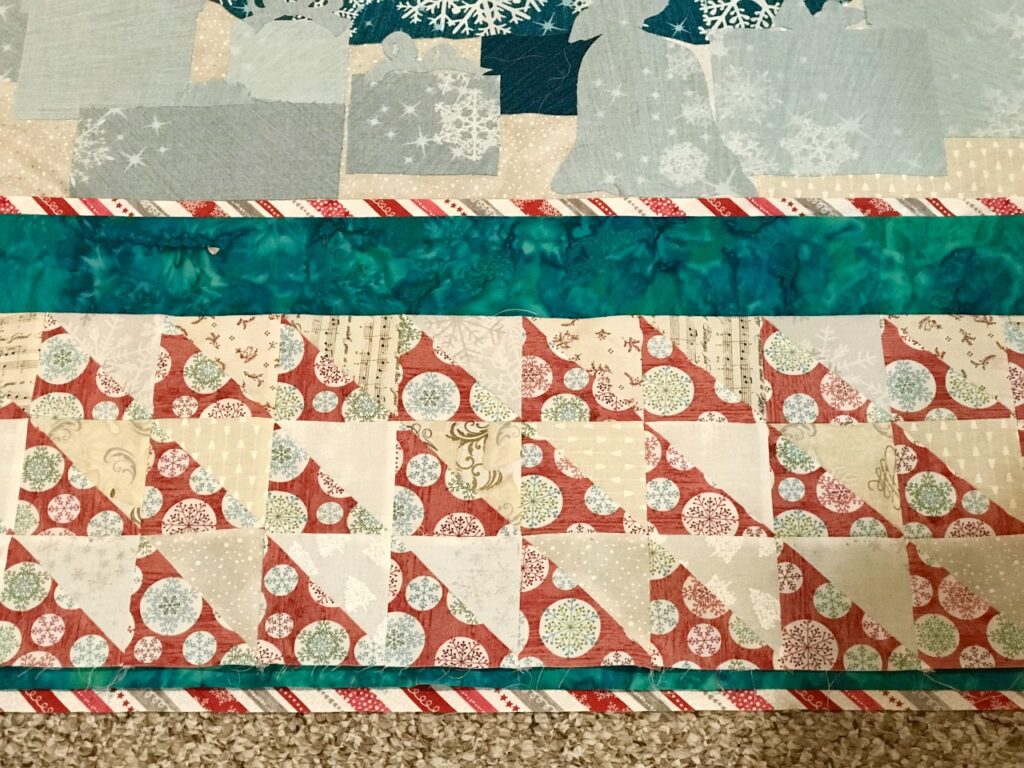
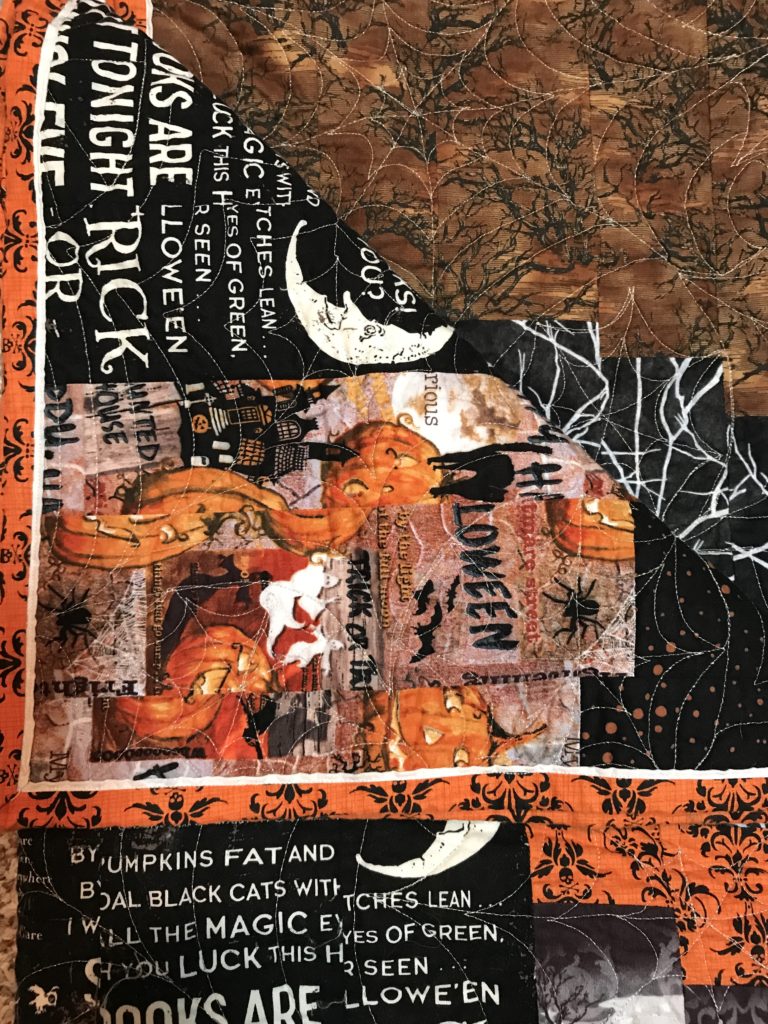
How about using bias of a stripe for a flange?
Here’s a glimpse of a new pattern made from an old pattern coming soon! Here I have laid out the pieced top and auditioned an outer flange and bias binding. The bias flange is accenting the center of the quilt.
Are UFOs, PIGS, or WIPs a part of your New Years Quilting Resolutions?
UnFinished Objects, Projects in Grocery Sacks, and Works in Progress can weigh a quilter down if she or he isn’t careful!
Maybe you could use this easy binding technique to get some of your projects out of the way and off your mind. The Lickety-Split Quilt Binding makes that last big step go quickly and looks smart!
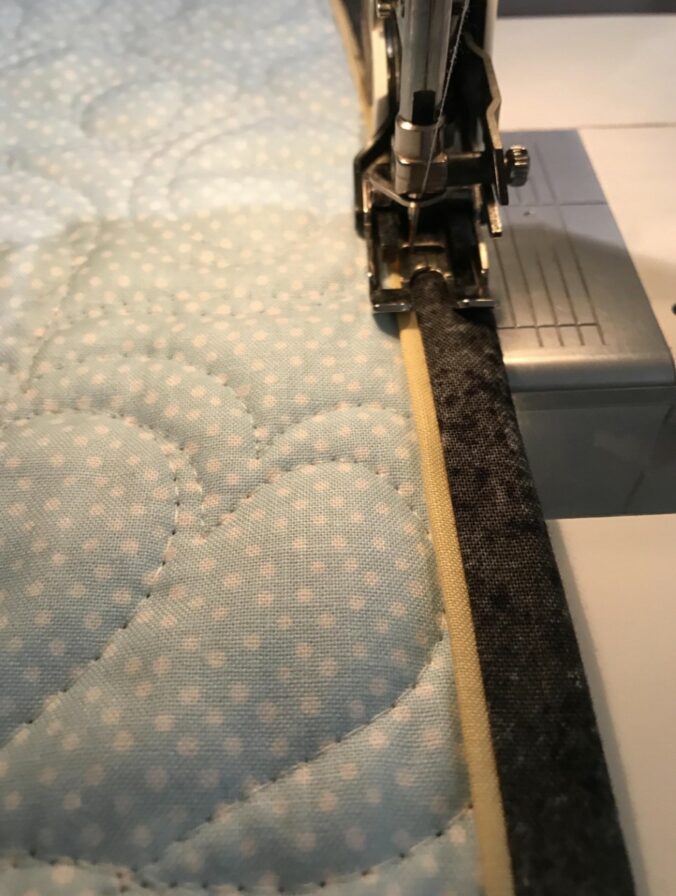
When I have “git-er-done” quilts on my quilting resolutions list, this is my go-to technique. This technique provides a 2 1/4″ or a 2″ binding (for mini quilts) options for those quilts that don’t require a hand-turned binding. See this original binding method here – it finishes a larger than 2 1/2 inch size binding.
What’s nice about this machine stitched binding is that it gives your quilt a tiny burst of contrasting color between the quilt and the binding, appearing to be piping or a “micro-flange”. This also gives your needle a perfect nesting line for stitching on.
How to:
2 1/4 ” binding: Cut main binding strips 1 1/4″ width and cut the accent strips (piping look) slightly larger at 1 1/2″ width.
2″ binding: Cut main binding strips 1 1/8″ width and cut the accent strips (piping look) slightly larger at 1 3/8″.
Simply cut your strips, sew them end to end and press like normal binding. Do this for both sets of strips. Then, with right sides together, sew your long strips, press the seam to the binding color.
With the seam facing down, align the edge of the binding along the edge of your quilt and stitch a scant 1/4 inch seam (or smaller than your final stitch seam. Lastly, using bobbin thread that matches your backing and upper thread to match the accent, turn your binding to the front of your quilt and stitch in the ditch between the two fabrics. You might use a seam guide and adjust your needle position to a comfortable spot.
And just like that – your binding is finished – Lickety Split!
Here’s to your health, happiness, and many finished quilts in 2020!
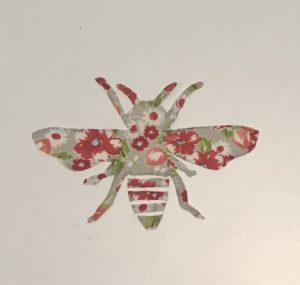
Need a new project? Shop more than 40 patterns at Creative Bee Studios that use BOTH beautiful sides of your fabric!
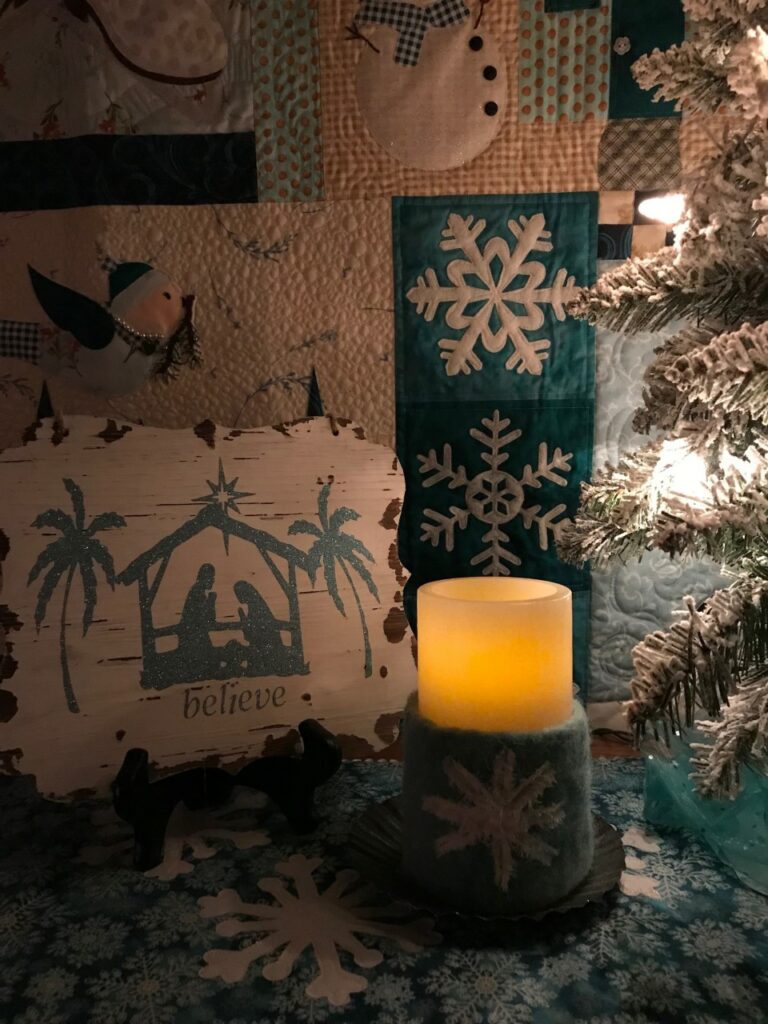
Do quilts already play a part in your Christmas decorating? They do in mine! How about including some additional textures among the quilts?
Add texture with simple touches.
Explore some new techniques and textiles to add to your holiday handmade joy!
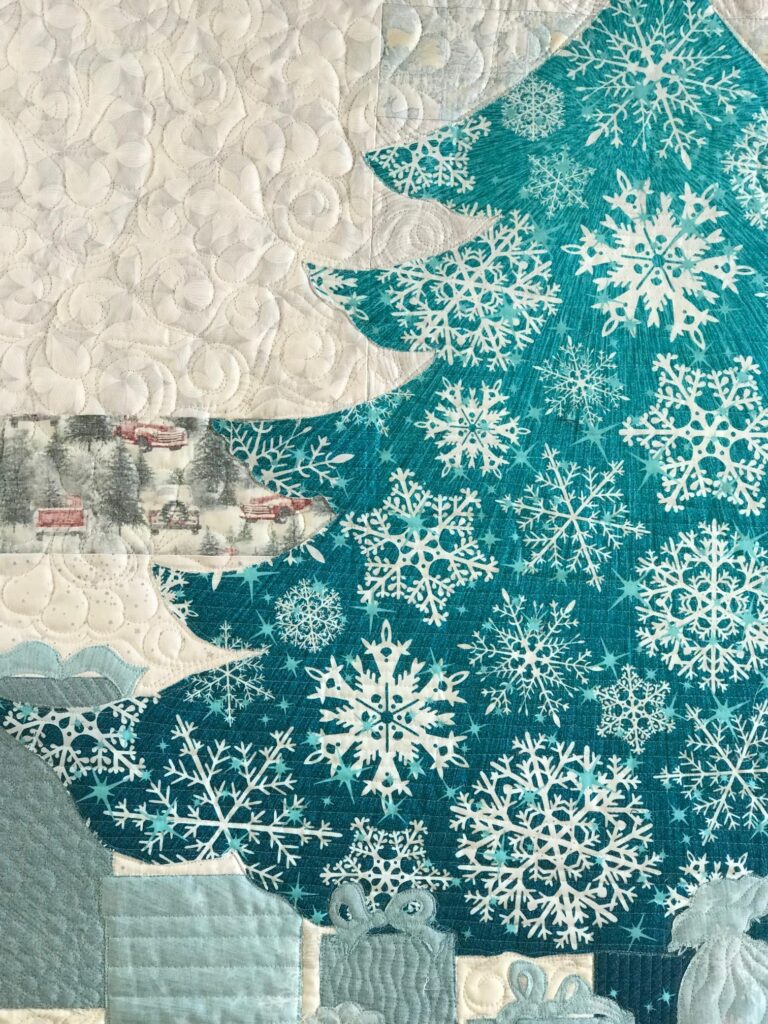
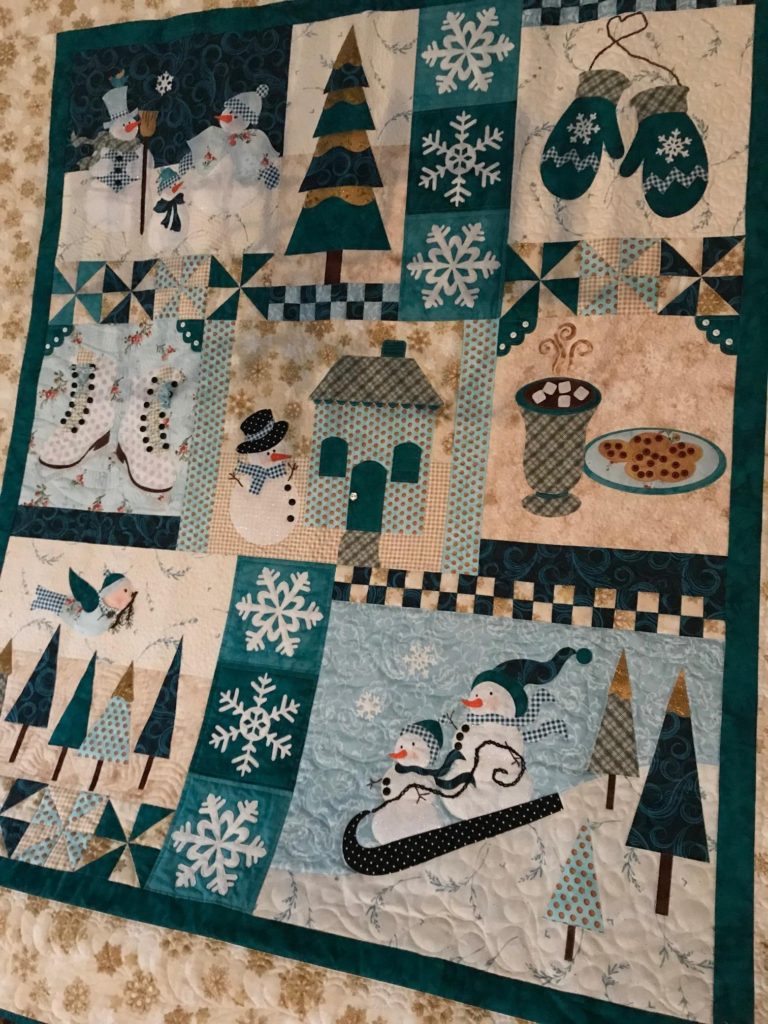
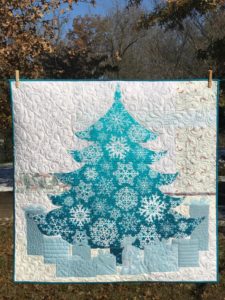
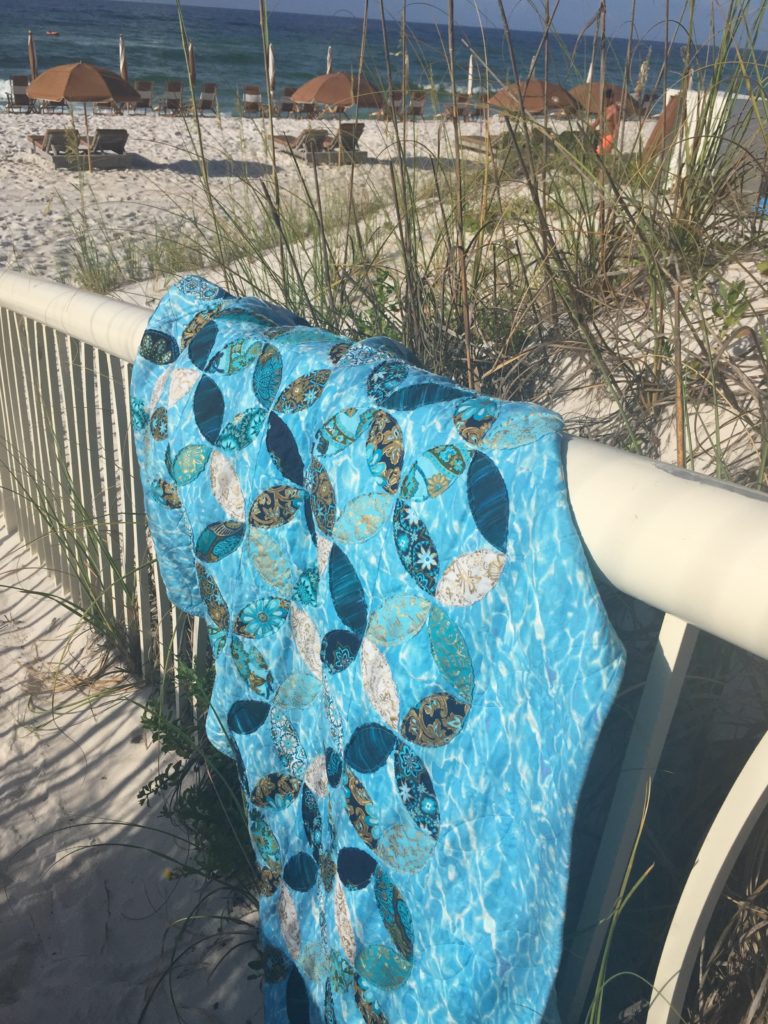
The main focus of my dining room is a texture-rich quilt! This quilt is great for decorating all winter long. I happen to love aqua as a Christmas color (year-round, really) and it’s here to stay in parts of my Christmas/winter decorating! Fun things to note on this quilt are the buttons, “pearl” necklaces on the birds, skate strings and glitzy fabrics.
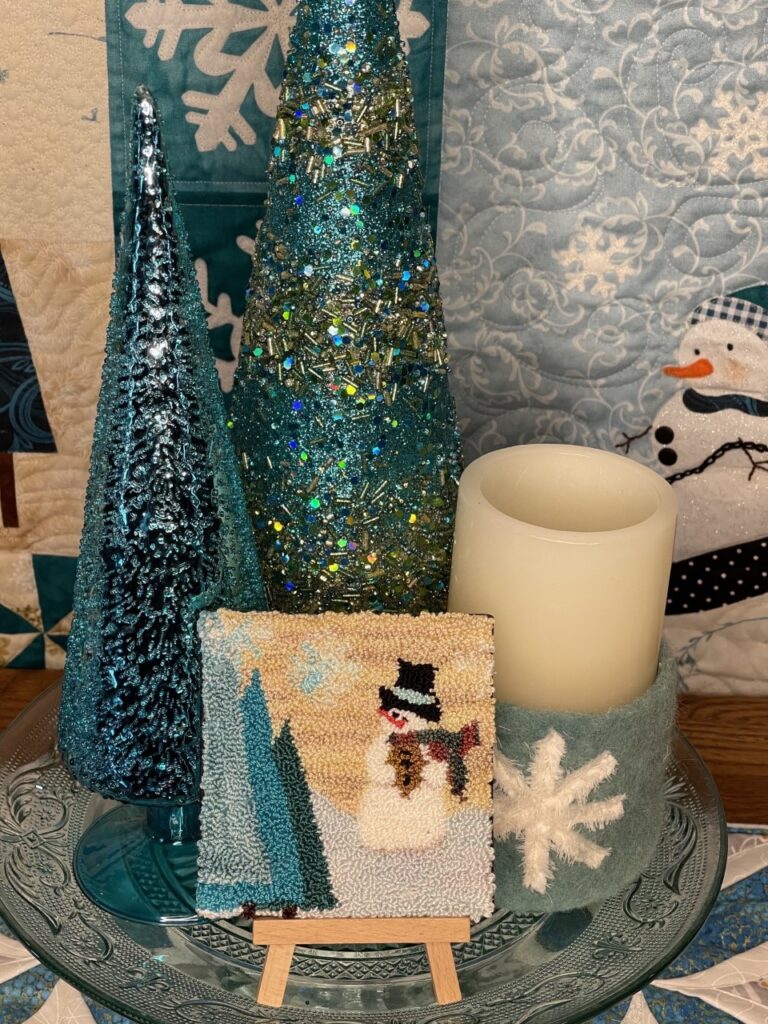
Mr. Punch Needle Snowman is small enough to finish quickly and glue to the smallest canvas (available at Michael’s). Click on the link above for the free PDF download.
Snowflake Table Runner
I made this simple table runner from one wonderful piece of snowflake fabric. Next, I cut the glitzy snowflakes with an Accuquilt die and fused them in place. I did quick quilting on the top/batting. Then I added a ribbon of tiny white balls, like a piping. Finally, I layered it with the backing and turned it like a pillowcase- super fun and fast!
Wood Manger Scene Sign
Make a quick manger scene sign using Scan N Cut, a pre-made sign and shimmery vinyl!
Wool Candle Wrap
To make the candle wrap, I just cut strips of muslin on the diagonal and stitched down the middle of them onto a piece of wool. I then threw them in the washer and dryer with a load of towels and they came out nice and fuzzy. Connect the ends in back with a button and a thin hair elastic, sewn to the wool.
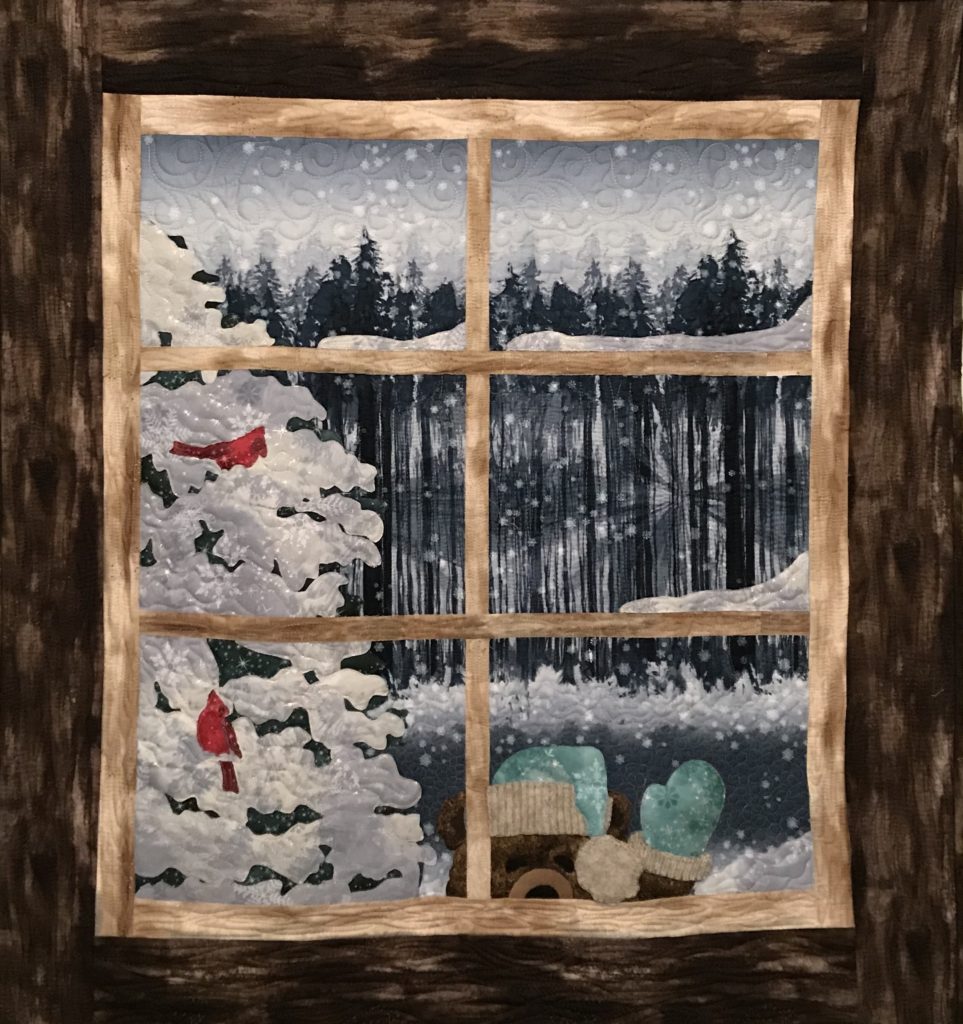
Just for fun, take a look at this Christmas bear quilt! I made it from a McKenna Ryan kit. His hat and glove were meant to be red cotton, but instead I made them from a fun aqua cotton and the ribbing from an old wool sweater that was in my late mother-in-law’s stash.
Be sure to check out the Christmas quilt patterns made with BOTH beautiful sides of fabric HERE!
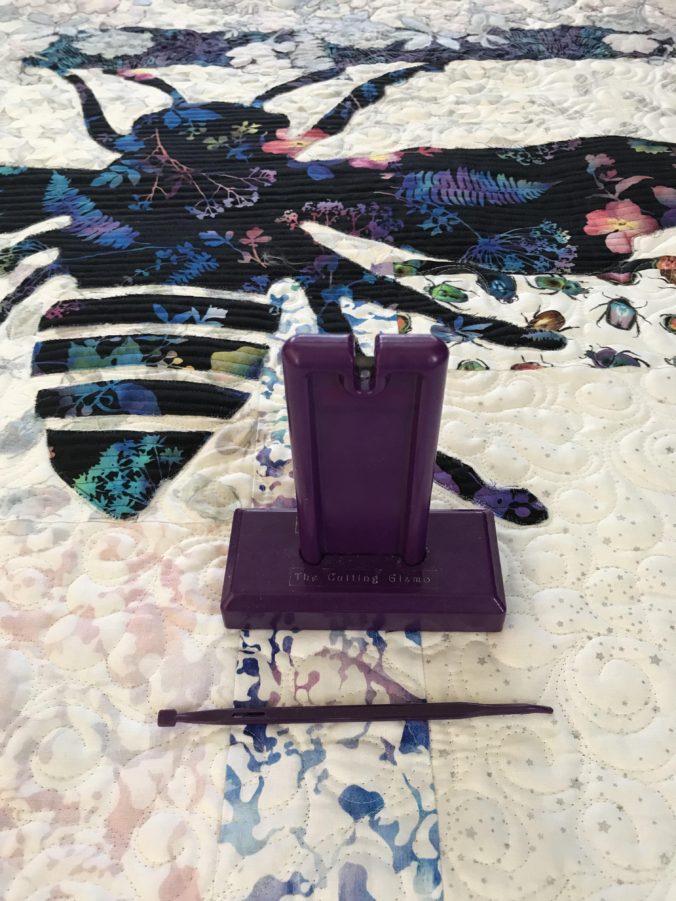
Two simple quilting tools make a big difference in my stitching experience.
While both of these quilting tools are “Barney” purple, their uses are anything but child’s play!
The Cutting Gizmo has it’s place in my studio AND my retreat bag.
First, let’s look at The Cutting Gizmo. If you chain piece, this guy is a must-have! The Cutting Gizmo (click here) is by no means new longevity is in it’s favor. This tool by Gypsy Quilter is the best stationary snipper I have found.
Specifically, The Cutting Gizmo is a weighted cutter with a rubber, non-slip bottom. It is especially wonderful to use when you are making lots of chain-pieced segments for a pieced quilt. Just grab the two fabric pieces and draw them down either side of the gizmo to cut the connecting thread.
This gizmo saves and repetitive movements.
Seriously, think about the time it takes to grab your scissors, re-positioning your hands, snip a thread and put down your scissors.
Instead, you just pop up from your machine, snip, snip, snip and press, press, press! I keep this tool on the end of my ironing board, always.
Secondly, that long thin stick is one of the first quilting tools I ever purchased. So, at about twenty years old, it must be a good “thang”. It’s actually called, That Purple Thang from the Little Foot Quilt Shoppe.
That Purple Thang is more than just a pointy tool.
One end is softly pointed with a slight curve. It’s perfect to send nearer your moving needle than you want to send your fingers. You can control your fabric with the thin tip. The softly squared end is useful, too. One use is for turning a getting neat edges when turning a project right side out. I’ve had other tools made for this purpose, but this is the one I always go back to. I’m not sure why, but unlike other similar tools I’ve owned, I don’t misplace this one! I think it’s the cute name…
Both tools are shown on the Phoebee 2.0 quilt made from both beautiful sides of Hoffman California Fabrics.
This line of fabric, called Electric Garden, is bold and soft at the same time. Learn more about using both beautiful sides of fabric HERE.
Use the social media buttons to share on Facebook, Instagram, and Pinterest!
It’s quilt retreat and time to take your sewing on the road!
First, for quilters to go through all the trouble of taking down one work station to pack to all up, travel, and set it up somewhere else means it MUST be a lot of fun! Whether you go for the social time, productivity, shopping or a combination, making the launch from home sewing to retreat sewing can be easy!
Keep it all in one spot.
I have a friend who keep duplicates of all sewing supplies. Of course, that is the ultimate way to pack and travel. But if space and budget don’t allow for duplicates, try using a central command center.
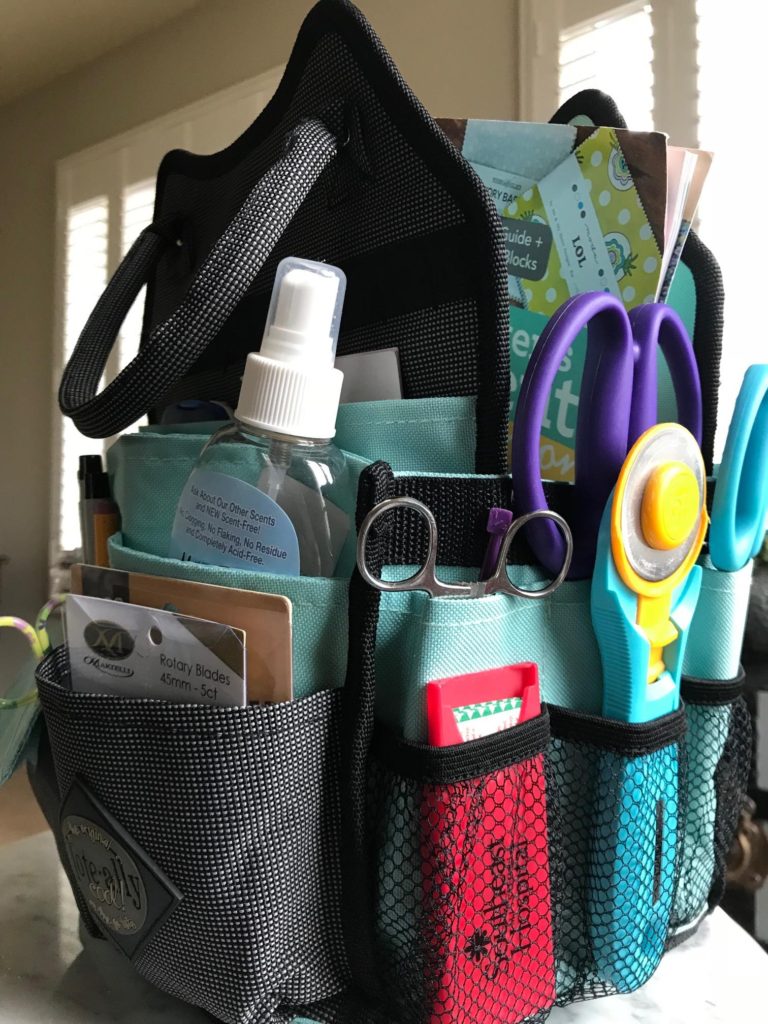
Find a organizer that works at home and away.
The one I use, pictured above holds just about all the little tools and gadgets I need for retreat. I can even store my mini iron in the center section.
I tend to take a lot of items on quilt retreat because I want to pack (no pun intended) everything I can into those lovely few days. Overall, I like to enjoy all the aspects of a good retreat which include laughter, fabric shopping, relaxation time, yummy food, reading, movies, music, and walks, I’m still a high production type of quilter.
No sense spending time looking for supplies.
Whether in my studio or on the road I need to see what I’ve got and know where to find it.
Below is a very unofficial list of some of the things I take on retreat. I hope it helps you get ready for your next adventure of quilting on the road.
Sewing machine (with cord, pedal, extra light bulb, bobbins, and attachments)
Table
Extra lighting
Projects, preferably pre-cut
Felt-backed table cloth for make-shift design wall
Other supplies such as seam ripper, rotary cutter, blades, rulers, and cutting mat.
Iron and pressing mat or board and pressing spray.
Extension cords and electrical strips.
Personal items, including clothes, usually get packed last for me! You might consider walking shoes, rice bag for sore shoulders, and pain relief.
Charger cords
Snacks
The rest of the story.
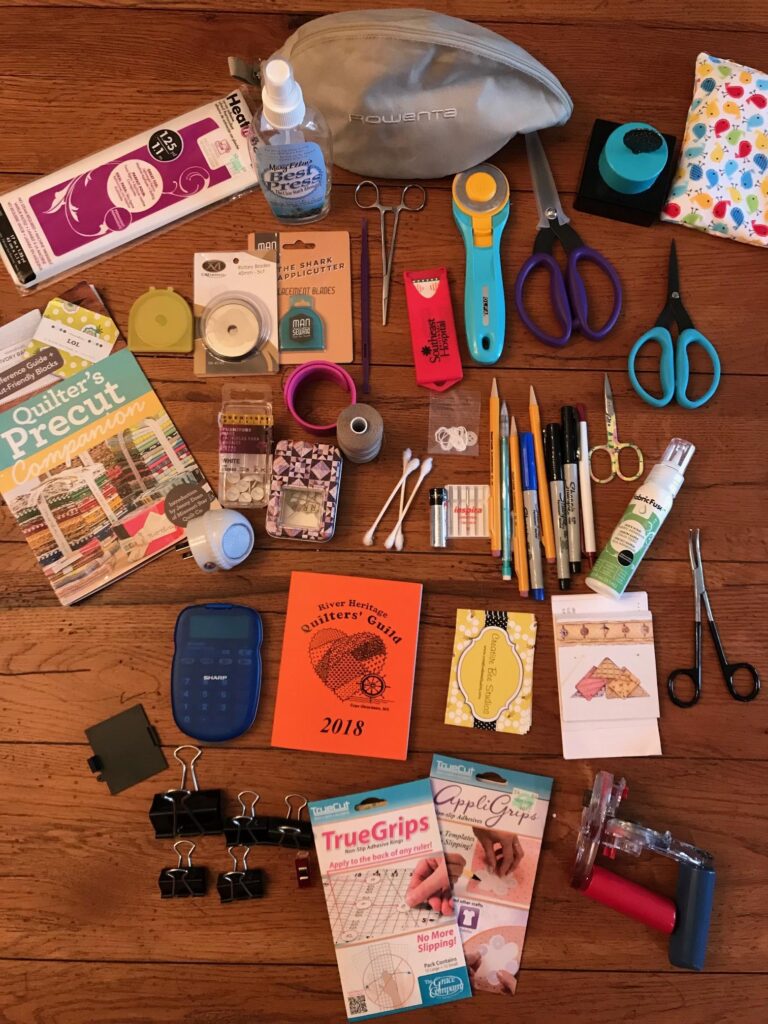
NOW for the REST of the story! Below I reveal everything that is actually in my spinning work station.
Without a doubt, I don’t use all of these items daily. But when at quilt retreat, it’s best to not be without! Starting at the top left, you see fusible web, pressing spray, mini iron, chain-piecing cutter, a very cute rice bag (made by my friend, Donna). Next you see various rotary blades, The Purple Thang, a gripper tool, bandages, rotary cutter, and two sizes of Karen K. Buckley scissors.
It is wise to clean out your organizer now and then!
Following that is a pre-cuts guide for fabric purchase emergencies, thumb tacks, pins, cord wrap, thread, Q-tips, battery, thread and button, needles, a plethora of markers and pencils, snipping scissors, and Fabric Fuse. Surprisingly, the next row starts with the back of something which apparently held batteries, a calculator, a guild directory, business cards, note pads, and another gripper tool. Lastly, there are clips for hanging design wall, True Grips (truly a favorite), and last, but not least, Martelli cutters (I am an ambidextrous cutter, so I use both left and right-handed ones).
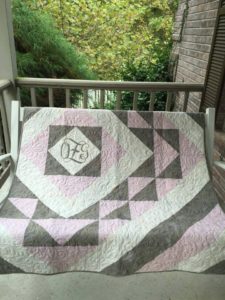
I wanted to make a little Christmas gift out of our dad’s shirts for my sister. I couldn’t come up with ideas, so picking the brains of my Lady of the Lake (LOL) quilting buddies proved quite helpful!
Sitting around the table, we ran the gamut of ideas…a bear, a quilted Santa, an apron, a journal cover…whatever I could make from my dad’s old shirts – but it needed to be just right. One friend suggested framing a pieced/ quilted shirt quilt – she was on to something. It often takes a period of mulling…or percolating for me to round out an idea…instead of a frame, make it a shadow box… and add vinyl lettering to the inside of the glass…
I have to say, this little piece came out sweeter than I expected!
It’s not a big, fabulous quilt, but I really like how it turned out- and hope to one day make for myself one day–or maybe the gift to me was the cutting, stitching, and remembering that came with making this for my sister.
I used small amounts three different shirts. Once quilted and trimmed, I glued the quilt to the back of the box. Using Scan N Cut (click HERE for more info.), I added our dad’s name in vinyl to the inside of the glass (remember to reverse the lettering). I penned a short message on the back of the box with a Sharpie.
Do you gift your quilting for Christmas? How do you find ideas?
Please share in the comments below.
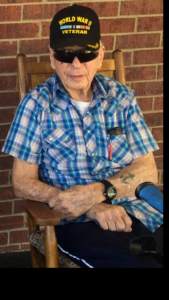
But when the fullness of the time had come, God sent forth His Son, born of a woman, born under the law, to redeem those who were under the law, that we might receive the adoption as sons. Galations 4:4-5
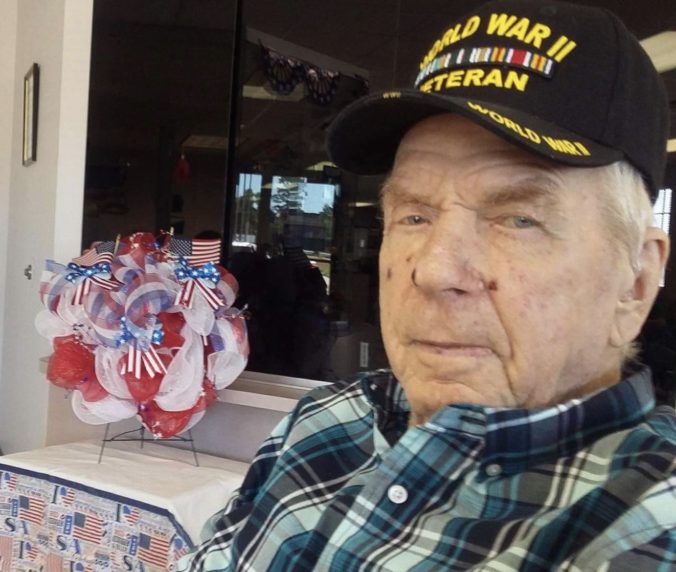
Read The Tie That Binds to meet Willie (Orville, Bill, husband, brother, uncle, son…dad).
Like many of us quilters, space is at a premium, so when I find a tool or machine that has multiple uses, I get excited about it!
Let’s face it, we can’t make everyone a quilt every time we need a gift! That’s why I like to use my Brother Scan N Cut, which I mostly bought for quilting purposes, to also make unique non-quilted gifts.
Click HERE for a review of the monogrammed baby quilt I made using a phone app and the Scan N Cut:
Click HERE to see the old Italian proverb made with Scan N Cut in this Italian Row-by-Row quilt.
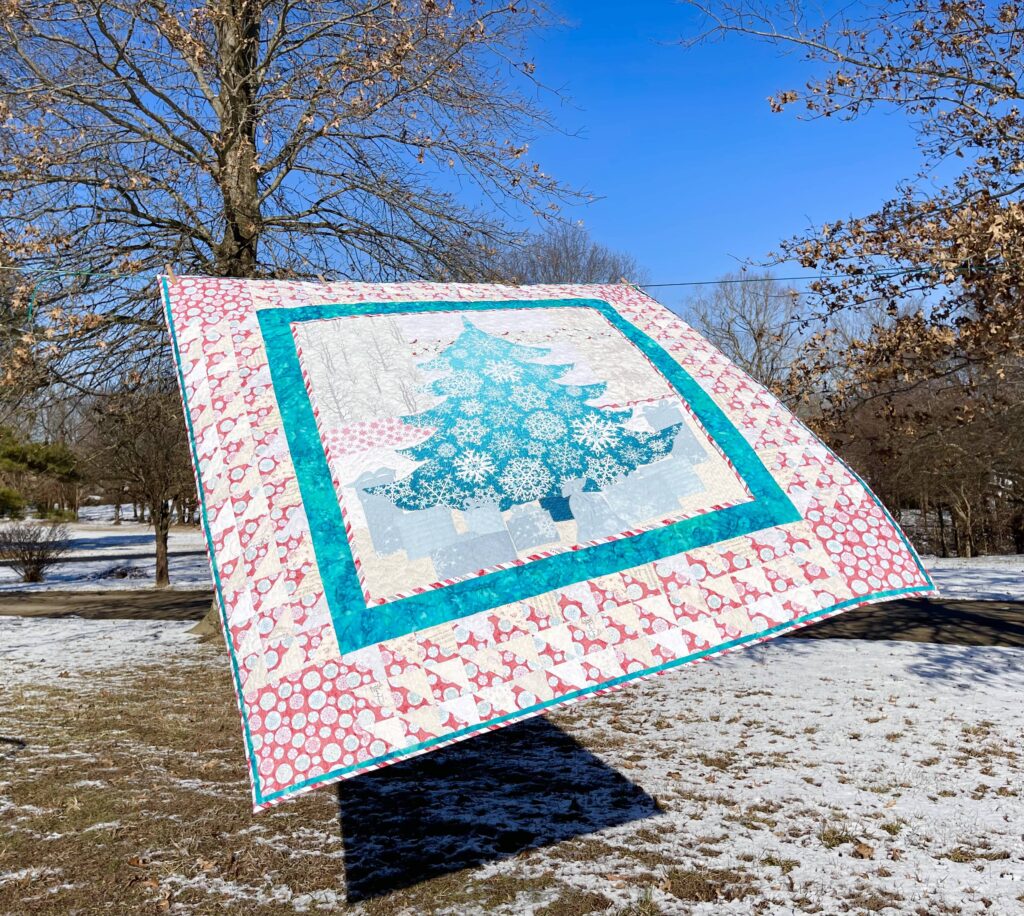
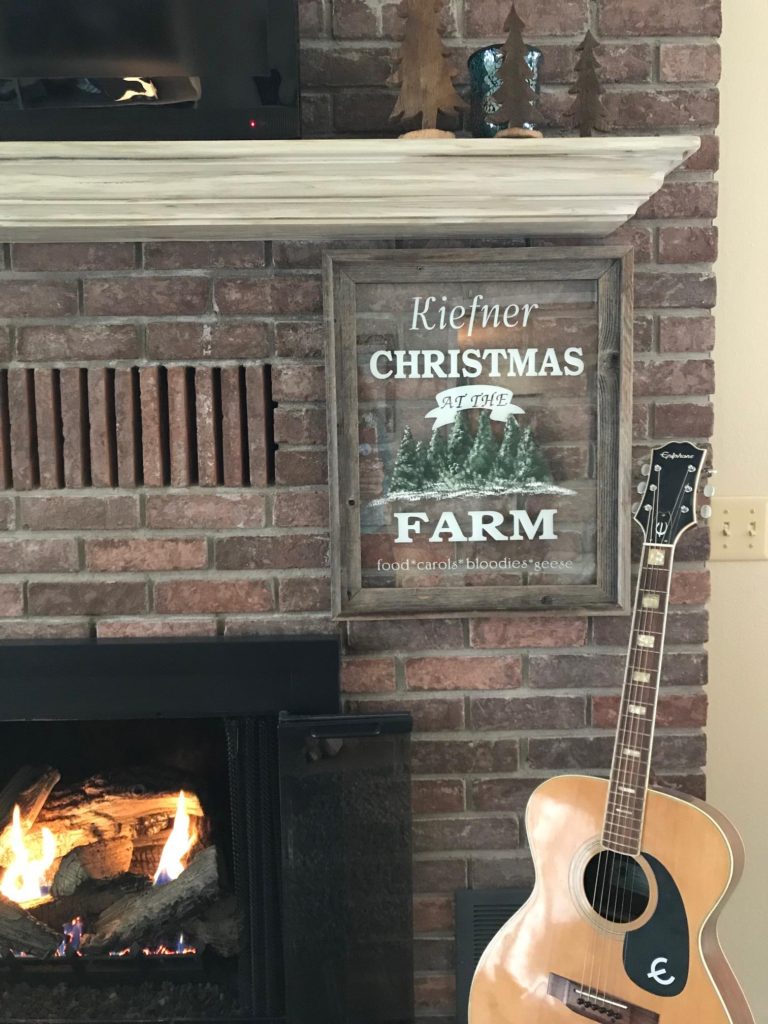
The Scan N Cut project I’d like to share with you today is one I made for Christmas last year – and it requires a short story…
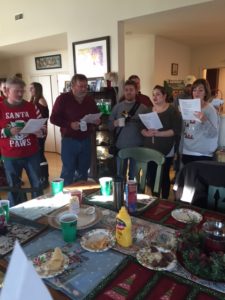
Each year, we gather at my husband’s family farm before Christmas. We all traipse into the fields and watch as the chosen tree is cut down. The (now grown) grand-kids decorate the tree while the older grown-ups visit. Before opening gifts and eating, everyone gathers around the very long dining table while our mother-in-law leads us on the piano in Christmas carols. It’s sounds all cozy and Hallmark-y, right?
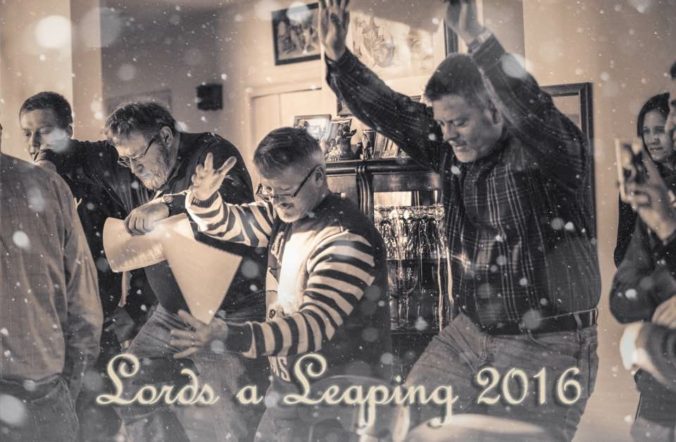
Then comes the finale, “The Twelve Days of Christmas”! Except for two assigned parts, we all do the motions for each of the days. The assigned parts? The three brothers are “Lords a Leapin'” for which they do what is supposed to be a leaping type of movement (they take this role very seriously) and any new boyfriend or girlfriend brought to the party is the “goose” for “Geese a Layin'”. This involves squatting, twisting, and flapping movements.
Fabulous Photo by Black Kiefner
Now, there is a year-long push for new geese–so each single grandchild has a bit of pressure to find a goose to bring for Christmas! Both of our daughters will say their geese have been somewhat traumatized by Kiefner Christmas!
What does this have to do with Scan N Cut? I came up with this gift idea last year using vinyl and paint on glass in a barn wood frame. The painting was very easy, just dabbing layers of green and white in the general shape of a tree (the only tricky part was that the paint is on the back of the glass so you want to paint the foreground first). Placing the letters was easy once I figured out to use a rotary mat under my glass to line everything up. I ended up making a few variations for other families and I think they were all well-received.
If you’ve wondered about using a Scan N Cut for quilting, this would be a great time of year to check them out – dealers are having sales and you need something to put on your wish list, right? (I have no affiliation with Brother or any dealers, I just like to share with you the things I like!)
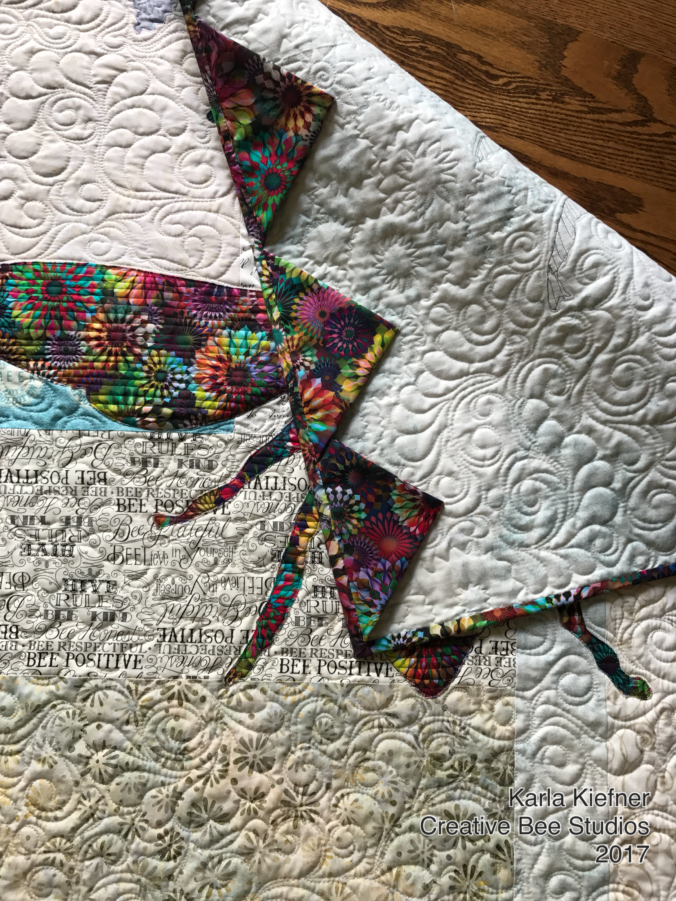
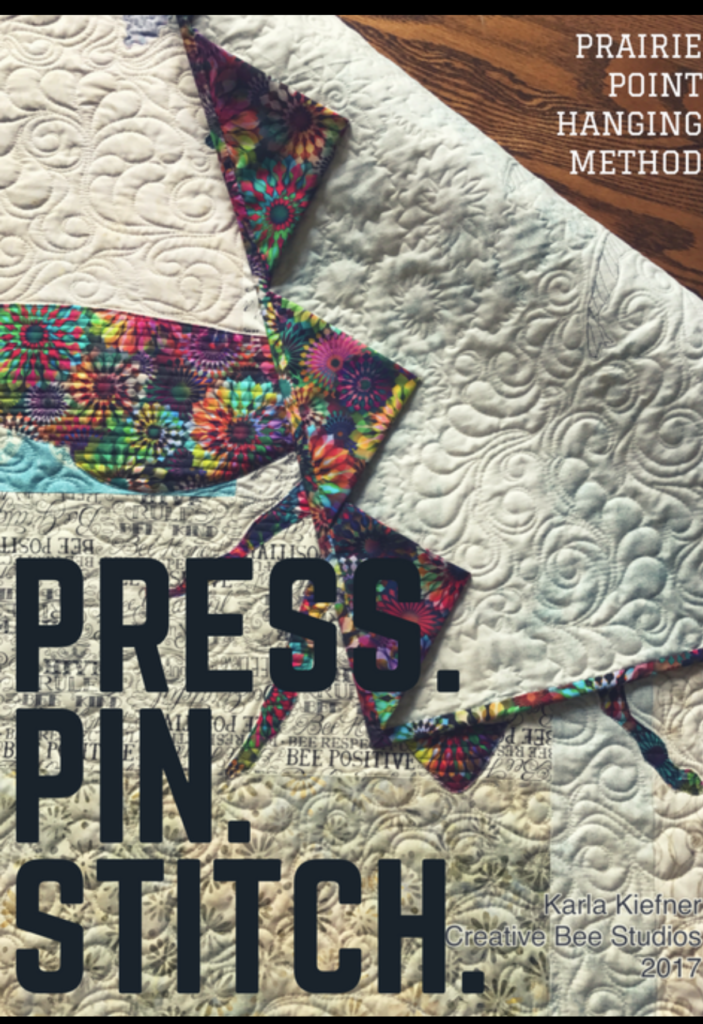
Use simple prairie points instead of a long fabric tube to hang your quilts. The number you need will depend on several things: the size of the quilt and how you will hang it.
First, fold a few squares.
To make prairie points, cut squares. Fold them in half, diagonally and press. Fold them again, diagonally and press. That’s it! You just made them! The size and number you will need depend on your quilt size and how you will hang it.
For best results, run a stitch about 1/8th inch from the raw edges of the prairie points to hold them together.
Next, baste the prairie points onto your quilt.
Align your prairie points across the top edge of the back of the quilt. Distribute them evenly, with the outer points at least an inch from the sides.
Baste the points, using a seam allowance smaller than your binding seam allowance.
Finally, make a few hand stitches.
Lastly, you will stitch the points to your quilt by hand, with a doubled-tread. Take care not to stitch through the front of your quilt. About four stitches in each is enough to secure your points.
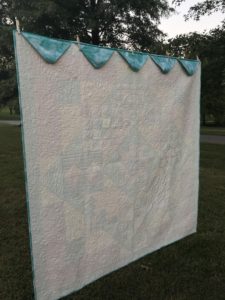
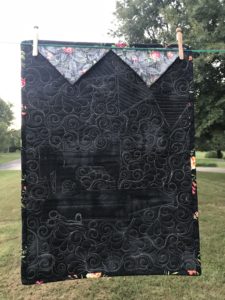
When your binding is complete, your quilt is ready to hang!
Use an even number of prairie points to hang a quilt from a single point.
Generally, consider 8- inch squares. Try larger ones for larger quilts and vice versa.
All the Creative Bee Studios patterns provide the size and number of points needed for each pattern.
Pressing well helps keep the points orderly.
Trim any uneven edges before attaching the points to your quilt.
For use with unusually large rods (like in a quilt show), hand stitch your points about an inch higher than they reach when flat. This will allow some added room for the large rod and help the quilt hang flat.
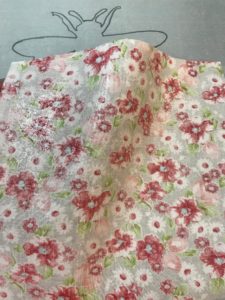
I first fell in love with light-weight fusible web when I used it with the Leaves Galore rulers.
Water Colours was made with Misty Fuse, a nearly weightless fusible web.
Water Colours
Misty Fuse is a paperless fusible web.
First, Misty Fuse is paperless. Like a thin spiderweb of glue, it is nearly weightless. It is so soft, your machine won’t even know it is there! Neither will the loved ones who snuggle in your quilt.
However, because there is no paper on this fusible, I feared it couldn’t be used for tracing templates. I do a lots of fusible applique which require tracing templates. In fact, about half of the more than 50 quilt patterns I’ve designed use templates.
Soft Fuse is my favorite paper-backed product.
Soft Fuse is a paper-backed fusible web that is also very lightweight. Although any lightweight fusible will work, I recommend Soft Fuse in my classes and workshops. Even with large applique, your quilt feels softs to the touch. In addition, with a light pressing, it is possible to remove and re-position your applique if needed.
Transferring Designs with Mistyfuse Fusible Web
If you’re in a pinch and caught without your trusty paper-backed product, here’s what you can do!
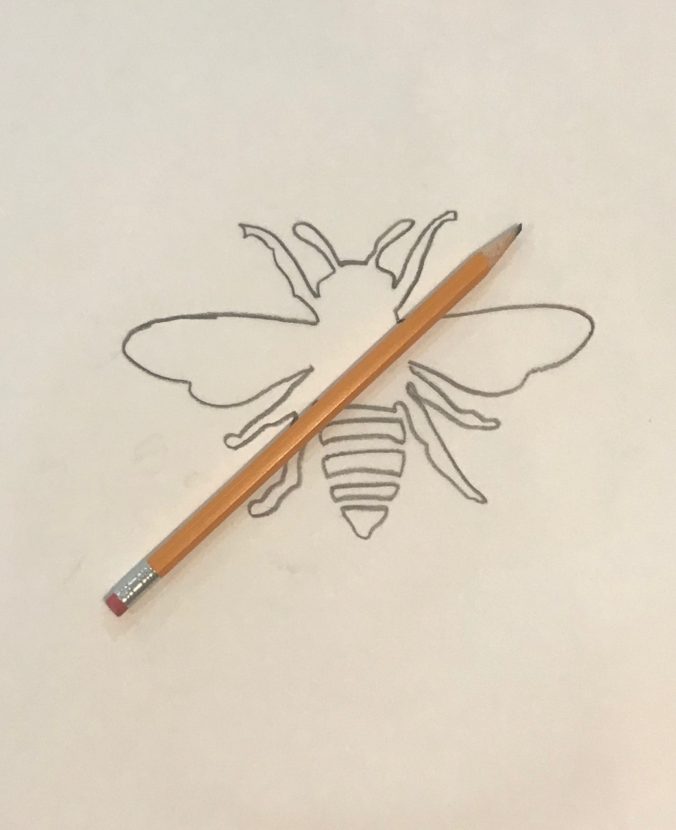
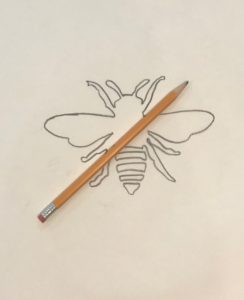
First, draw or trace your design with lead pencil on to parchment paper. You need to make your tracing dark. I use a #2 lead pencil.
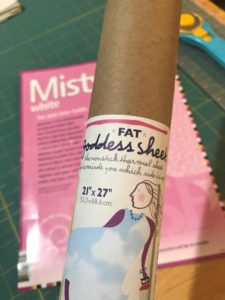
Then cut a piece of Mistyfuse large enough to cover your design.
Using a protective sheet (I used a Goddess Sheet), press the Mistyfuse to the wrong side of your fabric. The Goddess Sheet gives the Mistyfuse a sheen so you can see where it is on your fabric.
After the fabric cools, place it with the fusible side up on a hard surface. Cover it with your, design side down, on your fabric and trace the design with a hard pointed object like a stylist tool.
The lead markings transfer much easier onto the Mistyfuse than they do directly onto fabric. The finer your pencil, the finer your lines. A finer lead will give you a more precise drawing.
This is a great fusible alternative for tracing a template!!
However, these tips for half-square triangle blocks can really help the beginning quilter to understand how and why you need to square your units or blocks accurately. I know they helped me!
There are lots of techniques for making these blocks. This one describes how to make them individually versus mass-produced, in case you don’t need 200!
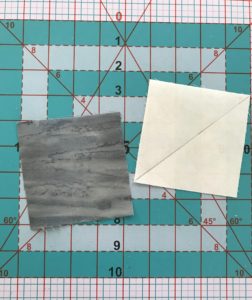
Start your half-square triangle block with two squares.
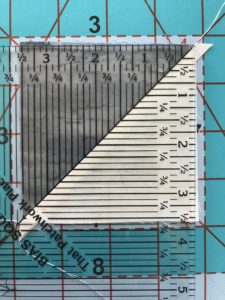
For example, shown above are two 4-inch squares of fabric. One is a dark gray batik. The other is a soft white.
The block we need will be 3 1/2″ (before sewing to other units). The actual “finished” block size will be 3 inches. Therefore, above you see two 4-inch squares. Draw a diagonal line, corner to corner, on the reverse side of the lightest fabric.
Draw a diagonal line from corner to corner on the light square.
While it doesn’t really matter which fabric you choose, you’ll follow this line as a guide for stitching. Just make sure you can see your marking well.
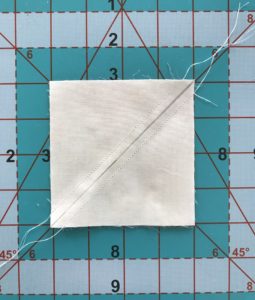
Stitch on both sides of the marked line.
Layer your squares with the marked one on top; I’ll say “right sides together”. However, remember that if you are using BOTH beautiful sides of fabric in a half-square triangle block, you’ll want your “intended fronts together”. This means BOTH right sides will either be facing down or facing up.
Next, stitch from corner to corner, 1/4 inch from the drawn line.
Make great time by chain-stitching.
If you have lots of these units to make, try chain-stitching them. First, have your squares marked and paired, ready to stitch. Second, stitch on one side of the line on each set, without cutting threads in between. Thirdly, turn the string of them to repeat the stitching on the other side of the line.
Cut on the center line.
Separate the units by snipping the threads. See “Two Purple Tools for Quilting” for a great cutting tool. Press to the darker fabric. The block should be larger than 3 1/2 inches and have threads and tails (or ears) on them as shown below.
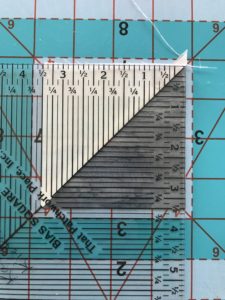
Use a squaring ruler with a 45 degree line.
Using any ruler with a 45-degree line, place that line along the diagonal seam of your block and so that the over-all size after you trim the first two sides is still slightly larger than 3 1/2″. Notice the extra fabric outside of the 3 1/2″ marks?
Don’t trim the first two sides at the 3 1/2 inch mark.
Trim the first two sides slightly larger than 3 1/2 inches. This will allow you to get the most accurate finished unit with a perfectly aligned diagonal seam.
Next, spin your half-square triangle block around and line up the trimmed sides directly on the 3 1/2″ marks. Trim the last two sides.
I AM from the Show-Me State!
Perhaps most new quilters would figure out on their own not to make the first trim at exactly 3 1/2 inches, but I needed a kind teacher to show me why I shouldn’t so that with the first trimming cuts.
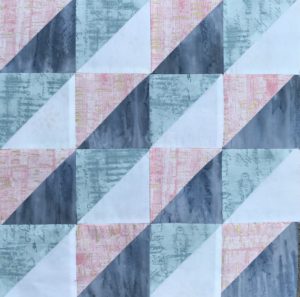
If you are making the River Heritage Block-of-the-Month Mystery Quilt, you are probably figuring out that there are a lot of half-square triangle blocks in the design.
Here is a the Trail of Tears block, featuring all half-square units.