Estimated reading time: 7 minutes
Table of contents
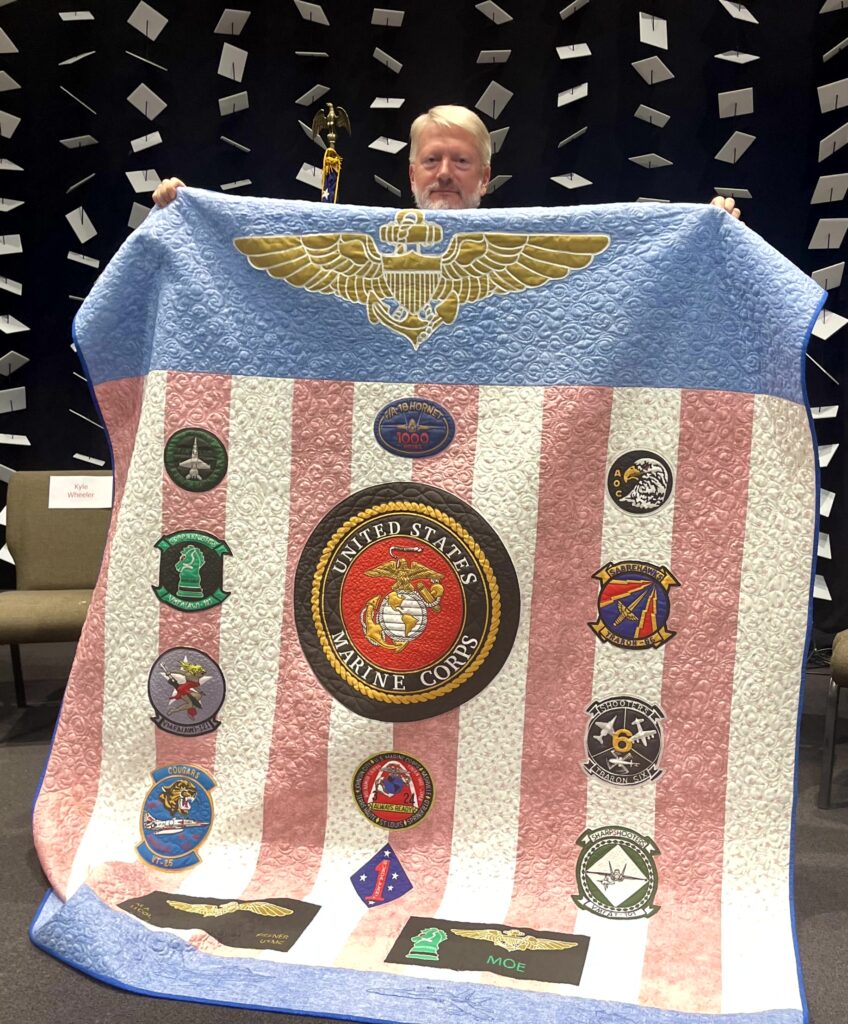
Each year our guild hosts a presentation of valor quilts. As one of three committee members organizing this event, I’ve had a front row view to some beautiful valor quilt design! Over the last ten years, our members and guests from the community have had the honor to present scores of gorgeous patriotic quilts to wonderful, humble, and grateful active duty military and veterans.
Valor Quilt Design – Making it personal.
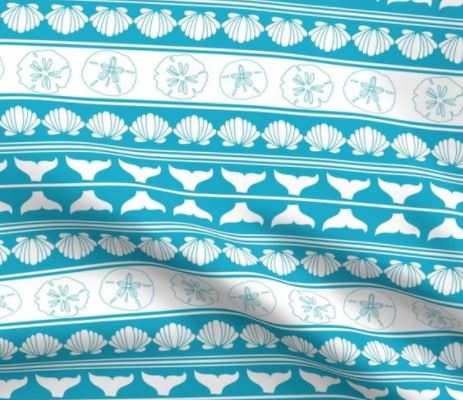
Firstly, the variety of patterns, fabrics, and designs of these quilts make the special presentation very personal for each recipient, with no two quilts alike. In addition, a quick search online to find you lots of patterns designed specifically for this genre of quilts, with consideration of the sharp contrasts of the blues and reds with white – a common theme of these quilts.
Why share this quilt?
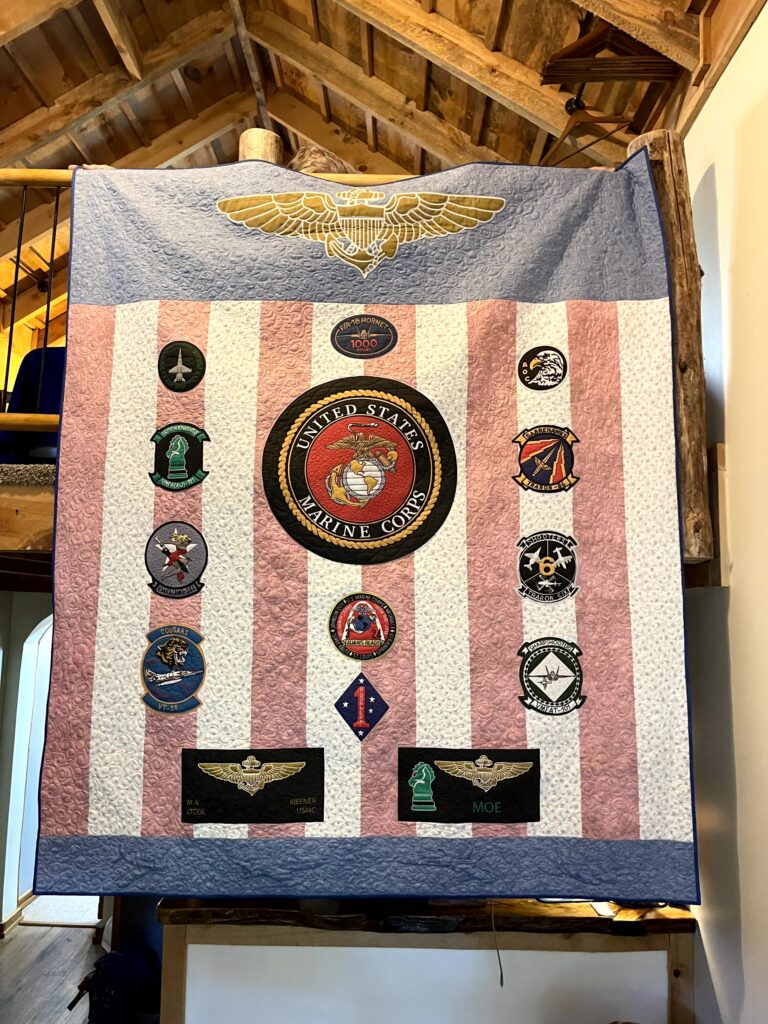
The quilt I am sharing with you today was a labor of love. I bet you can relate. Oftentimes, when you make a quilt for someone you know really well, you are driven to make it truly special for them. That’s what this quilt is. It isn’t a show-quality quilt. It would not win any prizes for design or technique. However, I’m certain the content of the motifs on this Valor Quilt design touched my husband’s heart – and for that I am pleased.
Additionally, I’m sharing the process with you, my quilter friends, because I remember a big influence in my quilting journey was from one person, Tula Pink, saying two words. We were at a Fall Paducah Quilt Show, listening to her presentation about how she designs fabric. I wrote in my notes: Adobe Illustrator.
About a year later, I decided I wanted to learn fabric design. Consequently, had to go searching for that notebook for the two words I had written. I knew nothing about Illustrator, except that it is what Tula used.
Unusual Tools of the Quilting Trade
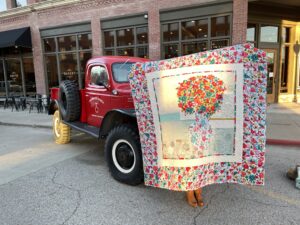
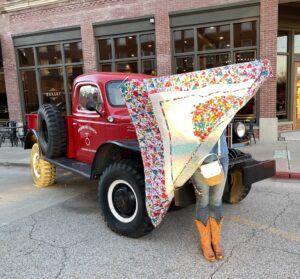
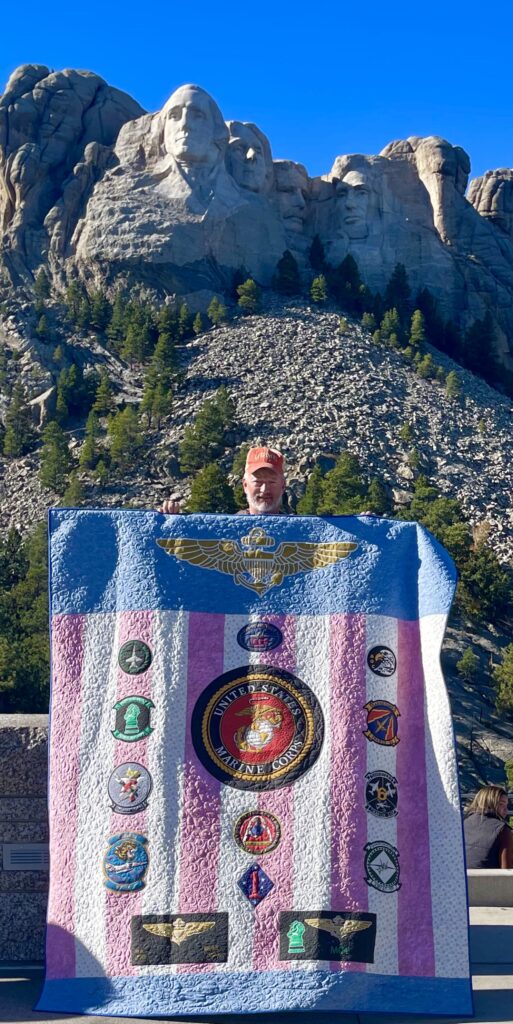
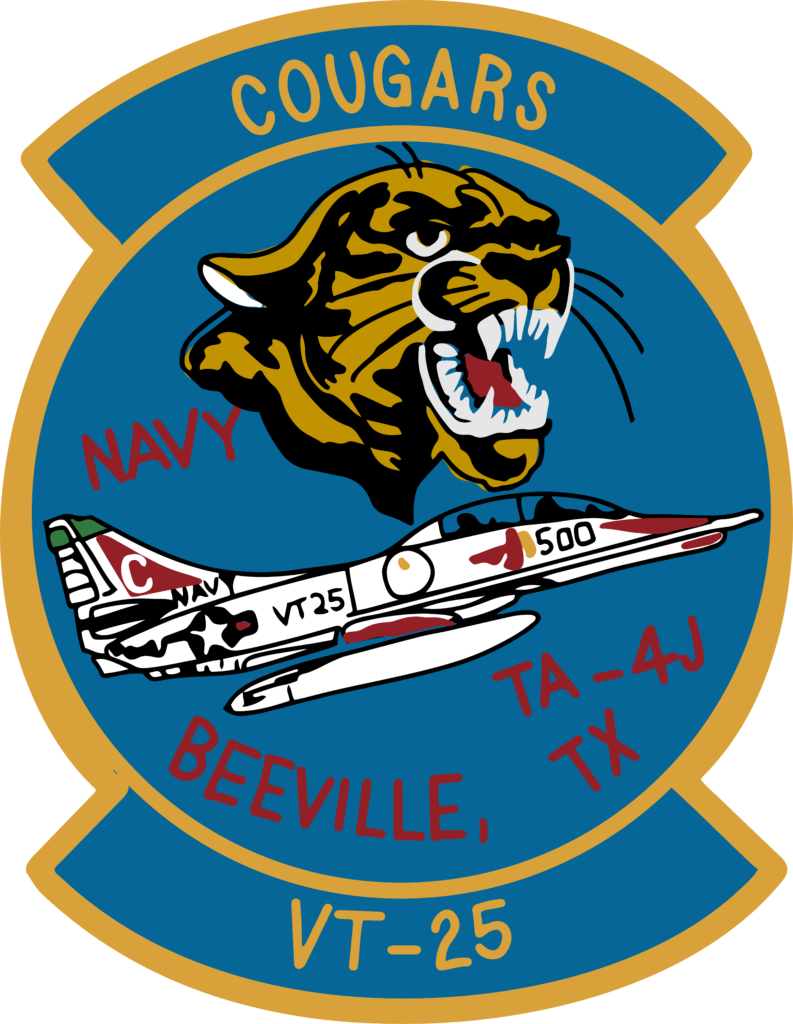
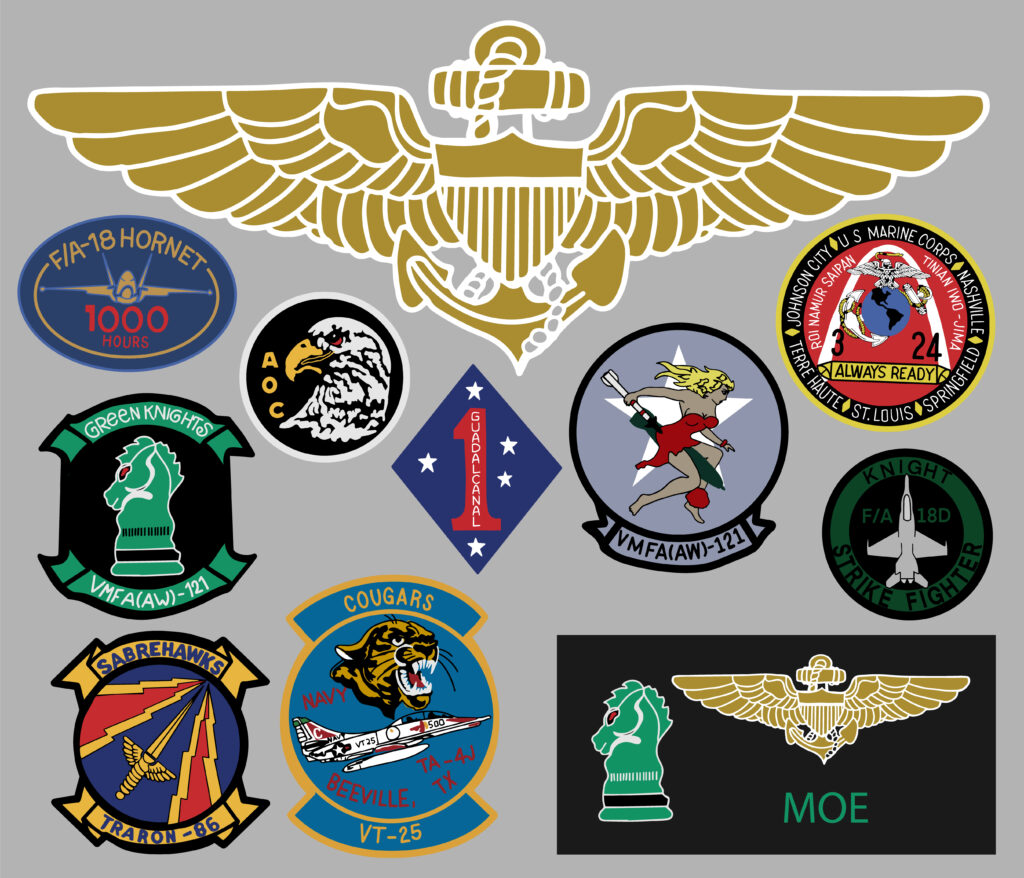
Briefly, let me explain this quilt. It is a simple patriotic background of vertical stripes of red and white. Across the top and bottom are two horizontal strips of blue. The true features of the quilts are the flight patches, flight suit name tags, the golden wings and USMC emblem appliqued onto the quilt top. Each of these symbols define my husband and his time in the Marine Corps, first as a pilot and later as a Forward Air Officer. I asked him for his patches and got to work.
Step One – Trace the Elements
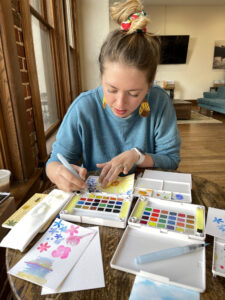
Fortunately, by this time I had learned enough about Illustrator to know that I needed to draw each individual element in order to layer them to look like a patch. I’ll use “Bombing Betty” as my example. The easiest way for me to do this was to use my iPad and a very cool and expensive drawing app called, “Procreate”.
I took a photo of each patch and began tracing the elements. As you can see on this patch there are different colors – beige for her legs, arms and face, red for her dress, etc. So I traced them all separately, based on their color and what layer they would be. For example, the background is grey, the white star is next, Betty’s left leg is behind the bomb, her dress is in front of it and her hair is on a layer on top of her face and so on.
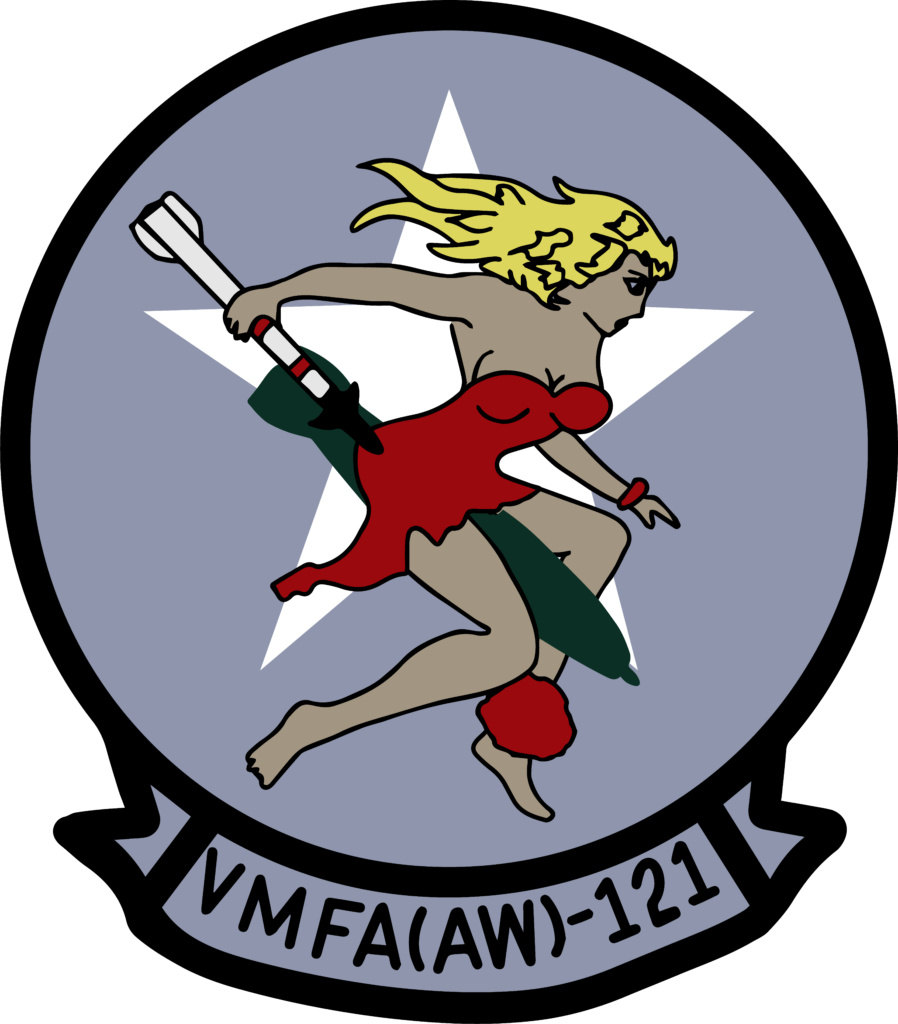
Keep in mind, I had no idea if this scheme of mine was going to work!
Next, Vectorize and Colorize with Illustrator
I developed each patch, one at a time. I sent each file via email to my computer where I opened it into Illustrator.
Undoubtedly, you may be wondering why I didn’t just take photos of the patches. Because the patches were between two to six inches in size, photos would have become pixilated (distorted blurry) when made very large.
However, vectors (which is what Illustrator is for) can be any size – even as large as the 22-inch Marine Corp Emblem in the center of the quilt and look as crisp as the four-inch patch. So I changed each element into a vector shape, then colored and layered them until they resembled the patch. I got approval for each patch from my husband as I went along.
Spoonflower to the Rescue!
Furthermore, all of this work was dependent upon the printing of the fabric. Having designed fabric for a few years now, I was relatively sure I could eventually get a good result, but I wasn’t sure how many printings it might take to get it right. So, my next step was export each patch as a high resolution photo and arrange them on two artboards, to mimic two yards of Cotton Poplin. I sent the files to Spoonflower and waited for the results.
YATZEE! BINGO! CORNER ON RYE! (a family favorite called PIT)
Fusible Applique – the truly easy part!
The first printing was a success! Fortunately, once I received these two yards of fabric I could breathe a sigh of relief. Everything looked great. The color and vibrancy were spot-on. Next, I proceeded to make fusible applique out of each patch. I use a very lightweight fusible that quilts beautifully and is barely there. So you quilters know the rest of the story here…almost!
One More Valor Quilt Design Tool – Design Doodler
On the bottom blue strip of the background, I added outline embroidery of the aircraft my husband flew in the Marine Corps. I wanted to add this part of his story to the quilt, but not in a way that took away from the patches. So simple outlines in blue worked perfectly.
Admittedly, I’d been wanting this software for two years, and this quilt was the perfect excuse! However, Design Doodler is SO easy to learn and SEW much fun, I recommend it to anyone with an iPad and an embroidery machine! You truly DOODLE and it works out the stitching! Notably, John Deere, Deere’s Embroidery Legacy, so it is a top-quality product. Check out the YouTube videos and start playing with the full app today!
Last But Not Least: VALUE!
You may have noticed that the background of this quilt is lighter than most patriotic fabrics on the market. Yep, you guessed it – I used the reverse for the entire background. I made the binding with the RIGHT side of the blue fabric. Had I used the right sides as the background, the patches may have gotten lost. And I wasn’t going to take that chance! I did make sure I found just the right red, so that it would read as red and not pink. Learn more about using both beautiful sides of fabric.
Be happy to learn and willing to fail.
Finally, I shared this valor quilt design adventure because I hope to remind each of you that you can never learn too many things, take too many notes, or try too many new things. You never know when it might all come together one day for something you never dreamed of doing! I’m glad my husband likes his quilt. That’s what’s most important.