Category: How To (Page 6 of 6)

Image of Karla on YouTube

Learn how to use both beautiful sides of fabric…and MORE!

Firstly, learn how to use both beautiful sides of fabric, discover the nuances of value, choose focus and background fabrics!

It’s all about value.

From blog posts to YouTube videos, you can learn about more than 50 quilt patterns that use both beautiful sides of fabric.  Discover the nuances of value and what to look for when auditioning and choosing fabrics for Karla’s patterns AND all your future quilt projects.

When you learn how to use both beautiful sides of fabric, it’s almost like doubling your stash!

In addition, find fun quilting tips and how-to techniques to help you complete your quilting projects quickly and easily. Also, Karla shares her favorite quilting tools, rulers and more. You’ll learn about some unusual ones, too!

A variety of topics.

As well as learning how to use both beautiful sides of fabric, you can learn how to choose color themes for quilts, how to do broderie perse, or how to chain-piece a block. Also find guides to purchasing fabric on Spoonflower, merchandise on RedBubble,  and quilt patterns on Etsy.

Guild programs and classes.

Finally, you can learn about Karla’s classes and programs that teach quilters how to use both beautiful sides of fabric. Moreover, you’ll “meet” some quilt guilds along the way. When you see quilters’ progress on class projects, you get a good look at how different focus fabrics can create completely different quilts, even when the quilters use identical quilt patterns.

Start your journey of learning here!

To Be or Not to Be Modern…

Defining modern quilting–that is the question!

ANNOUNCMENT!!!

My local quilt guild is adding a NEW CATEGORY for our quilt show: Modern!

First response: Yay! Exciting!

Second response: Hmmmm, what EXACTLY is that?

Frankly, this has my Lutheran roots saying,

“What Does This Mean?”

 (Martin Luther, Small Catechism)

This really is big news! We are, as a whole, fairly traditional quilters in this area, I think. That’s not to say that we don’t like new things or venture out into new techniques and fabrics…but now that it is an Official Category, I’m pretty sure I’m not the only quilter wondering, “What EXACTLY is Modern Quilting?”

The River Heritage Quilters’ Guild hosts a regional quilt show biennially (every two years). We take entries from residents in five-state area including Missouri, Illinois, Kentucky, Tennessee and Arkansas. Our next show is September 29 & 30, 2018. Click here to see the entry

information our next show.

So while researching the modern quilt world for my own information, I decided to make this information available to my guild members as well so that we can all learn more about this new-ish era (it’s actually been around a while) in quilting.

FAIR WARNING: while I will do my best to present my findings about “Defining Modern” as unbiased as I can, I feel I must remind everyone that:

  1. a) As in every quilt show, the judge is the ultimate decision-maker about who gets ribbons and what comments go on your entry sheet,
  2. b) Each judge has his or her own likes and dislikes, biases and prejudices against certain colors, styles, quilting methods–you name it, judges are people and, being people, no two are alike!
  3. c) You should take a judge’s decision with a grain of salt because even if one judge passes your quilt by at one show, it could be the next judge who awards one of your quilts BEST OF SHOW! …and

*You should ENTER, ENTER, ENTER! While you are deciding what quilts to make (or finish) and enter in the next two years, maybe one of those will fit BEST into the MODERN category!

Note: It is my understanding that if you have a quilt which can qualify in more than one category based on all criteria, you can still choose which category in which you enter it. (For example, if it could qualify as modern but you choose to put it in the wall hanging category because you think it will compete better there, you can. No quilt will be prejudged as too modern or too traditional and moved from a category–provided the entry meets size and all other requirements for that entry.)

DEFINING MODERN:

Many modern quilt guilds have popped up all over the country—and the world! I was amazed at the numbers! Modern Quilt Guild  has over 170 member guilds worldwide. The MQG began in Los Angeles in 2009. Let’s start with their mission:

Our mission is to support and encourage the growth and development of modern quilting through art, education, and community.

That’s easy enough. The MQG definition:

Modern quilts are primarily functional and inspired by modern design. Modern quilters work in different styles and define modern quilting in different ways, but several characteristics often appear which may help identify a modern quilt. These include, but are not limited to: the use of bold colors and prints, high contrast and graphic areas of solid color, improvisational piecing, minimalism, expansive negative space, and alternate grid work. “Modern traditionalism” or the updating of classic quilt designs is also often seen in modern quilting.

The Modern Quilt Guild has two regional member guilds in our area, one in Saint Louis ([email protected], Saint Louis MQG Blog, and Saint Louis MQG Facebook), and one in Southern Illinois ([email protected])

Modern Quilting defines quilting as follows:

  • Fresh colors and fresh fun prints
  • Focus is more on fabric than on block design
  • There is infrequent use of borders
  • Not so concerned with “matching” fabrics
  • Frequent use of solids
  • Sometimes asymmetrical and minimal
  • Using traditional blocks with a modern flair

Basically, there are no rules!

Hmmm, I’m liking THAT!

Do you use Pinterest? There’s a community board (which means when you’ve been accepted, you can pin to that board and you will see other member’s pins as well) called “Fresh Modern Quilts” which has almost 8,000 members so you’re sure to see a variety of quilts just following that one board! Here’s what they say:

A community board for modern quilting projects, tutorials and patterns to inspire. Any patchwork or quilted projects including quilts, bags, pillows and techniques are welcome . . . join us!

Here are a few modern quilt pictures from their board:

by Jenelle Clark of Echinops & Aster:

by Jenelle Clark of Echinops & Aster

Pie, Sweet or Savory by Modern Quilt Relish, Sweet Throw:

Pie, Sweet or Savory by Modern Quilt Relish, Sweet Throw

Other modern quilt guilds say this about modern quilting:

The Orlando Modern Quilt Guild

The Orlando Modern Quilt Guild, a Chapter of the Modern Quilt Guild, is a non-profit organization formed to:

inspire and support our members in their enjoyment of and growth in quilt making;

promote an interest in and appreciation of the art of quilt making, especially in a no rules modern approach to fabric arts;

assist our community by creating quilts and other fabric projects for those in need.

 The Cincinnati Modern Quilt Guild

  • The mission of the Cincinnati Modern Quilt Guild is to provide an atmosphere of fellowship for persons interested in the art and craft of modern quilt making by sharing of skills and knowledge.
  • There are other quilt guilds and creative groups in the city; our guild focuses exclusively on modern quilting. That’s where we focus our education segments and that’s what we share at show and tell.
  • What is modern quilting? The Modern Quilt Guild site says, “Modern quilters work in different styles and define modern quilting in different ways, but several characteristics often appear which may help identify a modern quilt. These include, but are not limited to: the use of bold colors and prints, high contrast and graphic areas of solid color, improvisational piecing, minimalism, expansive negative space, and alternate grid work. ‘Modern traditionalism’ or the updating of classic quilt designs is also often seen in modern quilting.”
  • How do I know if my work is modern? If you made your piece with the intention of it being modern—using modern fabrics and/or the principles above—then we’d love to see it at one of our Guild meetings. If you’re interested in learning how to make a piece more modern, just ask! Our members will have a variety of opinions to share.

 My good friend, Deborah, who lives in Maryland, has belonged to a NOVA MQG and before that the Philadelphia MQG. I asked her to give me her thoughts on the subject:

My description of a “modern quilt” is broader than some of the definitions I’ve seen on various websites. Much of the time a quilted piece strikes me as modern because of something unexpected in its design. For instance, a basic 9-patch can easily take on a modern feel if the pieces are varied in size, allowing some to be rectangles rather than keeping perfect symmetry. Similarly, if one allows some negative space to shine through in a design a more modern arrangement can be achieved. I’m sure most of have seen blocks made with “wonky” stars—the choice to allow some whimsy in a design contributes to a more modern aesthetic. Other times, for me, simply using bold, geometric prints in an otherwise traditional layout does it for me. As soon as you think you’ve defined what a “modern quilt” is, someone manages to produce one you couldn’t possibly have expected and that’s part of the fun.

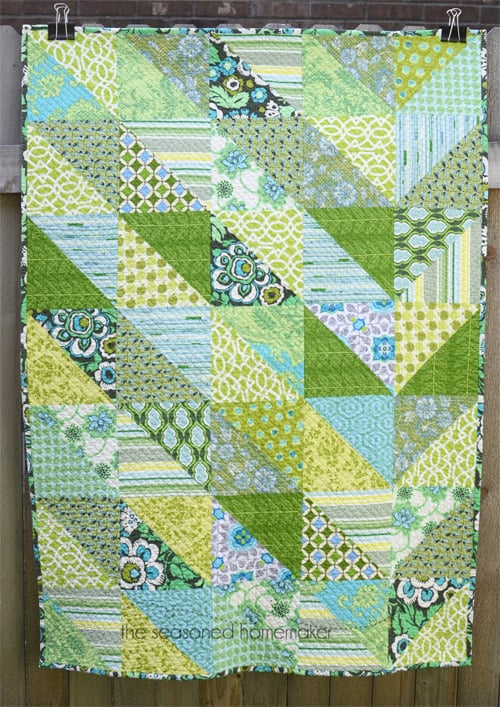
Blogger Leslie at The Seasoned Homemaker  tried to determine if one of her quilts is modern by asking the questions formed by the MQG’s definition:

  • Use of bold colors and prints – nope
  • High contrast – nope
  • Graphic areas of solid color – nope
  • Improvisational piecing – nope
  • Minimalism and negative space – nope
  • Modern traditionalism (would my modified Flying Geese count?)
  • Alternate grid work – Bingo!
In the world of quilting, modern quilts are the new kid on the block. Do you know what defines a modern quilt? It's not really that cut and dry. Find out a few ways to define modern quilts.

The Seasoned Homemaker

Leslie decided that her quilt DID qualify as modern because of the different grid-quilting she did on it.

CONCLUSION:

In my quest to define modern quilting, I have learned that there are some very strong opinions about it and MOST (though, not all) of the opinions are (and I paraphrase),

“DON’T BOX ME IN!”

MY THOUGHTS on modern are that anything that is a traditional pattern with traditional fabrics isn’t modern, but a traditional pattern with Kaffe fabrics…might BE?  Traditional blocks, off-centered? Landscapes certainly aren’t traditional in my mind.

While I tend to think Tula Pink and Kaffe Fassett  define modern, I think even hand-embroidered quilts can be modern with the right style, fabric, and quilting.
Through the Chicken Wire

I am starting to embrace the “No Rules” idea of modern quilting—probably because I tend to break traditional rules anyway!

Also, I think many of the quilts already shown in our guild’s “Show and Tell” have a modern flair– we just haven’t defined them as such.

MAYBE…

… the definition of modern depends somewhat on where you are living and what the norm is there.

…modern is as modern does…meaning, it’s all up to you–if YOU think it is modern, it probably is!

For me, I think the best way to decide if a quilt I make belongs in the Modern Quilting category, I will ask myself,

“Is it traditional?” If not, it must have some modern elements and can go in that category!*


I hope this short study on the definition of modern was helpful to you! I do think I have a better handle on what I define as modern.

*Remember to check for size and other category requirements for your quilt show entries.

Thank you for coming to my blog. Please sign up to get an email about once a week when a new post goes live.

Please share this with your friends and encourage every quilter you know (members or not) in our region to start quilting for the River Heritage Quilters’ Guild Quilt Show . Please comment below if this post has been helpful to you!

You can also follow me on Bloglovin.com , Facebook, Pinterest, Twitter, and Instagram.
 

Sometimes You Gotta Look Up

Find a little heaven on earth with this heavenly quilt.

It’s such a human thing to do…

exhaust all other options,

do everything you can…

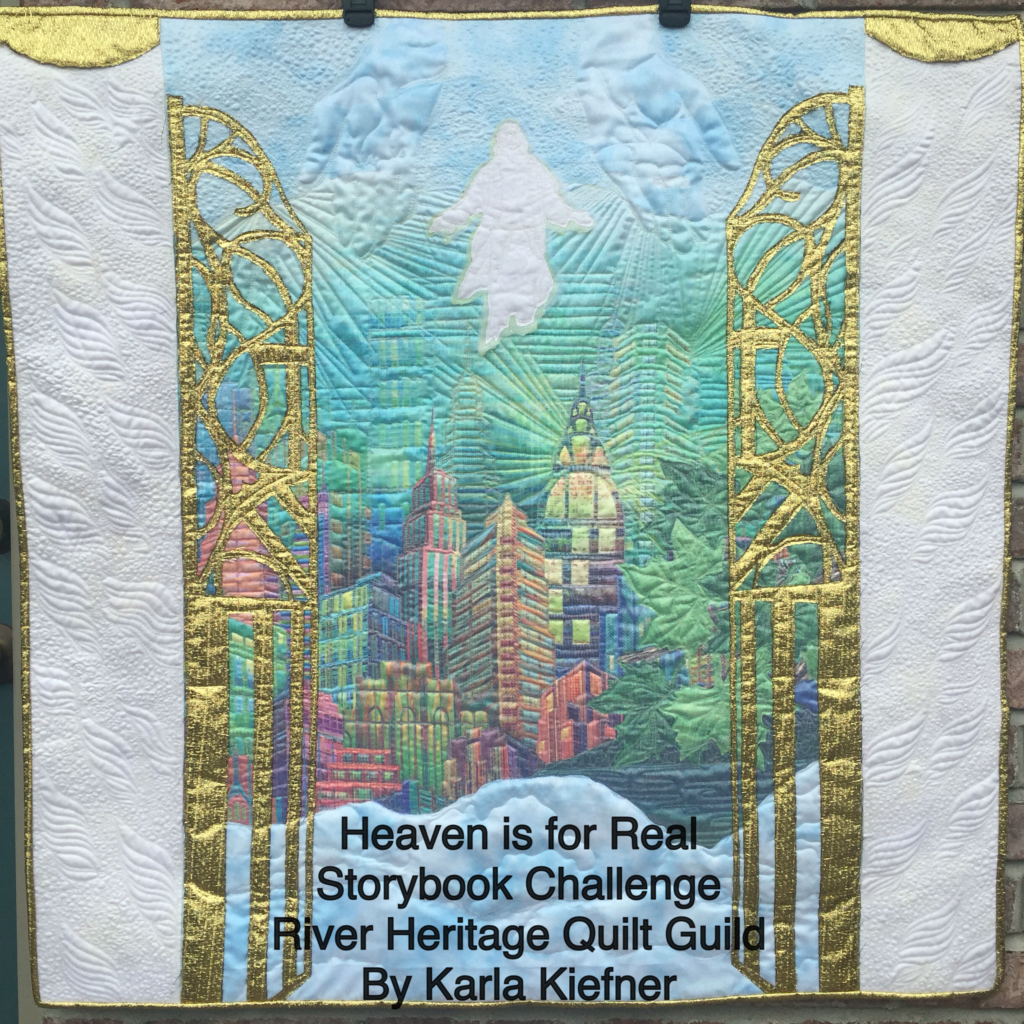
Storybook Challenge Quilt

Storybook Challenge Quilt

then drop to your knees and pray.

I don’t know why it is the last thing I think of. Every time it happens, I think I’m not going to wait until there is nothing left to do but pray, but every time, that’s what I do.

So today this is a simple reminder to let go of your troubles and worries, and let them float upward. Whether they are personal or even crazy-election related, remember to look up to heaven and realize these are only problems for here on earth. The battle is won, the victory is real. Like little Colton Burpo learned first-hand, Heaven is for Real

My local quilt guild, River Heritage Quilters Guild, handed out story books for each willing quilter to use as a challenge. I was expecting something like Good Night Moon or Are You My Mother?. Instead, I got this book, Heaven is for Real. I am ashamed to say, I actually complained about having to make a quilt about heaven because it was going to be so hard (what a problem to have)! I had read the adult version of this book and loved it. I was comforted by the “evidence” of promises it presented and I was able to look at the loss of my loved ones from their perspective–which is really unimaginable! I’m sure if my girls were younger, I would have known about the children’s storybook version.

Because little Colton Burpo described more about heaven than I would be able to display in 36 inches square, I chose to focus on the three most important elements: Father, Son, and Holy Spirit. You can see the Father’s large, gentle hands at the top of the quilt. He is reaching into heaven and presenting His one and only Son. The Holy Spirit is depicted by the rainbow colors of the city. The entire quilt is covered in a layer of organza to give it a softened and glistening look. Angel wings are quilted into the pearl pillars of the heavenly gate.

See the entire collection of challenge quilts in the community room during the month of December at the Cape Girardeau Arts Council.

Please sign up for email notifications of future posts and/or follow me on Bloglovin. Please share on Facebook, Pinterest, Instagram, and Twitter.

I appreciate your interest and support!

Creative Bee Studios

One…Singular Sensation

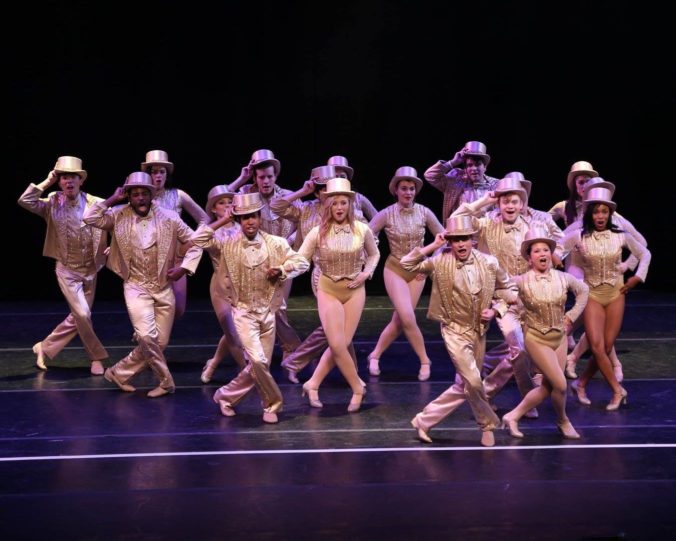
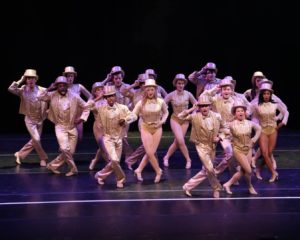
A Chorus Line at The Conservatory at Southeast Missouri State University

A Chorus Line rehearsal at The Conservatory of Theatre and Dance at Southeast Missouri State University

On the Line

On the Line

One…single, sensational tip… for show-quality quilt binding.

It’s a great idea. This is a pop-yourself-on-the-forehead kind of tip–and that’s exactly what I did when I first learned it.

You’ve trimmed your quilt and sewn on the binding. Next, you need to turn your binding. The trick to great binding is, of course, to have equal binding on the front and back of your quilt–WITH a filled edge. That involves a bit of math and precise stitching.

Just attach your binding as usual (generally by machine on the front). Grab a piece or ball of yarn. The length can be longer than the perimeter of your quilt or shorter and you can use more than one piece. Simply lay the yarn at the edge of your trimmed quilt and fold your binding over it. The yarn helps to fill the binding and makes it have a nice fold. You can “fit” different sizes of yarn before you begin stitching to see which size gives you better fill and gives your consistent width on the front and back of your quilt.

closeupyarn

A bit of yarn makes your binding better!

I like to use white or neutral yarn for light bindings and it doesn’t matter the color on darker bindings.

Now, I am big on giving credit where credit is due and I am sorry to say I can not determine the name of the person who first came up with this idea. I can tell you, it wasn’t me!

If you are like me, some quilts call for perfect binding and some are “get-‘er-done” bindings. No matter if your quilt is going to competition or be used every day, a little yarn in the mix will make your binding BETTER!

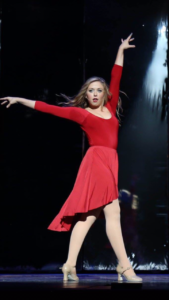
So, do you want to know who’s in that chorus line above? My kiddo! She’s playing the role of Cassie (wears red, oldest auditioner–last chance to dance–she sings and dances to “The Music and The Mirror”). The show opens in three days and I haven’t even begun her “shoe” quilt yet (see It’s All About The Shoes  and “Sweet Dreams…of You”  !)

UPDATE: Here she is as Cassie! Click on any of the below pics for a video clip from her role in the show.

Jacquelyn Kiefner as Cassie in A Chorus Line

Jacquelyn Kiefner as Cassie in A Chorus Line

Jacquelyn Kiefner as Cassie in A Chorus Line

Jacquelyn Kiefner as Cassie in A Chorus Line

One...Singular Sensation

One…Singular Sensation

Sign up so you don’t miss a bit of buzz– I’ll let you know when I’ve made a post. I appreciate any way you can spread the word about my blog– sharing on Facebook, Pinning on Pinterest,  and word of mouth works, too!

Prairie Point Hanging Method

Discover a quick quilt hanging method to display your quilts!

Let’s face it…quilts take time. We really should cherish each step of the process. But, if you’re like me, it’s those last few steps that sometimes really test your patience:

Firstly, the binding…

Then the label…

Last, the SLEEVE…ugh!

Now, here is a fast, easy way to attach a hanging sleeve, with just a few quick points – Prairie Points!

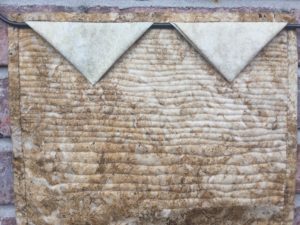
Start with a few squares of fabric, fold them diagonally twice and lay them on your quilt. Next, baste with your machine, using a seam width that is smaller than your binding seam. Lastly, stitch the points by hand with just a few stitches! That’s it! It’s that easy.

Now let’s break it down:

For instance, if you have a small wall hanging, 5 inch squares will do.  But if you have a large quilted wall hanging, 12 – 16 inch squares will work.  The number you need depends on how large you make them and the size of your quilt. You’ll see, as soon as you fold one and hold it up to your quilt, how many you’ll need. This method is so much faster and easier that the traditional “sleeve”, you’ll be looking forward to using this method on your quilts!

So, for this tiny wall hanging (11  inches wide), I am using two five-inch squares.

Easy Method for Hanging Quilts

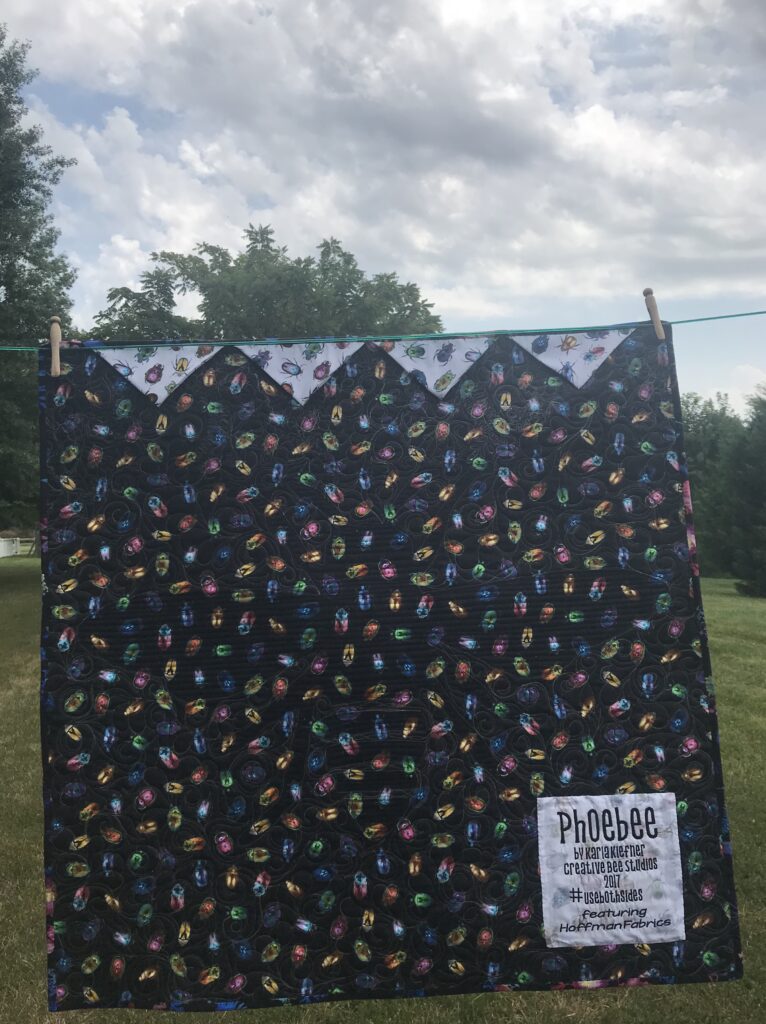
For small pieces, I like to use an even number of triangles so that the center is open for hanging it on one hook or nail. Of course, larger pieces need to be hung by two points, so the number of triangles attached to the quilt depend only on how many you want to add. For example, my 90 -inch wide quilt has 7 triangles which started with 12 1/2 inch squares.

Also great about this method, if you have a particularly heavy quilt to hang, you can add additional rod support in the center of your quilt in between two triangles.

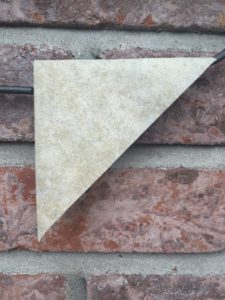
To begin, fold a square diagonally once, press. Fold that triangle

Folded twice from square.

diagonally again, press. Do this for all of the squares. Secondly, lay them at the top of your quilt, cut edge, lining up with the top edge of your quilt sandwich. Pin in place. Next, machine baste within the seam of your binding (whether the binding is on yet or not). Lastly, use a needle and thread (I like to use doubled thread for this) to stitch down each point, securing with several stitches.

Finally, attach and turn binding as usual and your quilt is ready to hang!

Image of Quilt Hanging Method

All Creative Bee Studios patterns provide Prairie Point Hanging Method instructions. Shop Patterns HERE.

Learn more about Creative Bee Studios #usebothsides patterns here.

Learn about NEW textiles, merchandise and MORE at Uncork the BUBBLES!

JOIN The BUZZ and follow Creative Bee Studios on Facebook, Instagram, and Pinterest!

Why It’s Hip to Be Square

Test this demo about squaring up quilts!

You just gotta love square quilts!

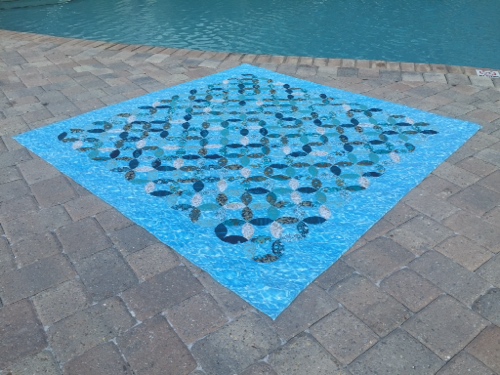
Water Colours 

I’ve heard several of my quilter friends comment that they don’t like to make square quilts. I get that. Bed-size quilts can be more practical, usable, and gift-able. Even if I’m making a wall hanging or art quilt, mine usually aren’t square. But I DO love a quilt with right corners, no matter the length of its sides!

If your long-arm quilter ever mentions measured borders and “squared” backings, you might wonder, “What’s the big deal?”, especially in regards to your backing fabric.  Here’s a little demo you can do yourself to understand why it benefits you–and your quilt–to start and stay square:

*Grab two pencils, tape, scissors, and a piece of paper from a little notepad. I’m assuming your paper is a rectangle, but a square works, too.
*First make a straight cut on one of the long sides of your paper at an angle. It doesn’t have to be a big angle, just make sure you aren’t cutting it parallel to the edge of the paper.
*Now tape the opposite end to a pencil, keeping the paper even across the pencil.
*Now tape the other, angled end to the other pencil.
*Roll your paper “quilt backing” onto the first pencil.
As you can see, the second pencil lies at an angle. Straighten that pencil until it is parallel to the first pencil. The extra paper you see would be the extra fabric in a real quilt backing. This can cause folds on the back of your quilts. Your quilter might try to avoid that by making sure your backings is trimmed square before loading it onto her poles, but it could cost you extra fees because, depending on the backing, it could take up to an hour to square an unruly backing.
I figure most quilters understand why they’d want their quilt top to be square (have right angles). Whether it’s a wall hanging or going on a bed, or even folded as a throw, it’s nice to have everything line up just right. Tops have a tendancy to take on an hourglass shape, especially if the borders are applied and then trimmed. Measured borders (based on measurements from the center of the quilt) which are pinned at the centers and corners and  “eased” onto the top will actually help your quilt stay square.
Now, I am not telling you this so that you stress over your quilt tops and fret if they don’t (heehee) “measure up” (couldn’t resist). We don’t need more quilt police, especially in today’s world of quilting when so many of the old rules no longer apply. I do think as long as we take consistent steps in our quilting process that tend to lead toward a square quilt, that is effort enough. From time to time, I will get a quilt top in my long arm frame (including my own) which are less than square by (wait for it) a fair measure (sew many puns, see?). All puns aside, I have certain procedures I follow when loading and advancing a quilt so that I can be certain I’m doing everything possible to keep the quilt square. Sometimes, and it’s usually a mystery, a quilt just doesn’t play nicely, no matter how precisely it has been pieced or prepped. In those cases, there are tricks for easing in extra fabric and avoiding folds, some I’ve learned in classes and others I’ve learned through trial and error.
Sometimes, you can do everything possible to keep your quilt square and it still doesn’t cooperate. Sometimes it can truly be a mystery! Think, though, of all of the variables which go into the production of the fabrics and threads, the cutting, stitching, the differences in machines, etc. and construction of a quilt and you can understand why many quilters say, “If you can’t see it riding a horse at 40 mph, don’t worry about it!”. I say, if your quilt is made with love and passion, it is perfect just as it is.

For more information about prepping your quilt for a long-arm quilter, see my blog page. Also, visit me on Facebook at The Quilting Bee Long-arm Designs by Karla. Follow me on Bloglovin’ at: blog.creativebeestudios.com and at my website, www.creativebeestudios.com.

One of the lovely bonds between quilters is that we are crafting beautiful works with our hands to be enjoyed by others.

Sign up and I’ll email you when a new post goes live, usually once a week.

Happy Quilting!

Tropical Fun traveled with the AccuQuilt GO! AQS Tour.

Six Sweet Tips for Using Color in Landscape Quilts

These six tips for using color in landscape quilts makes choosing them a breeze!

The tips for using color, of course, depends on subject of your landscape. But there are some general tips that can help make that process fun.

Let’s start at the very beginning…a very FUN place to start.

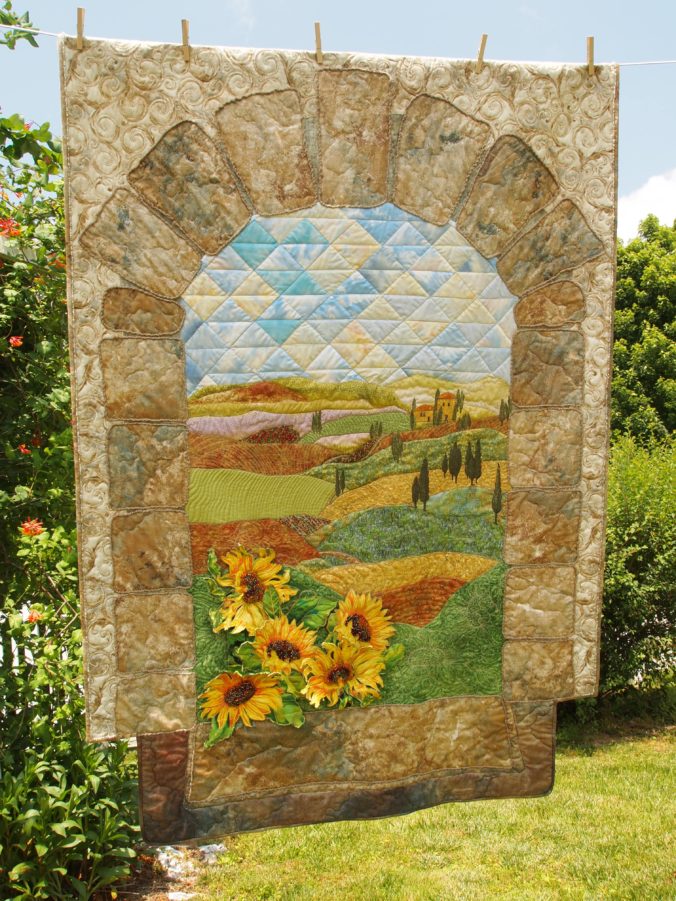
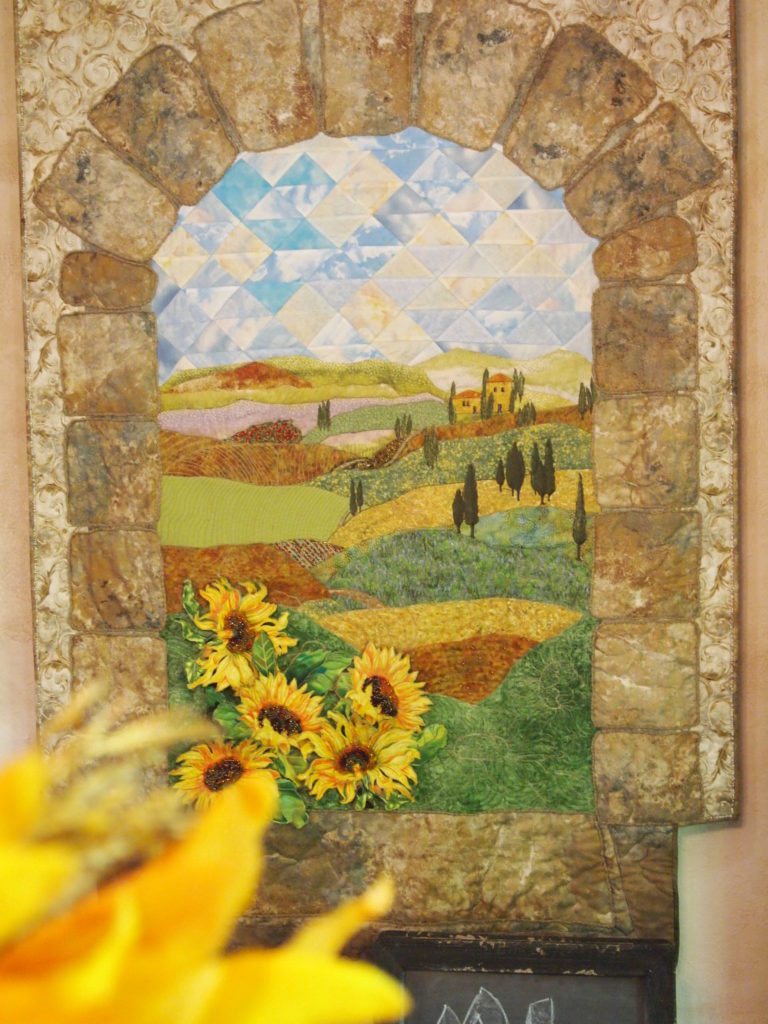
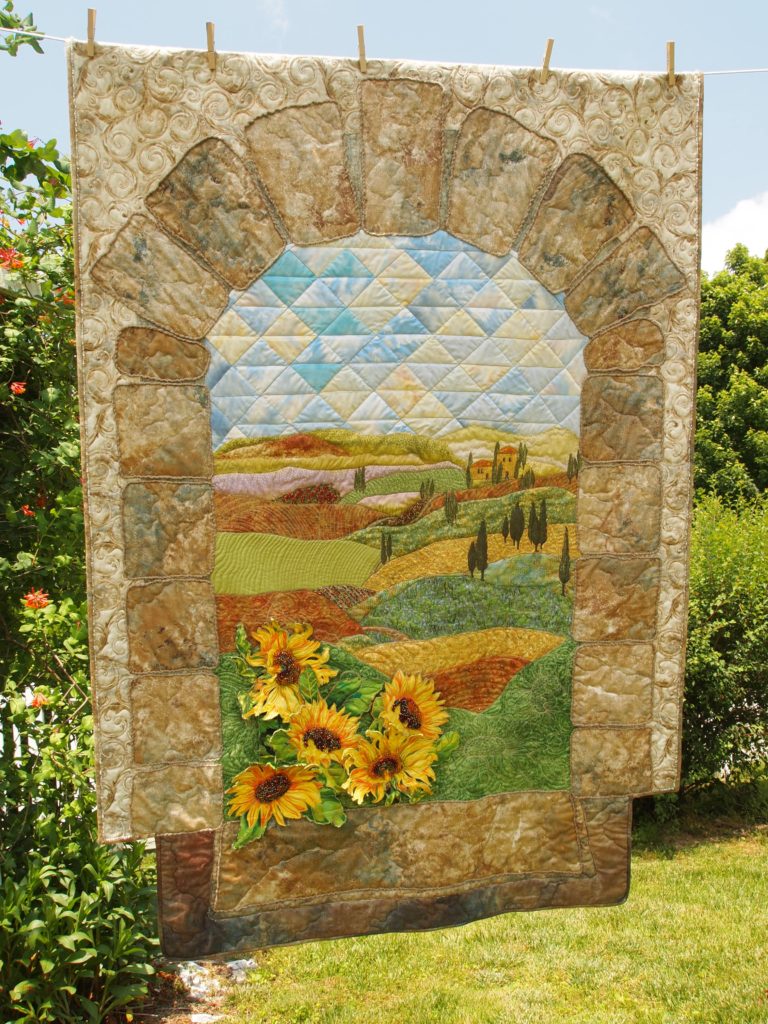
Tips for Using Color Shown in Bella Vista quilt.
Bella Vista by Karla Kiefner

My favorite part of landscape quilts is when I’m first digging through my fabric stash, searching for any fabrics which might remotely play nicely in my quilt…folding them into shapes, layering them on top of each other…imagining.

  1. When choosing fabrics for a landscape quilt, choose a wide variety of dark, medium, and light fabrics, mostly cottons, but also other textures. (I have been known to cut up old clothing for the right fabric in a small space.) You can’t have too many!
  2. Throw in some “wild card” colors! Go ahead and grab fabrics you might not immediately think of for nature scenes, both by color and print. Add some purple, copper, gold, olive/brown, gray, and gray-blue or colors with those combinations in them.
  3. Use those “ugly” fabrics! Of course, you don’t want an entire quilt of your least favorite fabrics, but they do have an important role because they make your beautiful fabrics really pop.
  4. When auditioning your fabrics, remember that generally speaking, distant hillsides will be “cooler” and bluer than the close, “warmer” hillsides–a phenomenon called “aerial perspective”. In addition to color, use quilting to also give a more defined perspective, using larger quilting in the foreground and tighter, smaller designs in the distance.
  5. Use whatever materials you need to get the look you want. (Don’t be afraid to break the rules.) In Bella Vista, I used several layers of yellow tulle on the hillsides and sky to give them a muted look of warm sunshine to contrast the stone window and close sunflowers.
  6. When choosing your fabrics for a landscape quilt, think of your stash as a brand new box of crayons. Be playful and daring and PLAN to color outside the lines!
Bella Vista
by
Karla Kiefner

Enjoy your quilting journey!

Three Quick Tips for Using a Long-arm Quilter

Check out these three tips for using a long- arm quilter.

TIP 1 : Choose your quilting based on the needs of your specific quilt top and how the quilt will be used. For example, is it going to be entered into a show, hung on a wall or used on a bed? Will the quilt be cherished as an heirloom or used as a beloved blankie? Determining how your quilt will be used will help you decide how much and what kind of quilting you want. (Generally, most people want soft quilts for a bed which means less quilting per square inch. In contrast, quilts entered in today’s competitions require more dense and varied quilting.)

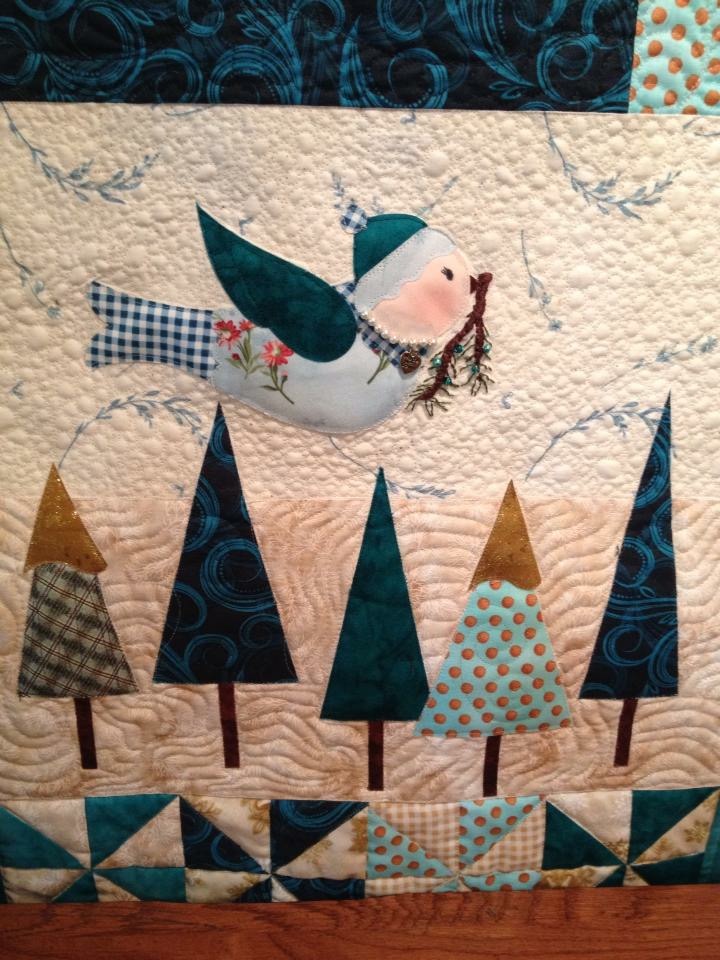
Winter Blessings Quilt
Pattern by Shabby Fabrics

TIP 2: Choose your style. Remember that quilting styles vary based on each quilter’s experience and equipment. Piecers who crave perfection may prefer a quilter with computerized designs. Piecers making art quilts or those who want a hand-crafted look may prefer a quilter who does free-hand and tool-guided designs. It really depends on what you like and what your quilt top needs.

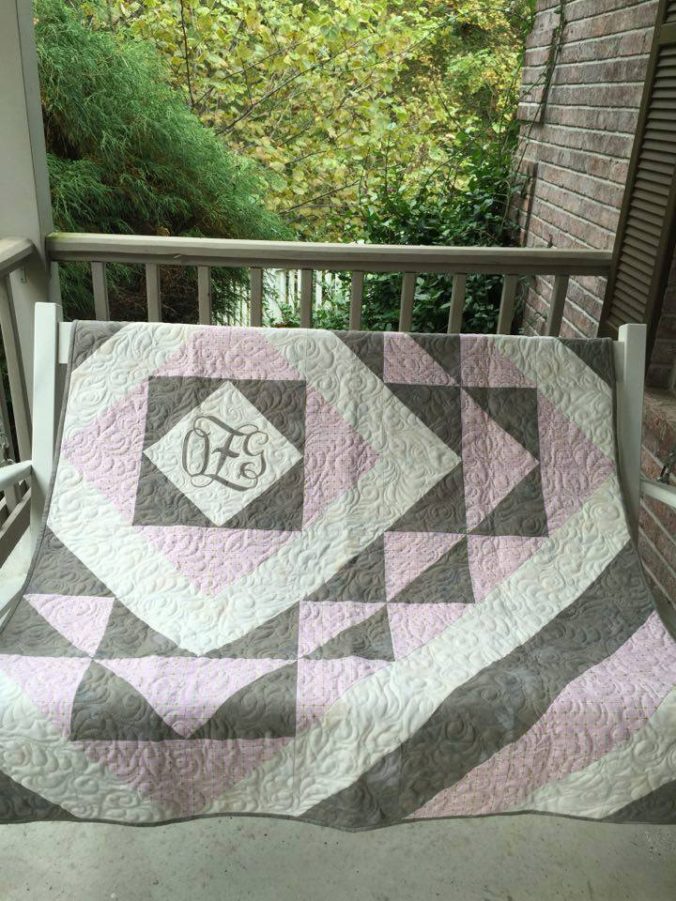
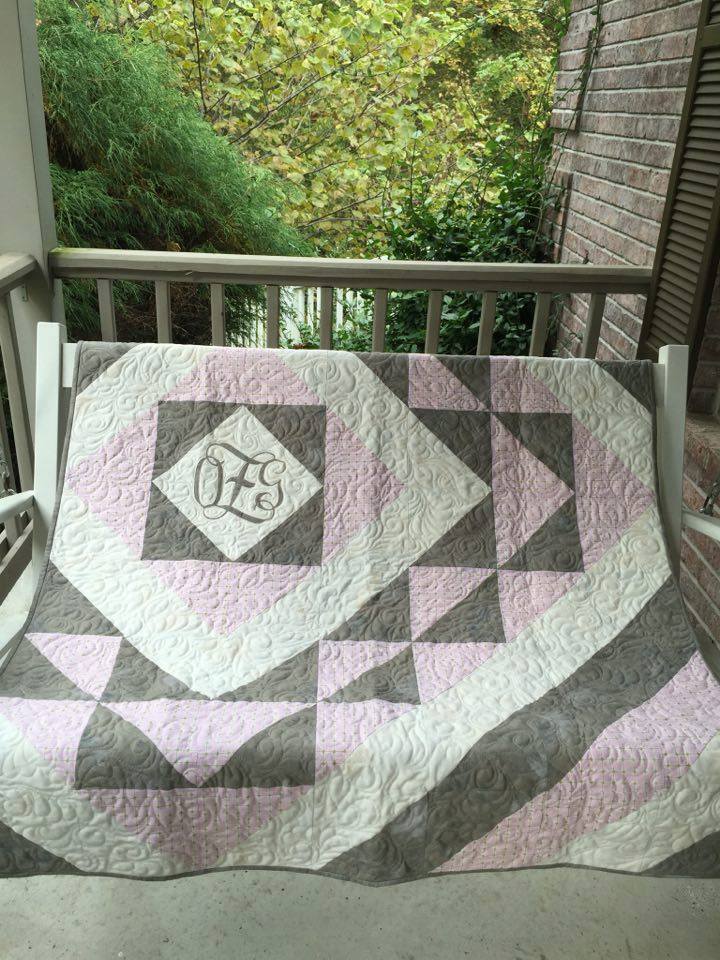
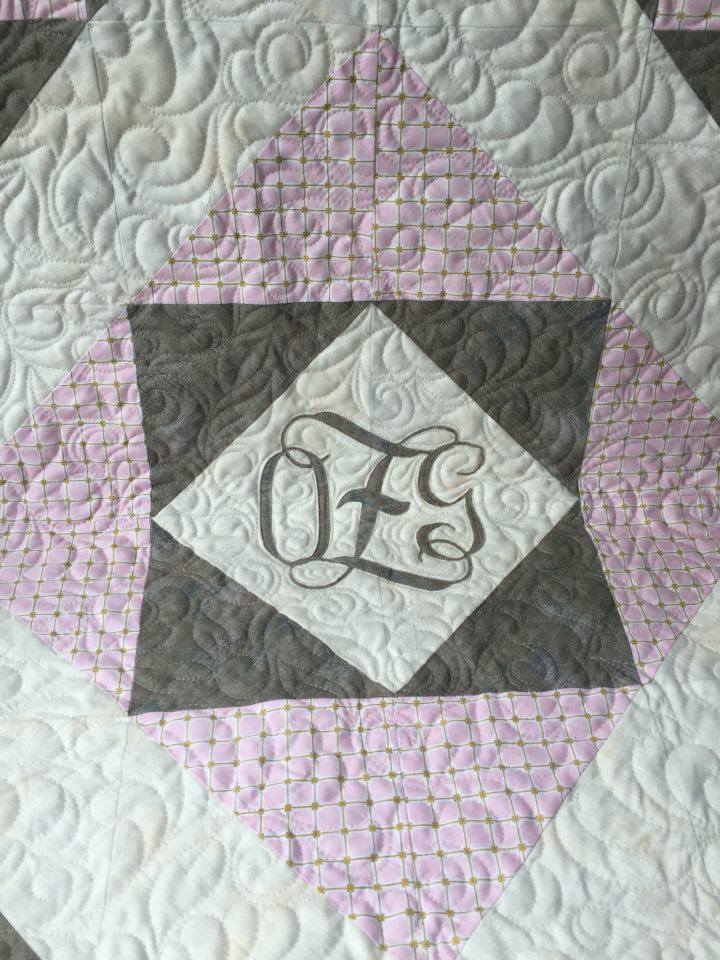
Monogrammed Baby Quilt

See more about this baby quilt at One Sophisticated Lady.

TIP 3: Choose your backing carefully. First, realize that most long-arm quilters today use the same color of thread in the bobbin as is used on the top. Keep this in mind when choosing your backing and you can determine if you want a big contrast, so the quilting shows or little contrast, so that it blends. ALSO, use quality backing. I encourage quilters to choose the same quality of backing as is used on the top. Be wary of “bargain” backings which may have low thread counts. Do the feel test!

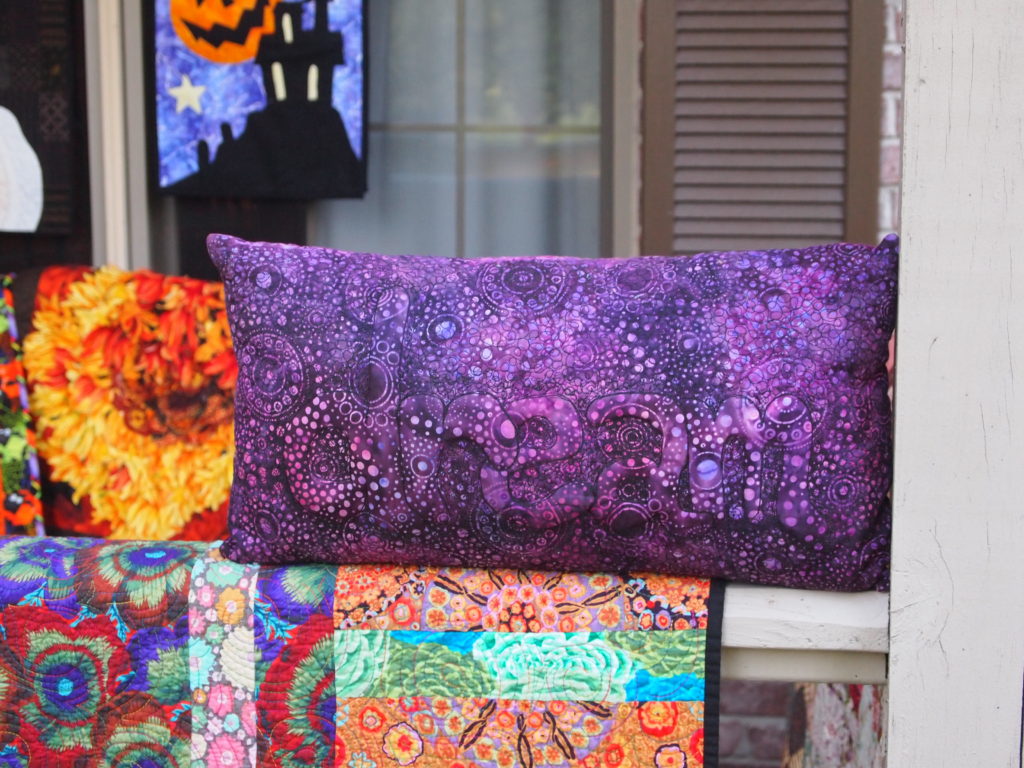
Dream Pillow Trapunto

If you aren’t sure what and how much quilting you want, talk to your quilter. She or he has hopefully made these same decisions over and over for people who tell them to do whatever they think the quilt needs.  What is the quilt’s purpose? What do you like? Remember, that there are no wrong answers and, as the creator of your quilt, YOU RULE!

Happy Quilting!

Sign up and I’ll send you an email when my next post goes live:

Follow and share on Facebook and Twitter and pin to your Pinterest boards! Thanks, Karla

Newer posts »