Tag: Prairie Point Hanging Method

Phoebee Goes to Market!

Estimated reading time: 4 minutes

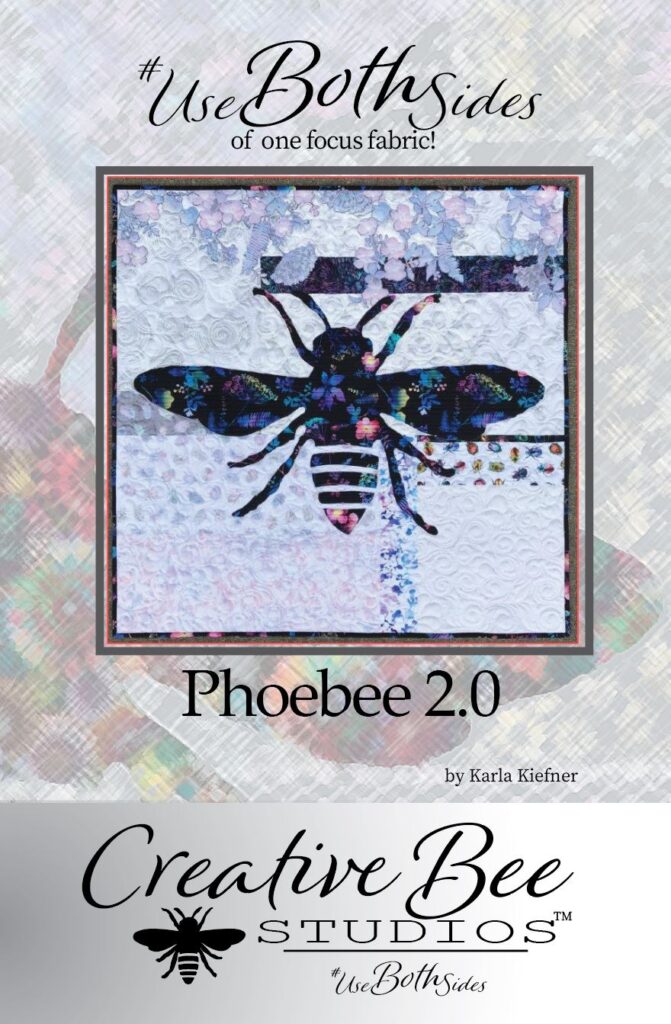
This is the story of how Phoebee for Hoffman began.

Phoebee, designed for Hoffman California Fabrics, was my first experience designing a pattern for a fabric company. I’d wondered for a few years what it would be like to collaborate with a fabric company. I never dreamed it would be this fun!

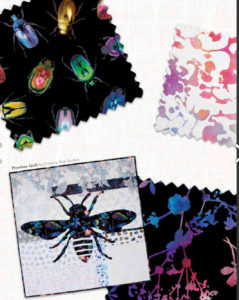
Starting on August 3, at 3:47 p.m., I opened two packages of 21 fabrics  from Hoffman California Fabrics company. 

Image of fabric to make Phoebee for Hoffman
Fabrics from Hoffman California Fabrics.

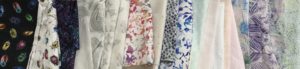
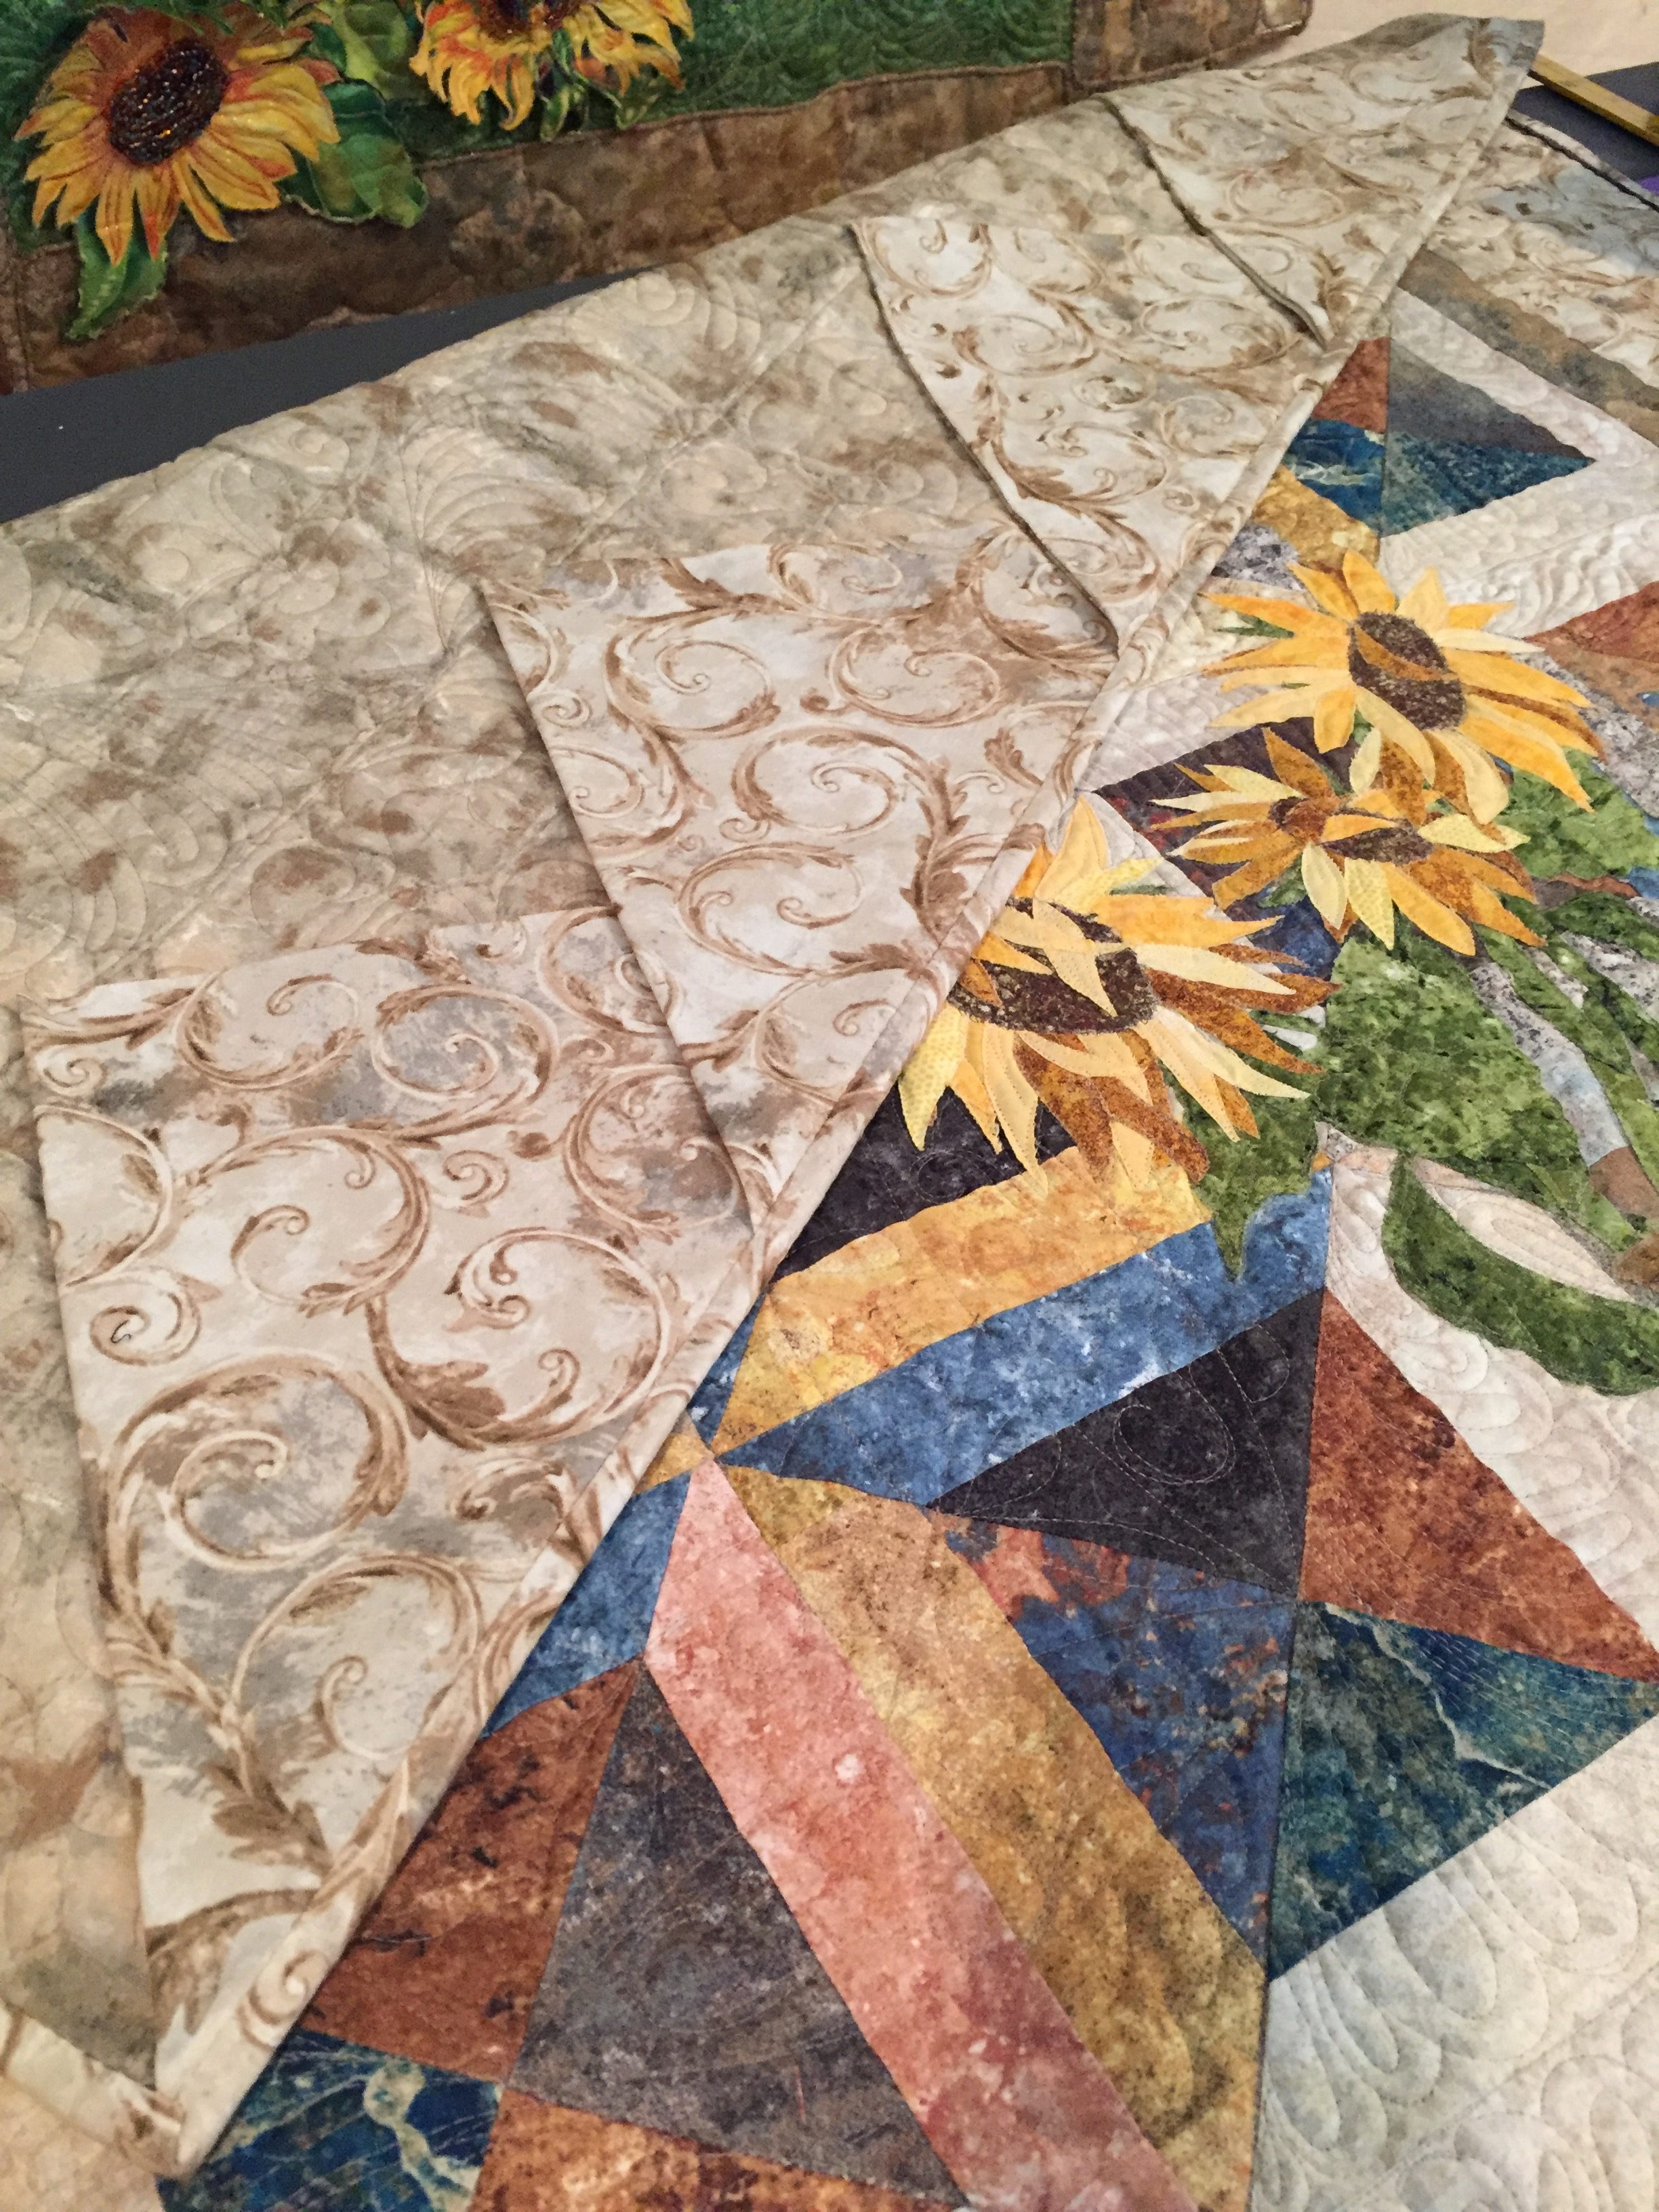
First and foremost, for the next six hours, I auditioned “Phoebee for Hoffman” fabrics trying to get just the right mix of color, contrast, values, and feel that would be worthy of this new line by Hoffman California Fabrics.

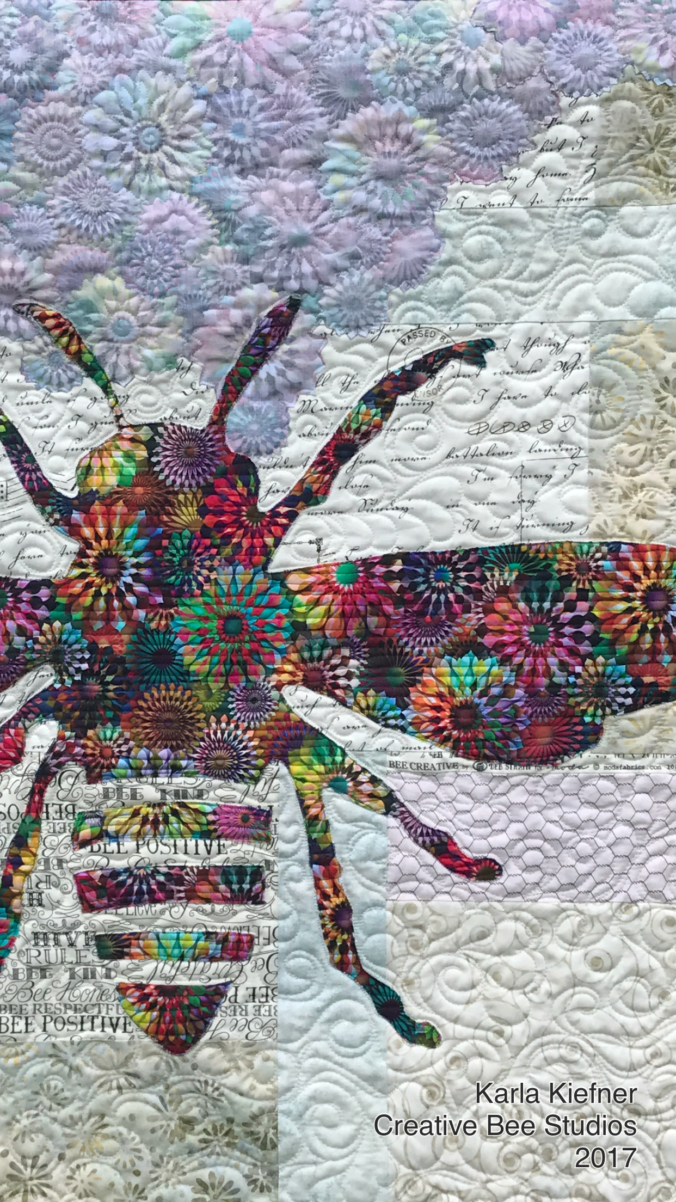
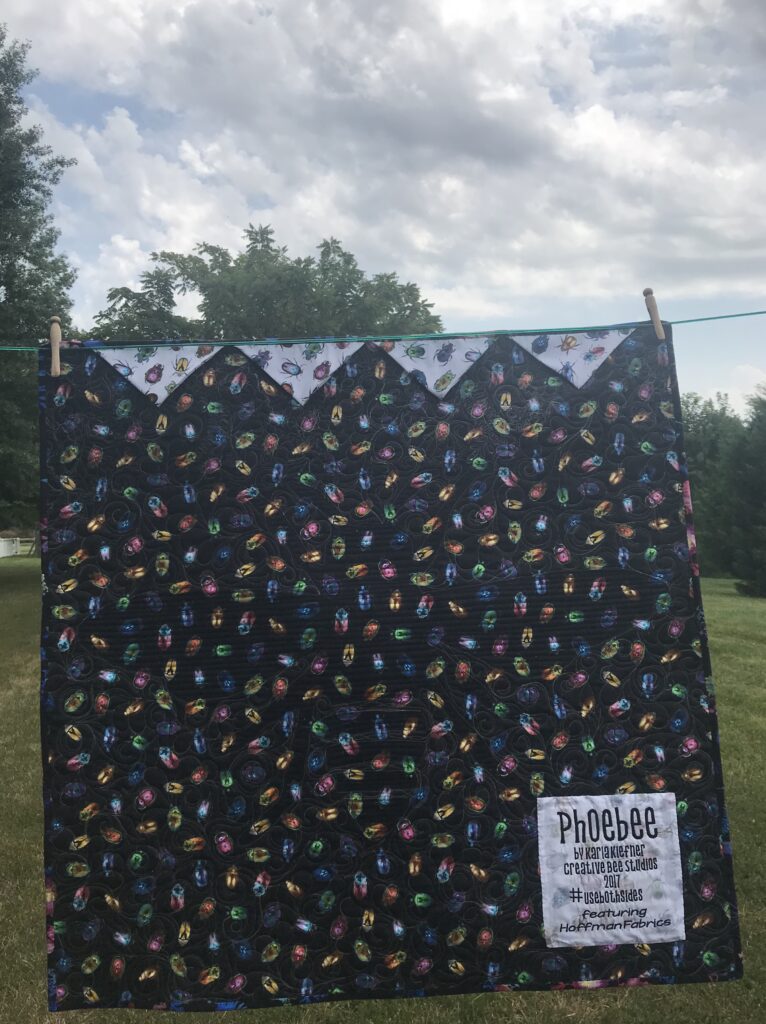
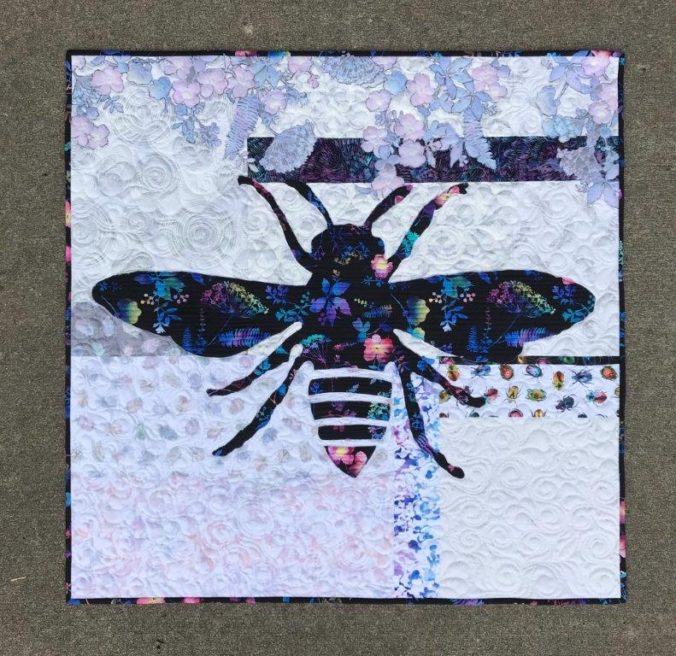
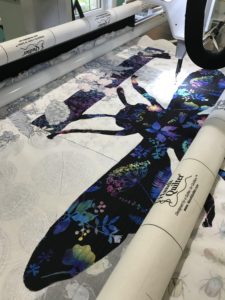
Well, Electric Garden rocks! Vibrant color with a soft, contrasting reverse side was just the recipe I needed. I flipped several backgrounds to their reverse as well, so they wouldn’t compete with the bee or flowers. The next step was cutting out Phoebee and her flowers.

Image of Quilt on Clothesline
Image of Phoebee Quilt
Image of Phoebee for Hoffman

I slept on this mix so I could get a fresh look the next morning. Yes!

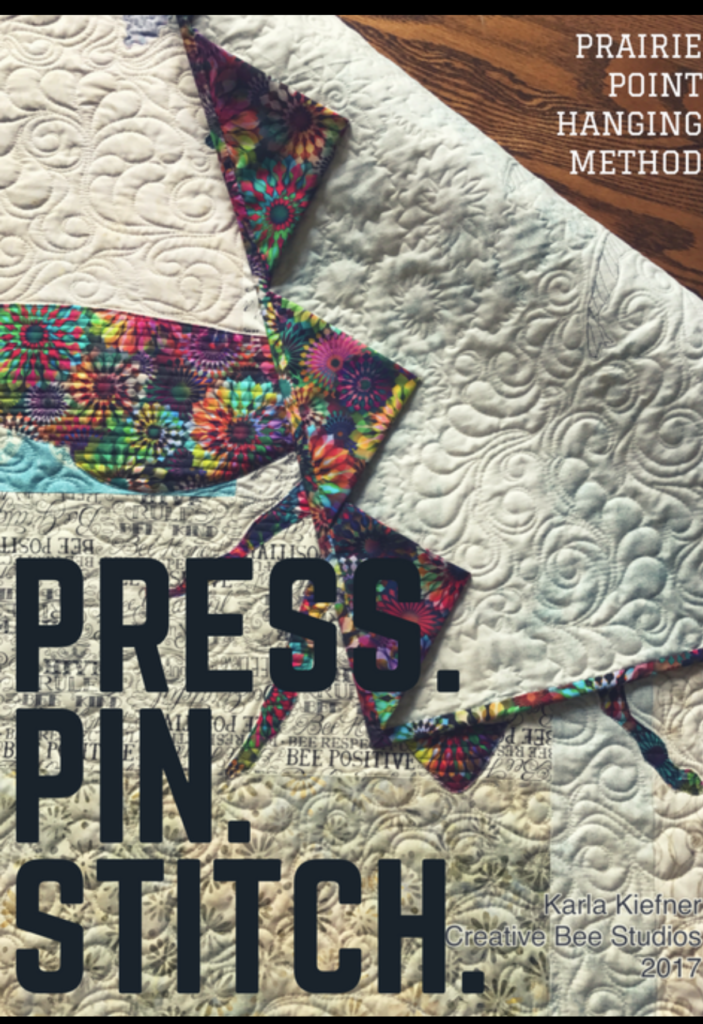
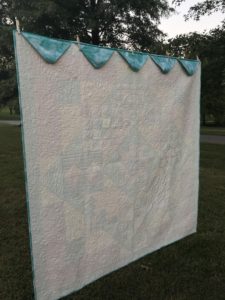
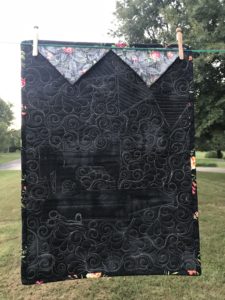
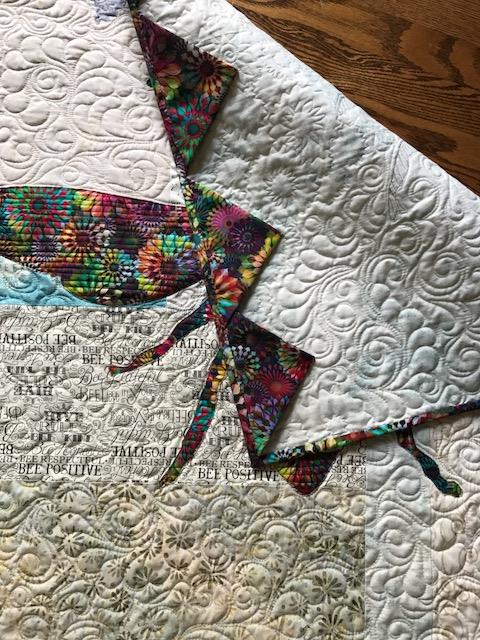
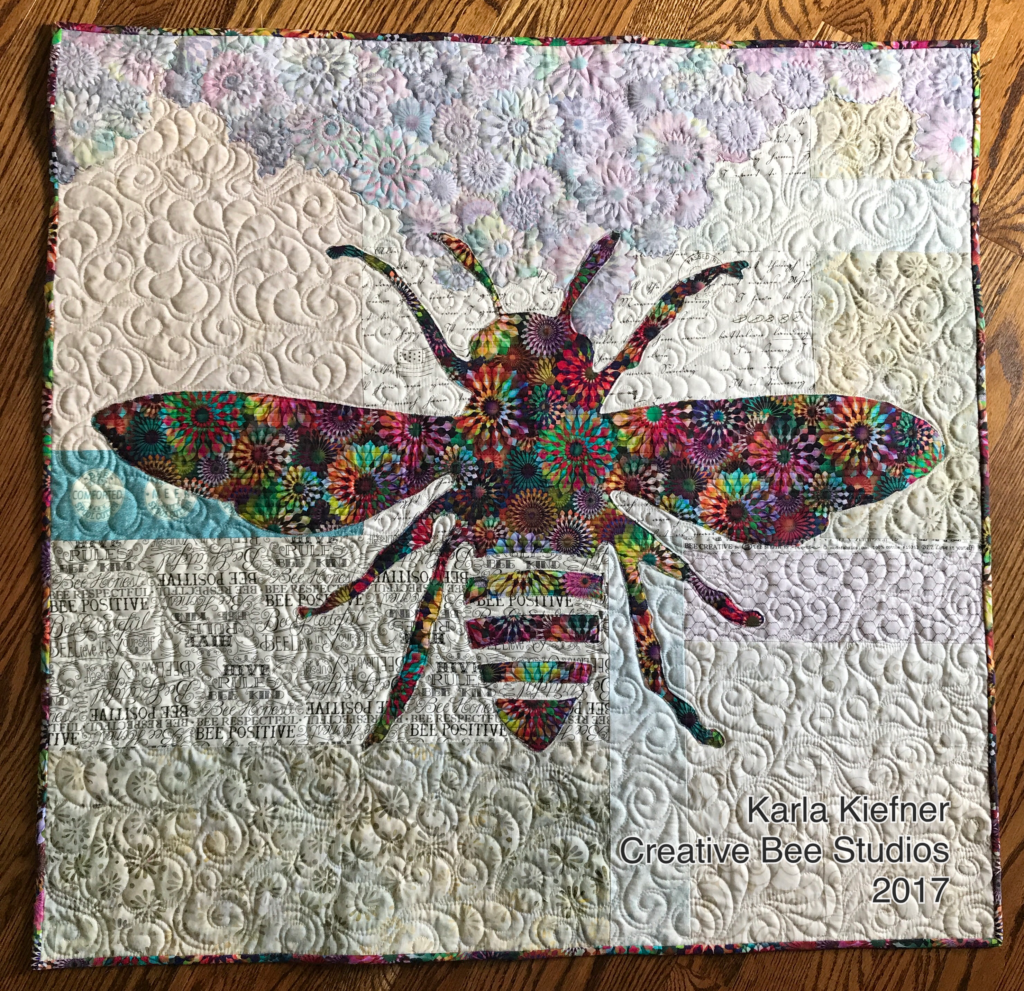
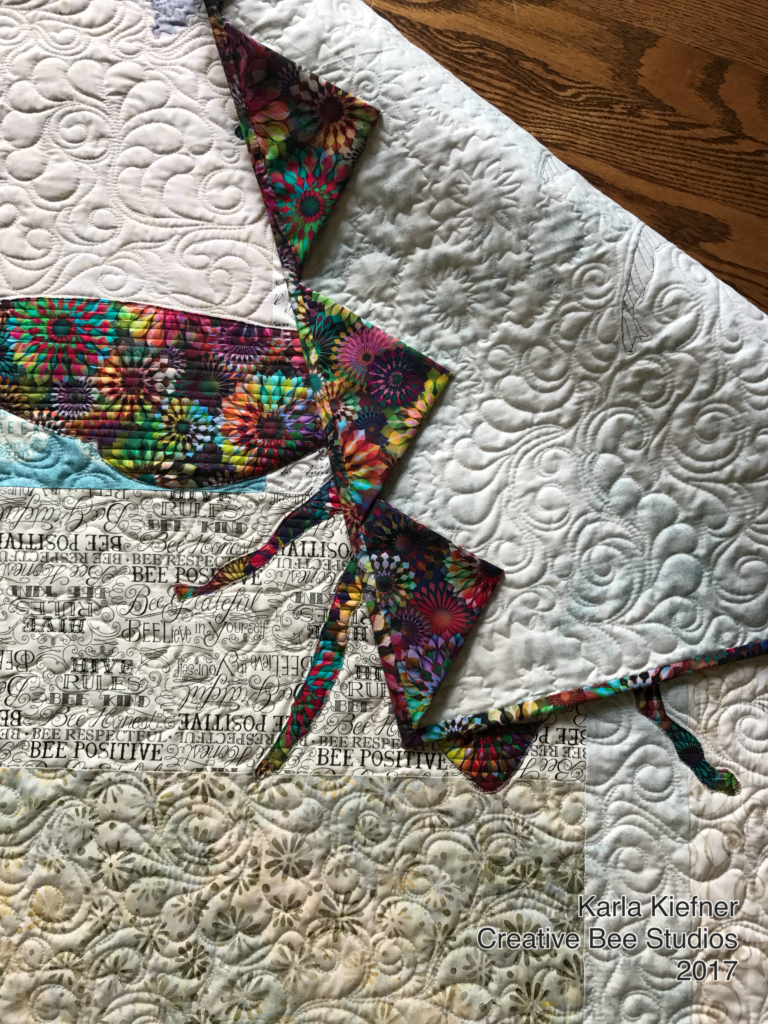
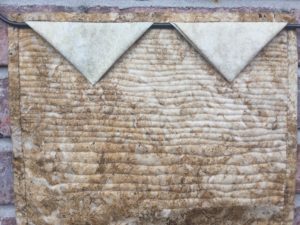
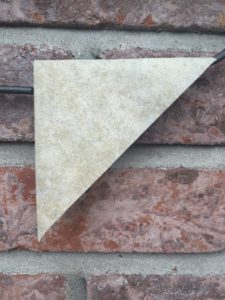
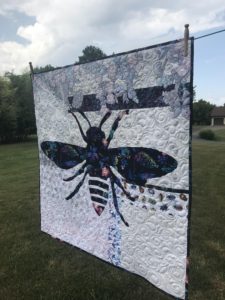
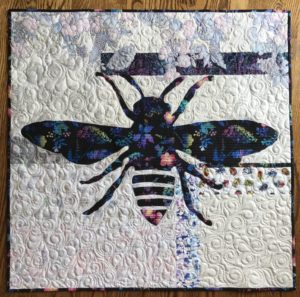
Immediately, I began fusing and quilting (on my Handiquilter Avante) right away. Next came the prairie point hanging method, binding, label, photos, writing and producing the pattern, and Phoebee was flying to California on Tuesday, August 7th!

Image of Quilt in Frame
Image of Back of Quilt

My new friend in California let me know Phoebee for Hoffman arrived safely!

Image of Phoebee at Quilt Market
Phoebee 2.0 in the Hoffman booth at market!
Image of Electric Garden
Phoebee 2.0 pictured in the Projects Catalog

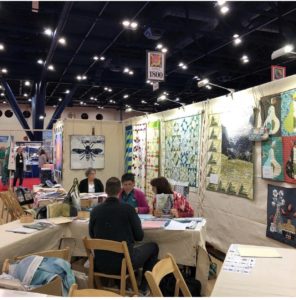
Quilt Market in Houston was a big debute for Phoebee. I was fortunate that several kind quilter souls saw her hanging in the Hoffman California Fabric booth and shared their pics with me on Instagram! Thank you, friends! 

In addition to quit shops across America, I am shipping Phoebee 2.0 patterns to a very fun quilt shop in Canada!

See more quilt patterns designed for Hoffman California Fabrics HERE!

Original Phoebee and Phoebee 2.0 quilt patterns are available in my Etsy Shop HERE.

Image of Bee Quilt
Phoebee Quilt Pattern

Catch The BUZZ! FOLLOW on Instagram, Facebook and Pinterest!

Enjoy your quilting journey!

New-Prairie Points for Hanging Quilts

Estimated reading time: 3 minutes

Use prairie points to easily hang your quilts.

Use simple prairie points instead of a long fabric tube to hang your quilts. The number you need will depend on several things: the size of the quilt and how you will hang it.

First, fold a few squares.

To make prairie points, cut squares. Fold them in half, diagonally and press. Fold them again, diagonally and press. That’s it! You just made them! The size and number you will need depend on your quilt size and how you will hang it.

For best results, run a stitch about 1/8th inch from the raw edges of the prairie points to hold them together.

Next, baste the prairie points onto your quilt.

Align your prairie points across the top edge of the back of the quilt. Distribute them evenly, with the outer points at least an inch from the sides.

Baste the points, using a seam allowance smaller than your binding seam allowance.

Finally, make a few hand stitches.

Lastly, you will stitch the points to your quilt by hand, with a doubled-tread. Take care not to stitch through the front of your quilt. About four stitches in each is enough to secure your points.

When your binding is complete, your quilt is ready to hang!

For sizes and to review the complete method, see Hang Quilts Using Prairie Points  and Prairie Point Hanging Method

Image of quilt with prairie points.
Prairie Point Hanging Method shown on Phoebee.
  • Use an even number of prairie points to hang a quilt from a single point.
  • Generally, consider 8- inch squares. Try larger ones for larger quilts and vice versa.
  • All the Creative Bee Studios patterns provide the size and number of points needed for each pattern.
  • Pressing well helps keep the points orderly.
  • Trim any uneven edges before attaching the points to your quilt.
  • For use with unusually large rods (like in a quilt show), hand stitch your points about an inch higher than they reach when flat. This will allow some added room for the large rod and help the quilt hang flat.

In addition to using scraps for Prairie Points, I like to use the REVERSE side!

Try using the reverse side to tone them down or provide interest on the back of your quilt! #usebothsides

Image of Back of Quilt
See the front of this quilt and new pattern in the next post!

Follow on Facebook and Instagram and pin on Pinterest!

Enjoy your quilting journey!

Hang Quilts Using Prairie Points

Use pretty prairie points and just a couple of hand-stitches to hang your quilts.

The Prairie Point Hanging Method is as easy as 1, 2, 3…4 stitches!

1. Fold and press fabric squares diagonally, twice, just like you would when making prairie points.

2. Pin the raw edge of the prairie points (triangles) at the top edge of the back of your quilt, spaced evenly.

3. Baste across the top of the quilt by machine and make four stitches by hand (with doubled thread) on the points of each triangle, making sure you only stitch through the backing and batting.


It’s EASY, FAST, and PRETTY! Click here to see this quilt.

Image of back of quilt with prairie points.

Prairie Points Hanging Method

Adjust the size and number of your squares based on the width of your quilt. For example:

My mini wall hanging uses four small, 4-inch squares. See this quilt in A Love Note from Johnny to June

Image of back of miniature quilt.

Miniature quilt hung with prairie points.

Four 7-inch squares make prairie points for a 24-inch wide hanging.

Four 16-inch squares work well for a 48-inch quilt and easily accommodates the largest requirements for our quilt show standards. Simply add more of the same size prairie points for a bed-size quilt.

Image of 48-inch quilt with prairie points.

Bella Piastrella with Prairie Points Hanging Method


TIP: For small wall hangings, use an even number of prairie points and you can hang your quilt from a single nail or hook instead of leveling it between two points.

How do you hang your quilts?  Share in the comment box below. 

Scroll down to sign up for email notification and you’ll get a notice when a new post goes live (about once a week).

Thanks for checking out by my blog. Please share, pin, and tell your friends!

Designing Quilts by Chance

In this quilt, I used the front AND reverse side of its focal fabric.

How do you design a quilt? Do you use graph paper and draw out the design with exact proportions? Do you use color pencils or do you label the drawn areas with the colors of fabric or values you’ll use? Do you use a quilt design software or a tablet quilt design app?

Yeah…not me.  A quilt often comes to life in my head… very vaguely, kind of like a mystery unfolding.  I ponder the idea until I start to pull fabrics from my stash and start cutting, drawing, and stitching. At least, that’s how Phoebee came to life.

Image of Quilt with Bee.

Phoebee was designed using both sides of a focal fabric.

Phoebee began with a vague idea to use pieced scraps from my stash for the background and use a bee as the main design. That’s about all I knew.  I thought I wanted to use multiple fabrics for the bee as well. I knew the shape I wanted to draw out for my bee, but I wanted to get my background set first for size.

I did use graph paper in my process, but it was after I stitched my pieces together and decided I liked the look. That’s when I wrote down the dimensions and drew the shapes out, labeling which fabrics I used. I used a pencil because my drawings and placement of fabric changed several times in the process.

Once I was happy with the background, I made all my notes and could hardly wait to grab fabrics to design the bee.

NOTE: I don’t clean up ANYthing while I’m in creating mode — I just let it flow and fabric is everywhere!

So here I was, sitting on my floor (because my design wall was {and still is, truth be told} full of a bed-size quilt in progress), trying out fabrics, figuring out how to combine them to make an interesting bee, when one fabric just kept jumping out at me. I finally gave in and decided to use it alone for my bee. That fabric looked really good against the pieced background.

But something was missing. I liked the bee. I liked the background. There needed to be another element – something of surprise or interest and something to “ground” the bee somehow. I moved the extra fabrics aside and accidentally turned the “bee (focal)  fabric” upside down — now THAT was interesting! To use the reverse side of the focal fabric for the flowers the bee was pollinating was exactly what this quilt needed to make sense, be unique, and complete the “story”.

Image of Full Quilt with Bee

Phoebee means bright, pure in Greek.

Phoebee means BRIGHT,  PURE in Greek and she is both! I happened to use a color-dense Hoffman Spectrum Digital floral print for the bee, the flowers and the binding, but any floral, big or small would work which makes this a great stash-busting quilt.

I like the idea that Phoebee is vibrant and the flowers are softer in value as the bee is getting its life from the flowers.

I’m excited to finish writing this pattern and I have hazy plans in my head brewing  of additional designs using pieced backgrounds and one floral focal fabric.

Image of Prairie Point Hanging Method

Prairie Point Quilt Hanging Method

Notice the Prairie Point Hanging Method (click here for details)

Sign up and get an email when my next post goes live!

For more information about free-hand stylized quilting, visit my The Quilting Bee page.

Prairie Point Hanging Method

Discover a quick quilt hanging method to display your quilts!

Let’s face it…quilts take time. We really should cherish each step of the process. But, if you’re like me, it’s those last few steps that sometimes really test your patience:

Firstly, the binding…

Then the label…

Last, the SLEEVE…ugh!

Now, here is a fast, easy way to attach a hanging sleeve, with just a few quick points – Prairie Points!

Start with a few squares of fabric, fold them diagonally twice and lay them on your quilt. Next, baste with your machine, using a seam width that is smaller than your binding seam. Lastly, stitch the points by hand with just a few stitches! That’s it! It’s that easy.

Now let’s break it down:

For instance, if you have a small wall hanging, 5 inch squares will do.  But if you have a large quilted wall hanging, 12 – 16 inch squares will work.  The number you need depends on how large you make them and the size of your quilt. You’ll see, as soon as you fold one and hold it up to your quilt, how many you’ll need. This method is so much faster and easier that the traditional “sleeve”, you’ll be looking forward to using this method on your quilts!

So, for this tiny wall hanging (11  inches wide), I am using two five-inch squares.

Easy Method for Hanging Quilts

For small pieces, I like to use an even number of triangles so that the center is open for hanging it on one hook or nail. Of course, larger pieces need to be hung by two points, so the number of triangles attached to the quilt depend only on how many you want to add. For example, my 90 -inch wide quilt has 7 triangles which started with 12 1/2 inch squares.

Also great about this method, if you have a particularly heavy quilt to hang, you can add additional rod support in the center of your quilt in between two triangles.

To begin, fold a square diagonally once, press. Fold that triangle

Folded twice from square.

diagonally again, press. Do this for all of the squares. Secondly, lay them at the top of your quilt, cut edge, lining up with the top edge of your quilt sandwich. Pin in place. Next, machine baste within the seam of your binding (whether the binding is on yet or not). Lastly, use a needle and thread (I like to use doubled thread for this) to stitch down each point, securing with several stitches.

Finally, attach and turn binding as usual and your quilt is ready to hang!

Image of Quilt Hanging Method

All Creative Bee Studios patterns provide Prairie Point Hanging Method instructions. Shop Patterns HERE.

Learn more about Creative Bee Studios #usebothsides patterns here.

Learn about NEW textiles, merchandise and MORE at Uncork the BUBBLES!

JOIN The BUZZ and follow Creative Bee Studios on Facebook, Instagram, and Pinterest!