Page 10 of 21

Two Purple Tools for Quilting

Estimated reading time: 3 minutes

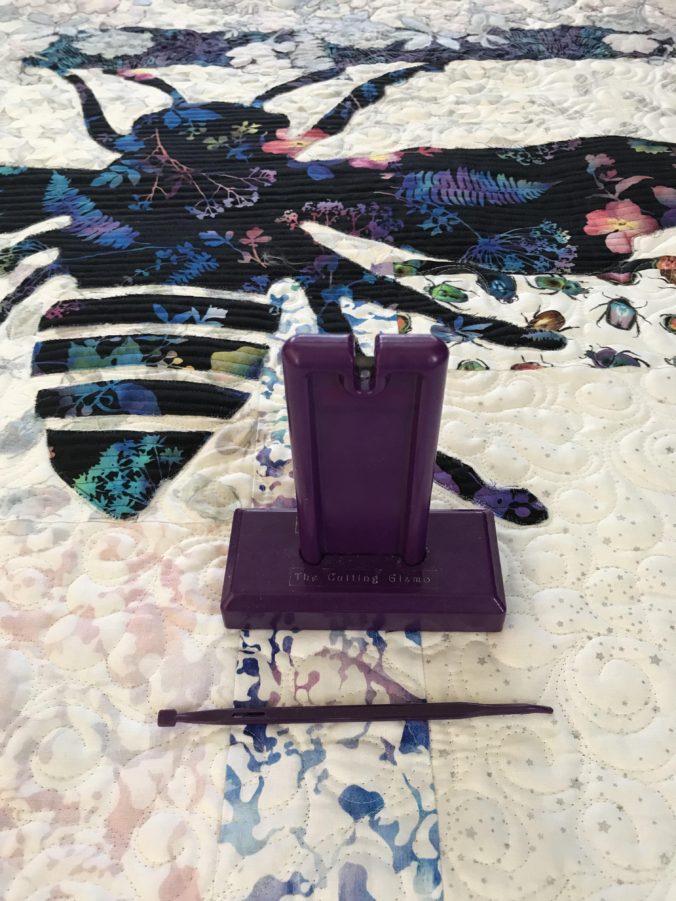
Two simple quilting tools make a big difference in my stitching experience.

While both of these quilting tools are “Barney” purple, their uses are anything but child’s play!

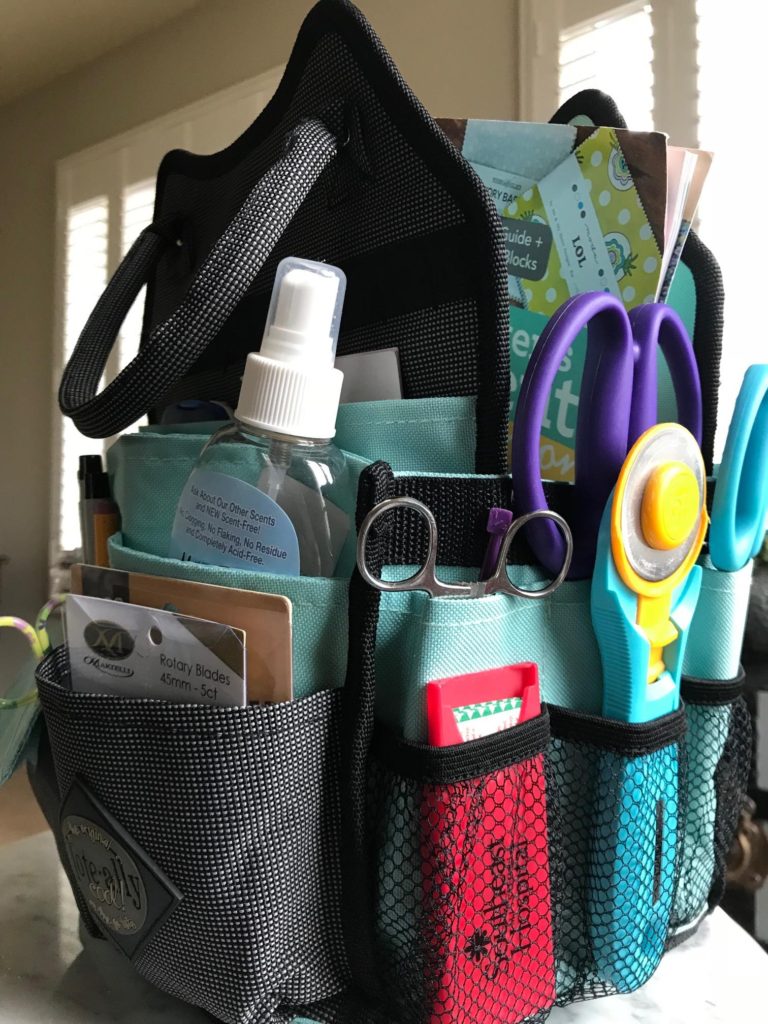
The Cutting Gizmo has it’s place in my studio AND my retreat bag.

First, let’s look at The Cutting Gizmo. If you chain piece, this guy is a must-have! The Cutting Gizmo (click here) is by no means new longevity is in it’s favor. This tool by Gypsy Quilter is the best stationary snipper I have found.

Specifically, The Cutting Gizmo is a weighted cutter with a rubber, non-slip bottom. It is especially wonderful to use when you are making lots of chain-pieced segments for a pieced quilt. Just grab the two fabric pieces and draw them down either side of the gizmo to cut the connecting thread.

This gizmo saves and repetitive movements.

Seriously, think about the time it takes to grab your scissors, re-positioning your hands, snip a thread and put down your scissors.

Instead, you just pop up from your machine, snip, snip, snip and press, press, press! I keep this tool on the end of my ironing board, always.

That Purple Thang is a useful quilting tool, too.

Secondly, that long thin stick is one of the first quilting tools I ever purchased. So, at about twenty years old, it must be a good “thang”. It’s actually called, That Purple Thang from the Little Foot Quilt Shoppe.

That Purple Thang is more than just a pointy tool.

One end is softly pointed with a slight curve. It’s perfect to send nearer your moving needle than you want to send your fingers. You can control your fabric with the thin tip. The softly squared end is useful, too. One use is for turning a getting neat edges when turning a project right side out. I’ve had other tools made for this purpose, but this is the one I always go back to. I’m not sure why, but unlike other similar tools I’ve owned, I don’t misplace this one! I think it’s the cute name…

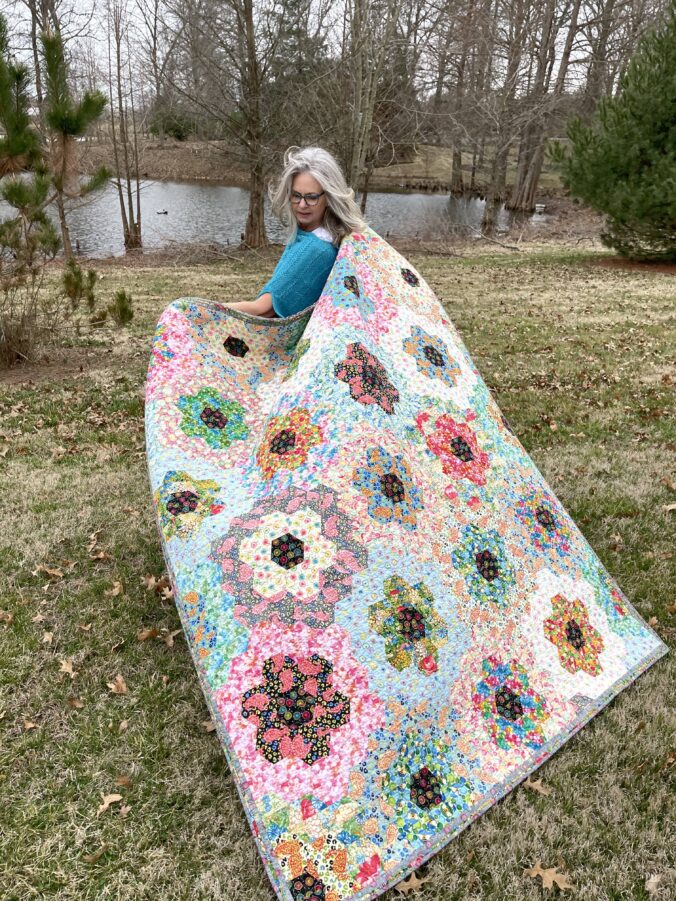
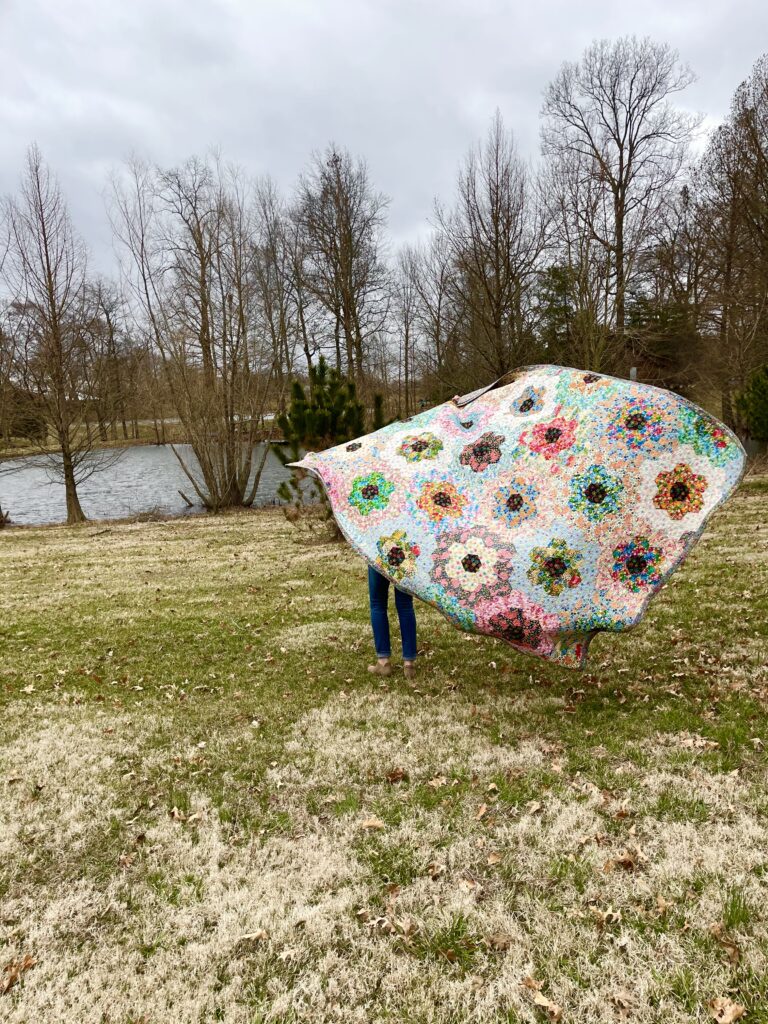
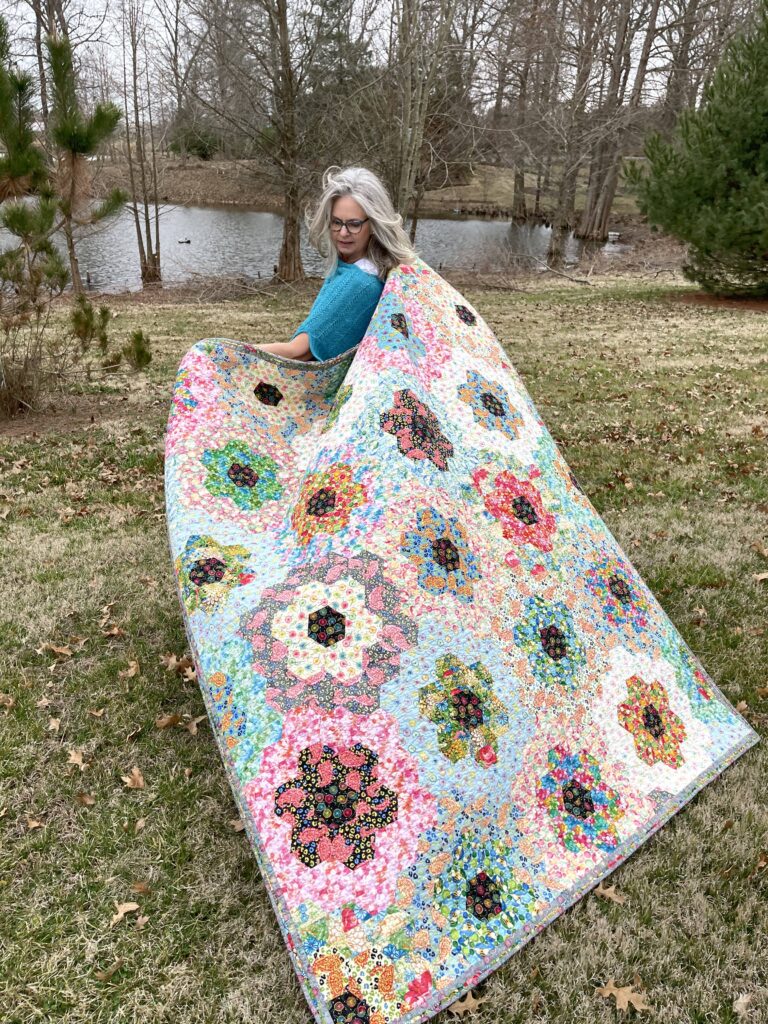
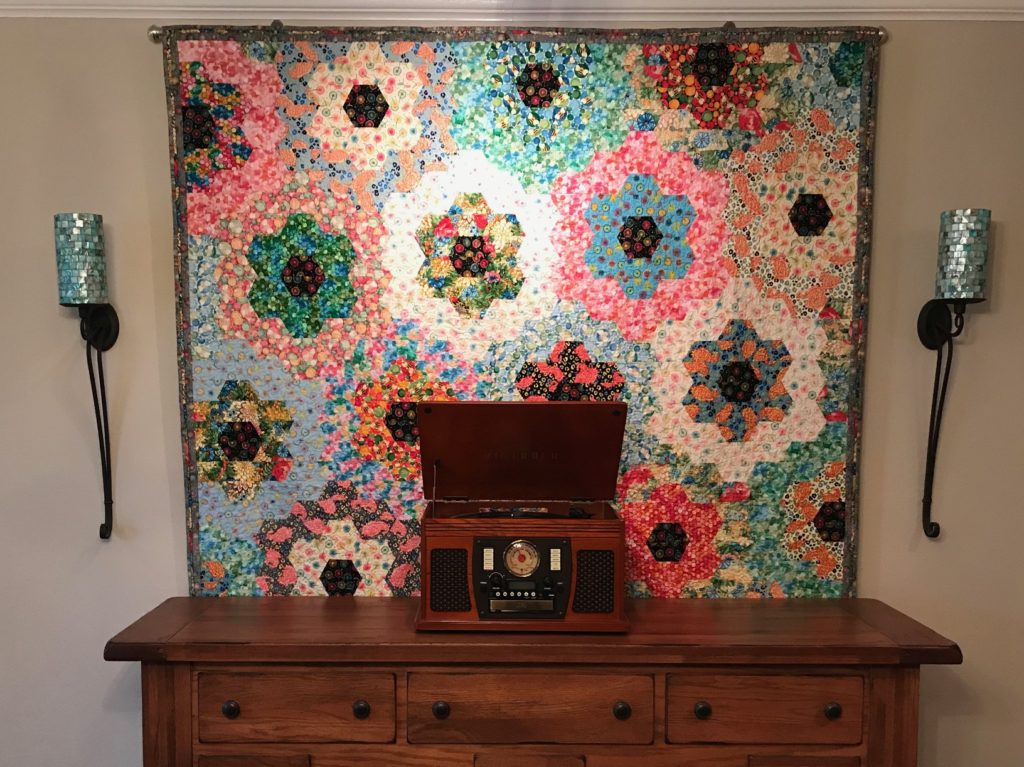
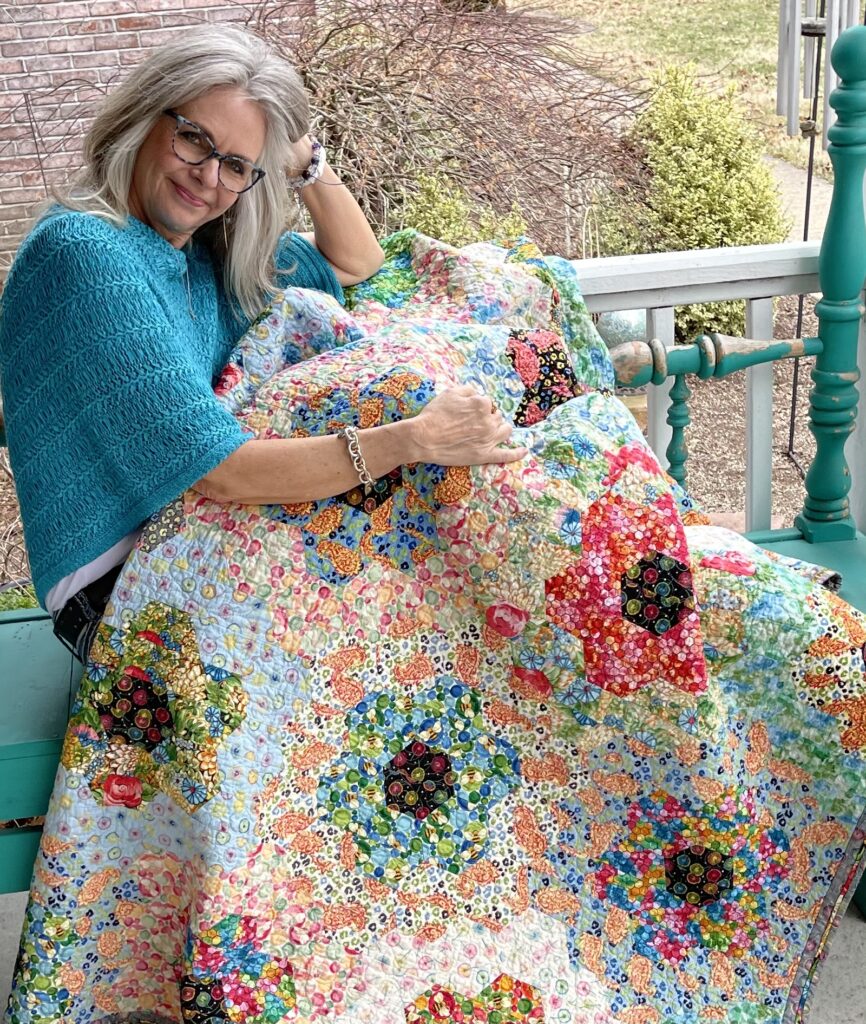
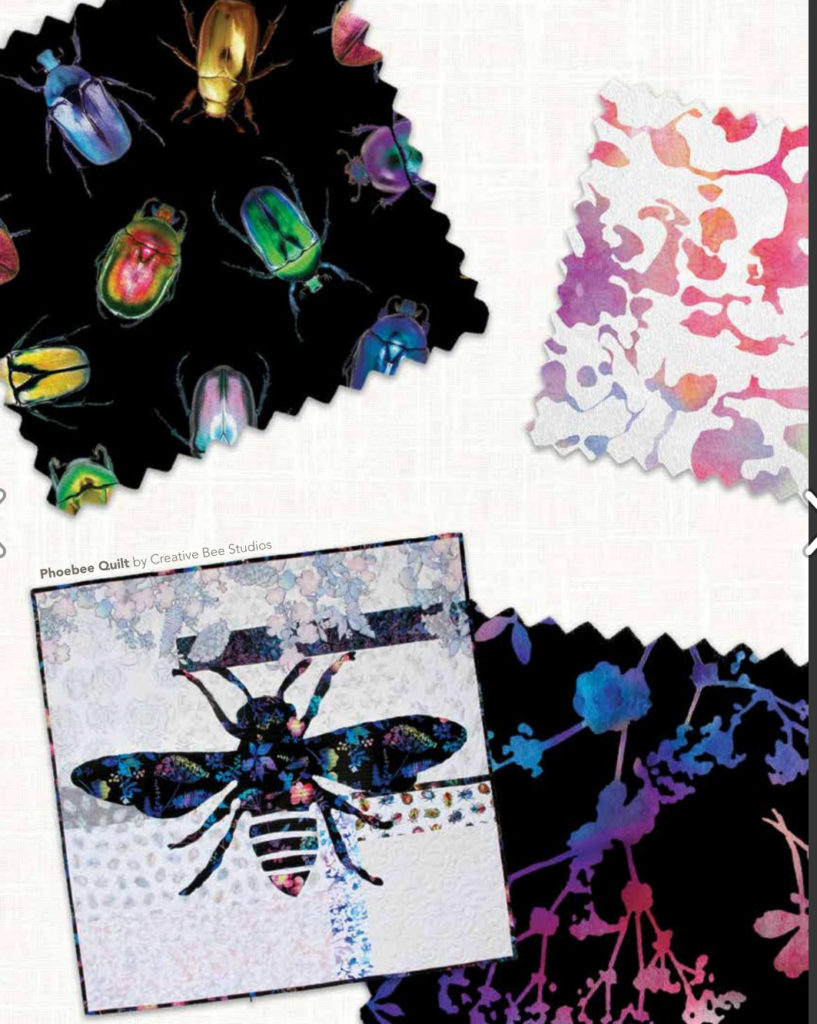
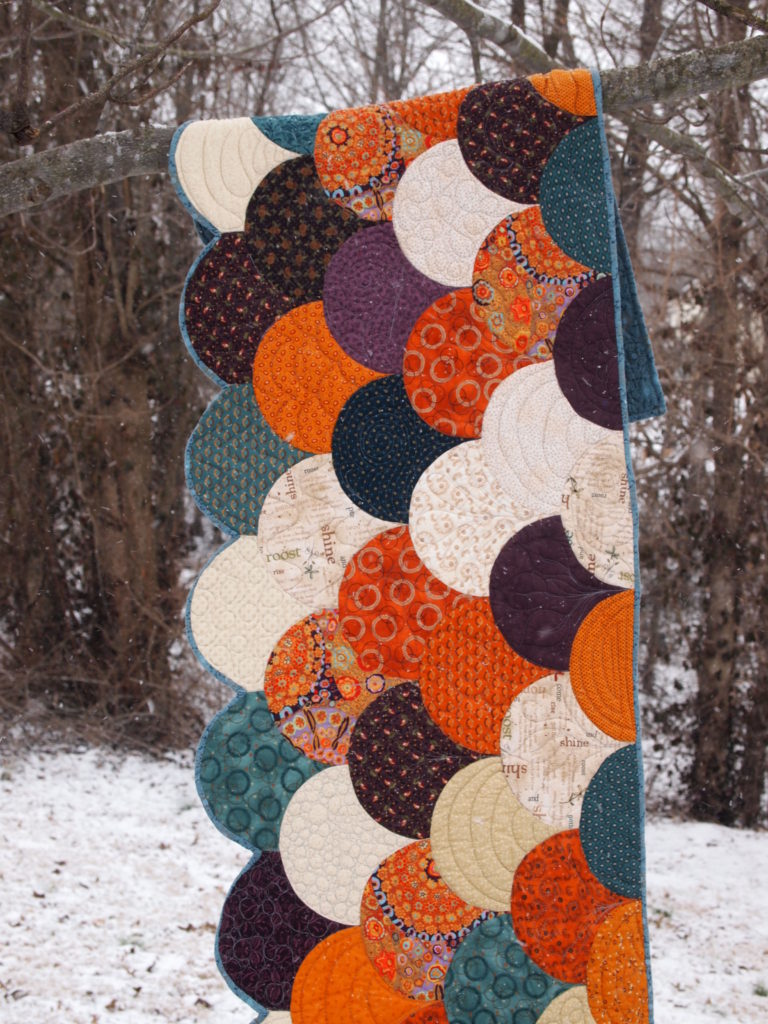
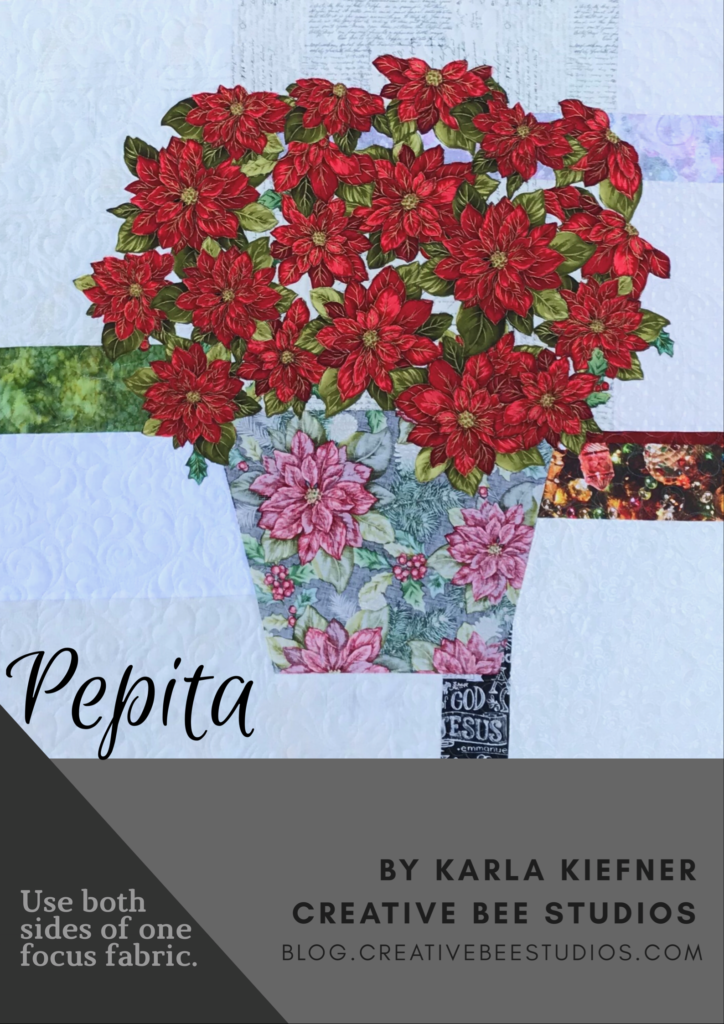
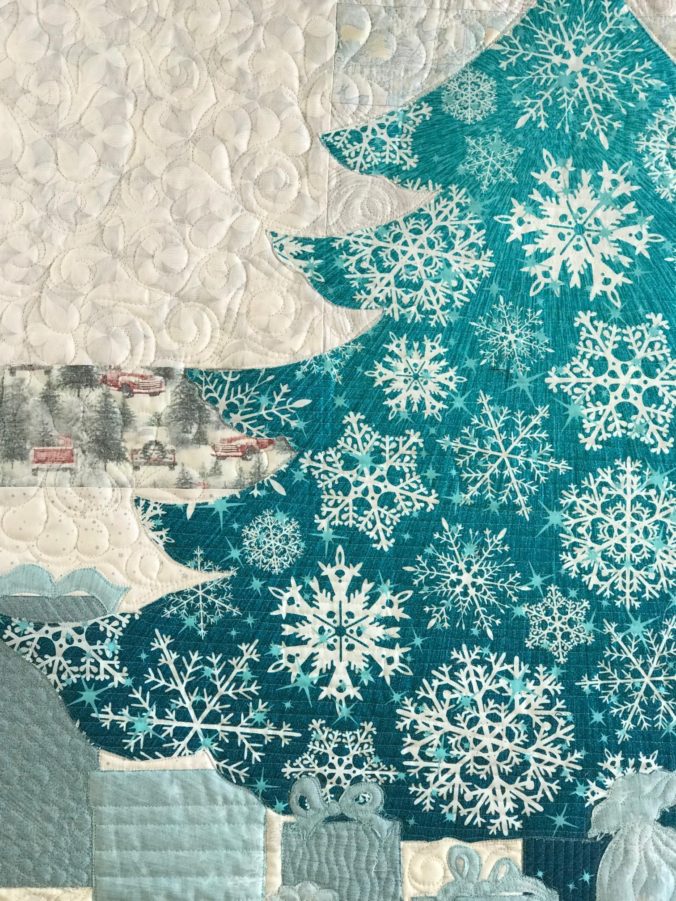
Both tools are shown on the Phoebee 2.0 quilt made from both beautiful sides of Hoffman California Fabrics.

This line of fabric, called Electric Garden, is bold and soft at the same time. Learn more about using both beautiful sides of fabric HERE.

Use the social media buttons to share on Facebook, Instagram, and Pinterest!

Floating Flower Garden

A floating flower garden is a queen’s palace for sure!

The Floating Flower Garden quilt is a modern take on a classic quilt.

What’s a better spot for a creative queen bee than this lovely palace quilt?

Floating Flower Garden

Image of queen's palace quilt
Floating Flower Garden Quilt by Karla Kiefner

First, this quilt began with fat quarter bundles from one fabric line. It was one of those fabric purchases without any planning or direction.

In addition, I was certain I wanted to use both beautiful sides of this fabric line.

How to use both sides for a classic quilt design?

Next, I found a tool for making half-hexagons. Using the Hex and More ruler and lots of 2.5 ” strips, I made lots of half-hexagon pieces.

Image of Karla holding quilt

Add to that, a non-traditional method for making this floating flower garden.

Yet, I still wasn’t sure where this quilt was headed – or if it would work! For months, I arranged and re-arranged the hexagons. In addition to changing the placement of color, I also played with the values by turning some fabrics to their REVERSE side. Read The Tricky Traits of Value.

Design wall to the rescue.

Using a design wall helped me figure this baby out in a number of ways. Most importantly it allowed me to take good photos of this large quilt.

Image of Floating Flower Garden indoors.
Perfect place for the turn table.

Black and white photos galore!

Just as I instruct students in classes and workshops, always take black and white photos to check your values. Color can fool you – and it tried to fool me with this quilt!

My goal was to create a blended quilt version (see Blended Quilts book) of the classic Grandmother’s Flower Garden. I tried many combinations, but the look really came together when I started to use the reverse side of the fabrics for the outer flower rings.

Image of Karla with Floating Flower Garden

Each black center and first ring are the front of the fabric. I could have excluded the lightest fabric to make the changes in value more apparent, but again, I was aiming for a more subtle approach.

Using both sides of fabric provides a soft difference to the values and makes a quilt sparkle!

I’m happy to say that this quilt one a coveted ribbon in my guild’s quilt show!

Shop more than 50 patterns that use BOTH beautiful sides!

Enjoy YOUR quilting journey!

Quilt Retreat Take-Alongs

Estimated reading time: 4 minutes

Start your packing for quilt retreat!

It’s quilt retreat and time to take your sewing on the road!

First, for quilters to go through all the trouble of taking down one work station to pack to all up, travel, and set it up somewhere else means it MUST be a lot of fun! Whether you go for the social time, productivity, shopping or a combination, making the launch from home sewing to retreat sewing can be easy!

Keep it all in one spot.

I have a friend who keep duplicates of all sewing supplies. Of course, that is the ultimate way to pack and travel. But if space and budget don’t allow for duplicates, try using a central command center.

Image of Tool Holder

Find a organizer that works at home and away.

The one I use, pictured above holds just about all the little tools and gadgets I need for retreat. I can even store my mini iron in the center section.

I tend to take a lot of items on quilt retreat because I want to pack (no pun intended) everything I can into those lovely few days. Overall, I like to enjoy all the aspects of a good retreat which include laughter, fabric shopping, relaxation time, yummy food, reading, movies, music, and walks, I’m still a high production type of quilter.

No sense spending time looking for supplies.

Whether in my studio or on the road I need to see what I’ve got and know where to find it.

Below is a very unofficial list of some of the things I take on retreat. I hope it helps you get ready for your next adventure of quilting on the road.

  • Sewing machine (with cord, pedal, extra light bulb, bobbins, and attachments)
  • Table
  • Extra lighting
  • Projects, preferably pre-cut
  • Felt-backed table cloth for make-shift design wall
  • Other supplies such as seam ripper, rotary cutter, blades, rulers, and cutting mat.
  • Iron and pressing mat or board and pressing spray.
  • Extension cords and electrical strips.
  • Personal items, including clothes, usually get packed last for me! You might consider walking shoes, rice bag for sore shoulders, and pain relief.
  • Charger cords
  • Snacks

The rest of the story.

NOW for the REST of the story! Below I reveal everything that is actually in my spinning work station.

Image of Quilt Retreat Supplies

Without a doubt, I don’t use all of these items daily. But when at quilt retreat, it’s best to not be without! Starting at the top left, you see fusible web, pressing spray, mini iron, chain-piecing cutter, a very cute rice bag (made by my friend, Donna). Next you see various rotary blades, The Purple Thang, a gripper tool, bandages, rotary cutter, and two sizes of Karen K. Buckley scissors.

It is wise to clean out your organizer now and then!

Following that is a pre-cuts guide for fabric purchase emergencies, thumb tacks, pins, cord wrap, thread, Q-tips, battery, thread and button, needles, a plethora of markers and pencils, snipping scissors, and Fabric Fuse. Surprisingly, the next row starts with the back of something which apparently held batteries, a calculator, a guild directory, business cards, note pads, and another gripper tool. Lastly, there are clips for hanging design wall, True Grips (truly a favorite), and last, but not least, Martelli cutters (I am an ambidextrous cutter, so I use both left and right-handed ones).

Read more about retreats here at: One Sweet Retreat and Friendship, Laughter & Quilts, Oh My!  and Seven Projects from Quilt Retreat

Home or away, enjoy YOUR quilting journey!

Take One: Cool Tools for Quilters

Do you love quilting tools, gadgets, and gizmos? Once a month I’ll be featuring a new (to me) cool tool.

Here’s a new ruler I ran across a few months ago on my travels. I finally pulled it out and decided to learn how to use it.

It is called the “Quick Curve Ruler” by Sew Kind of Wonderful (click HERE)

I practiced with some scrap fabric, marked my ruler as indicated in the pattern directions, and off I went! It was fun to watch the curved piecing literally “come together”.

There are numerous quilt patterns available which use this ruler. Here’s the one I used. Stunning quilt, isn’t it? I love it when my brain can’t quite find one simple design, but jumps around to the various secondary patterns in a quilt.

Here’s my first try at a mix a fabrics. As you can see, I have a few bumbles for my first block, but it was fun to make! I do suggest using a fine marker to mark your ruler for better accuracy.

I think this quilt is now on my bucket list! What’s on your bucket list? Do you have a favorite specialty ruler?

See my Cross-over Quilting Tools (click HERE) post to learn about using the Brother Scan N Cut for quilting.

Shop Creative Bee Studios #usebothsides quilt patterns and kits HERE!

Designing Quilts with Panels

To the tune of “On the Cover of the Rolling Stones”, I feel like singing! At the close of 2018, I happened onto my pattern, “Holly”, featured on the cover of a Hoffman California Fabrics’ catalog!

It began with an email asking if I (along with four or five other designers) would like to try our hand at designing with a new Christmas line of fabric. It’s my understanding that other designers use digital fabric swatches and their computers to design patterns. But since I use BOTH sides of the fabric, I need the real thing!

Click HERE to see the Winter Projects 2019 Catalog by Hoffman California Fabrics.

We had a week for the deadline – but since I needed the fabric shipped to me and then I needed to ship the finished quilt back to California, I had less than that to design and make the quilt!

Frankly, I was in a hurry! Add to the mix that it was Thanksgiving weekend, I was driving six hours on Saturday, attending our daughter’s show, driving four on Sunday, and staying in a hotel (with terribly inadequate lighting) until Tuesday AND, until I could see and audition BOTH sides of the fabric, I had no idea if my idea would work!

Working with both sides of fabric means lots of value-checking. You can’t tell from the front of fabric if the reverse will work. Some fabrics have great reverses and some just don’t. Click HERE for “The Tricky Traits of Value”.

The Christmas tree panel is gorgeous on its own – who would want to cut that apart? I certainly wouldn’t cut it to make another tree. I was also pretty certain that other designers would be designing borders around the whole panel, so mine had to be different.

I started to focus on the fat-quarter panel they sent. I had received a whole box of fabric to choose from and I knew if I wanted to use this panel, I couldn’t just use one fat-quarter of it or even half of them- I needed to use the whole panel. After auditioning many combinations, I decided I could use the panel – BOTH sides of the panel!

So…once again, it all comes down to fabric values. In classes, I have quilters audition many background fabrics and take lots of black and white pictures to see how their background fabrics “play” with their focus fabric. The smaller accents strips are allowed to be a bit “louder”, but the larger pieces need to provide interest as opposed to distraction. So take a look at this picture of the panel. Lots of dark fabric, right? Really pretty fabric…but more darks than lights.

Now look at a close-up of the quilt. Do you recognize those fabrics? …same fat quarters from the panel – just using the other side! Most of the accents strips are made from the front side. The bows, bells, stripes, plaid, and Christmas words make this an exciting background for the Holly wreath. One of the fat-quarters had two stockings printed on it. I used the one on the wreath and I embroidered the second stocking for the quilt label.

Image of Quilt Close Up
See the candy canes made from the reverse stripe?
Image of Back of Quilt
You can see the quilting, the extra stocking as a label, and the prairie point hanging method here.

The wreath is made using fused holly leaf shapes from the Christmas tree panel. Being a digital print, the fabric has a sparkle of light to it, making the wreath sparkle as well.

You might notice I didn’t have time to take great pictures – and apparently I borrowed my husband’s house shoes that day!

Even the pieced binding is made from the fat-quarter panel!

This is a fun quilt to make and so easy to shop for if you use the two panels! While I have no official timeline, my guess is that these fabrics will be in shops by summer!

If you have Christmas yardage in your stash – you can use it! I wrote this pattern to work with the panels as shown OR using your own choices of fabrics. The same method applies to both – it’s all about the value!

Here’s how Holly look inside the catalog!

I designed Phoebee 2.0 using BOTH sides of Hoffman California Fabrics “Electric Garden” as the focus fabric -it’s available in shops now!

Image of Electric Garden

Shop all my patterns at my Etsy Shop: Creative Bee Studios (Click HERE)

Don’t miss out – subscribe below! Follow me on Facebook, Instagram, and Twitter and pin to your Pinterest boards, please!

Winter Quilts

I love nothing better than seeing quilts in nature! You’ve seen “Summer Quilting” (click HERE) to see quilts both poolside and on the beach), so I thought it’d be only fair to share some winter-themed quilts and a few with nature.

First up is a McKenna Ryan quilt pattern. I purchased the kit from Missouri Star Quilt Company several years ago – the year of the bear in our yard (Click HERE to read “It’s a Bear Out There” and see the markings). This bear was supposed to have a red cap and scarf, but I changed it up by using the wool from a sweater which was in my late mother-in-law’s stash. It makes the quilt more special for me and I feel I can keep the quilt on display throughout the winter.

Next is quilt is called Winter Blessings and was kit I purchased from Shabby Fabrics. It was so fast and easy to put together – I highly recommend their kits if that’s what you like. Everything was labeled and organized beautifully. It was kinda like a paint-by-number, only a lot more fun and waaaaay better outcome!

Image of Winter Quilt

The next photo shows just a bit of a quilt (with a Buttercup bomb) that I made long ago in my second-ever quilt class. It was supposed to be bed-size and I actually thought I would finish it my first day in class! I only got it to the throw-size stage (and not during that class), but it’s a favorite!

Here is my latest version of JOY Quilt Pattern. I used a Hoffman panel for the tree (front side) and gifts (reverse side) on a scrappy, snowy background. See all my patterns in my Etsy Shop HERE.

Image of JOY Quilt Hanging
JOY Quilt Pattern

Snow makes a lovely background for quilt photography.

Image of Bed Runner in Snow
Image of Quilt on Swing
This is a Bonnie Hunter Mystery Quilt called Grand Illusion.
Image of Water Colours Quilt in the snow.
Water Colours

Hope you are enjoying some warm stitching time during these short winter days.

A Mini-Quilted Christmas

I wanted to make a little Christmas gift out of our dad’s shirts for my sister. I couldn’t come up with ideas, so picking the brains of my Lady of the Lake (LOL) quilting buddies proved quite helpful!

Image of Orville Wichern

Sitting around the table, we ran the gamut of ideas…a bear, a quilted Santa, an apron, a journal cover…whatever I could make from my dad’s old shirts – but it needed to be just right. One friend suggested framing a pieced/ quilted shirt quilt – she was on to something. It often takes a period of mulling…or percolating for me to round out an idea…instead of a frame, make it a shadow box… and add vinyl lettering to the inside of the glass…

I have to say, this little piece came out sweeter than I expected!

It’s not a big, fabulous quilt, but I really like how it turned out- and hope to one day make for myself one day–or maybe the gift to me was the cutting, stitching, and remembering that came with making this for my sister.

I used small amounts three different shirts. Once quilted and trimmed, I glued the quilt to the back of the box. Using Scan N Cut (click HERE for more info.), I added our dad’s name in vinyl to the inside of the glass (remember to reverse the lettering). I penned a short message on the back of the box with a Sharpie.

Do you gift your quilting for Christmas? How do you find ideas?

Please share in the comments below.

But when the fullness of the time had come, God sent forth His Son, born of a woman, born under the law, to redeem those who were under the law, that we might receive the adoption as sons. Galations 4:4-5

Read The Tie That Binds to meet Willie (Orville, Bill, husband, brother, uncle, son…dad).

Walking in a Winter Wonderland

Sleigh bells ring – are you listening?

In the lane, snow is glistening…

Want to experience some old style Christmas? There are a couple of ways here locally (Southeast Missouri) and in towns all across the nation – and if you can’t find one near you, grab a Christmas themed book – the one I’m sharing includes quilts, a Christmas Walk, and antiques in a quaint wine country town.

Celebrated author and creator of the popular Colebridge Community and East Perry County novel series,  Ann Hazelwood provides insight into a new community with her Wine Country Quilts series. I am currently reading Lily Girl’s Christmas Quilts (2nd book of the new series) and was fascinated to learn that the real town, Augusta, Missouri (upon which the series is based), is having a Christmas Walk (as depicted in the book), and the author, Ann Hazelwood, will be signing books at this Stone Ledge Antiques shop (I wonder if it looks like Lily’s) starting at 7 tomorrow night! Learn more about Ann’s books HERE. Take a stroll on the Candlelight Christmas Walk tomorrow night – find more information HERE

Image of LIly Girl's Christmas Quilt Book

A beautiful sight- we’re happy tonight.

Stone Ledge Antiques during the Candlelight Christmas Walk in Augusta, MO.

Another opportunity  for an old-style Christmas experience is to take the driving tour of country churches in rural Southeast Missouri counties of Bollinger, Cape Girardeau, and Perry. You are encouraged to tag your steeple-chasing buddies for this self-guided tour and travel the beautiful country-side to these decorated country churches where you’ll find music, warmth, treats, and the real meaning of Christmas. This tour begins today at 2 p.m. The tours run both today and tomorrow until 9 p.m. Learn more HERE.

I hope you’ll find joy and take a break from rush of the season by going walking in a winter wonderland.

Need a last minute gift for the quilter in your life?Shop #usebothsides quilt patterns HERE.

Behold, the virgin shall conceive and bear a Son, and shall call His name Immanuel. Isaiah 7:14.

Cross-over Quilting Tools

Like many of us quilters, space is at a premium, so when I find a tool or machine that has multiple uses, I get excited about it!

Let’s face it, we can’t make everyone a quilt every time we need a gift! That’s why I like to use my Brother Scan N Cut, which I mostly bought for quilting purposes, to also make unique non-quilted  gifts.

Click HERE for a review of  the monogrammed baby quilt I made using a phone app and the Scan N Cut:

Click HERE to see the old Italian proverb made with Scan N Cut in this Italian Row-by-Row quilt.

The Scan N Cut project I’d like to share with you today is one I made for Christmas last year – and it requires a short story…

Each year, we gather at my husband’s family farm before Christmas. We all traipse into the fields and watch as the chosen tree is cut down. The (now grown) grand-kids decorate the tree while the older grown-ups visit. Before opening gifts and eating, everyone gathers around the very long dining table while our mother-in-law leads us on the piano in Christmas carols. It’s sounds all cozy and Hallmark-y, right?

Then comes the finale, “The Twelve Days of Christmas”! Except for two assigned parts, we all do the motions for each of the days. The assigned parts? The three brothers are “Lords a Leapin'” for which they do what is supposed to be a leaping type of movement (they take this role very seriously) and any new boyfriend or girlfriend brought to the party is the “goose” for “Geese a Layin'”. This involves squatting, twisting, and flapping movements.

Image of Kiefner Brothers Leaping

Fabulous Photo by Black Kiefner

Now, there is a year-long push for new geese–so each single grandchild has a bit of pressure to find a goose to bring for Christmas! Both of our daughters will say their geese have been somewhat traumatized by Kiefner Christmas!

What does this have to do with Scan N Cut? I came up with this gift idea last year using vinyl and paint on glass in a barn wood frame. The painting was very easy, just dabbing layers of green and white in the general shape of a tree (the only tricky part was that the paint is on the back of the glass so you want to paint the foreground first). Placing the letters was easy once I figured out to use a rotary mat under my glass to line everything up.  I ended up making a few variations for other families and I think they were all well-received. Image of Hanging Picture

If you’ve wondered about using a Scan N Cut for quilting, this would be a great time of year to check them out – dealers are having sales and you need something to put on your wish list, right? (I have no affiliation with Brother or any dealers, I just like to share with you the things I like!)

Check out these Christmas items in my Etsy Shop (Click Here).Image of Poinsettia Quilt

Image of JOY QuiltImage of Blue Christmas Tree Quilt

Behold, the virgin shall conceive and bear a Son, and shall call His name Immanuel. Isaiah 7:14

Christmas and Quilts and JOY!

It’s the most wonderful time of the year for fun Christmas cheer!

“Holiday Revue” is our youngest daughter’s current fun Christmas dinner theatre gig at the Myers Dinner Theatre in Hillsboro, Indiana.

Our first stop in the quaint town was a visit to the old-fashioned soda shop!Image of Hot Fudge Sundae

Image of Myers Dinner Theatre Logo

Everything about the dinner was delicious and the Christmas “variety” show featured every fun Christmas genre: we heard beautiful spiritual music, classic carols, and youthful tunes. Featured guests included Mary and Joseph, Elvis, Santa and Mrs. Claus, Frosty, a cow girl, a giant blue bear, Linus, and a stage full of life-size toys. Image of Raggedy AnnImage of Cow Girl

And there was lots of audience participation! Yes, that is my husband on stage and dancing to Santa Baby! I got a little hug from Elvis!Image of Matt DancingImage of Karla and Elvis

The show ended my favorite way- with a wonderful White Christmas finale!

Image of Matt on StageImage of JacquelynImage of Singers

Oh, the weather outside is frightful…

It’s the most wonderful time for quilts! Do you include quilts in your fun Christmas decor?

You might recall JOY, made with Hoffman California Fabrics All Aglow on a scrappy background. The tree, topper, and binding are made from the front of the focus fabric and the gifts are made from the reverse.Image of JOY Quilt

Now see JOY made with Hoffman California Fabrics Supernova Seasons panel for the tree, topper, gifts, and  binding! It’s a fun Christmas quilt pattern that makes a great gift for a quilter friend, a quick quilt to gift, or to add to your Christmas decor.Image of Blue Christmas Tree QuiltImage of JOY Quilt Hanging

Shop HERE for the JOY Quilt Pattern.

Also, learn about Pepita (named after the poor Mexican girl in the Legend of the Poinsettia who had no gift to give the Christ Child on Christmas Eve) HERE.Image of Poinsettia Quilt

Silver bells…silver bells…

Yes, I’ve been listening to Hallmark Christmas music the whole way to and from Hillsboro, Indiana!

I love the classic big band sounds of the holidays and Hallmark has a great variety. Sirius XM has Free Listen – so check out the Christmas channels!

And there shall come forth a rod out of the stem of Jesse, and a Branch shall grow out of his roots: Isaiah 11:1

Subscribe on YouTube! Share on Facebook, Post to Instagram, and Pin on Pinterest!

For more winter fun, read Warning…Controversial Topic Ahead and Add a Little JOY.

« Older posts Newer posts »