Page 20 of 21

Through the Chicken Wire…

Look through the chicken wire at the local fair for quilts and punch needle.

karlasiphonepicsoct16-1127

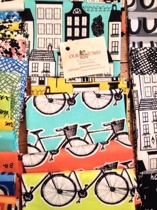
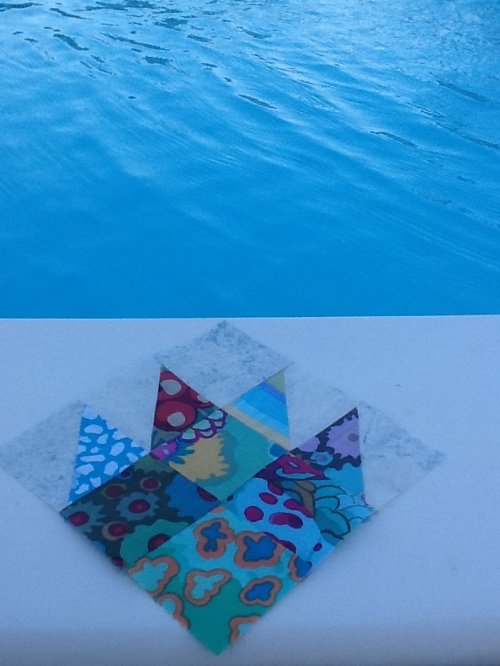
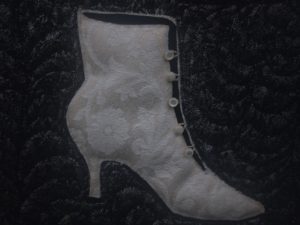
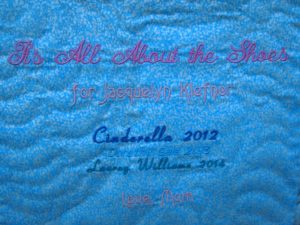
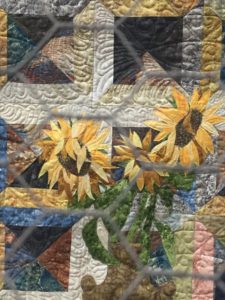
Vintage Fun Cross-stitch by Nancy Kester, Quilted by Karla Kiefner

There are county fairs all over our beautiful country each year–this one just happens to be in the Show-Me state.

The district fair is where you can show off your talent for growing plants, making quilts, raising livestock, crashing cars, grooming little ones (baby contests), singing, creating recipes, rooster crowing, showing livestock, hen clucking, antique-tractor pulling, barrel racing, juggling, doing magic tricks, and eating of things which are fried!

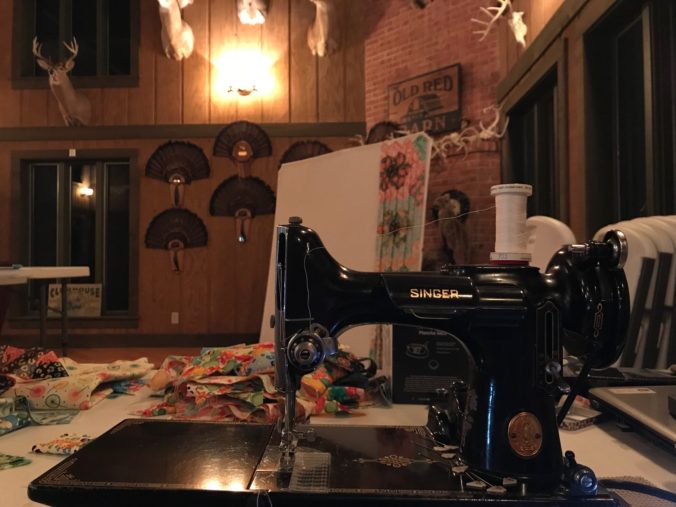
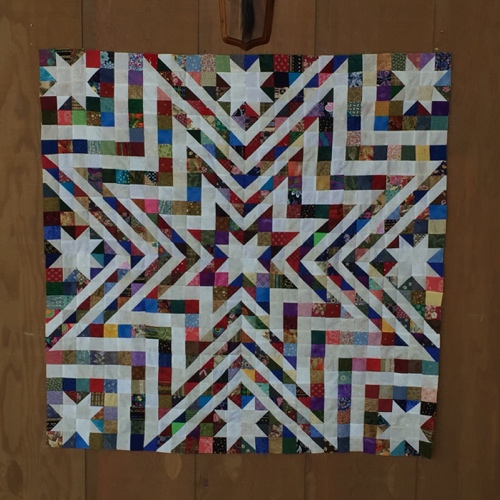
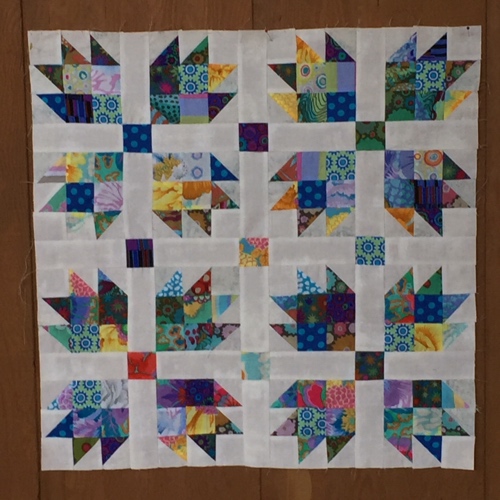
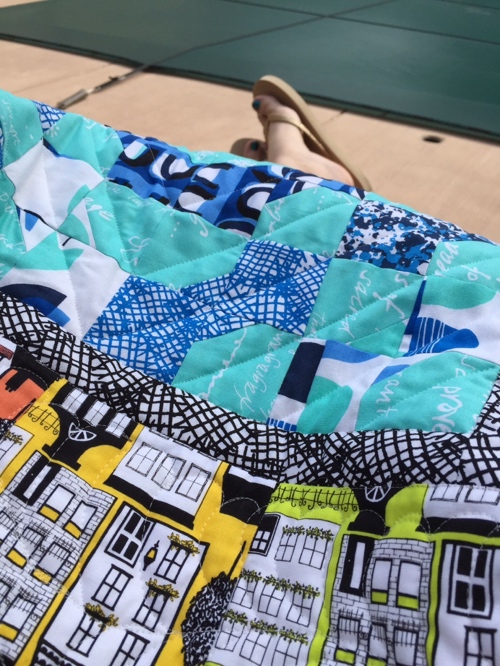
Not all things shown at the fair are kept out of reach, but many small animals like rabbits, guinea pigs, and poultry, as well as hand-made items like small quilts, embroidery, tatting, and crochet, are kept from wandering hands by the prolific use of chicken wire.

karlasiphonepicsoct16-1132

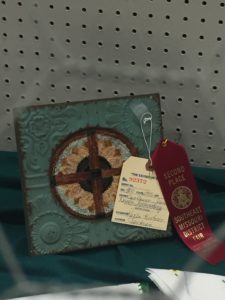
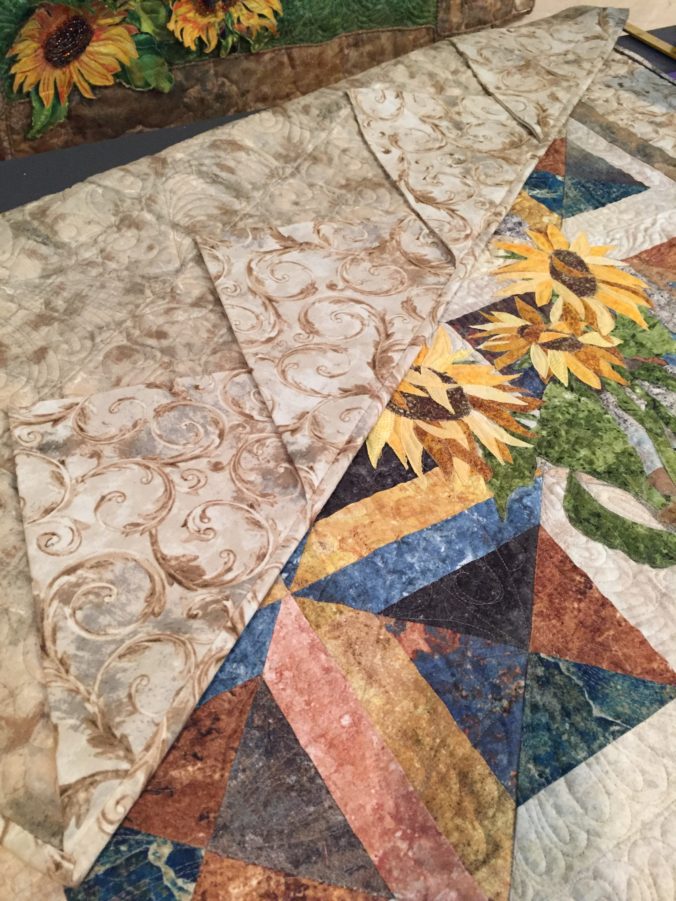
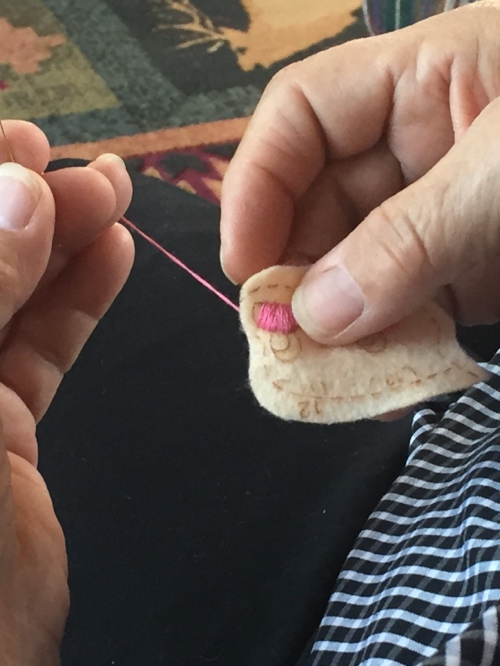
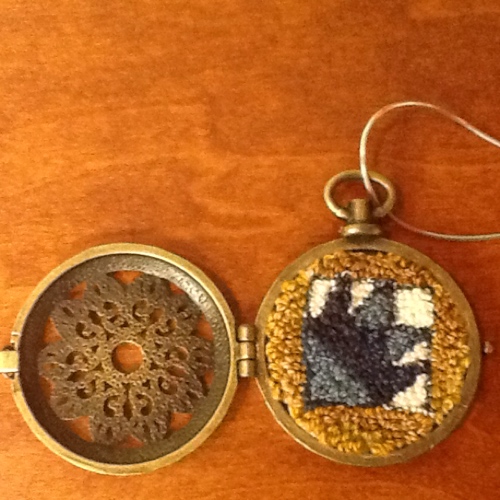
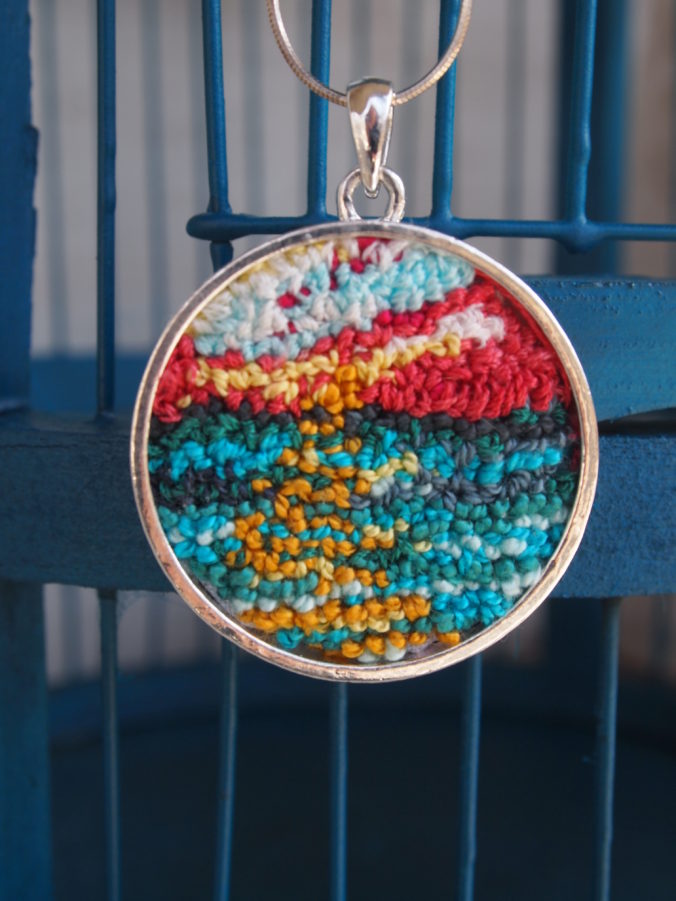
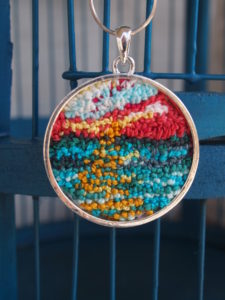
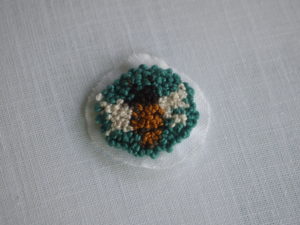
Sunflower Tile Punch Needle Embroidery

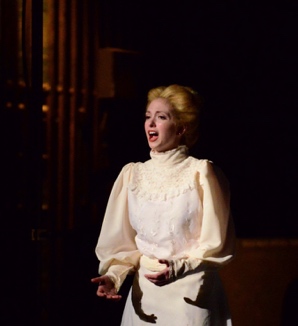
For over 155 years, people have gathered at this fair to eat, socialize, and kick back, and share the product of their skills. There are concerts and contests almost every night.  We (and our faithful friends and family) have spent many a year cheering our hearts out at the Heartland Idol contest in which our daughter was determined to compete. Plus, there’s the Little Miss SEMO Karaoke contest, pageants, mother/daughter look-alike contests, and a field full of carnival rides and games.

The fair kicks off with a parade through town, ending at the fairgrounds and even the local schools often schedule half-days during the fair so the kids can enjoy the fun.

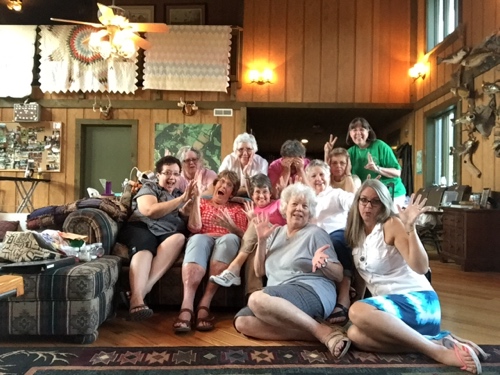
One of my favorite places at the SEMO District Fair is inside the Arena building where the quilts and other hand-work are displayed, along with a touching display which honor our local men and women of our military who gave their all, along-side our guild’s display of  Quilts of Valor. My second fave is the Trinity Men’s Club stand where many of our church members work diligently each year, including my friend, Nancy, who stitched the Vintage Fun quilt shown above.

karlasiphonepicsoct16-1128

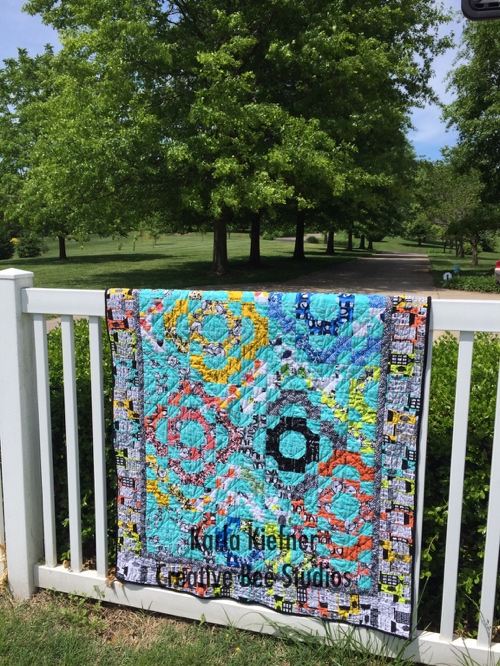
My Bella Piastrella takes a blue ribbon.

Of course, its always fun to win a little something–a ribbon from the fair makes the effort more fun and the promise of a smidgen of cash ($23 this year) to come in the mail makes it all the more sweet.

So next time a fair opens up near your town, take the time to check it out. Check out the barrel races or the strolling magician and treat yourself to a good ole fried turkey leg–and remember, go see what you can see…through the chicken wire.


Visit Creative Bee Studios to see my portfolio.

Follow me on Facebook, Pinterest, Instagram, Bloglovin.

Sign up here to follow my blog. I’ll send you an email when my next post goes live.


One…Singular Sensation

A Chorus Line at The Conservatory at Southeast Missouri State University

A Chorus Line rehearsal at The Conservatory of Theatre and Dance at Southeast Missouri State University

On the Line

On the Line

One…single, sensational tip… for show-quality quilt binding.

It’s a great idea. This is a pop-yourself-on-the-forehead kind of tip–and that’s exactly what I did when I first learned it.

You’ve trimmed your quilt and sewn on the binding. Next, you need to turn your binding. The trick to great binding is, of course, to have equal binding on the front and back of your quilt–WITH a filled edge. That involves a bit of math and precise stitching.

Just attach your binding as usual (generally by machine on the front). Grab a piece or ball of yarn. The length can be longer than the perimeter of your quilt or shorter and you can use more than one piece. Simply lay the yarn at the edge of your trimmed quilt and fold your binding over it. The yarn helps to fill the binding and makes it have a nice fold. You can “fit” different sizes of yarn before you begin stitching to see which size gives you better fill and gives your consistent width on the front and back of your quilt.

closeupyarn

A bit of yarn makes your binding better!

I like to use white or neutral yarn for light bindings and it doesn’t matter the color on darker bindings.

Now, I am big on giving credit where credit is due and I am sorry to say I can not determine the name of the person who first came up with this idea. I can tell you, it wasn’t me!

If you are like me, some quilts call for perfect binding and some are “get-‘er-done” bindings. No matter if your quilt is going to competition or be used every day, a little yarn in the mix will make your binding BETTER!

So, do you want to know who’s in that chorus line above? My kiddo! She’s playing the role of Cassie (wears red, oldest auditioner–last chance to dance–she sings and dances to “The Music and The Mirror”). The show opens in three days and I haven’t even begun her “shoe” quilt yet (see It’s All About The Shoes  and “Sweet Dreams…of You”  !)

UPDATE: Here she is as Cassie! Click on any of the below pics for a video clip from her role in the show.

Jacquelyn Kiefner as Cassie in A Chorus Line

Jacquelyn Kiefner as Cassie in A Chorus Line

Jacquelyn Kiefner as Cassie in A Chorus Line

Jacquelyn Kiefner as Cassie in A Chorus Line

One...Singular Sensation

One…Singular Sensation

Sign up so you don’t miss a bit of buzz– I’ll let you know when I’ve made a post. I appreciate any way you can spread the word about my blog– sharing on Facebook, Pinning on Pinterest,  and word of mouth works, too!

Prairie Point Hanging Method

Discover a quick quilt hanging method to display your quilts!

Let’s face it…quilts take time. We really should cherish each step of the process. But, if you’re like me, it’s those last few steps that sometimes really test your patience:

Firstly, the binding…

Then the label…

Last, the SLEEVE…ugh!

Now, here is a fast, easy way to attach a hanging sleeve, with just a few quick points – Prairie Points!

Start with a few squares of fabric, fold them diagonally twice and lay them on your quilt. Next, baste with your machine, using a seam width that is smaller than your binding seam. Lastly, stitch the points by hand with just a few stitches! That’s it! It’s that easy.

Now let’s break it down:

For instance, if you have a small wall hanging, 5 inch squares will do.  But if you have a large quilted wall hanging, 12 – 16 inch squares will work.  The number you need depends on how large you make them and the size of your quilt. You’ll see, as soon as you fold one and hold it up to your quilt, how many you’ll need. This method is so much faster and easier that the traditional “sleeve”, you’ll be looking forward to using this method on your quilts!

So, for this tiny wall hanging (11  inches wide), I am using two five-inch squares.

Easy Method for Hanging Quilts

For small pieces, I like to use an even number of triangles so that the center is open for hanging it on one hook or nail. Of course, larger pieces need to be hung by two points, so the number of triangles attached to the quilt depend only on how many you want to add. For example, my 90 -inch wide quilt has 7 triangles which started with 12 1/2 inch squares.

Also great about this method, if you have a particularly heavy quilt to hang, you can add additional rod support in the center of your quilt in between two triangles.

To begin, fold a square diagonally once, press. Fold that triangle

Folded twice from square.

diagonally again, press. Do this for all of the squares. Secondly, lay them at the top of your quilt, cut edge, lining up with the top edge of your quilt sandwich. Pin in place. Next, machine baste within the seam of your binding (whether the binding is on yet or not). Lastly, use a needle and thread (I like to use doubled thread for this) to stitch down each point, securing with several stitches.

Finally, attach and turn binding as usual and your quilt is ready to hang!

Image of Quilt Hanging Method

All Creative Bee Studios patterns provide Prairie Point Hanging Method instructions. Shop Patterns HERE.

Learn more about Creative Bee Studios #usebothsides patterns here.

Learn about NEW textiles, merchandise and MORE at Uncork the BUBBLES!

JOIN The BUZZ and follow Creative Bee Studios on Facebook, Instagram, and Pinterest!

One Sweet Retreat

Take a look at our sweet quilt retreat in the woods.

This sweet retreat includes summer breezes, floating skies, lazy days…butterflies.

This is a retreat – by the numbers!

Image of Creek at the Sweet Retreat
One Sweet Retreat

First, we have one hunting cabin. Add twelve ladies. Next, throw in three feather-weight, one Brother, two Janome, and one New Home sewing machines. Furthermore, we had three Scan N Cut machines working away.

In addition, some gals brought handwork to stitch. There is fabric everywhere along with thread, pins, needles, fusible, vinyl and food!

What more could a quilter want?

Perhaps a few deer out the window.

Deer on the bluffs.

While some gals worked on their sewing machines and some day-trippers brought handwork, many of us worked on final details for the local quilt. Our River Heritage Quilt Guild quilt show was less than a month away. Definitely, there were bindings and labels being stitched. Surprisingly, some quilts were just getting started!

Rosie’s stocking.
The End of the Road

What seemed to a few like a road to nowhere turned into a swell time for us all!

Nearly everyone got some kind of monogram as we were testing our wits against our new Brother Scan N Cut machines. and realizing the possibilities.

A is for Anne with an E

Simply put, we were busy from dawn unto late in the night.

Of course, a sweet retreat must involve food.

In addition to the laughter, sharing, and world problems being solved at this sweet retreat, there was a fair amount of food involved. And one sweet treat involved a practical joke.

With a recent experience regarding a visit from a bear, one quilter planted this “bear scat” near my car.

I thought I’d bring some bear scar to scare; instead it was really bear scat to share.

Lynnore

See It’s a Bear Out There!

Image of sweet bear droppings (candy) at the retreat.
Fresh Bear Scat

Bear Droppings

  • 2 cups milk chocolate chips
  • 1 Tbsp shortening
  • 1/2 cup raisins
  • 1/2 cup slivered almonds
  • In double boiler over simmering water, melt the chocolate chips and shortening until smooth. Remove from heat; stir in raisins and almonds. Drop by tablespoonfuls onto waxed paper. Chill until ready to serve.

My answer to the bear trickery was a bear paw quilt made with Kaffe and Moda Grunge. See It’s a Bear Out There for the full bear tale.

My Bear Likes Kaffe

This little getaway was a fun and beautiful way to transition from the heat of the summer to the cooler temps ahead.

Sweet Friends

It was a sweet retreat.

The Infamous Low Water Bridge

Enjoy your quilting journey!

Sweet Dreams…of You

A Tracing of Patsy Cline’s Signature on “Always”

Patsy Cline’s signature hides in this memorabilia quilt.

Back in Baby’s Arms

I Fall To Pieces

Walkin’ After Midnight

She’s Got You

Leavin’ on Your Mind

Crazy

Faded Love

Honky Tonk Merry-go-round

True Love

Just a Closer Walk with Thee

Blue Moon of Kentucky

Ahhhh, Patsy Cline. A legendary sound born out of illness. Vocal perfection, untrained. A voice silenced too soon.  Patsy didn’t have an easy or long life. But she left us with an incredible style of songs only she could sing. She had a way of making each song hers, even though she didn’t write a single one. She had a way of singing that told her fans she knew what she was singing about.

This past June, my youngest daughter was honored to play the role of Patsy in the musical, Always…Patsy Cline. 

Two characters, three wigs, six shows, eight costumes, and twenty-seven songs each night made for a tiring but satisfying two weeks of performances. Her dad and I saw seven performances and I would still go every week if I could.

Photo by Kenn Stilson


Even after seven shows, I never tired of Patsy’s songs, her spunky band, the Bodacious Bobcats, and her lovely friend, penpal, and biggest fan, Louise. I think it was the character Louise who made the character of Patsy seem so real.

Walkin’ After Midnight Photo by Kenn Stilson Click for link to video.


Because there are no recordings of the show, I made Jacq a small quilt to keep the memories alive, but, to be honest, it was probably a work of mourning for me as much as it was accomplishment for her because I didn’t want the show to end!

The white boot and fringe represent one of her favorite of eight costumes and the stationary card with a “P” appliqued on the front has a tracing of Patsy’s signature and familiar closing, “Love Always”.

“Just a Closer Walk with Thee” Photo by Kenn Stilson

For a small quilted hanging like this, a little swirly quilting and glitz go a long way.

I know Jacq learned so much from this opportunity to play the role of this American legend. I know I will cherish watching her do it…always.


Patsy and Louise played by Jacquelyn Kiefner and Holly Lynn


Jacquelyn Kiefner, The Conservatory of Theatre and Dance

Her Role, Our Town, My World

When your baby calls and says she landed the leading role in the Eastman School of Music’s opera, what would YOU do? (You answered, “Make an opera quilt!”, right?)

“Emily is the lead, Mam.”

An opera quilt, it is!

So an opera quilt it is for our eldest daughter who landed “Emily” in Our Town, by Ned Rorem at the Eastman School of Music in Rochester, NY. THIS WAS HUGE. Emily sang almost the entire second act herself! Emily (Paige) had to own it. Rehearsals began mid-fall for the mid-April performances–because it was that hard! I can’t describe how proud her dad and I were of her. She had worked very hard at Eastman and had some tough years of struggling which had just paid off. All I needed to do was make a quilt–that should be an easy “part to play”.

Step 1: Read the play.

I read it. It was incredibly short and vague. I read it again. Then I called Paige and asked, “What? What? What does this mean? And how in the world can they make a whole opera out of this?” She laughed and said, “Trust me, they do!” I had nothing (as far as inspiration goes for the quilt). I had to think deeper than normal to understand the message of this story.

Her bestie, Jacob.

Step 2: Develop a theme.

I’m a theme-thinking person. I can’t just make some random quilt. It has to have some connection, a special meaning. But what? Step two became step 3.

Step 3: Go to Missouri Star Quilt Company website to procrastinate.

Suddenly, like magic, it appears…new fabric by Benartex, called…you’ll never believe it, Our Town. YES!

Perfect fabric!

See the first quilt Paige made (as an adult), ALL herself HERE in “What is Quilting Heritage?”

Now my next step (4) was by divine intervention, luck, or my mind’s way of connecting the dots.

I chose a bow tie block so that I could use my AccuQuilt Go! die to cut my fabric. There’s a good reason for that–I had just shoulder surgery and the Go! cutter required the same circular arm motion that I had to do in therapy, so it was GOOD for me to make this particular quilt. The lucky part? I later found out that Paige’s boyfriend played a role in the opera in which he had to wear a huge bow tie. THAT WAS IT! This quilt was meant to be.

While Paige polished her vocals for her role (while also playing Maria in West Side Story, going to school, and working her church job) I made the quilt.

When I drove the sixteen hours to see her, we spent an hour at the poolside on a rare sunny day for Rochester and I finished the binding.

Binding poolside.

Her dad and sister flew in to Rochester and we watched our little girl sing her heart out in a vocally very difficult role.

Emily

By the end of the run, she was exhausted and ready for the next event in her life: graduation!More than one Eastman alumni told us singing the part of Emily in Our Town was quite a feat for a soprano her age. 

I saw Our Town three nights in a row. I had my heart torn apart three times as the meaning and hauntingly beautiful music of this opera was forever ingrained in my mind and soul.

“Emily”


It was something I’ll never forget…the beauty, the sorrow, the emotion, and the tears of a proud momma.

Paige’s quilt is much lighter and happier than the opera it represents. But then, that’s our Paigee!

See Emily’s Aria at by clicking here:

Please share this post on Facebook and Pinterest. Follow me on Bloglovin.com and the Bloglovin phone app!

Join The BUZZ to get all the latest quilting news and prose!

SHOP patterns, fabrics, merchandise and more using easy-link, blue SHOP buttons HERE!

More than 45 patterns that use BOTH beautiful sides are available in my Etsy shop!

Why It’s Hip to Be Square

Test this demo about squaring up quilts!

You just gotta love square quilts!

Water Colours 

I’ve heard several of my quilter friends comment that they don’t like to make square quilts. I get that. Bed-size quilts can be more practical, usable, and gift-able. Even if I’m making a wall hanging or art quilt, mine usually aren’t square. But I DO love a quilt with right corners, no matter the length of its sides!

If your long-arm quilter ever mentions measured borders and “squared” backings, you might wonder, “What’s the big deal?”, especially in regards to your backing fabric.  Here’s a little demo you can do yourself to understand why it benefits you–and your quilt–to start and stay square:

*Grab two pencils, tape, scissors, and a piece of paper from a little notepad. I’m assuming your paper is a rectangle, but a square works, too.
*First make a straight cut on one of the long sides of your paper at an angle. It doesn’t have to be a big angle, just make sure you aren’t cutting it parallel to the edge of the paper.
*Now tape the opposite end to a pencil, keeping the paper even across the pencil.
*Now tape the other, angled end to the other pencil.
*Roll your paper “quilt backing” onto the first pencil.
As you can see, the second pencil lies at an angle. Straighten that pencil until it is parallel to the first pencil. The extra paper you see would be the extra fabric in a real quilt backing. This can cause folds on the back of your quilts. Your quilter might try to avoid that by making sure your backings is trimmed square before loading it onto her poles, but it could cost you extra fees because, depending on the backing, it could take up to an hour to square an unruly backing.
I figure most quilters understand why they’d want their quilt top to be square (have right angles). Whether it’s a wall hanging or going on a bed, or even folded as a throw, it’s nice to have everything line up just right. Tops have a tendancy to take on an hourglass shape, especially if the borders are applied and then trimmed. Measured borders (based on measurements from the center of the quilt) which are pinned at the centers and corners and  “eased” onto the top will actually help your quilt stay square.
Now, I am not telling you this so that you stress over your quilt tops and fret if they don’t (heehee) “measure up” (couldn’t resist). We don’t need more quilt police, especially in today’s world of quilting when so many of the old rules no longer apply. I do think as long as we take consistent steps in our quilting process that tend to lead toward a square quilt, that is effort enough. From time to time, I will get a quilt top in my long arm frame (including my own) which are less than square by (wait for it) a fair measure (sew many puns, see?). All puns aside, I have certain procedures I follow when loading and advancing a quilt so that I can be certain I’m doing everything possible to keep the quilt square. Sometimes, and it’s usually a mystery, a quilt just doesn’t play nicely, no matter how precisely it has been pieced or prepped. In those cases, there are tricks for easing in extra fabric and avoiding folds, some I’ve learned in classes and others I’ve learned through trial and error.
Sometimes, you can do everything possible to keep your quilt square and it still doesn’t cooperate. Sometimes it can truly be a mystery! Think, though, of all of the variables which go into the production of the fabrics and threads, the cutting, stitching, the differences in machines, etc. and construction of a quilt and you can understand why many quilters say, “If you can’t see it riding a horse at 40 mph, don’t worry about it!”. I say, if your quilt is made with love and passion, it is perfect just as it is.

For more information about prepping your quilt for a long-arm quilter, see my blog page. Also, visit me on Facebook at The Quilting Bee Long-arm Designs by Karla. Follow me on Bloglovin’ at: blog.creativebeestudios.com and at my website, www.creativebeestudios.com.

One of the lovely bonds between quilters is that we are crafting beautiful works with our hands to be enjoyed by others.

Sign up and I’ll email you when a new post goes live, usually once a week.

Happy Quilting!

Tropical Fun traveled with the AccuQuilt GO! AQS Tour.

It’s a Bear Out There!

Estimated reading time: 4 minutes

Bear paw prints, claw marks and scat!

How does this bear paw experience turn into stitchery? Read on to see the quilt block and punch needle embroidery inspired by our visitor

That is a bear out there.

Have you ever seen a certain quilt or pattern and you think, “No, I’m not going to make that.” Then, all of a sudden, something happens and you’re thinking, “I’ve got to make that quilt.”?

Our neighborhood has suddenly become a flurry of excitement. We don’t live in the country, really. We certainly don’t live in bear country! I didn’t think so, anyway. But after pondering a these odd markings on our cedar play set, we aren’t so sure anymore.

Bear markings?

This takes a bit of bear paw sleuthing.

At first, we thought it was anything but a bear.

But soon the neighbors and I are sharing our experiences and findings daily.

We visit each other’s yards to look at “evidence”. Next, we learned the lingo (scat).

Collecting evidence in the neighborhood.

This was actually a bonding time for some of our neighbors! We got to know each other a little better through the clues left by our new guest.

Calling in the bear paw experts.

Furthermore, we sent photos of the clues to the local experts. While they hesitate to say for certain it’s a black bear, but they did say it’s either a black bear or a large dog. Following that, they said they wouldn’t know why a dog would make these markings.

Game Cam time.

Finally, my husband was convinced enough to commandeer a Game Cam from deer camp. The waiting game began. The markings on our playset are near our crabapple tree so the neighborhood “experts” are waiting for the fruit to ripen and our bear to be caught–well, red-pawed?

More scratches!

Quilt time.

Pertaining to the bear, this brings to my first point, about a quilt block I never intended to make. Bear Paw. Suddenly, this block appeals to me on a very personal level. Plus, it’d be a great barn quilt to mark the area, kinda like our mysterious friend did.

Its a Kevin Bacon thing.

So here is my first partial block. Of course, my bear likes Kaffe!

Image of partial bear paw quilt block
Bear Paw by the Pool

Never to stop at one, I might as well make a little punch needle bear paw.

image of bear paw punch needle
Bear Paw Mini Punch Needle

It’s going to take me a bit longer to make that barn quilt—maybe we should get a picture of the guy to make sure he’s not a giant raccoon or something!

You know it makes sense, really. Creative Bee…quilting bee…bees make honey…in a Kevin Bacon kind of way, we really should have a bear living here!

Image of bear paw quilt block
Bear Paw Quilt Top

Visit my shop on Etsy for more than 50 quilt patterns that use BOTH beautiful sides of fabric!

Want a great treat recipe called Bear Droppings? Find it here:  One Sweet Retreat

Read about prepping for retreats at Quilt Retreat Checklists and Quilt Retreat Take-alongs.

It’s All About The Shoes

See how shoes can make a memorabilia quilt just the right size.

I rarely give someone a random quilt.

If I’m going to gift a quilt, I want it to have a special meaning in color, pattern, or design. Sometimes the meaning can be so subtle the receiver wouldn’t know unless I told them—“I picked this design/colors because…”, but I’d know it.  I’m a theme person and it’s got to make sense in my head before I can design and make a quilt for someone else. Luckily for me, my daughters (Paige, 23, and Jacquelyn, 20) are both performance majors and that means making theme quilts are an easy choice.

CreativeBeeStudios

It’s All About The Shoes


This small wall hanging represents so much more than what is worn on the feet. It represents three shows in which my youngest daughter played lead roles during high school– a glass slipper (Cinderella), a ruby slipper (Dorothy-Wizard of Oz) and a lace up bootie (Laurie Williams- OKLAHOMA! I don’t know if my daughter, has thought about it yet, but when I look at these shoes, they remind me of all the hours she would prepare (months, really) for auditions, the tense days of call-backs, the guarded euphoria after the cast-list was posted, feelings of despair that no one knows their lines and the costumes aren’t made yet, never-ending tech weeks, the satisfaction of microphones with fresh batteries and audience applause, and the mixed emotions of the last bows. There’s a lot filling these shoes. Maybe making these “show” quilts are my way of packaging up all those highs and lows and hanging them up for good.

CreativeBeeStudios

The buttons on this boot belonged to Jacq’s Mämä Pat.

The most recent shoes, white fringe boots, took us back in time last month with Patsy Cline and her friend, Louise (“Always” quilt will be posted soon).

CreativeBeeStudios

It’s All About the Shoes

I’m excited to announce there is a new pair of shoes on the horizon for this fall–tan character shoes for Cassie in A Chorus Line. That story began in 2015 when Jacquelyn first began learning the Broadway choreography to prepare for auditions this past May.

All the determination, memorization, voice lessons, character building, dance lessons, sweat, and sharpening of acting skills for these shows ride on one thing—the SHOES.

For more memorabilia quilts, see Sweet Dreams…of You and Her Role, Our Town, My World

Join me on Facebook, Pinterest, Instagram, and Twitter!

Sign up  and I’ll send you an email when my next post goes live, about once a week:


How to Put a Little Punch in Your Summer

Here’s a beachy punch needle design:

Creative Bee Studios

A Bit of Summer

Punch, in this case, is not a drink generally served at wedding and baby showers. I’m talking about sweet little punch needle-ette (new word)–tiny punch needle you can wear.

Small projects like this can be punched in one warm summer’s evening. Sit on the deck, the front porch swing, or in the coolest seat in your home and punch yourself a sweet little treat.

I wear my punched design as a necklace but you can also make key fobs or rings–even earrings. I have found various hardware at Hobby Lobby and Michael’s in the jewelry-making sections. There are even greater hardware options online.

creativebeestudios.com

Re-purposing Hardware for Punch Needle

The most important tip I have is to measure the inside diameter of your holder carefully and be sure your weaver’s cloth is secure and taut before you draw the outer perimeter onto your cloth.

creativebeestudios.com

The stretched diameter was larger than the pattern. Always hoop first, then draw on your design.


See this little bee? I drew the outer circle the correct size to fit its holder, but when I tightened my cloth in my hoop, the circle grew. I didn’t realize my mistake until I had completed the punch and realized it was too large for my holder. This little bee is now waiting for a new hive to come along.


For general instructions and a punch needle supply list, see my Punch Needle page.

Happy summer punching!


Sign up  and I’ll send you an email when my next post goes live, about once a week:

Please follow and share on Facebook and Twitter and pin to Pinterest. Thanks for following!

« Older posts Newer posts »