Learn how to use both sides of fabric to make stunning quilts!
From seeing features of more than 50 quilt patterns to learning how to audition both sides of fabric, this is where you find everything you need to know about using both sides.
Using both sides of fabric is an easy way to give your quilts a new level of interest. The subtle difference in value causes your eye to pause…to take in the beauty of the whole quilt.
Auditioning Fabrics
One of the most important (yet easy) lessons for learning to use both sides of fabric is the auditioning process. However, this isn’t a skill to be applied only to the more than 50 quilt patterns designed for this purpose. Quilters can apply this skill to all their future quilt projects.
Focus and Background Fabrics
In the broderie perse and fusible applique designs, you will first choose a focus fabric that is beautiful on both sides and has the proper contrast in value. Then you will audition both sides of the focus fabric with contenders for your backgrounds. It’s easy to do. Once you learn to use both sides of fabric, you’ll never look at one side again!
The key is value.
Most quilters choose fabric by color. Color is very alluring, even addicting (i.e. favorite colors). When you remove the color factor, you see the true values of fabrics. In The Tricky Traits of Value, you learn that values change depending on what is next to them. That’s why we audition both sides of the focus fabric with background fabrics.
Fun and easy.
It is fun and easy to learn to use both sides. That’s good, because we all need to enjoy our quilting journeys!
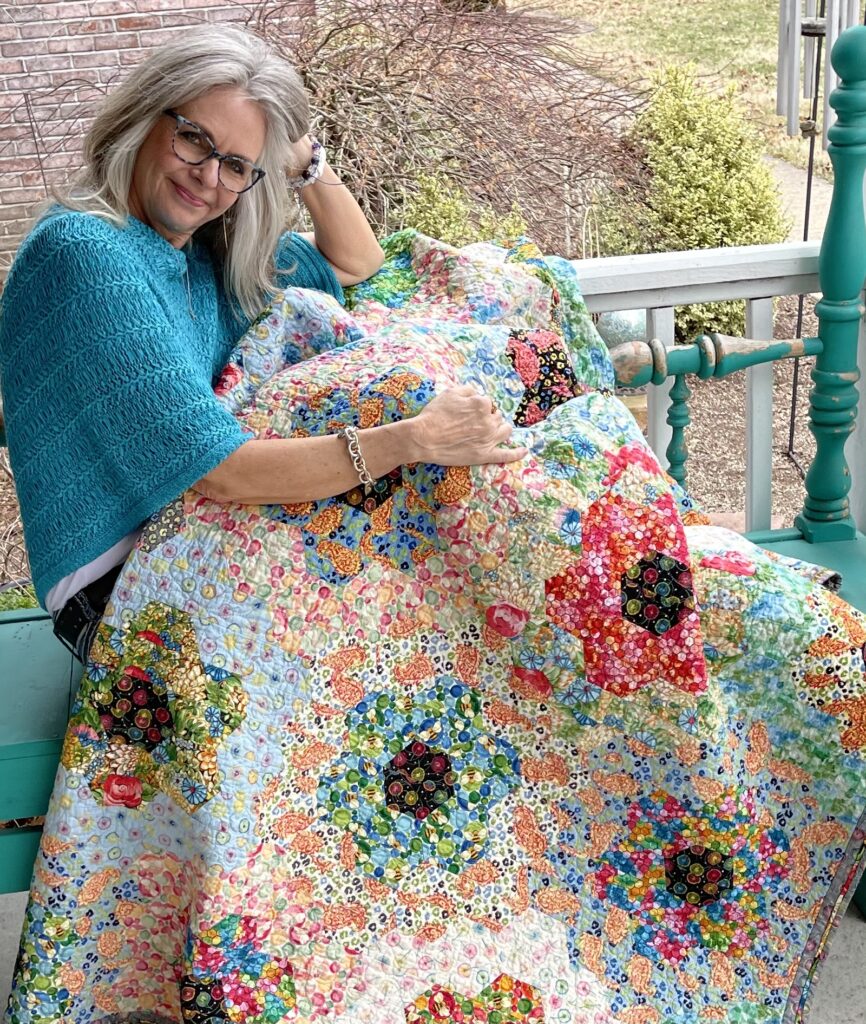
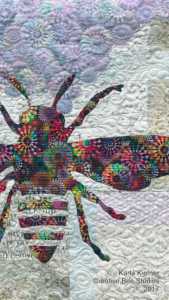
What’s a better spot for a creative queen bee than this lovely palace quilt?
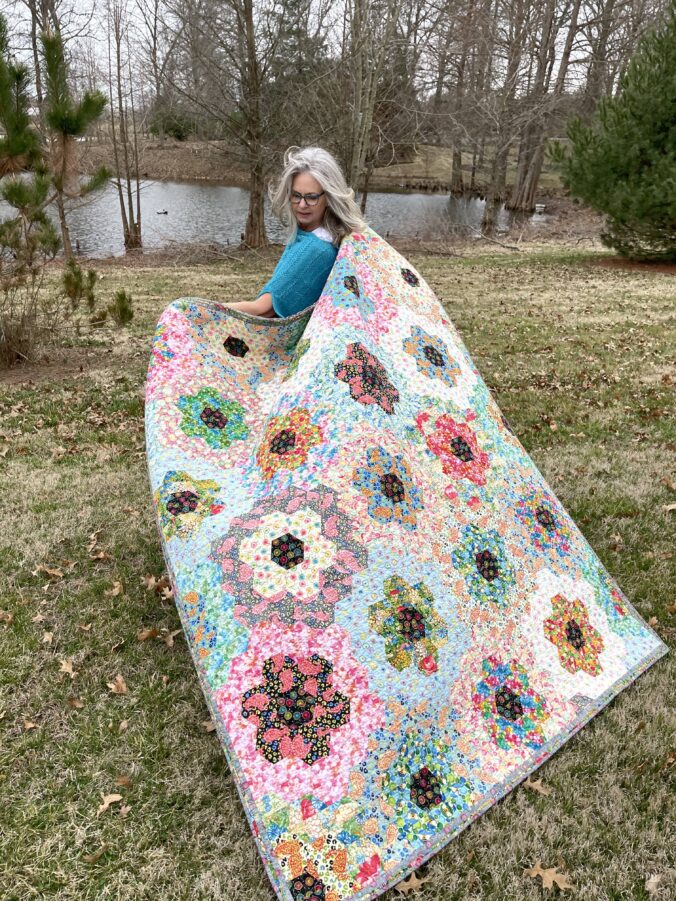
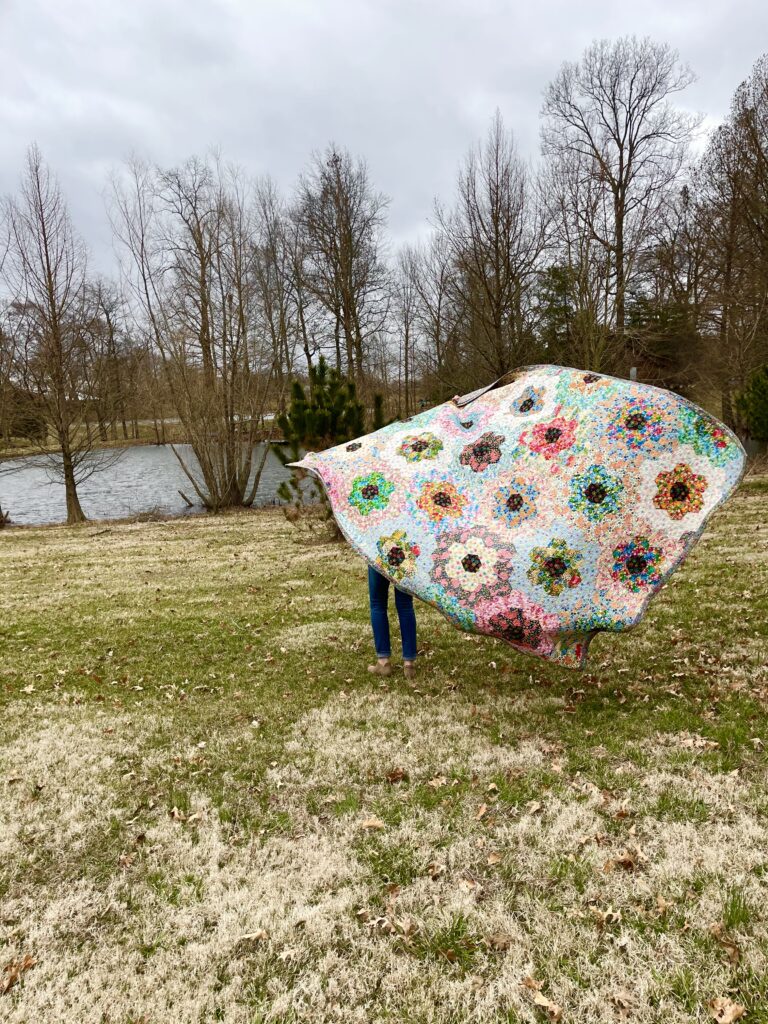
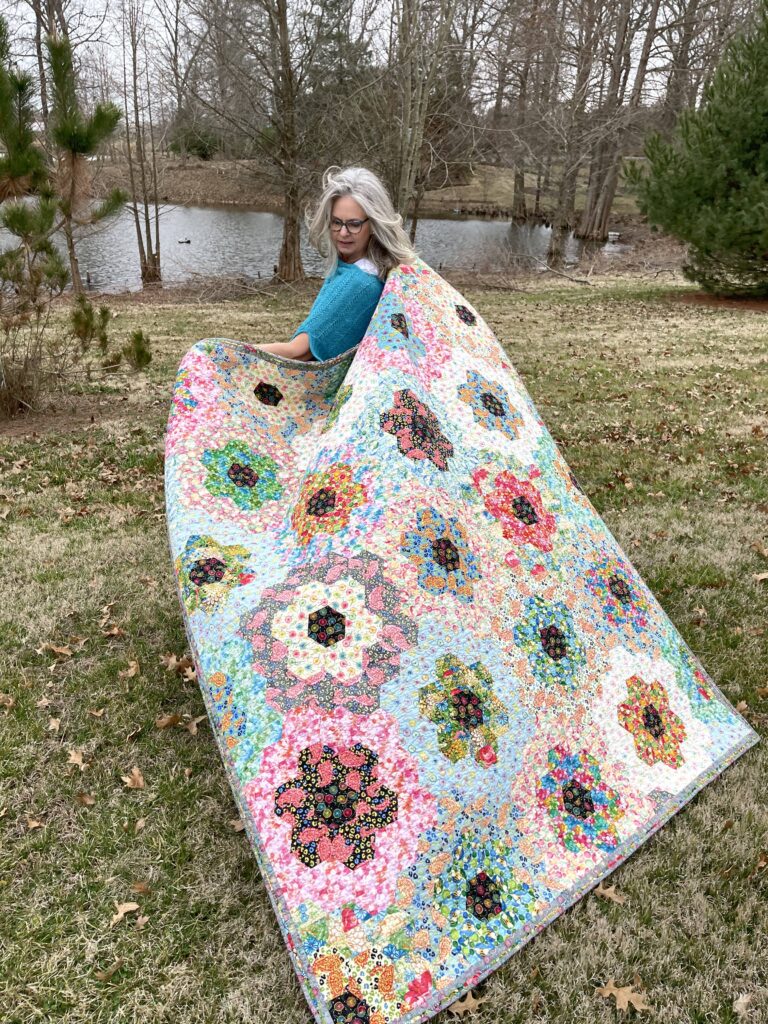
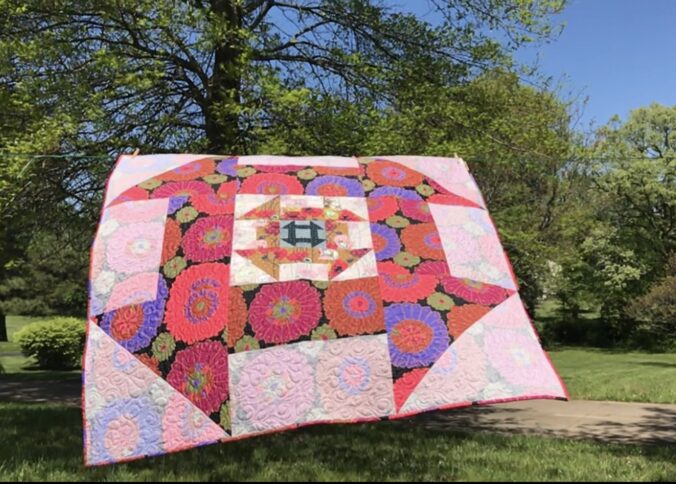
Floating Flower Garden
Floating Flower Garden Quilt by Karla Kiefner
First, this quilt began with fat quarter bundles from one fabric line. It was one of those fabric purchases without any planning or direction.
In addition, I was certain I wanted to use both beautiful sides of this fabric line.
How to use both sides for a classic quilt design?
Next, I found a tool for making half-hexagons. Using the Hex and More ruler and lots of 2.5 ” strips, I made lots of half-hexagon pieces.
Add to that, a non-traditional method for making this floating flower garden.
Yet, I still wasn’t sure where this quilt was headed – or if it would work! For months, I arranged and re-arranged the hexagons. In addition to changing the placement of color, I also played with the values by turning some fabrics to their REVERSE side. Read The Tricky Traits of Value.
Design wall to the rescue.
Using a design wall helped me figure this baby out in a number of ways. Most importantly it allowed me to take good photos of this large quilt.
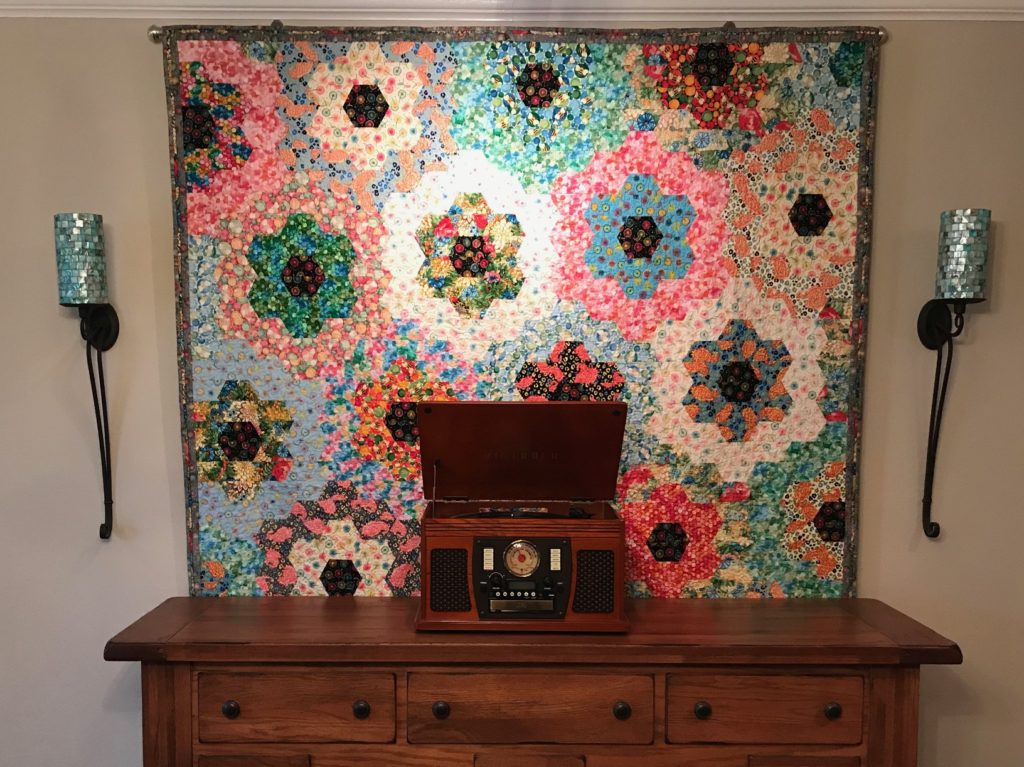
Perfect place for the turn table.
Black and white photos galore!
Just as I instruct students in classes and workshops, always take black and white photos to check your values. Color can fool you – and it tried to fool me with this quilt!
My goal was to create a blended quilt version (see Blended Quilts book) of the classic Grandmother’s Flower Garden. I tried many combinations, but the look really came together when I started to use the reverse side of the fabrics for the outer flower rings.
Each black center and first ring are the front of the fabric. I could have excluded the lightest fabric to make the changes in value more apparent, but again, I was aiming for a more subtle approach.
Using both sides of fabric provides a soft difference to the values and makes a quilt sparkle!
I’m happy to say that this quilt one a coveted ribbon in my guild’s quilt show!
If you love to quilt and don’t have enough time, maybe this How To is for you!
Firstly, this “how to” is meant to explain some the of mystery of shopping on Etsy. Secondly, I hope it saves you time, to boot!
If you are like me, sometimes you’d like to wear a button: “I’d rather be quilting”.
Obviously, if you are a quilter, you already know that quilting is time-consuming. Personally, I don’t consider myself productive when I’m doing something like laundry, housework, or even computer-work! Obviously, I know that these are necessary things to do and are valuable. But the way my mind works, do things other than creating beautiful quilts is kind of like buying tires. I just don’t want to do it!
Shopping online can be annoying and even scary.
So, I get it when quilters who aren’t familiar or comfortable shopping on-line get frustrated. Not only does it take time, it takes time away from what we’d all rather be doing!
Hopefully, this little How To guide to Etsy can save a quilter some time while introducing some fun quilting options.
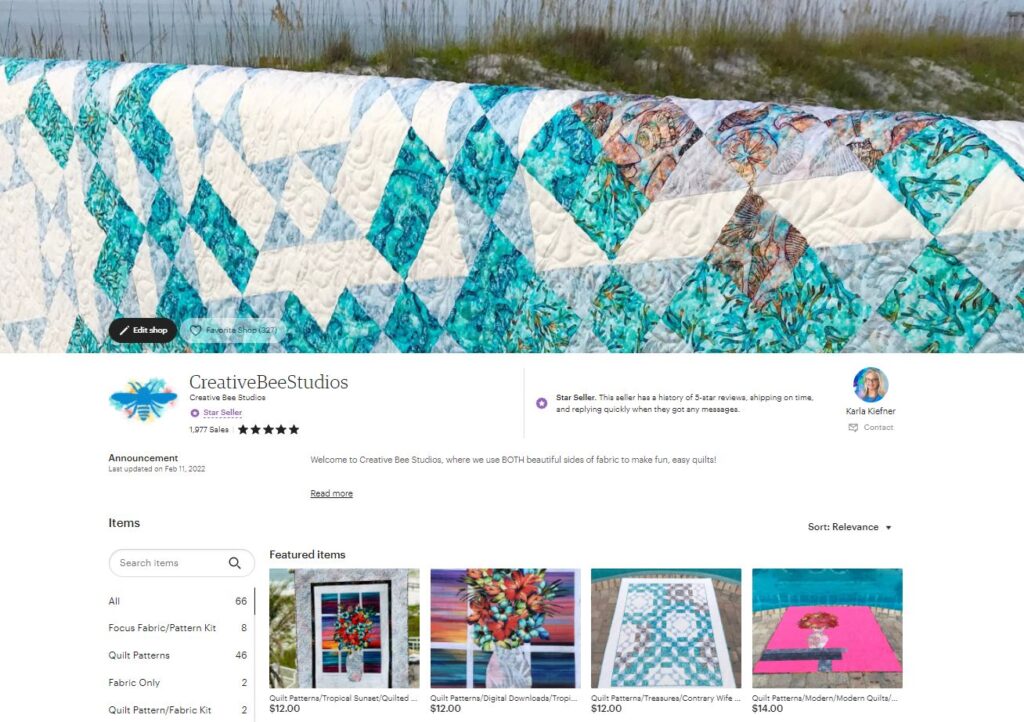
To keep things simple, I’ll use my own shop for some how-to examples.
Five things to know about how to use Etsy:
Etsy is an online global marketplace for all kinds of unique goods. It features handmade items, supplies, or vintage goods from little shops from all around the world
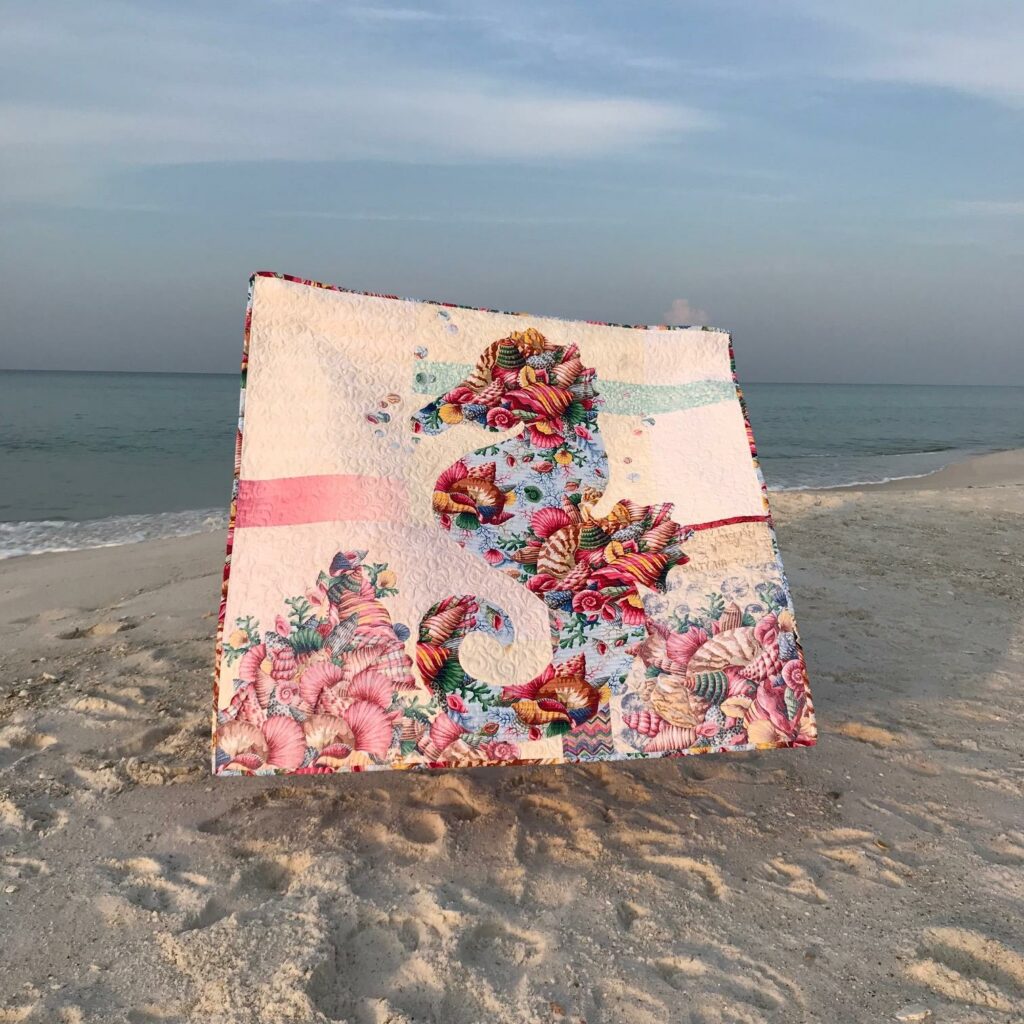
Etsy is easy to use. Simply type the name of the item or shop you are looking for in the search bar at the top of the website. If you don’t get a result you are looking for, try a “key word”, like “quilt patterns”, “bee” or “seahorse quilt pattern.
When you find something you like, click on the heart and it becomes one of your Favorites. All of your favorite items and shops are accessible through the simple “Favorites” button.
Also, you can to browse a feed that Etsy provides based on your searches and your favorites.
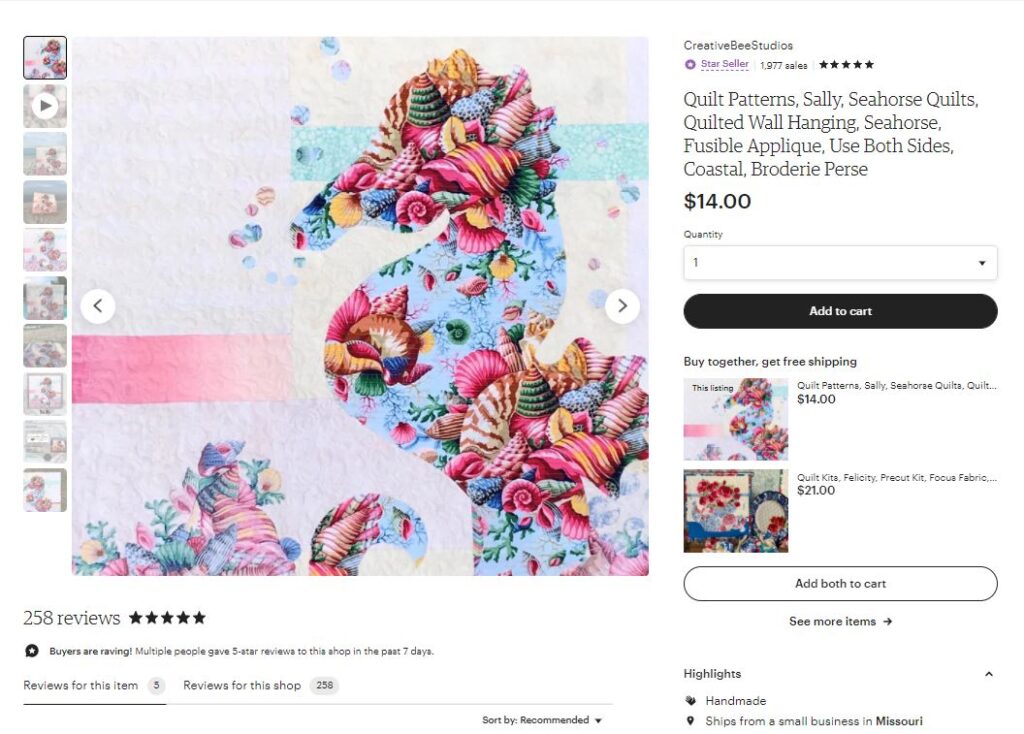
*Purchasing on Etsy is easy and safe. The Etsy company handles the monetary transaction completely, so the shop-owner never gets your payment information. For example, when someone places an order in my shop, I only get that person’s name and shipping address so that I can fill their order. That makes Etsy a place where you can shop online at many different boutiques while only providing your payment information to one company.
Like many companies, the Etsy review system is based on stars. You can rate one, two, three, four, or five stars. Moreover, most people still consider three stars to be good or average; a four is even better; and five is perfect. However, on Etsy, any star rating below a FIVE hurts that shop. Keep that in mind when you are giving reviews on Etsy!
How to consider the content instead of the stars.
You can also easily read reviews to see how other customers like a shop and the goods they’ve received. This is highly motivating for shop owners since they only want top ratings and reviews. You are sure to get good service! In the same fashion, consider that a 4-star rating (which Etsy considers bad) by I customers who states, “I LOVE IT!” is likely a fantastic review by someone who simply doesn’t ever give 5-star reviews.
What can you find on Etsy?
Quilters can shop for all things quilt related. Besides patterns and fabric, look for notions, fusible web, tools and rulers and even Featherweight machines!
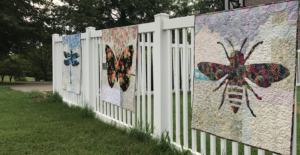
First, get a glance at seven (of now more than 50) quilt patterns made with both beautiful sides of fabric, right here, right now! Fun announcements included below!
The girl who started it all…Phoebee.
Learn how Phoebee inspired the start of using both sides of fabric HERE.
Firstly, Phoebee’s focus fabric has a lot to say! However, it doesn’t completely define this quilt! Look at that eclectic group of background fabrics! It’s all about value. I love how Phoebee gets her life and vibrancy from the very flowers (REVERSE) she’s pollinating.
Belle and Lilly join the party.
Soon after Phoebee was born, Belle and Lilly came to life. In the same fashion as Phoebee, these two gals were made with both sides of floral fabrics. Their contrasting genre of fabric give them each a unique style.
Additionally, I taught numerous classes of this Colorful Wings collection.
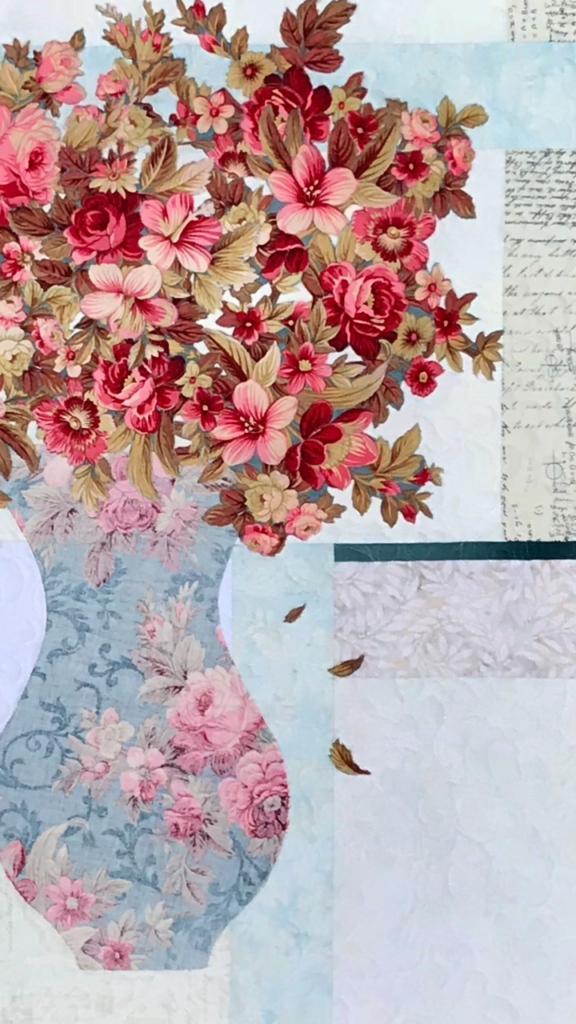
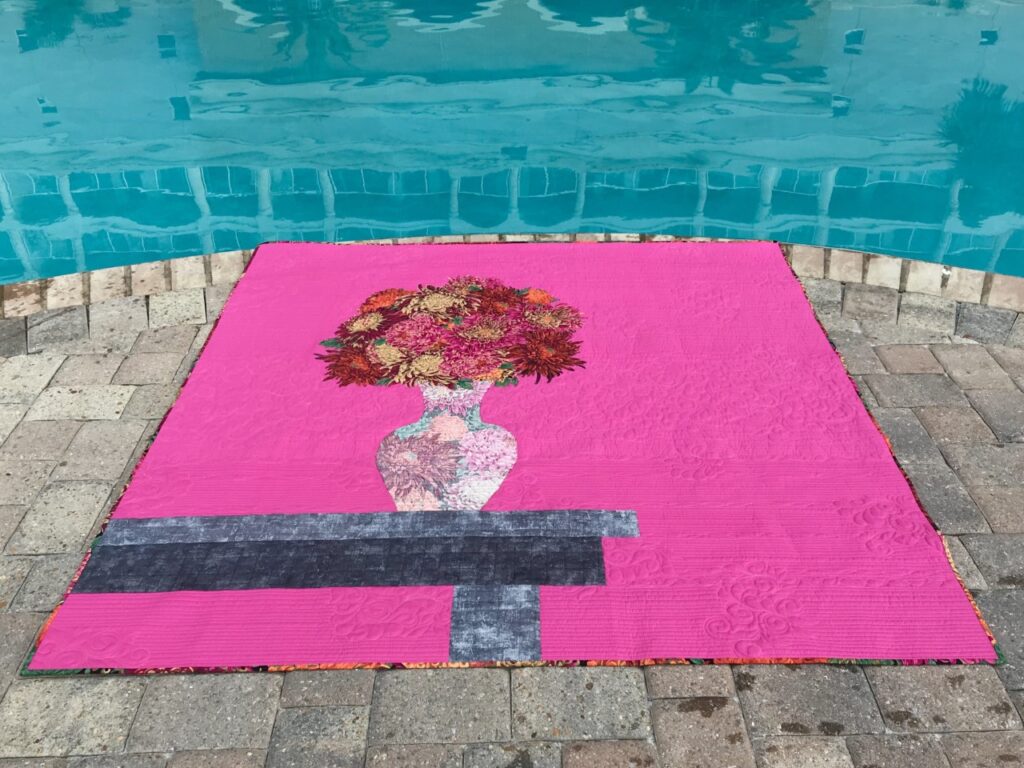
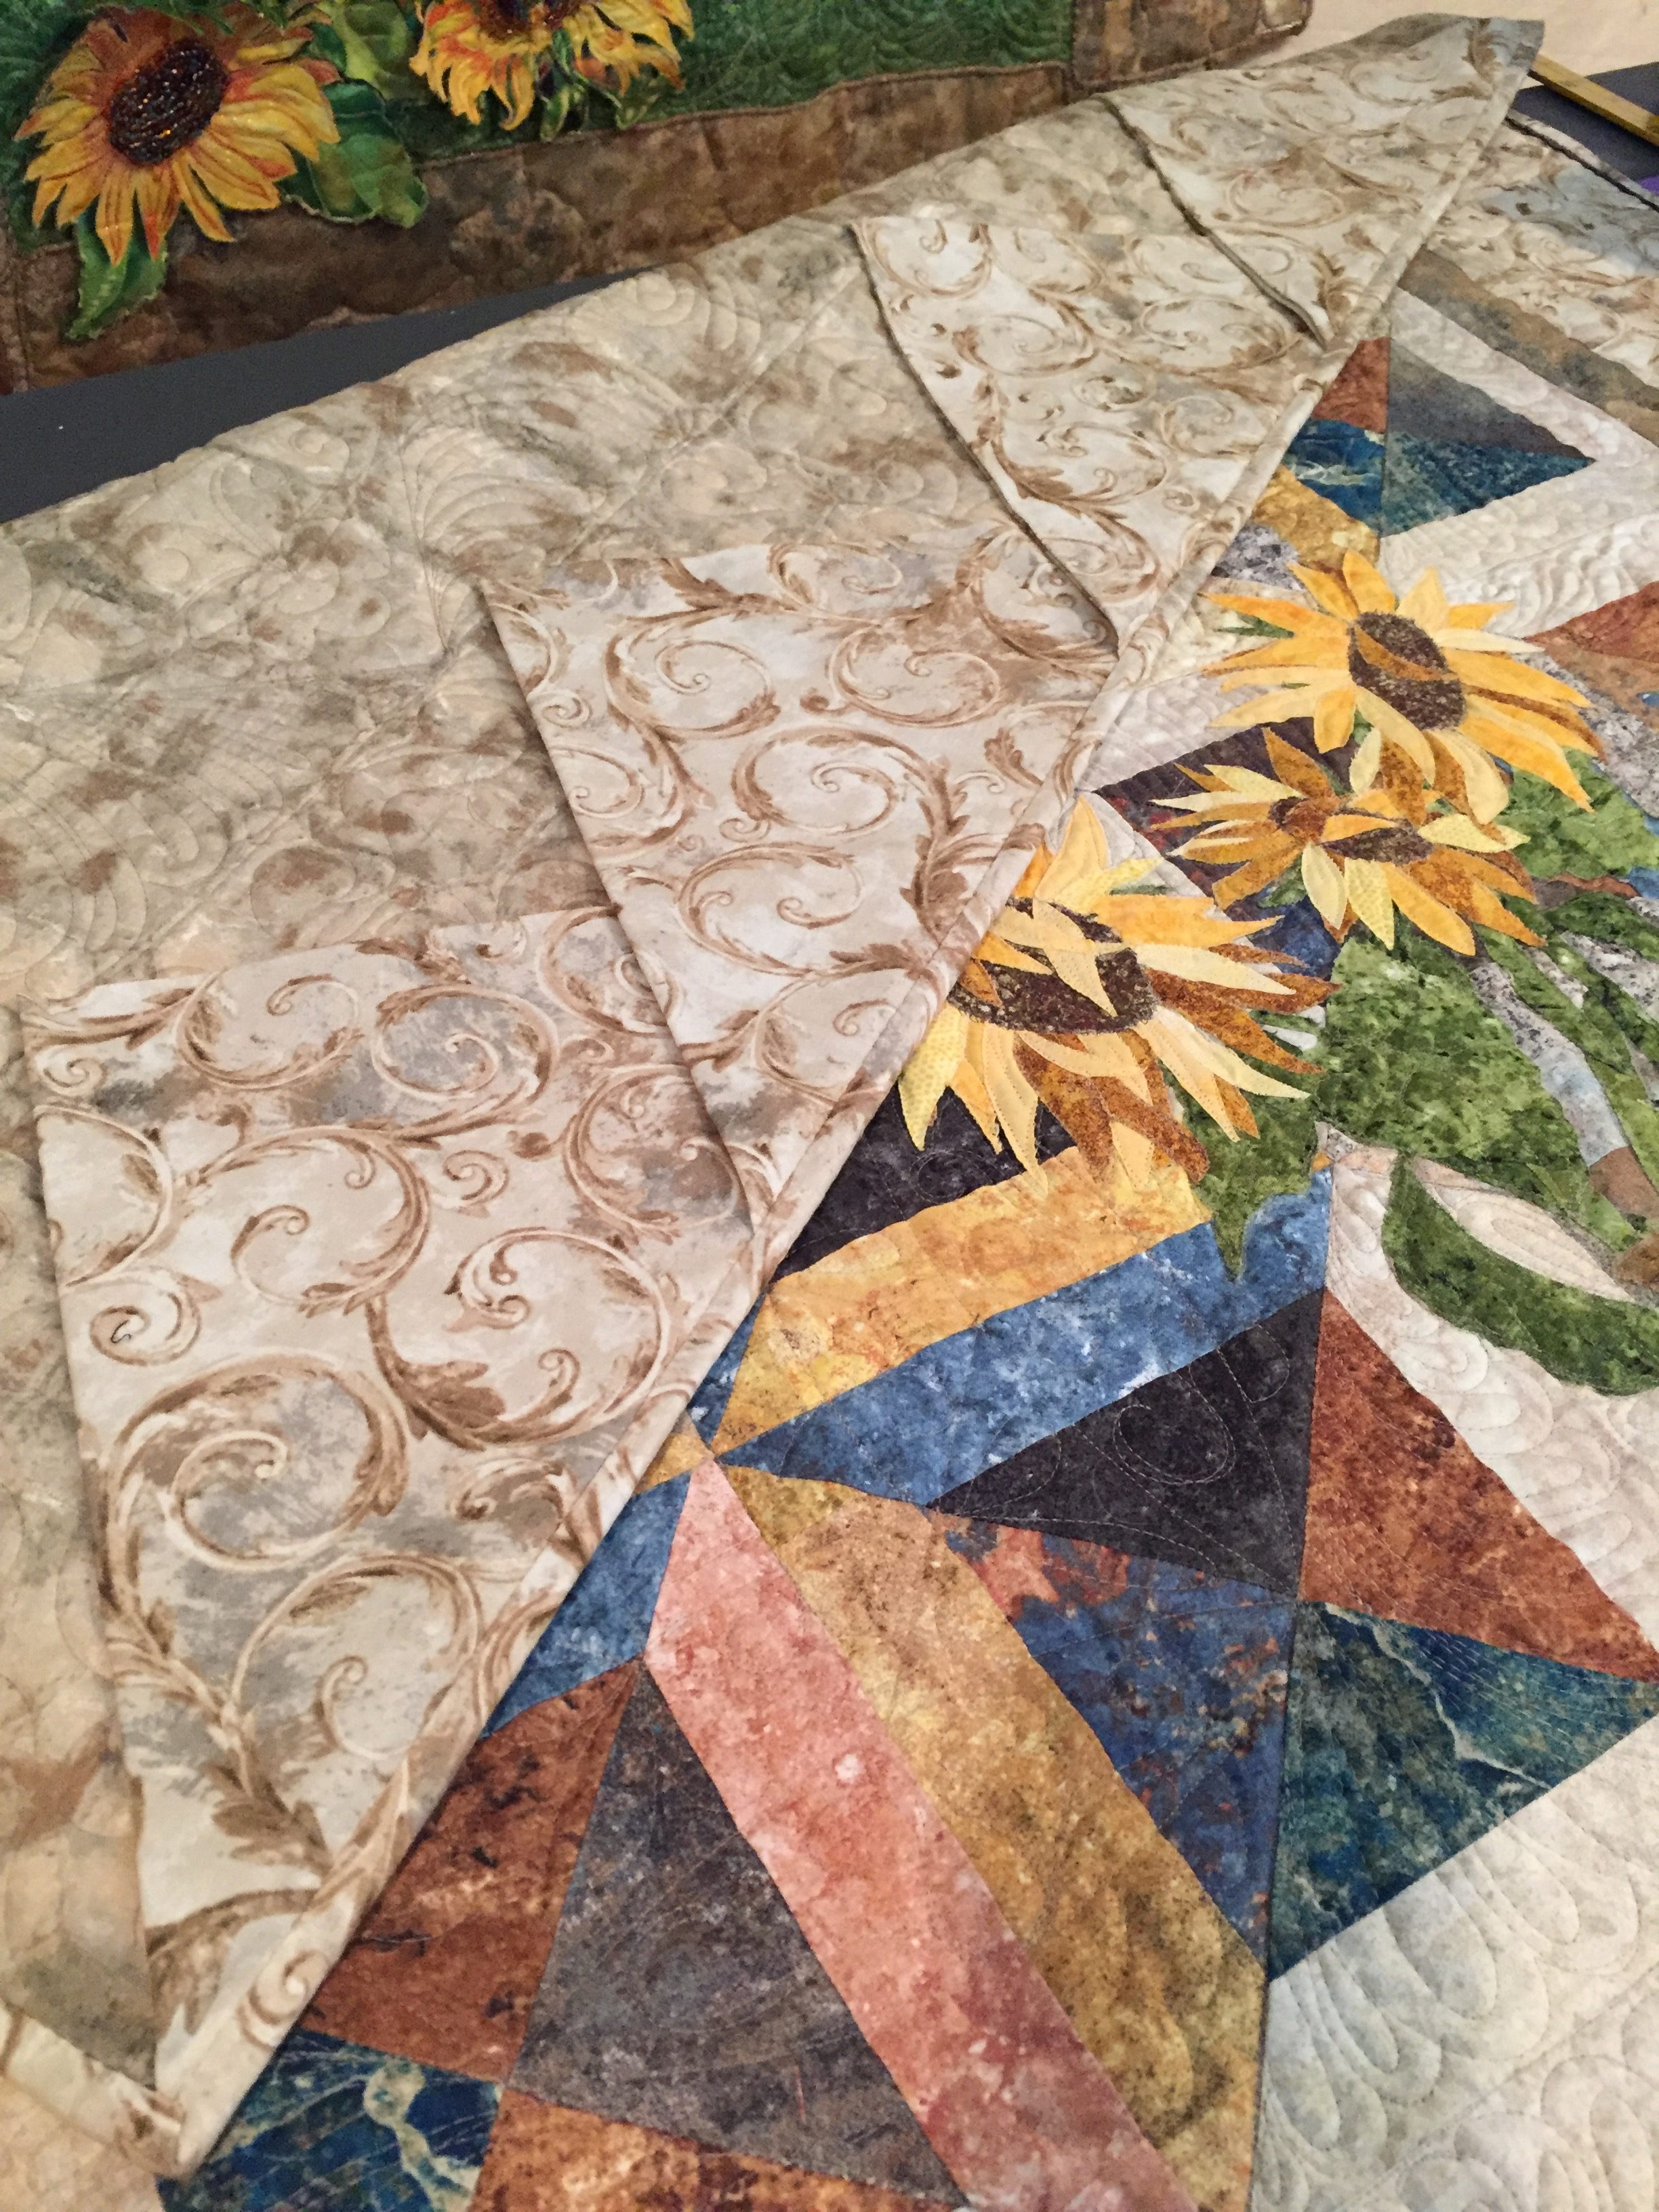
Rose was the first pattern in the Colorful Petals series.
Interestingly, I found Rose’s focus fabric in Branson, Missouri, as I raced through the shop. I quickly pulled out bolts to look at the reverse sides of fabric, while my husband waited in the car. This fabric by Red Rooster was an instant winner! Notice the secondary scroll design that shows on the vase? It’s gorgeous on the REVERSE.
Eventually, I began shipping patterns all over the United States and to Canada!
Creative Bee Studios use both sides of fabric quilt patterns have been featured in AQ Magazine, Hancock’s of Paducah, Connecting Threads, Nancy’s Notions, and quilt shops across America!
Tropical Trip by Karla Kiefner, Quick Trip Pattern by Eleanor Burns
Choosing color for quilts can be a daunting task.
Color for quilts is a common theme in the quilting book industry. Without a doubt, there are countless books on color theory.
Access to books on color for quilts isn’t my problem.
Unfortunately, wrapping my brain around the content in those books IS my problem! I wish I knew how many books there are which explain how to use color in making quilts. I also wish I knew how many times I looked at the color wheel. I know it, read about it, and studied it. However, going from page to fabric doesn’t seem to work for me!
Color for quilts is in the details.
Many books about color go into great detail explaining the principles for mastering color for quilts. You can learn about:
hue
color
intensity
warm and cool
harmonies of triadic, analogous, split-complimentary, double-complimentary
complementary colors
and MORE!
Summarily, there are whole books of very small print, explaining everything you’d ever want to know about color for quilts!
But they don’t work for me.
Likely, the reason is because I’d rather be making a quilt! But there is one thing I have learned about reading about choosing color for quilts: I have never been inspired by what I’ve read!
Look around you.
For me, I do better by “studying” nature. Sometimes its from a picture and sometimes it’s from real life. Either way, I find that nature, whether its a single flower, a landscape view, or a beach at sunset has perfect coloring. Furthermore, its inspirational!
Nevertheless, I am not recommending throwing color theory out the window. Instead, I prefer to use it to evaluate my choices AFTER I’ve been inspired with a color scheme. Color theory for quilts is obviously good and important information. I just want to learn about it while holding fabric!
I will admit I am very much a color person. Color can evoke emotions in me that seem just a little over the top — I REALLY, REALLY love some and REALLY don’t care for others. Maybe you are like that, too?
Learn how to overcome the mysteries of value. It’s easy!
Value can be a head-scratcher. Learn the simple tip for how to conquer fabric value!
To begin, you need to come to terms with the fact that fabric values change, depending on what is next to them. Initially, I was resistant to this!
When separating your fabrics for a new quilt project, you might wonder how to know which fabrics go where!
Darks, mediums, and lights.
Undoubtedly, it’s about more than piles of darks, mediums, and lights. The key is to learn how to measure their value.
I learned a valuable (wink) lesson when I stumbled upon the nuances of value when using both sides of fabric. See my design story HERE.
Up to this point, my method for separating values didn’t account for what those fabrics were next to. Consequently, two very cool Bonnie Hunter quilts I made (and still love) never displayed the secondary pattern her designs are known for. What did I do wrong?
Test your values.
How can a fabric value change, you ask? While the value of the fabric itself doesn’t physically change, how you see that value is affected by what is near it. Let me explain and then give you a simple way to test your values…
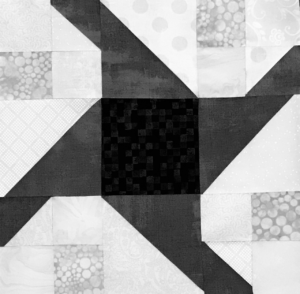
My Light looks too dark when I use that light of a Medium!
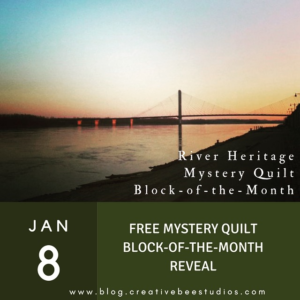
The three piles of fabrics shown above are my selection for the free River Heritage Mystery Quilt Pattern I am designing for my quilt guild. Darks, Mediums, Lights. This should be straight forward.
However, when you place, for example, a darker Light and a lighter Medium next to each other, they suddenly look similar in value. Color can make it difficult to determine value.
So how do you remove color from fabrics you are auditioning?
Take black and white photos. I learned this by testing values of both sides of fabric. Each pattern I design that uses both beautiful sides of fabric comes with a detailed guide for auditioning fabrics for that quilt project.
The best way I have found to truly see the value of a fabric is to take a black and white picture.
Check your values by taking a black and white picture.
If you are in one of my classes, you see that I don’t give any opinions about fabric options without seeing a black and white photo first. Even with years of experience looking at both sides of fabric, I can still be tricked by color! Quilters seem to have lots of fun with the process of auditioning and choosing fabrics. Oftentimes, they help each other and end up trading fabrics to get just the right mix for their project.
So grab your stash and your camera !
Now you know the how-to tip for determining value. Why not have fun practicing on a quilt made with BOTH beautiful sides of fabric!
Kate’s Bouquet is made with both beautiful sides of two fabrics. It’s all about value!
More than 45 patterns that use BOTH sides – SHOP HERE!
Phoebee was designed using both sides of a focal fabric.
As you can see above, Phoebee’s focus fabric is strong enough to accommodate even medium background fabrics.
Have fun playing with value and enjoy your quilting journey!
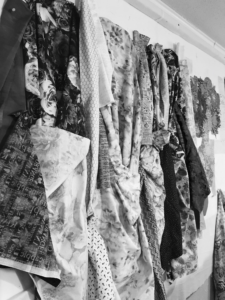
When you pin fabrics to your design wall, you can step back, get perspective, see how a fabric reads at a distance, and most importantly observe the values.
Granted most quilters don’t audition fabrics for four quilts all at the same time, but in this case, having four new designs waiting to be created made me realize how much more I like auditioning fabric on the wall rather than on the table or floor.
Plus, it’s much easier to take that black and white picture for observing value when the fabrics are in front of you! See The Tricky Traits of Value.
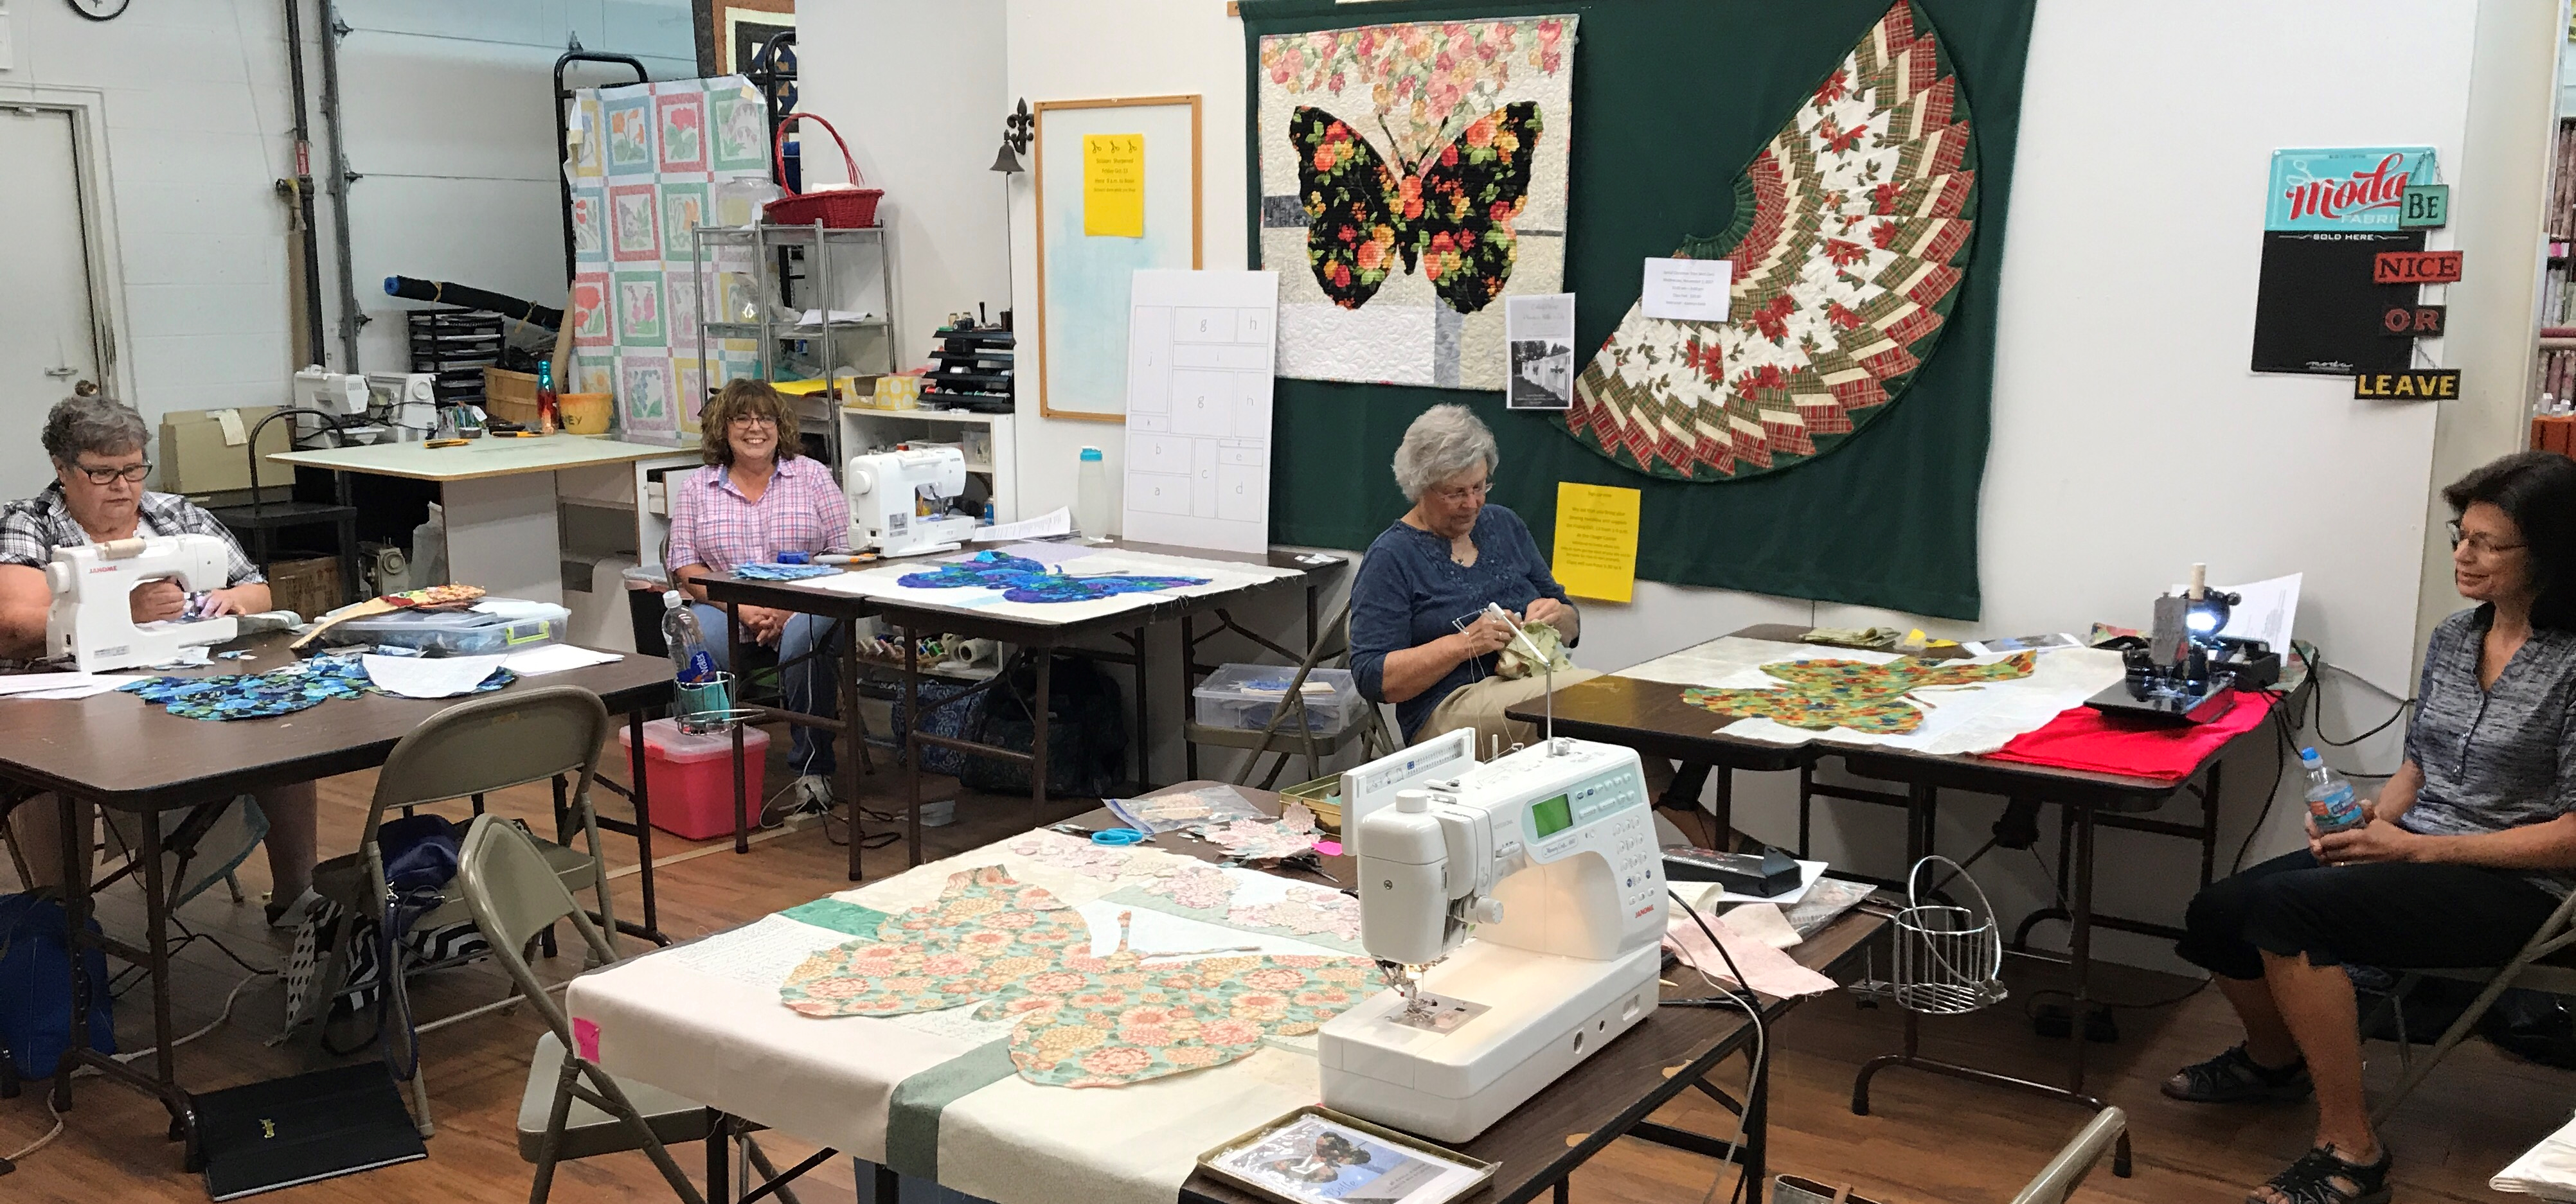
This past week was the kickoff of classes for Colorful Wings (click here for patterns) and I can’t wait to see the eleven finished quilts. In the meantime, my next post will give you sneak peek on how completely unique each of these winged-girls (and boy – yes, we had one boy) are!
A big thanks to all of the eleven students who took the challenge to #usebothsides!
Shop for Phoebee, Belle, and Lily from the Colorful Wings pattern series and Rose from the Colorful Petals series at www.etsy.com/shop/CreativeBeeStudios.
How do you audition your fabrics? Do you use a design wall? Please comment below.
Choosing fabrics for quilts isn’t hard, but it can be tricky.
Choosing fabrics for quilts involves auditioning the color, size of motif, and value of the fabrics. I have long thought I understood the value of fabric values. Value is what makes, say, a simple, two-color quilt have bold areas of light and dark. Value also makes those cool secondary patterns in your multi-color quilt design appear like magic.
Easy, right? I thought so. However, a few years ago (actually about 20 now), Blended Quilts became popular. I became mesmerized by blended quilts. I bought the books and studied them, reading about fabric choices and how to combine fabric values to work together, while not being too obvious. Turns out, I never did really “get” it. It was too hard for me to look past the floral motifs and colors. Thankfully, our guild had a program presenter who sold blended kits! Problem solved (for the moment).
Turns out, choosing fabrics for quilts based on value can be tricky!
For the record, I love all kinds of quilts.
Karla
My Grandma Emma Wichern’s lavender and white embroidered quilt is precious to me. Simple, clearly defined values. But I also love those wild “crazy-quilts” which practically shout in all dark values. Modern is fun, bright, and happy…or sometimes calming and simple. I have a passion to some degree for all types of quilts. But what really gets me excited about a quilt is when it is successfully splashed with all kinds of rich, colorful and different fabrics…and it works! Value is what makes the magic happen in those quilts.
To truly know the value of fabrics, you have to remove the color.
You can do this numerous ways, but the simplest trick for me is to take a picture of fabric choices or my blocks on my design wall with my phone and change the picture to black and white (mono or noir). Colors and motifs can fool you. For us quilters, fabrics aren’t just fabrics. They evoke emotion (usually happiness). I used to fall in love with a fabric, or line of fabrics, and be determined to use it because of my emotional connection. Consequently, I’ve made some quilts that turned out okay, but had the potential to be brilliant.
When choosing fabrics for quilts, remember that values change depending one their surroundings.
That’s the tricky part! A quilter once said, “My Light looks too dark when I use that light of Medium.” Okay, that was me who said that, but it’s true! And, it can be tricky.
Light. Medium. Dark.
The fact that my neat little piles of lights, mediums, and darks can change their values, depending on what is around, them was a “V8” moment for me!
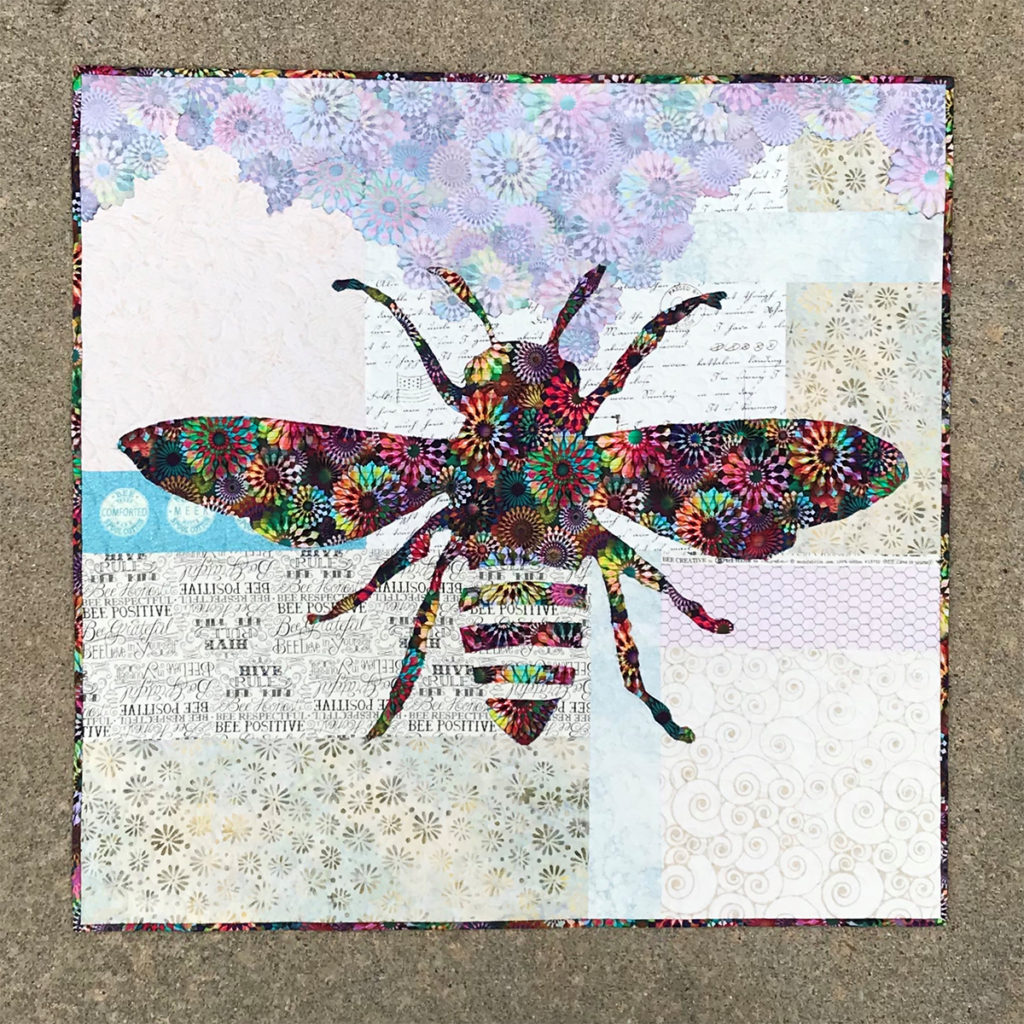
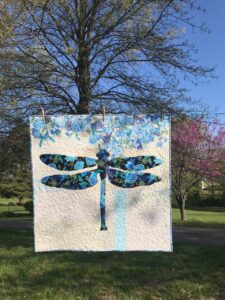
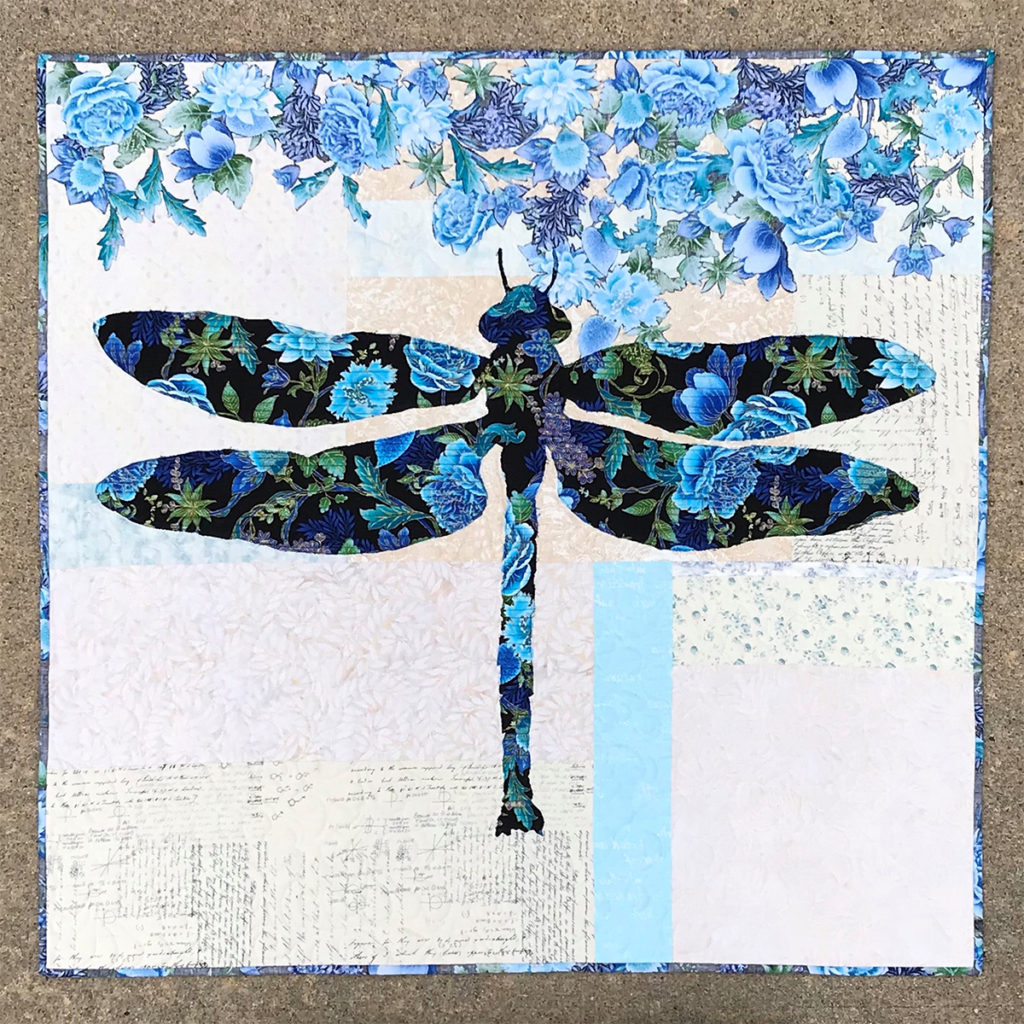
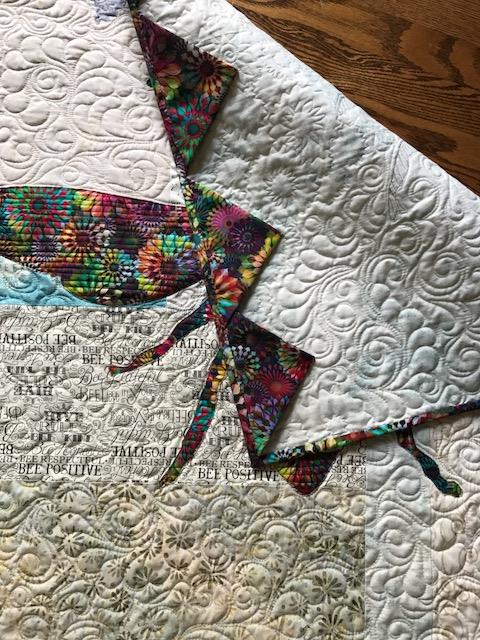
Let’s look at this dragonfly quilt for an example.
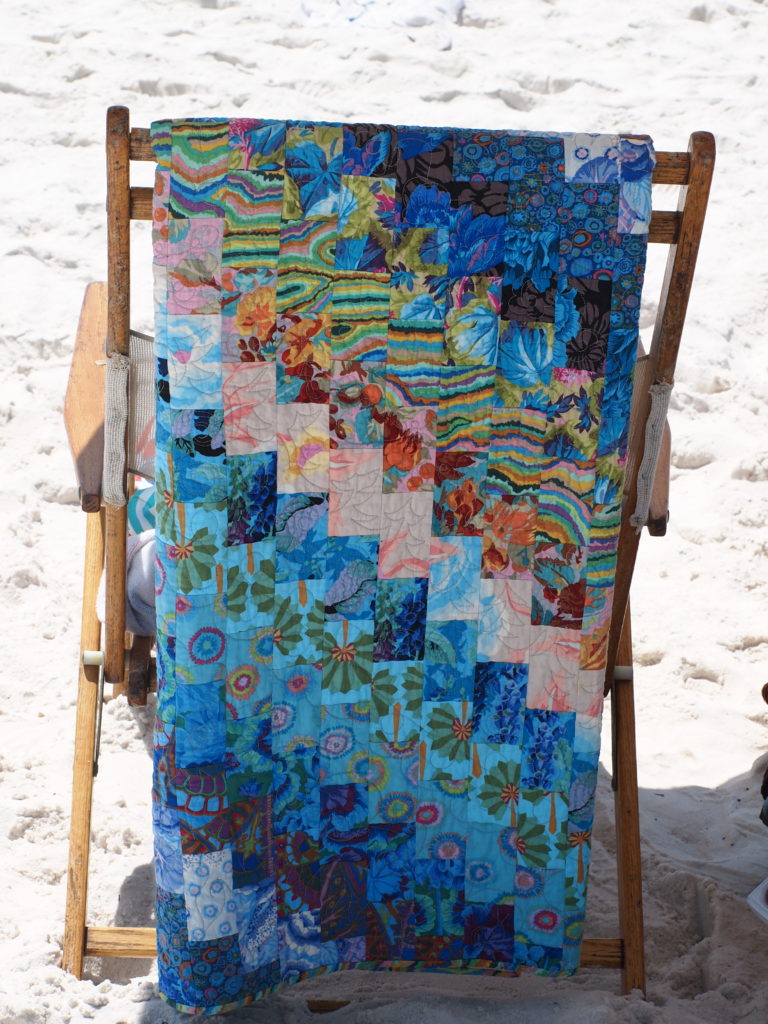
Lilly’s background is made of scrappy, light neutrals with a couple of colorful accent strips. The background is light when compared to the dragonfly focus fabric. The flowers at the top of the quilt are made from the reverse side of focus fabric. The flowers “read” as a medium value. Clearly the dark value of the dragonfly is what you notice first. The flowers are secondary. The various background fabrics catch your eye last and allow your eyes to linger on them.
When you are just working on your background, those strips of color can look quite bold and may seem too dark to be part of the background. But when looking at those same fabrics in black/white WITH the focus fabric laying across them, they all fall into the light category and they work!
Even the colorful accent strips disappear in this black and white photo.
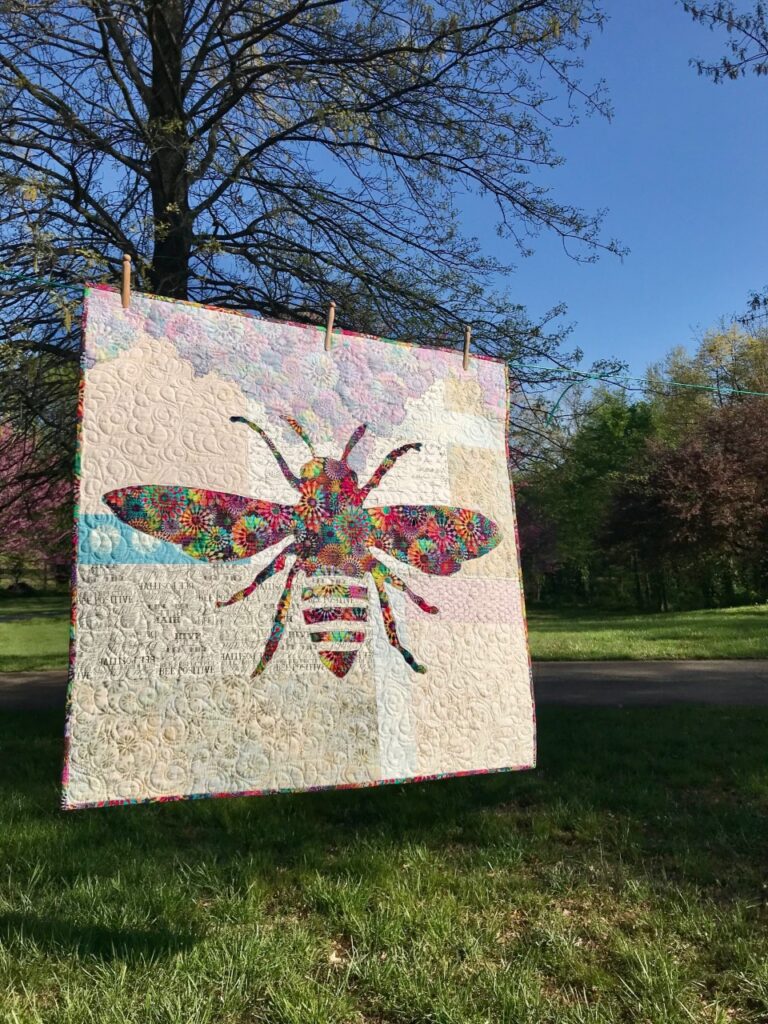
Phoebee is made with both sides of one focus fabric on a scrappy background. Choosing fabrics for this quilt is how I first learned the nuances of value. Using both beautiful sides of fabric taught me that lesson.
Notice that the boldness of Phoebee’s focus fabric allowed for a variety of values in the eclectic background. Phoebee is clearly the “buzz” of this quilt!
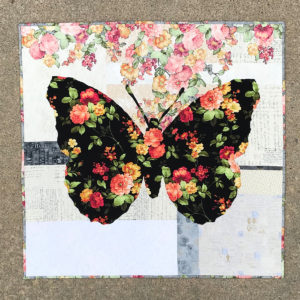
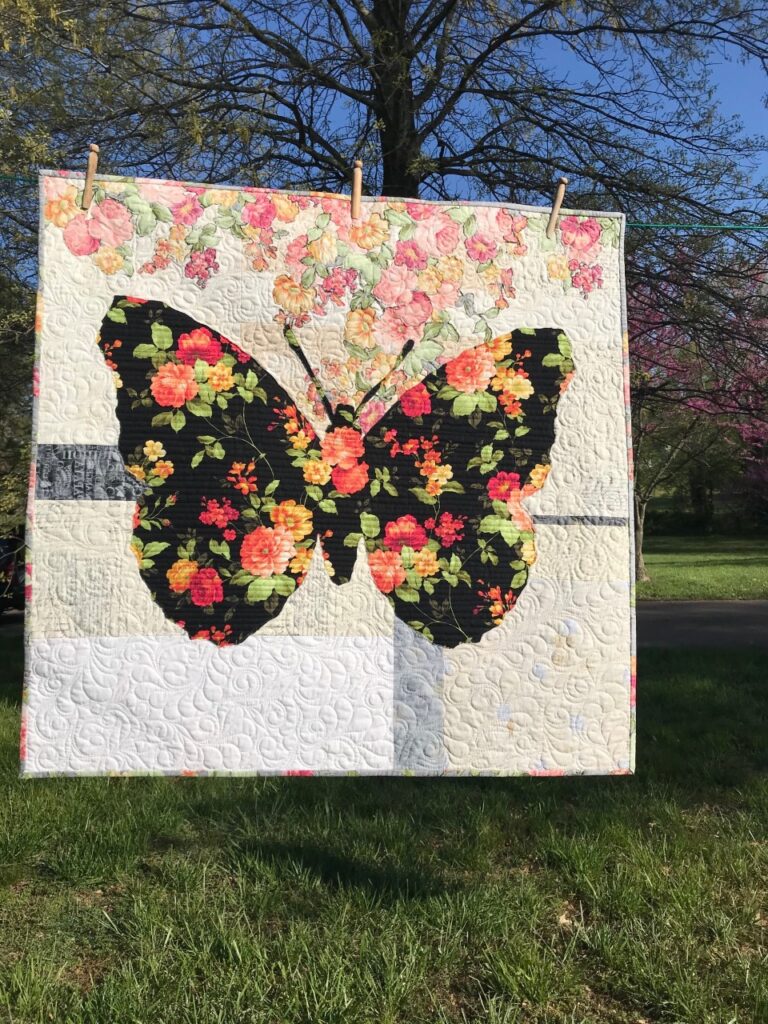
Next, lets look at Belle, the butterfly quilt.
Again, the RIGHT side of the butterfly focus fabric has a dark enough value that it can “handle” a lot from any background fabrics, including the accent strips. However, the REVERSE of the flowers made from the same background fabric are medium to light in value. Some of those flowers might have been lost if the value of the background fabrics were too similar.
In conclusion, choosing fabrics for these quilts might be a little out-of-the-box for some quilters, because they call for mixing so many colors of background fabrics. But if you follow this guideline it’s easy: If the value is right and you like the fabric, use it. It’s freeing to combine lots of “styles” of fabrics, like miniature prints, batiks, grunge and more! I encourage you to combine a variety of fabrics in your quilts. Remember, it can be fun choosing fabrics for quilts, when you take the guess work out of it.
It’s the combination of background fabrics that make these quilts sing!
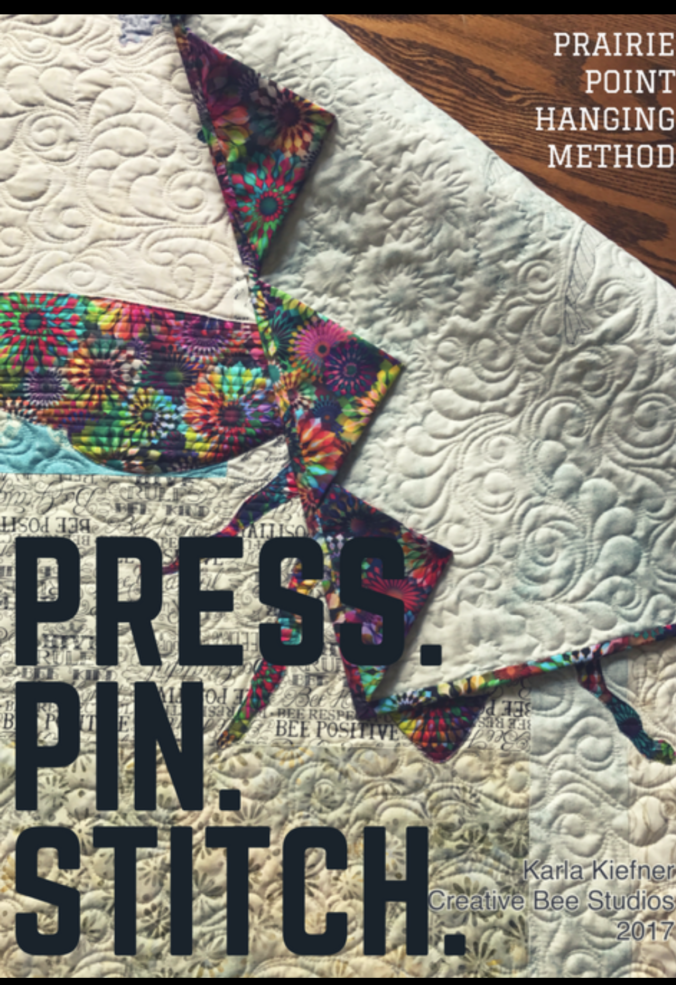
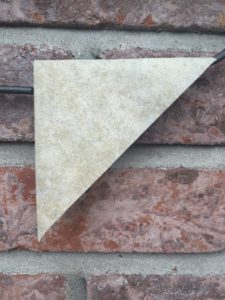
Use pretty prairie points and just a couple of hand-stitches to hang your quilts.
The Prairie Point Hanging Method is as easy as 1, 2, 3…4 stitches!
1. Fold and press fabric squares diagonally, twice, just like you would when making prairie points.
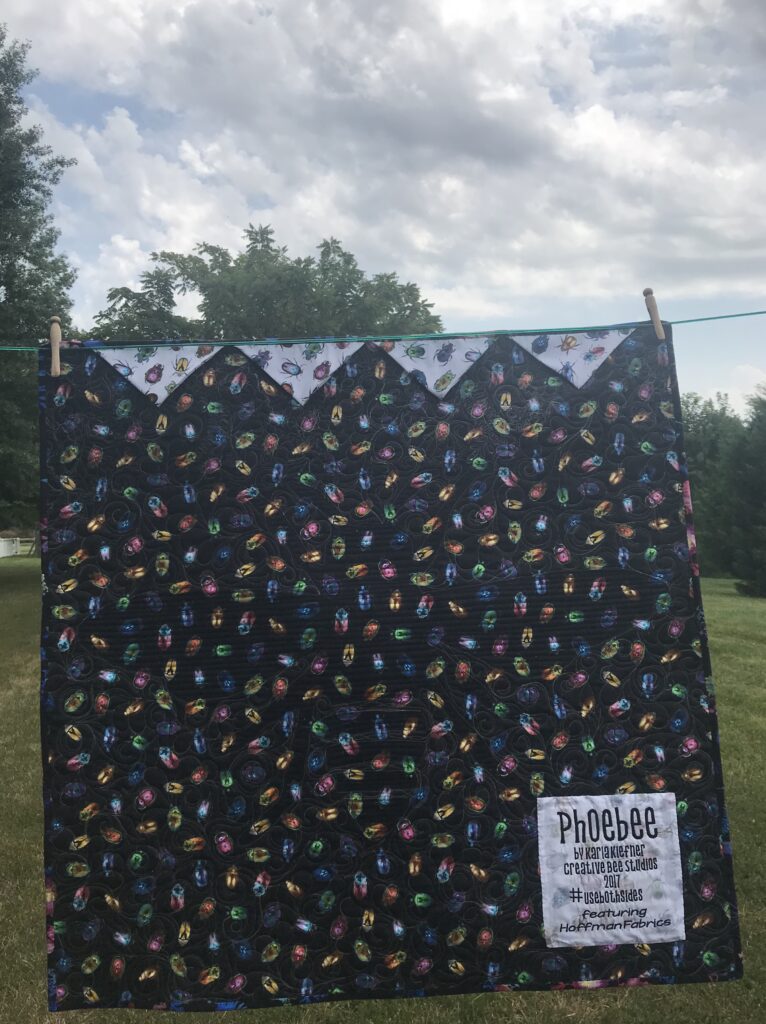
2. Pin the raw edge of the prairie points (triangles) at the top edge of the back of your quilt, spaced evenly.
3. Baste across the top of the quilt by machine and make four stitches by hand (with doubled thread) on the points of each triangle, making sure you only stitch through the backing and batting.
It’s EASY, FAST, and PRETTY! Click here to see this quilt.
Prairie Points Hanging Method
Adjust the size and number of your squares based on the width of your quilt. For example:
Four 7-inch squares make prairie points for a 24-inch wide hanging.
Four 16-inch squares work well for a 48-inch quilt and easily accommodates the largest requirements for our quilt show standards. Simply add more of the same size prairie points for a bed-size quilt.
Bella Piastrella with Prairie Points Hanging Method
TIP: For small wall hangings, use an even number of prairie points and you can hang your quilt from a single nail or hook instead of leveling it between two points.
How do you hang your quilts? Share in the comment box below.
Scroll down to sign up for email notification and you’ll get a notice when a new post goes live (about once a week).
Thanks for checking out by my blog. Please share, pin, and tell your friends!
Bella Piastrella with Prairie Points Hanging Method
Discover a quick quilt hanging method to display your quilts!
Let’s face it…quilts take time. We really should cherish each step of the process. But, if you’re like me, it’s those last few steps that sometimes really test your patience:
Firstly, the binding…
Then the label…
Last, the SLEEVE…ugh!
Now, here is a fast, easy way to attach a hanging sleeve, with just a few quick points – Prairie Points!
Start with a few squares of fabric, fold them diagonally twice and lay them on your quilt. Next, baste with your machine, using a seam width that is smaller than your binding seam. Lastly, stitch the points by hand with just a few stitches! That’s it! It’s that easy.
Now let’s break it down:
For instance, if you have a small wall hanging, 5 inch squares will do. But if you have a large quilted wall hanging, 12 – 16 inch squares will work. The number you need depends on how large you make them and the size of your quilt. You’ll see, as soon as you fold one and hold it up to your quilt, how many you’ll need. This method is so much faster and easier that the traditional “sleeve”, you’ll be looking forward to using this method on your quilts!
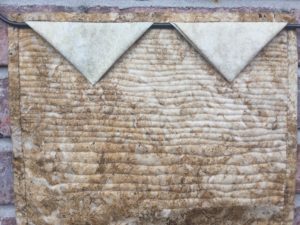
So, for this tiny wall hanging (11 inches wide), I am using two five-inch squares.
Easy Method for Hanging Quilts
For small pieces, I like to use an even number of triangles so that the center is open for hanging it on one hook or nail. Of course, larger pieces need to be hung by two points, so the number of triangles attached to the quilt depend only on how many you want to add. For example, my 90 -inch wide quilt has 7 triangles which started with 12 1/2 inch squares.
Also great about this method, if you have a particularly heavy quilt to hang, you can add additional rod support in the center of your quilt in between two triangles.
To begin, fold a square diagonally once, press. Fold that triangle
Folded twice from square.
diagonally again, press. Do this for all of the squares. Secondly, lay them at the top of your quilt, cut edge, lining up with the top edge of your quilt sandwich. Pin in place. Next, machine baste within the seam of your binding (whether the binding is on yet or not). Lastly, use a needle and thread (I like to use doubled thread for this) to stitch down each point, securing with several stitches.
Finally, attach and turn binding as usual and your quilt is ready to hang!
All Creative Bee Studios patterns provide Prairie Point Hanging Method instructions. Shop Patterns HERE.