Tag: quilts (Page 6 of 13)

Quilt Week Faves

Quilt shows are packed with fabulousness!

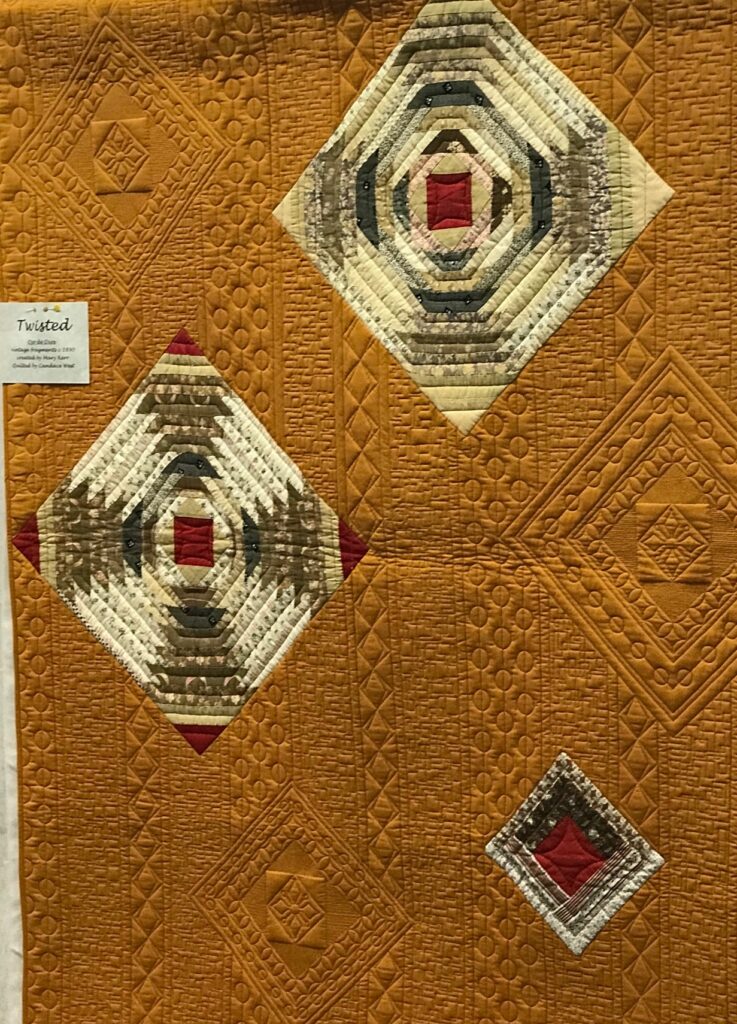
One artist, Mary W. Kerr, had a featured spot during quilt show week in Paducah, Kentucky. Her fantastic quilts, featured in her book, Twisted, hung in the Rotary for Quilt Week.

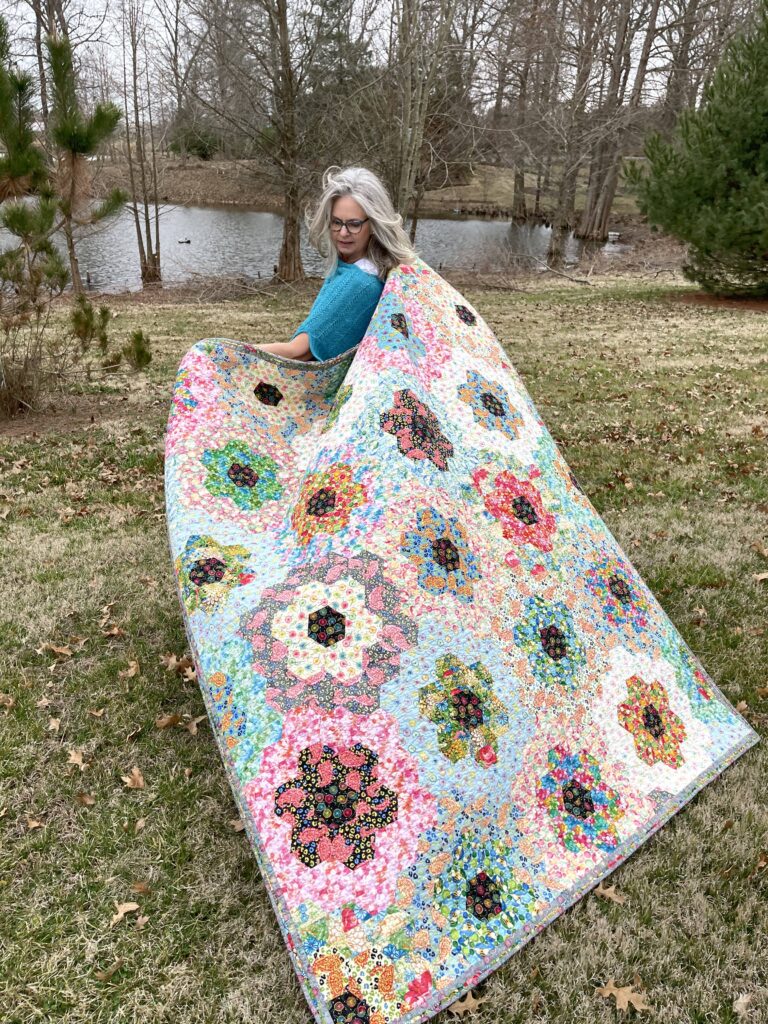
First, its difficult to know what quilts to share when it comes to quilt shows. There are just so many! Therefore, this time, I chose to focus on an artist. Mary W. Kerr’s collection was outstanding in concept and variety. Here are just a few that made me stop, take out my phone and grab a shot. Hope you like them, too!

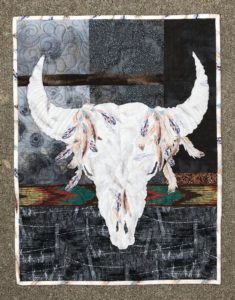
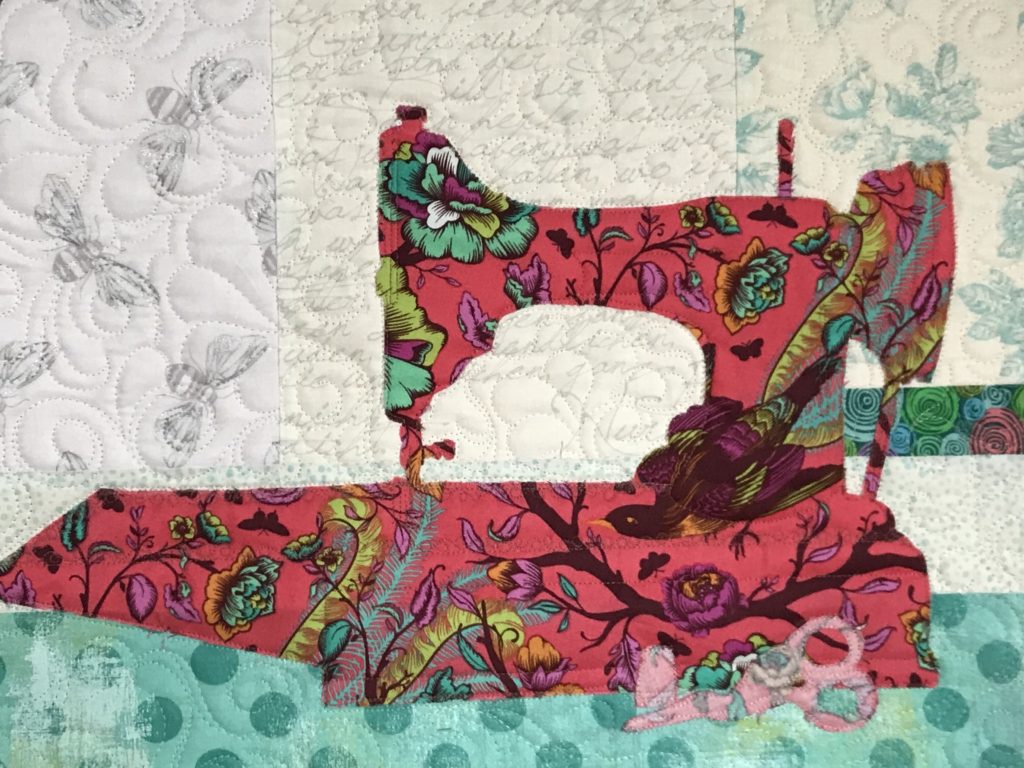
Mary likes to use vintage fragments in her quilts.

She’s always been drawn to antiques and orphaned blocks. Mary also likes the colors, designs and quilting of the modern era of this craft. In her book, Twisted, the culmination of the two styles are on beautiful display.

Oje De Dios by Mary W. Kerr, quilted by Candace West

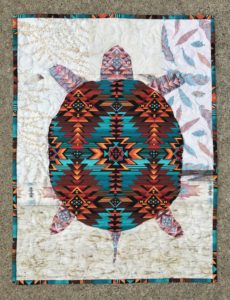
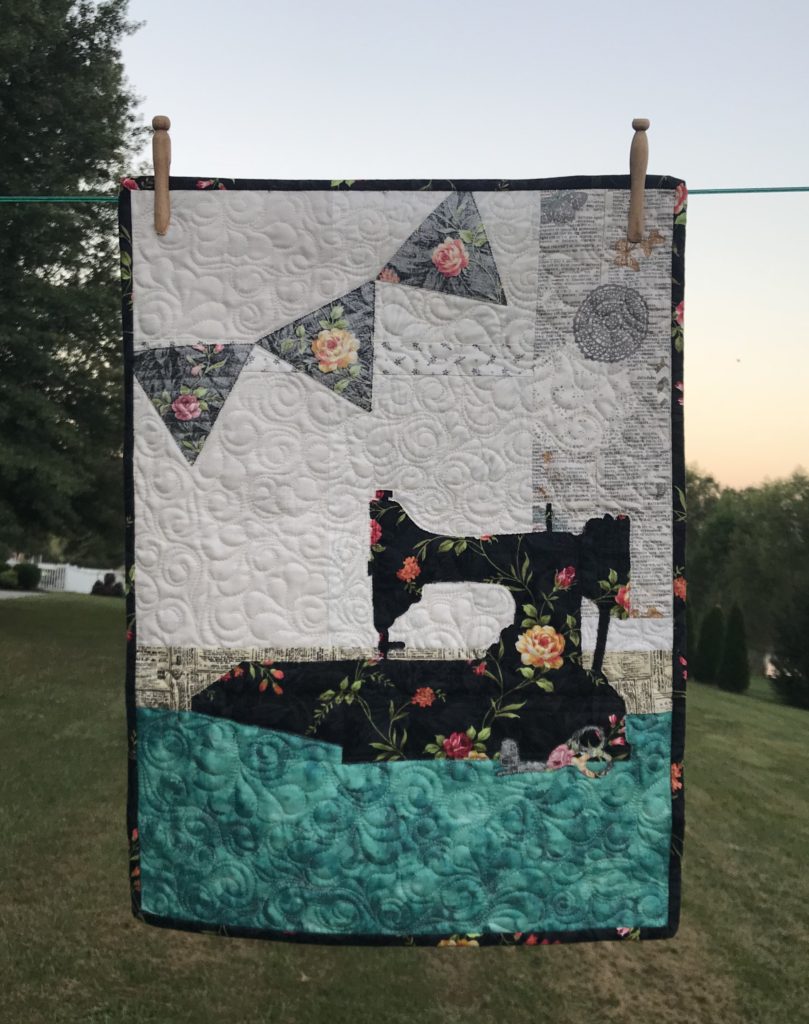
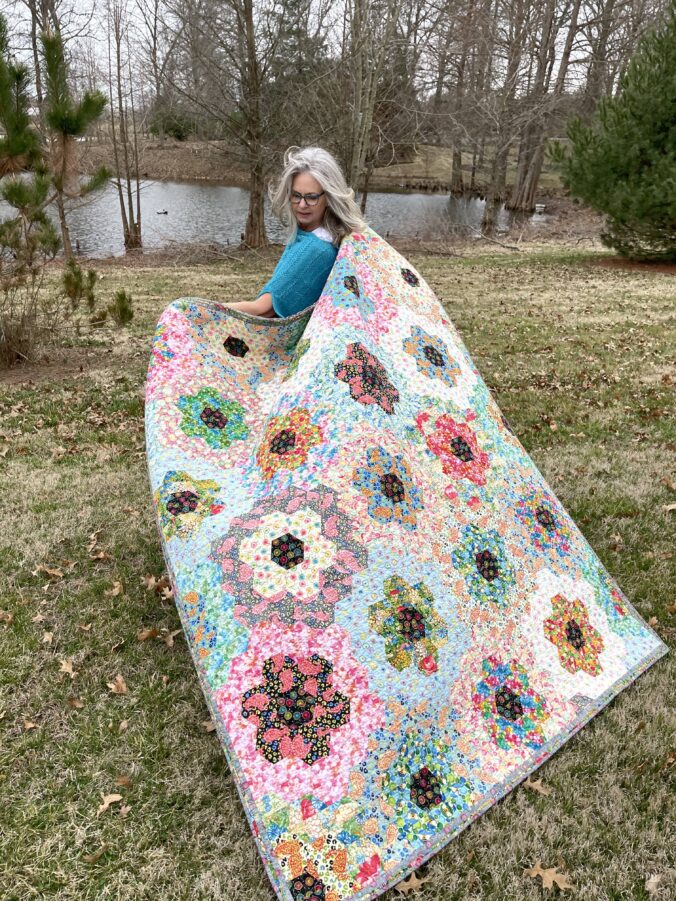
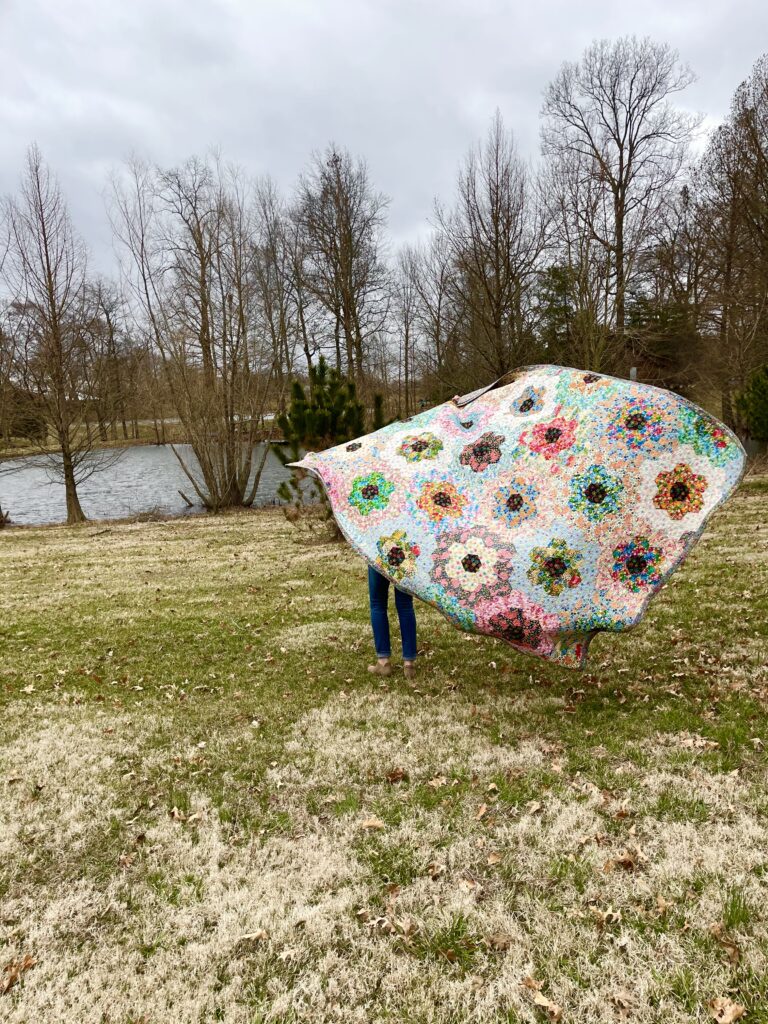
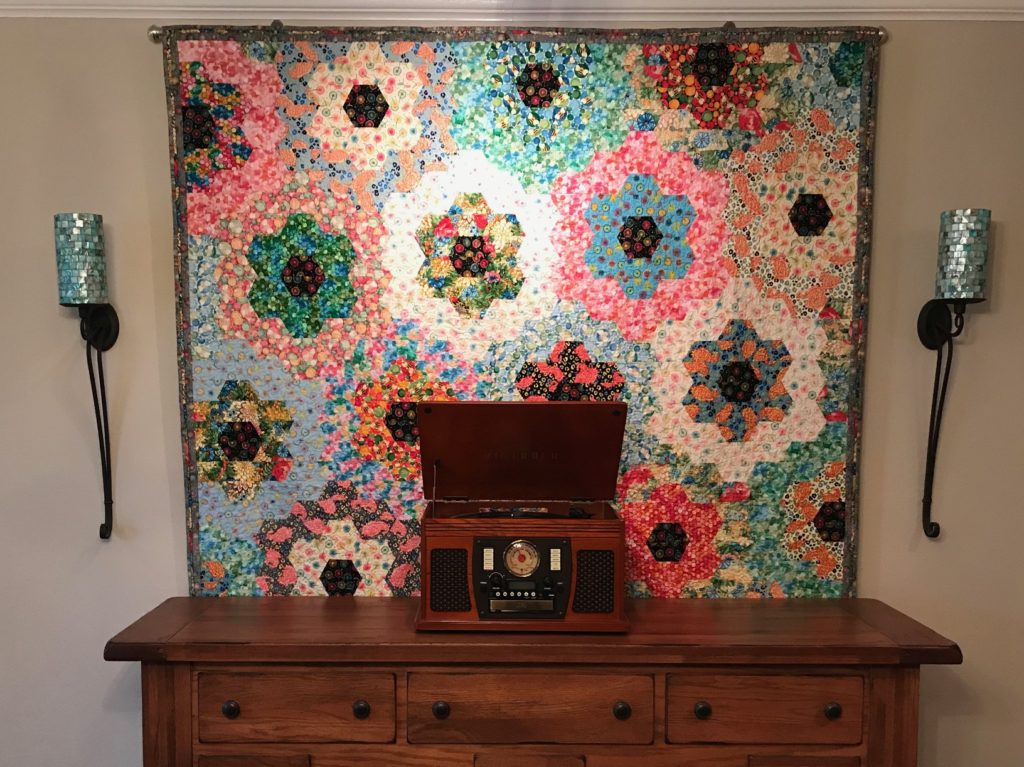
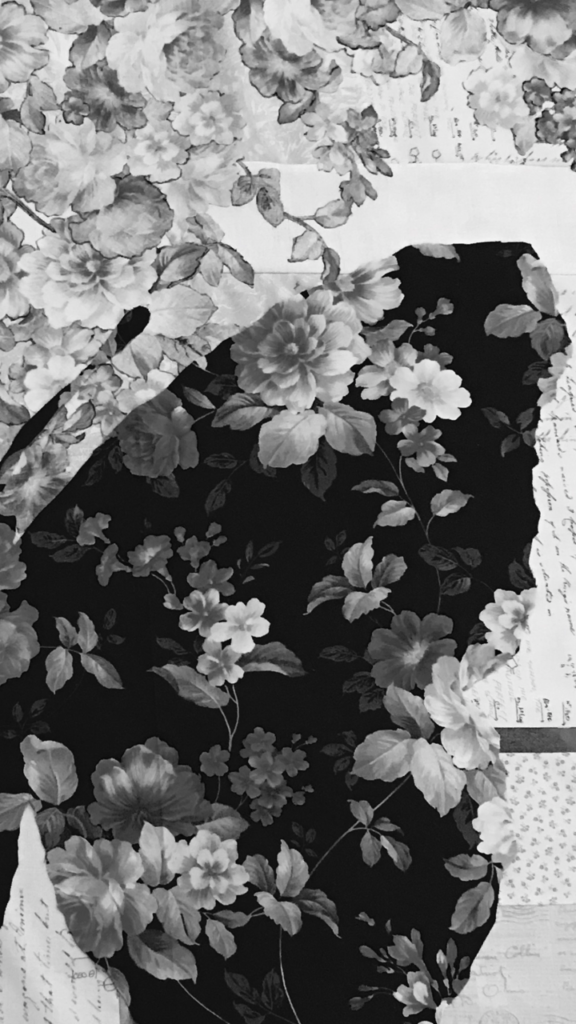
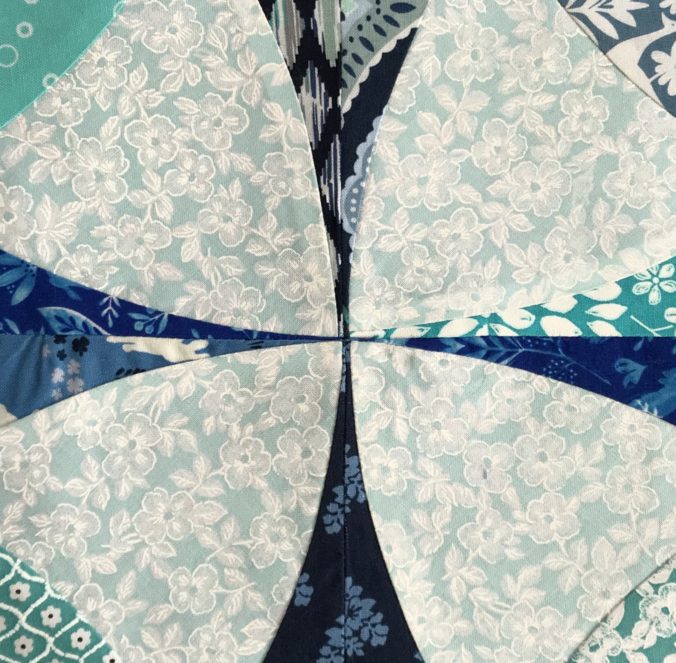
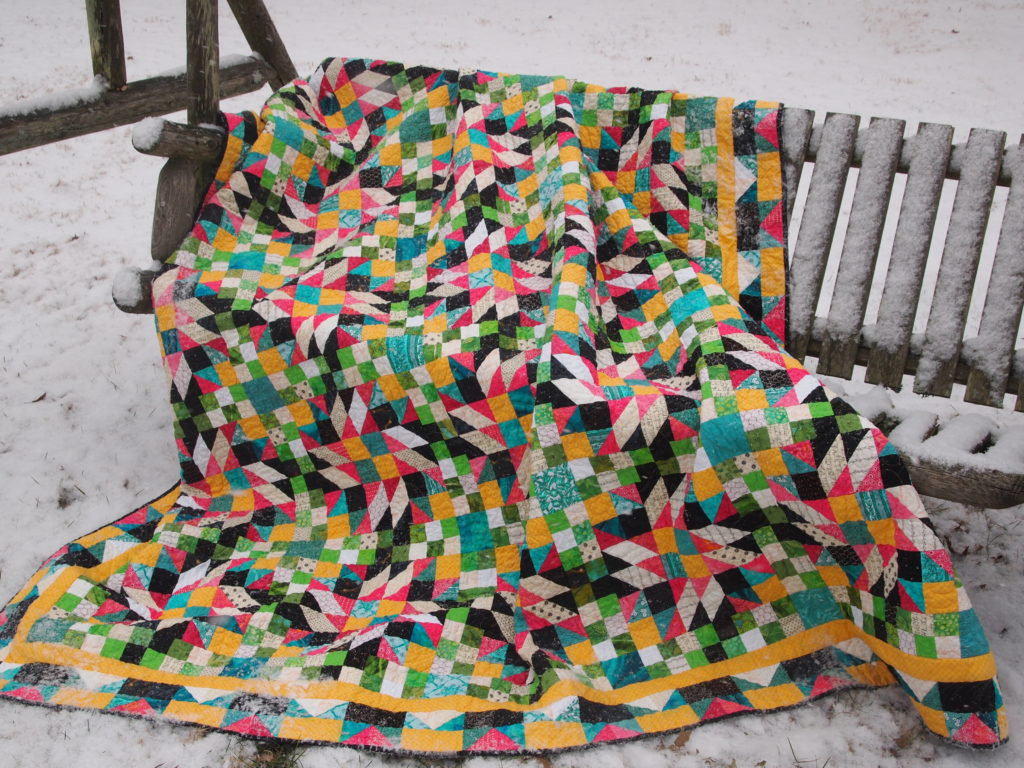
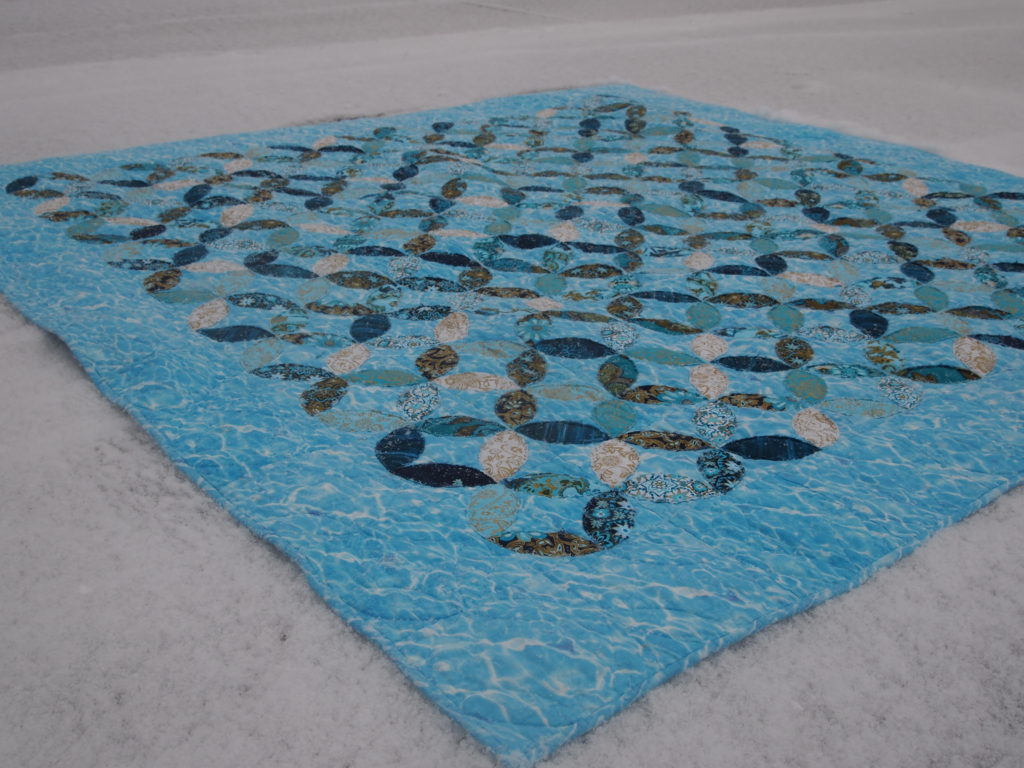
Oje De Dios by Mary W. Kerr, quilted by Candace West was featured with Mary’s whole series at the Rotary. She takes pieces of old quilts, blocks, or parts of quilts and incorporates them into new works with a modern flare. She gave each quilter freedom to do whatever they wanted for the quilting.

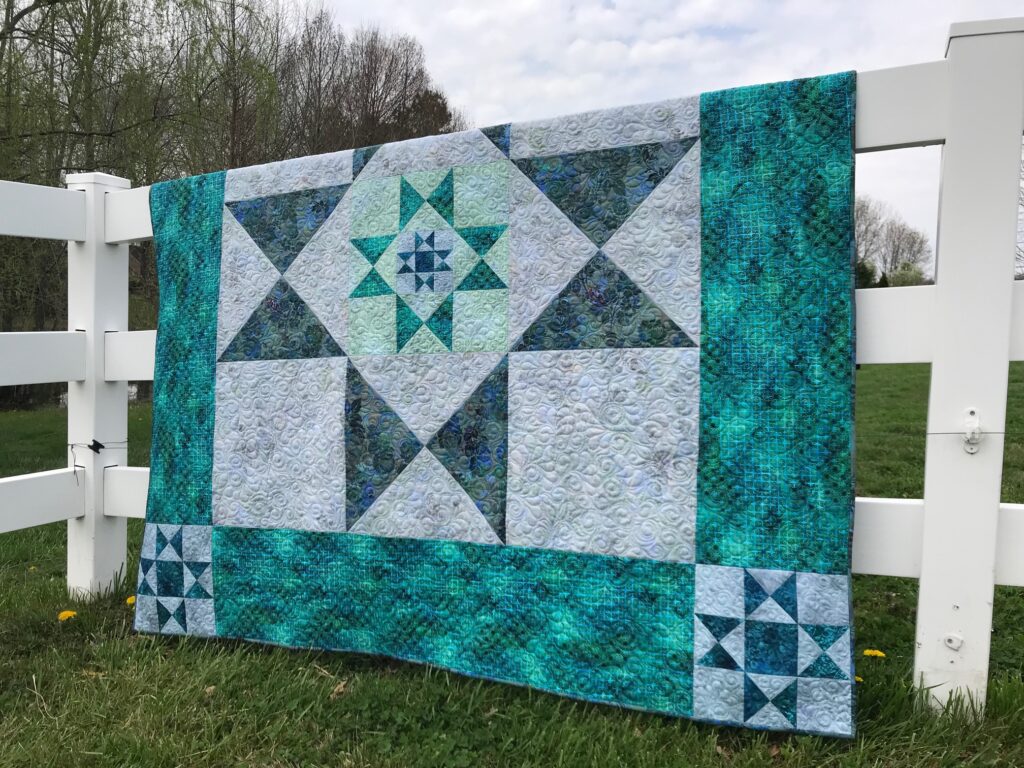
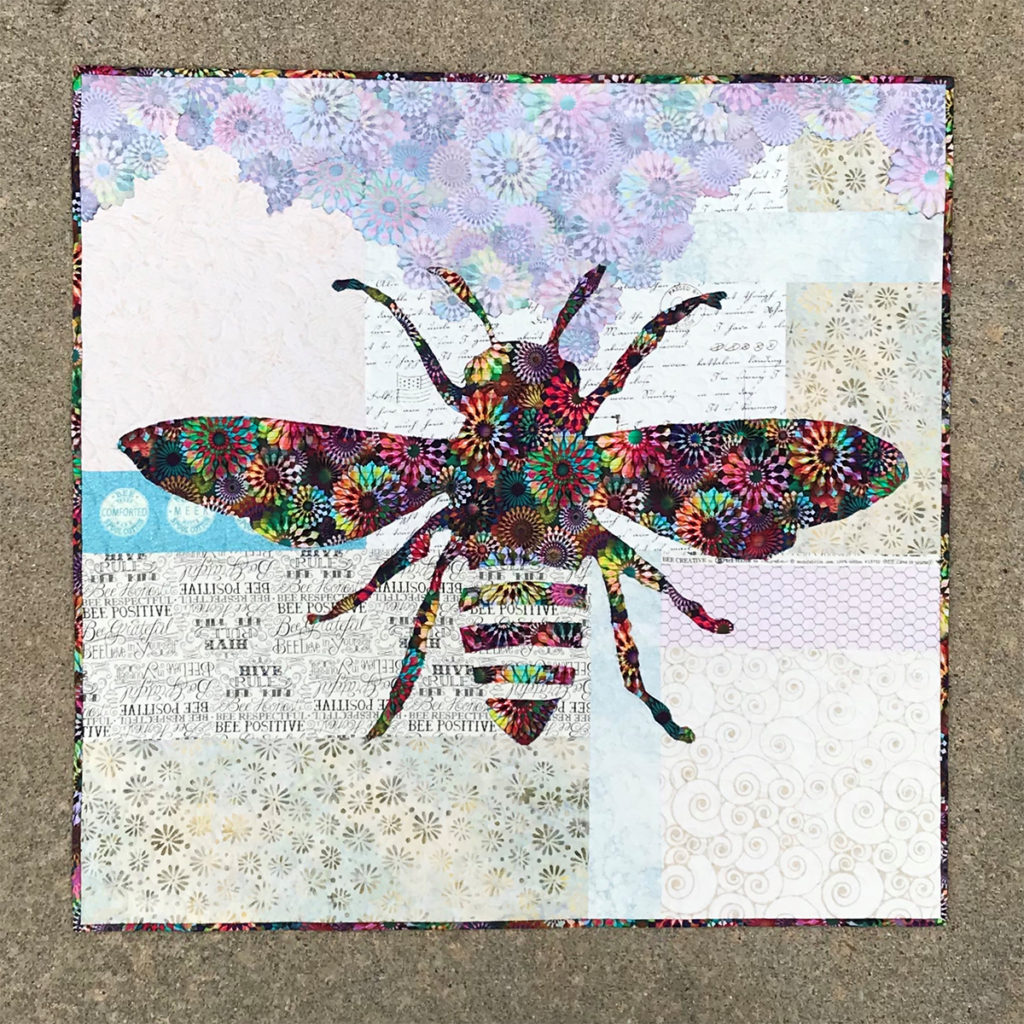
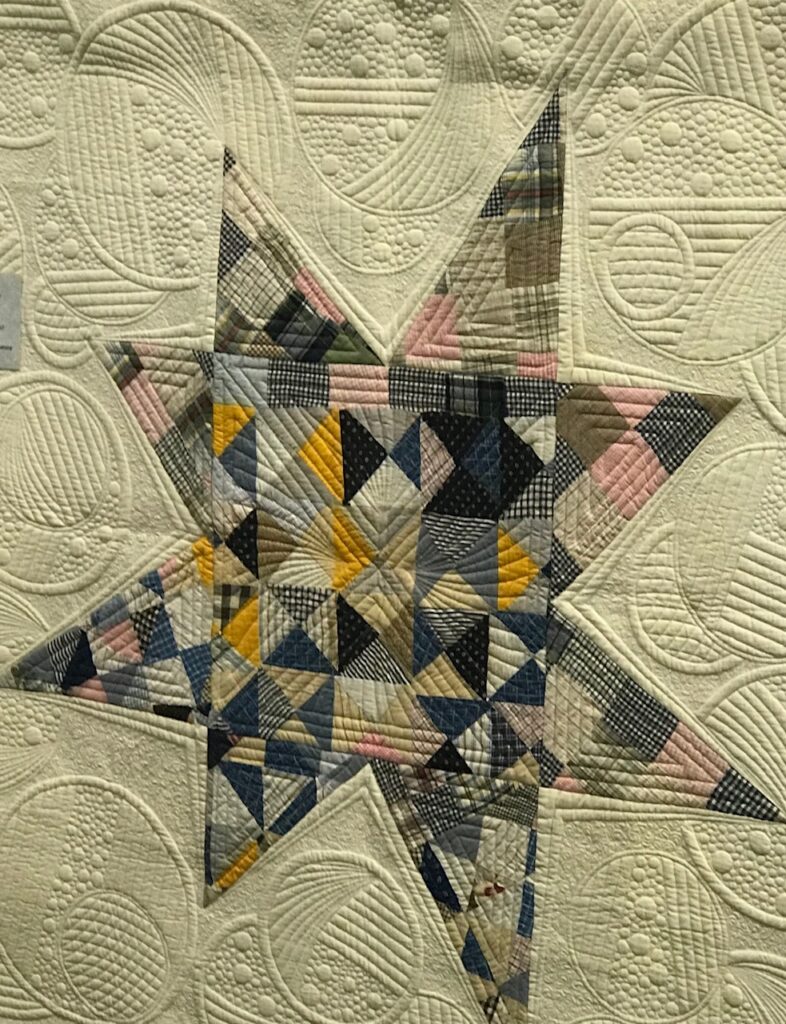
Below is Homespun, quilted by Donna Ferrill James. The wonky star was made from a worn quilt with lots of various designs in it. Mary was able to salvage parts by hand-piecing the star points. She used other workable parts as part of the backing.

Homespun by Mary W. Kerr, quilted by Donna Ferrill James

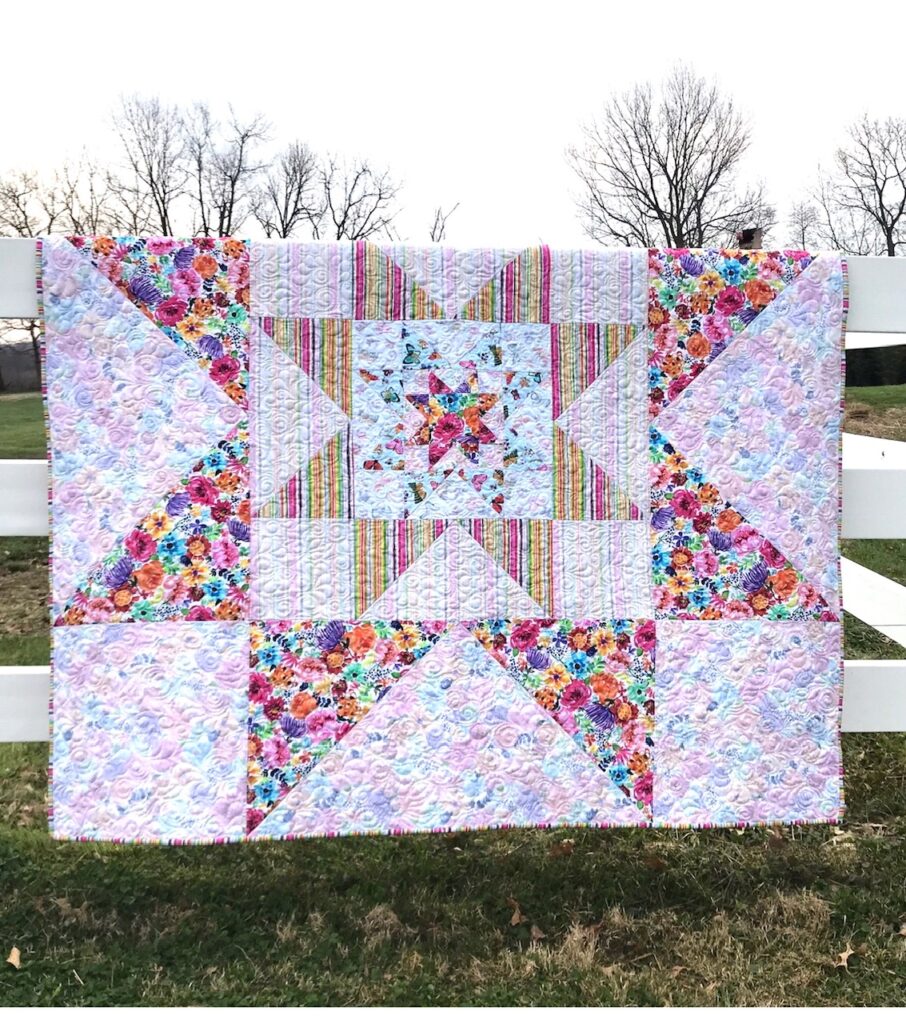
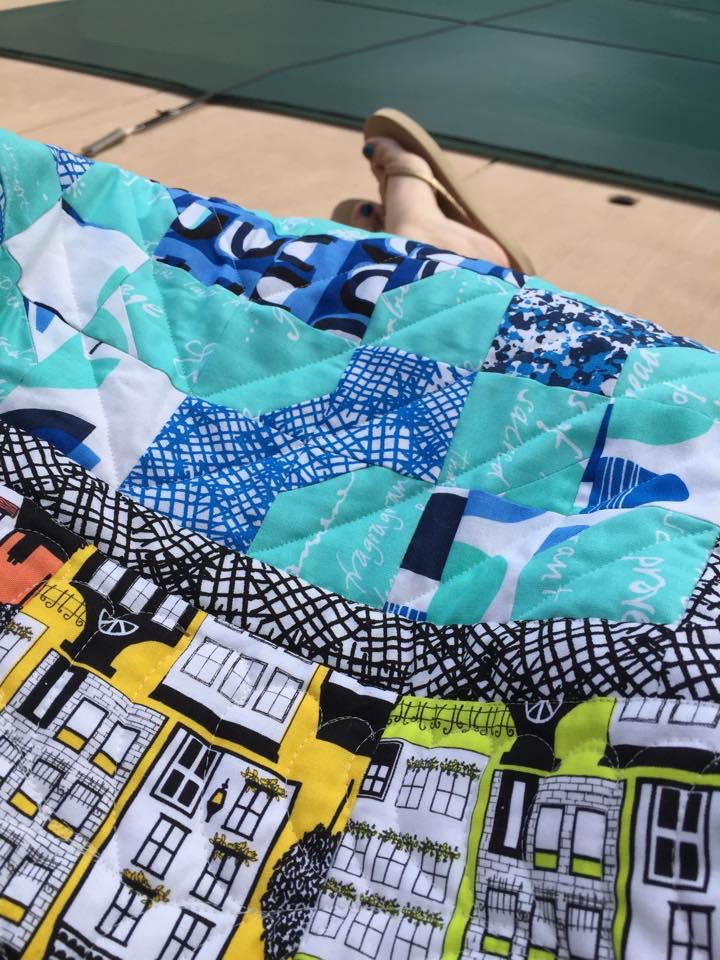
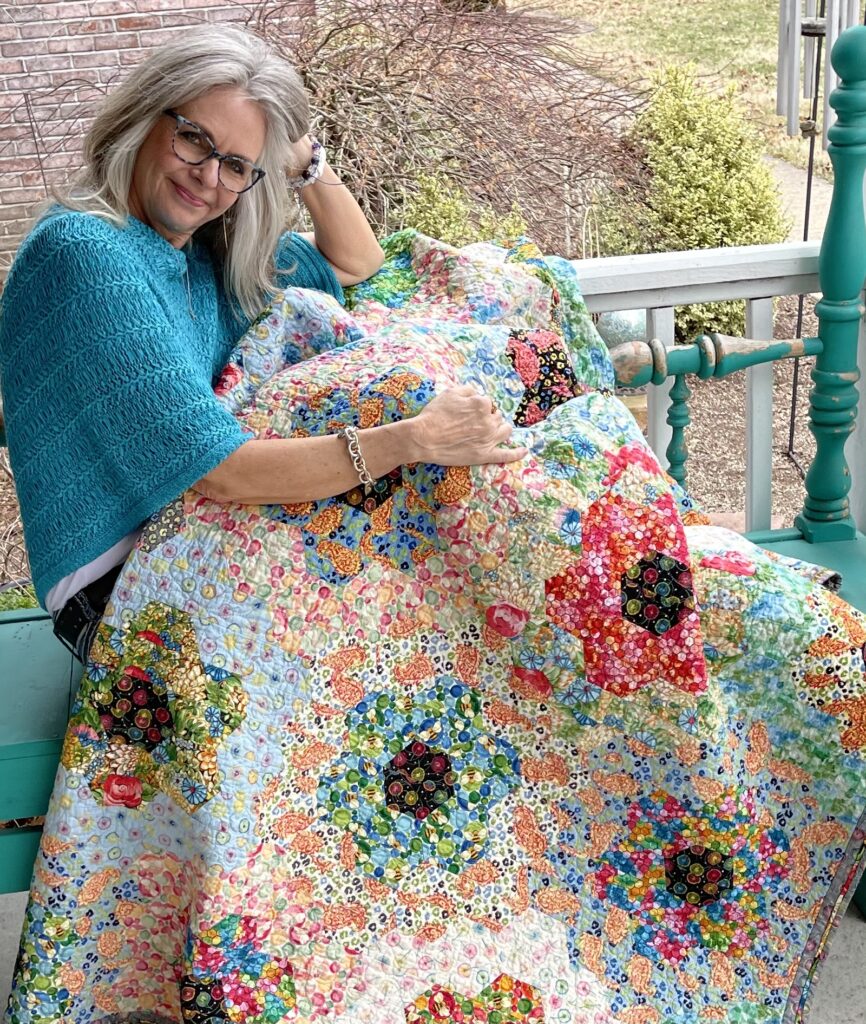
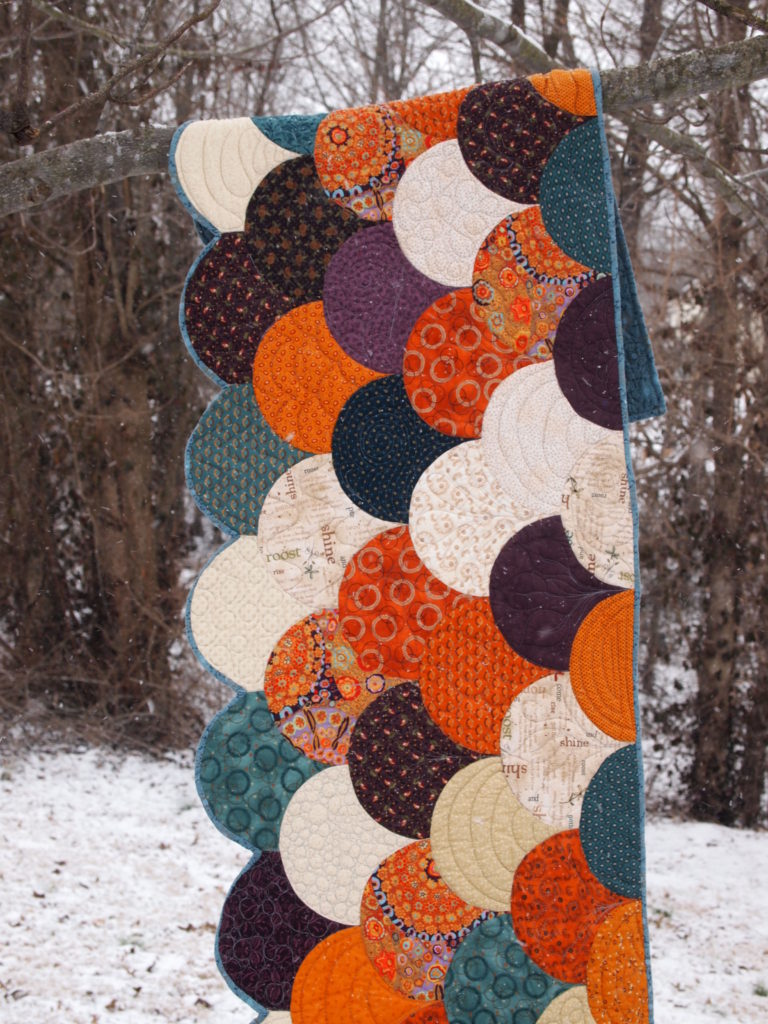
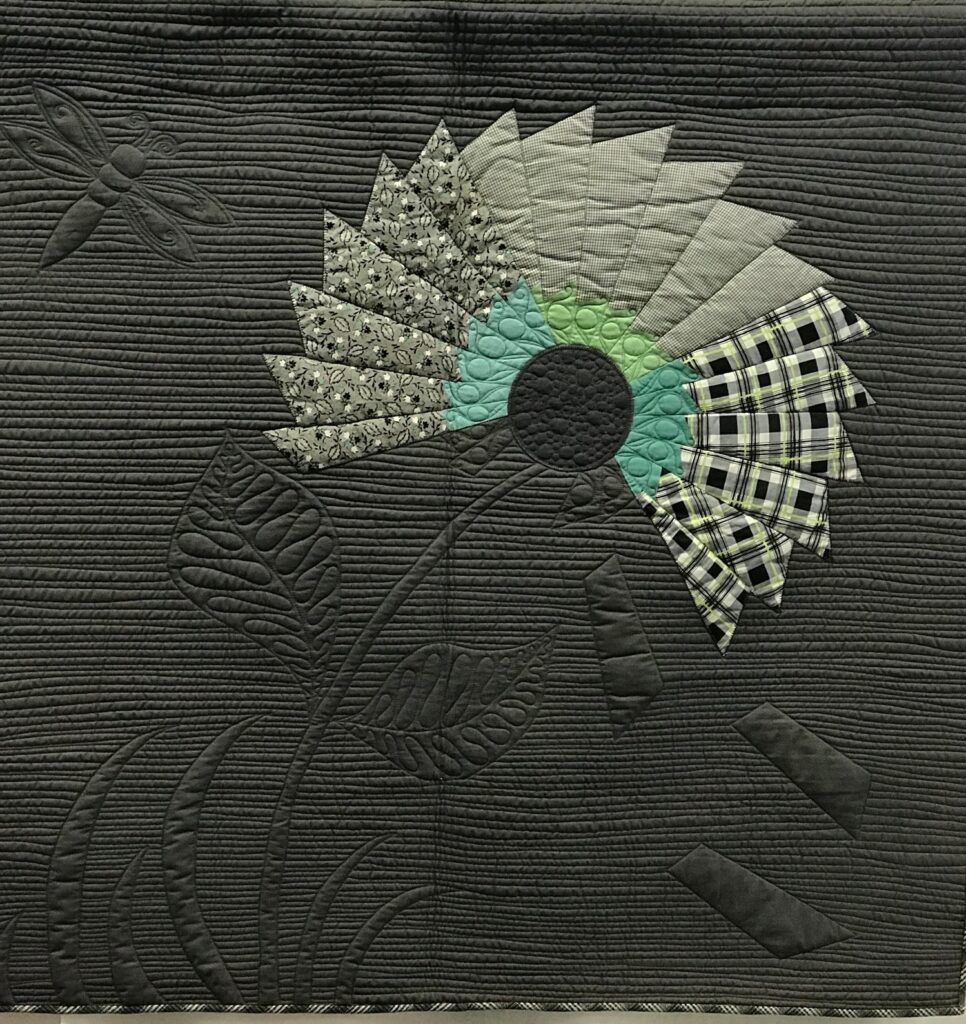
Similarly, Fan Flower, shown below, is a combination of individual vintage blocks made modern through quilting. Vicki Maloney quilted this piece. Mary purchased three fan blocks at an antiques shop and came up with the flower concept. Vicki worked her magic using those three blocks!

Fan Flower by Mary W. Kerr, quilted by Vicki Maloney

Additionally, I like how Mary combines the old with the new. Not only does she combine old blocks with new fabric, but also the color selections and techniques, too.

With this in mind, I recall having a book about how to combine hand and machine quilting. Seems like another interesting concept to explore!

See Mary W. Kerr’s work and get her book Twisted HERE.

Maybe I should take a look at it and see where it takes me. Quilt show aren’t just about prizes, ribbons, and vendors, are they?

Without a doubt, quilt shows are about inspiration, aspirations, goals, achievements, sparking ideas…and happiness.

Learn more about Kate’s Bouquet HERE.

Enjoy your quilting journey!

And…quilt by the light of the moon.

It certainly is a wonderful life when you can dance by the light of the moon.

This bison quilt makes me want to dance by the light of the moon because I couldn’t help singing along with characters George and Mary from It’s a Wonderful Life with those very words!

Sharing a quilt pattern is ALWAYS wonderful! Learn about this unique way to use both sides of fabric and the story behind this design.

The quilt, Buffalo Moon, is made with both sides of a light focus fabric on a starry, night-time background!

This Buffalo Moon quilt is a creation that has a lot of meaning for me – which is interesting since I have never lived “where buffalo roam”!

We enjoyed a visit to South Dakota for the first time the summer before I designed this quilt. Our youngest daughter was playing the role of Laurie in OKLAHOMA! at The Black Hills Playhouse in Custer, South Dakota. See South Dakota Quilts & More , OKLAHOMA! Backroads in South Dakota, and Quilting – Dakota Style.

Image of Bison
The bison were aplenty as we first entered the park!
Image of Final Show Scene
OKLAHOMA! at the Black Hills Playhouse

Buffalo Moon is made using BOTH sides of a fabulous focus fabric (say that three times fast!) on a scrappy, nighttime background. Spotting the bison roaming the Black Hills was an incredible experience. Having also learned about the Legend of the White Buffalo, saying YES to this focus fabric was easy! Unlike most of my other patterns, the difference in value between the front and reverse of the focus fabric are subtle, but still noticeable. This motif that reads as moon craters makes one want to dance by the light of the moon! Choosing dark background fabrics was a change of pace from my previous designs and a lot of fun!

Notice the ombre trees, the twinkling stars and the barbed wire fence fabrics?

Image of Black Hills Playhouse

We got a second round in bison country the following season, when Jacq played Annelle in Steel Magnolias and, one of her bucket list roles,…Sophie in Mamma Mia!

Needless to say, she was quite excited to be able to work again in such a beautiful place–but, even more, she was very happy to be able to work at what she loved to do.

My husband and I watched both of our girls struggle to work at what is their passion – and wondered at times where they got such courage. Yes, I make jokes that we let them play too much dress up and not do enough science fair projects, but truly I am glad they had the will to give it a whirl…and, in this case, go where the buffalo roam.

Jacq as Violet Bick in It’s a Wonderful Life

Buffalo gals won’t you come out tonight…

Image of Turtle Quilt
Dakota Quilt Pattern
Image of Bison Skull Quilt
Tanka Quilt Pattern

Reach for the stars…lasso the moon, or

…maybe just dance by the light of the moon.

#usebothsides

Totally Cool Quilting Tools

Estimated reading time: 4 minutes

I learned about some totally cool quilting tools at quilt retreat – thanks to friends who like to share!

For the first year EVER, I had my retreat projects planned, cut, packed, and ready-to-go to retreat one whole month before we left. What I didn’t plan for were some unexpected opportunities to pop up! I had not brought two totally cool quilting tools that became highly necessary. The new opportunities took priority over all that great planning of mine! But, who cares!

I didn’t even get my projects out of their neat, organized cases!

Me, under duress

First, you can see the outcome of these opportunities in the following link:

One Block Quilts

Next, in spite of all my planning, I wasn’t prepared!

While shopping for fabric one day, Justin (Hancock’s of Paducah), who understood the concept of using both beautiful sides of fabric, suggested we collaborate on some quilts!

Image of Hancock's of Paducah sign

While I was super excited about this opportunity, I hadn’t brought the right rulers to do the tasks at hand. Back at the cabin and with only a few days to vet my ideas, this led me to ask (frantically), “Does anybody have a squaring ruler?”

The Tucker Trimmer ruler became my new best friend!

These new projects included lots of half-square triangles, quarter-square triangles, and flying geese. I quickly fell in love with this ruler! Thank you, friend, Nancy, for introducing me to this trusted sewing tool! Click HERE or on the picture below to see more of Deb Tucker’s tools.

Image of Ruler on Block
Notice I #usebothsides of the fabric in this block?

Here’s another view of the ruler.

Image of quilting tool

The second tool I find indispensable I borrowed from friend.

Retreat roomie, Peggy introduced me to the LEDGLE Rechargeable LED Book Light.

Image of Quilting Tool
LED Light

What makes it so great for me are the re-positionable arms which let you guide the light to any angle. It rests around your neck so it is hands-free and perfect for hand-stitching in a dimly lit room. It also works great for reading in bed or even walking back from the neighbors or feeding the dogs in the dark! You set the light to shine where you want it and it stays until you move it. And best of all, I’ve used mine every day for more than a week and I still haven’t charged it once! Click HERE for link to book light.

To conclude, these two totally cool quilting tools saved my retreat and collaborate on two new quilt patterns with Hancock’s of Paducah!

Popular Vintage Machine Quilt

Estimated reading time: 3 minutes

Aria ahr-ee-uh quickly became a best-seller! She’s is a quilt pattern for any vintage machine lover!

Arias evolved from simple melodies in the 14th century and became a means to tell a story in a more emotional way, allowing a musicians (and later, vocalists) to display their talent. Arias are mostly associated with opera today. Aria is a good name for this vintage machine singer!

Image of Quilt Hanging Outsides

So why call this vintage machine pattern Aria? Take a look at her…she’s definitely a singer!

First, you should know that I haven’t always known what an aria was. And, had my oldest daughter not studied opera, I might still be in the dark. Because she began learning arias in high school, I soon learned the definition. Here she is as a senior at Eastman School of Music, singing “Emily’s Aria” from the opera, Our Town by Ned Rorem.

Here I was in Rochester, NY, on an unusually warm, sunny day, binding her graduation bow-tie quilt made with a fabric line called…wait for it…Our Town!

While the traditionalist might cringe at the thought, fun things are happening with featherweight machines. Tables and inserts, custom carry cases, and bright new paint jobs are indicators that these little work-horses will be around awhile.

As I mentioned HERE, I’d love to someday own a colorful featherweight. Here’s a Tula Pink quilt version until “some day” arrives!

Image of Pink Sewing Machine

#usebothsides of one focus fabric for the machine, binding, bunting (reverse), and scissors and thimble (both reverse). Choose fun, scrappy background fabrics and accent strips – all the while learning the nuances of value! (Click here for more about value.)

Shop for Aria and all the #usebothsides patterns at www.etsy.com/shop/CreativeBeeStudios.

Inspired Quilters Inspire

A couple of weeks ago I had the opportunity to share my quilting journey with a group of women whose enthusiasm for quilting was truly inspiring to me.

Image of Inspired Quilters Guild
Inspired Quilters of Warrensburg, Missouri

The Inspired Quilters of Warrensburg, Missouri invited me to speak during their guild meeting. It was a cold, wet, and somewhat icy night. I expected a lower turnout of members due to the weather. That was my first surprise.

One of the interesting things I see when speaking to quilt guilds is the uniqueness of each group.

Image of Guild Presentation

As quilters notably are, everyone was welcoming and helpful – helping my friend and me carry in 50 quilts, bins of patterns and fabric, and set up the power point.

After the presentation, Nancy and were overwhelmed by the enthusiastic quilters who lined up, waiting to purchase patterns and kits. It’s so fun to see people excited about something you’ve designed – and it is quite humbling.

Image of Presentation with Something's Brewing quilt.

What I noticed next, while Nancy and I spent the next hour repacking quilts and patterns, was how excited and involved the quilters were in their guild meeting. I was wishing I could sit and watch, especially when it came time for Show and Tell. It seemed like each quilter did more than showed her quilt, she told the story behind her project – who or what it was for, how it came about…the details that make a quilt more than just a quilt.

These quilters truly inspire me – to tell the details, to let people know the stories behind the quilts.

Isn’t that what it’s all about? Whether the quilts we make are for special people in our lives, for hurting people we don’t even know, for veterans and service members to be honored, or even for learning something new alongside friends – it’s the people in the story that make quilting worthwhile.

A heartfelt thanks to the quilters in Warrensburg for sharing their quilting journey with me!

Floating Flower Garden

A floating flower garden is a queen’s palace for sure!

The Floating Flower Garden quilt is a modern take on a classic quilt.

What’s a better spot for a creative queen bee than this lovely palace quilt?

Floating Flower Garden

Image of queen's palace quilt
Floating Flower Garden Quilt by Karla Kiefner

First, this quilt began with fat quarter bundles from one fabric line. It was one of those fabric purchases without any planning or direction.

In addition, I was certain I wanted to use both beautiful sides of this fabric line.

How to use both sides for a classic quilt design?

Next, I found a tool for making half-hexagons. Using the Hex and More ruler and lots of 2.5 ” strips, I made lots of half-hexagon pieces.

Image of Karla holding quilt

Add to that, a non-traditional method for making this floating flower garden.

Yet, I still wasn’t sure where this quilt was headed – or if it would work! For months, I arranged and re-arranged the hexagons. In addition to changing the placement of color, I also played with the values by turning some fabrics to their REVERSE side. Read The Tricky Traits of Value.

Design wall to the rescue.

Using a design wall helped me figure this baby out in a number of ways. Most importantly it allowed me to take good photos of this large quilt.

Image of Floating Flower Garden indoors.
Perfect place for the turn table.

Black and white photos galore!

Just as I instruct students in classes and workshops, always take black and white photos to check your values. Color can fool you – and it tried to fool me with this quilt!

My goal was to create a blended quilt version (see Blended Quilts book) of the classic Grandmother’s Flower Garden. I tried many combinations, but the look really came together when I started to use the reverse side of the fabrics for the outer flower rings.

Image of Karla with Floating Flower Garden

Each black center and first ring are the front of the fabric. I could have excluded the lightest fabric to make the changes in value more apparent, but again, I was aiming for a more subtle approach.

Using both sides of fabric provides a soft difference to the values and makes a quilt sparkle!

I’m happy to say that this quilt one a coveted ribbon in my guild’s quilt show!

Shop more than 50 patterns that use BOTH beautiful sides!

Enjoy YOUR quilting journey!

Quilt Retreat Take-Alongs

Estimated reading time: 4 minutes

Start your packing for quilt retreat!

It’s quilt retreat and time to take your sewing on the road!

First, for quilters to go through all the trouble of taking down one work station to pack to all up, travel, and set it up somewhere else means it MUST be a lot of fun! Whether you go for the social time, productivity, shopping or a combination, making the launch from home sewing to retreat sewing can be easy!

Keep it all in one spot.

I have a friend who keep duplicates of all sewing supplies. Of course, that is the ultimate way to pack and travel. But if space and budget don’t allow for duplicates, try using a central command center.

Image of Tool Holder

Find a organizer that works at home and away.

The one I use, pictured above holds just about all the little tools and gadgets I need for retreat. I can even store my mini iron in the center section.

I tend to take a lot of items on quilt retreat because I want to pack (no pun intended) everything I can into those lovely few days. Overall, I like to enjoy all the aspects of a good retreat which include laughter, fabric shopping, relaxation time, yummy food, reading, movies, music, and walks, I’m still a high production type of quilter.

No sense spending time looking for supplies.

Whether in my studio or on the road I need to see what I’ve got and know where to find it.

Below is a very unofficial list of some of the things I take on retreat. I hope it helps you get ready for your next adventure of quilting on the road.

  • Sewing machine (with cord, pedal, extra light bulb, bobbins, and attachments)
  • Table
  • Extra lighting
  • Projects, preferably pre-cut
  • Felt-backed table cloth for make-shift design wall
  • Other supplies such as seam ripper, rotary cutter, blades, rulers, and cutting mat.
  • Iron and pressing mat or board and pressing spray.
  • Extension cords and electrical strips.
  • Personal items, including clothes, usually get packed last for me! You might consider walking shoes, rice bag for sore shoulders, and pain relief.
  • Charger cords
  • Snacks

The rest of the story.

NOW for the REST of the story! Below I reveal everything that is actually in my spinning work station.

Image of Quilt Retreat Supplies

Without a doubt, I don’t use all of these items daily. But when at quilt retreat, it’s best to not be without! Starting at the top left, you see fusible web, pressing spray, mini iron, chain-piecing cutter, a very cute rice bag (made by my friend, Donna). Next you see various rotary blades, The Purple Thang, a gripper tool, bandages, rotary cutter, and two sizes of Karen K. Buckley scissors.

It is wise to clean out your organizer now and then!

Following that is a pre-cuts guide for fabric purchase emergencies, thumb tacks, pins, cord wrap, thread, Q-tips, battery, thread and button, needles, a plethora of markers and pencils, snipping scissors, and Fabric Fuse. Surprisingly, the next row starts with the back of something which apparently held batteries, a calculator, a guild directory, business cards, note pads, and another gripper tool. Lastly, there are clips for hanging design wall, True Grips (truly a favorite), and last, but not least, Martelli cutters (I am an ambidextrous cutter, so I use both left and right-handed ones).

Read more about retreats here at: One Sweet Retreat and Friendship, Laughter & Quilts, Oh My!  and Seven Projects from Quilt Retreat

Home or away, enjoy YOUR quilting journey!

Take One: Cool Tools for Quilters

Do you love quilting tools, gadgets, and gizmos? Once a month I’ll be featuring a new (to me) cool tool.

Here’s a new ruler I ran across a few months ago on my travels. I finally pulled it out and decided to learn how to use it.

It is called the “Quick Curve Ruler” by Sew Kind of Wonderful (click HERE)

I practiced with some scrap fabric, marked my ruler as indicated in the pattern directions, and off I went! It was fun to watch the curved piecing literally “come together”.

There are numerous quilt patterns available which use this ruler. Here’s the one I used. Stunning quilt, isn’t it? I love it when my brain can’t quite find one simple design, but jumps around to the various secondary patterns in a quilt.

Here’s my first try at a mix a fabrics. As you can see, I have a few bumbles for my first block, but it was fun to make! I do suggest using a fine marker to mark your ruler for better accuracy.

I think this quilt is now on my bucket list! What’s on your bucket list? Do you have a favorite specialty ruler?

See my Cross-over Quilting Tools (click HERE) post to learn about using the Brother Scan N Cut for quilting.

Shop Creative Bee Studios #usebothsides quilt patterns and kits HERE!

Designing Quilts with Panels

To the tune of “On the Cover of the Rolling Stones”, I feel like singing! At the close of 2018, I happened onto my pattern, “Holly”, featured on the cover of a Hoffman California Fabrics’ catalog!

It began with an email asking if I (along with four or five other designers) would like to try our hand at designing with a new Christmas line of fabric. It’s my understanding that other designers use digital fabric swatches and their computers to design patterns. But since I use BOTH sides of the fabric, I need the real thing!

Click HERE to see the Winter Projects 2019 Catalog by Hoffman California Fabrics.

We had a week for the deadline – but since I needed the fabric shipped to me and then I needed to ship the finished quilt back to California, I had less than that to design and make the quilt!

Frankly, I was in a hurry! Add to the mix that it was Thanksgiving weekend, I was driving six hours on Saturday, attending our daughter’s show, driving four on Sunday, and staying in a hotel (with terribly inadequate lighting) until Tuesday AND, until I could see and audition BOTH sides of the fabric, I had no idea if my idea would work!

Working with both sides of fabric means lots of value-checking. You can’t tell from the front of fabric if the reverse will work. Some fabrics have great reverses and some just don’t. Click HERE for “The Tricky Traits of Value”.

The Christmas tree panel is gorgeous on its own – who would want to cut that apart? I certainly wouldn’t cut it to make another tree. I was also pretty certain that other designers would be designing borders around the whole panel, so mine had to be different.

I started to focus on the fat-quarter panel they sent. I had received a whole box of fabric to choose from and I knew if I wanted to use this panel, I couldn’t just use one fat-quarter of it or even half of them- I needed to use the whole panel. After auditioning many combinations, I decided I could use the panel – BOTH sides of the panel!

So…once again, it all comes down to fabric values. In classes, I have quilters audition many background fabrics and take lots of black and white pictures to see how their background fabrics “play” with their focus fabric. The smaller accents strips are allowed to be a bit “louder”, but the larger pieces need to provide interest as opposed to distraction. So take a look at this picture of the panel. Lots of dark fabric, right? Really pretty fabric…but more darks than lights.

Now look at a close-up of the quilt. Do you recognize those fabrics? …same fat quarters from the panel – just using the other side! Most of the accents strips are made from the front side. The bows, bells, stripes, plaid, and Christmas words make this an exciting background for the Holly wreath. One of the fat-quarters had two stockings printed on it. I used the one on the wreath and I embroidered the second stocking for the quilt label.

Image of Quilt Close Up
See the candy canes made from the reverse stripe?
Image of Back of Quilt
You can see the quilting, the extra stocking as a label, and the prairie point hanging method here.

The wreath is made using fused holly leaf shapes from the Christmas tree panel. Being a digital print, the fabric has a sparkle of light to it, making the wreath sparkle as well.

You might notice I didn’t have time to take great pictures – and apparently I borrowed my husband’s house shoes that day!

Even the pieced binding is made from the fat-quarter panel!

This is a fun quilt to make and so easy to shop for if you use the two panels! While I have no official timeline, my guess is that these fabrics will be in shops by summer!

If you have Christmas yardage in your stash – you can use it! I wrote this pattern to work with the panels as shown OR using your own choices of fabrics. The same method applies to both – it’s all about the value!

Here’s how Holly look inside the catalog!

I designed Phoebee 2.0 using BOTH sides of Hoffman California Fabrics “Electric Garden” as the focus fabric -it’s available in shops now!

Image of Electric Garden

Shop all my patterns at my Etsy Shop: Creative Bee Studios (Click HERE)

Don’t miss out – subscribe below! Follow me on Facebook, Instagram, and Twitter and pin to your Pinterest boards, please!

Winter Quilts

I love nothing better than seeing quilts in nature! You’ve seen “Summer Quilting” (click HERE) to see quilts both poolside and on the beach), so I thought it’d be only fair to share some winter-themed quilts and a few with nature.

First up is a McKenna Ryan quilt pattern. I purchased the kit from Missouri Star Quilt Company several years ago – the year of the bear in our yard (Click HERE to read “It’s a Bear Out There” and see the markings). This bear was supposed to have a red cap and scarf, but I changed it up by using the wool from a sweater which was in my late mother-in-law’s stash. It makes the quilt more special for me and I feel I can keep the quilt on display throughout the winter.

Next is quilt is called Winter Blessings and was kit I purchased from Shabby Fabrics. It was so fast and easy to put together – I highly recommend their kits if that’s what you like. Everything was labeled and organized beautifully. It was kinda like a paint-by-number, only a lot more fun and waaaaay better outcome!

Image of Winter Quilt

The next photo shows just a bit of a quilt (with a Buttercup bomb) that I made long ago in my second-ever quilt class. It was supposed to be bed-size and I actually thought I would finish it my first day in class! I only got it to the throw-size stage (and not during that class), but it’s a favorite!

Here is my latest version of JOY Quilt Pattern. I used a Hoffman panel for the tree (front side) and gifts (reverse side) on a scrappy, snowy background. See all my patterns in my Etsy Shop HERE.

Image of JOY Quilt Hanging
JOY Quilt Pattern

Snow makes a lovely background for quilt photography.

Image of Bed Runner in Snow
Image of Quilt on Swing
This is a Bonnie Hunter Mystery Quilt called Grand Illusion.
Image of Water Colours Quilt in the snow.
Water Colours

Hope you are enjoying some warm stitching time during these short winter days.

« Older posts Newer posts »