Tag: Quilting Techniques (Page 1 of 3)

Valor Quilt Design – Creative Tools for Unique Quilts

Estimated reading time: 7 minutes

Each year our guild hosts a presentation of valor quilts. As one of three committee members organizing this event, I’ve had a front row view to some beautiful valor quilt design! Over the last ten years, our members and guests from the community have had the honor to present scores of gorgeous patriotic quilts to wonderful, humble, and grateful active duty military and veterans.

Valor Quilt Design – Making it personal.

Firstly, the variety of patterns, fabrics, and designs of these quilts make the special presentation very personal for each recipient, with no two quilts alike. In addition, a quick search online to find you lots of patterns designed specifically for this genre of quilts, with consideration of the sharp contrasts of the blues and reds with white – a common theme of these quilts.
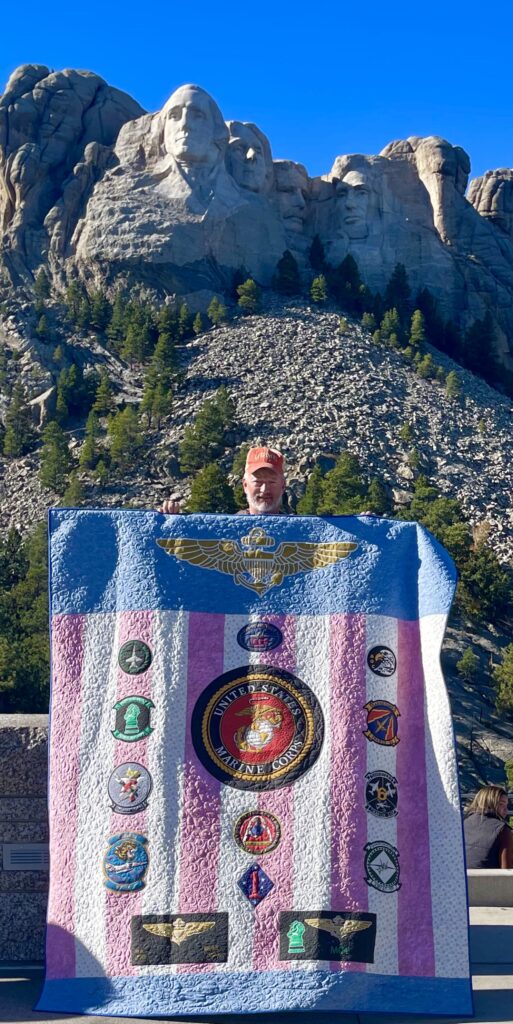
valor quilt design at mount rushmore
Lt. Col. (Retired) Matthew A. Kiefner, USMC

Why share this quilt?

The quilt I am sharing with you today was a labor of love. I bet you can relate. Oftentimes, when you make a quilt for someone you know really well, you are driven to make it truly special for them. That’s what this quilt is. It isn’t a show-quality quilt. It would not win any prizes for design or technique. However, I’m certain the content of the motifs on this Valor Quilt design touched my husband’s heart – and for that I am pleased.

Additionally, I’m sharing the process with you, my quilter friends, because I remember a big influence in my quilting journey was from one person, Tula Pink, saying two words. We were at a Fall Paducah Quilt Show, listening to her presentation about how she designs fabric. I wrote in my notes: Adobe Illustrator.

About a year later, I decided I wanted to learn fabric design. Consequently, had to go searching for that notebook for the two words I had written. I knew nothing about Illustrator, except that it is what Tula used.

Unusual Tools of the Quilting Trade

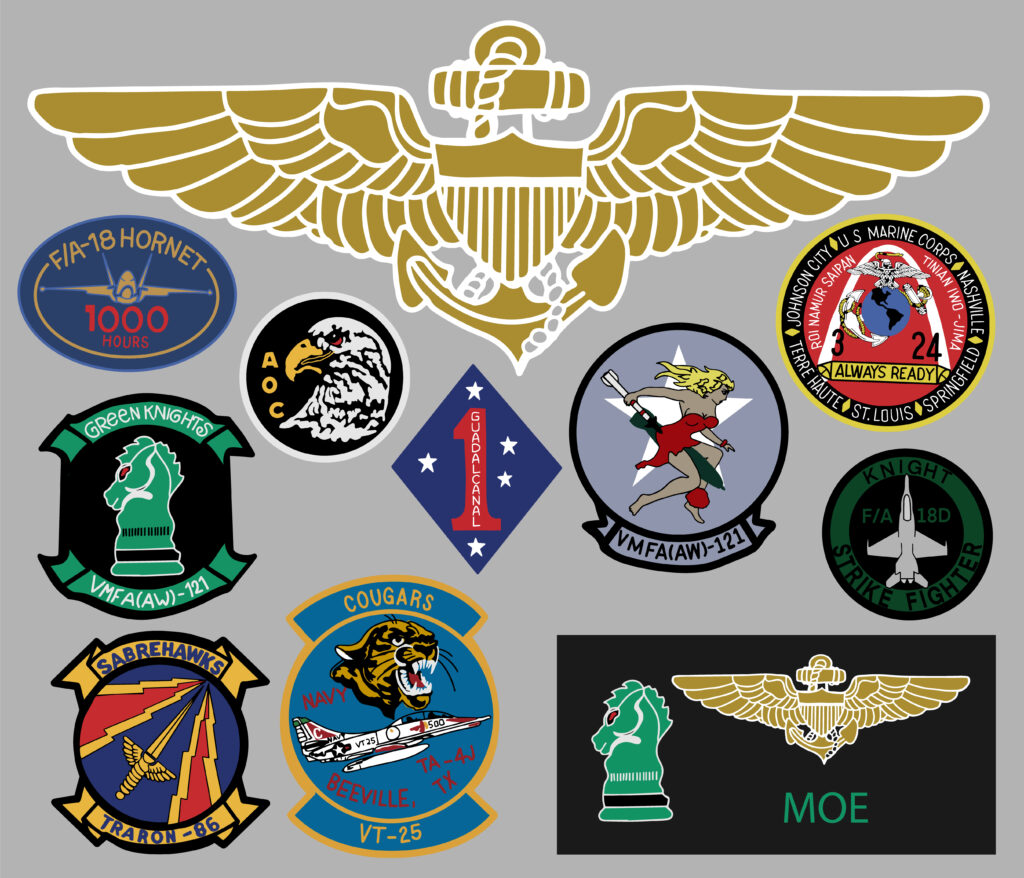
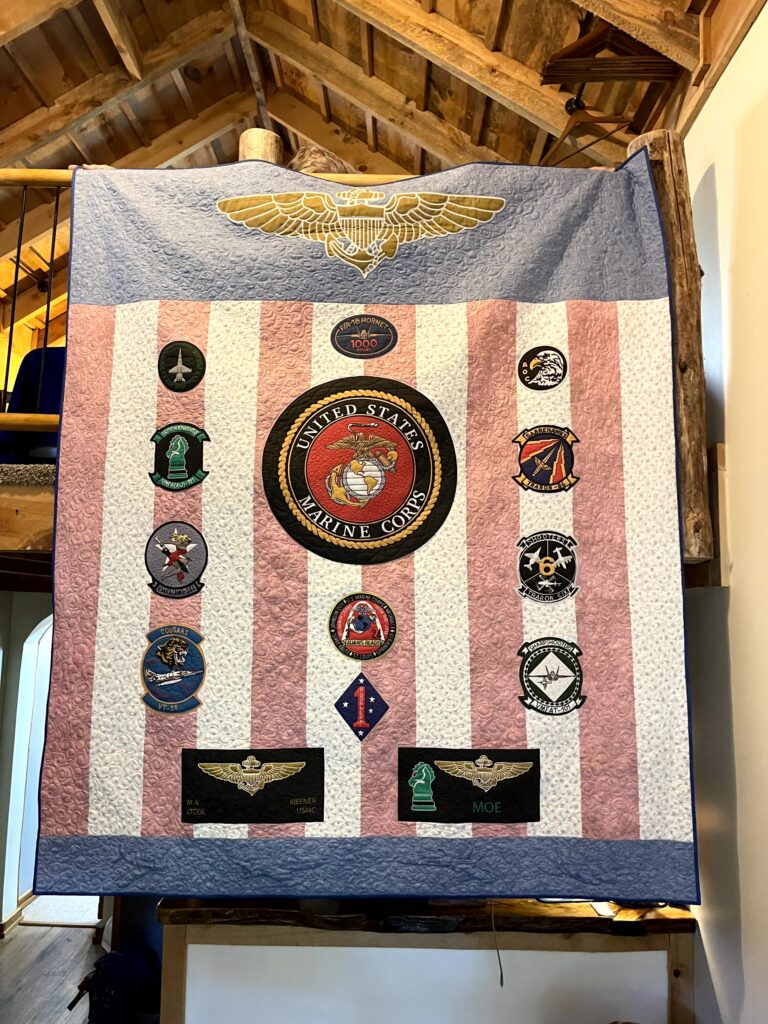
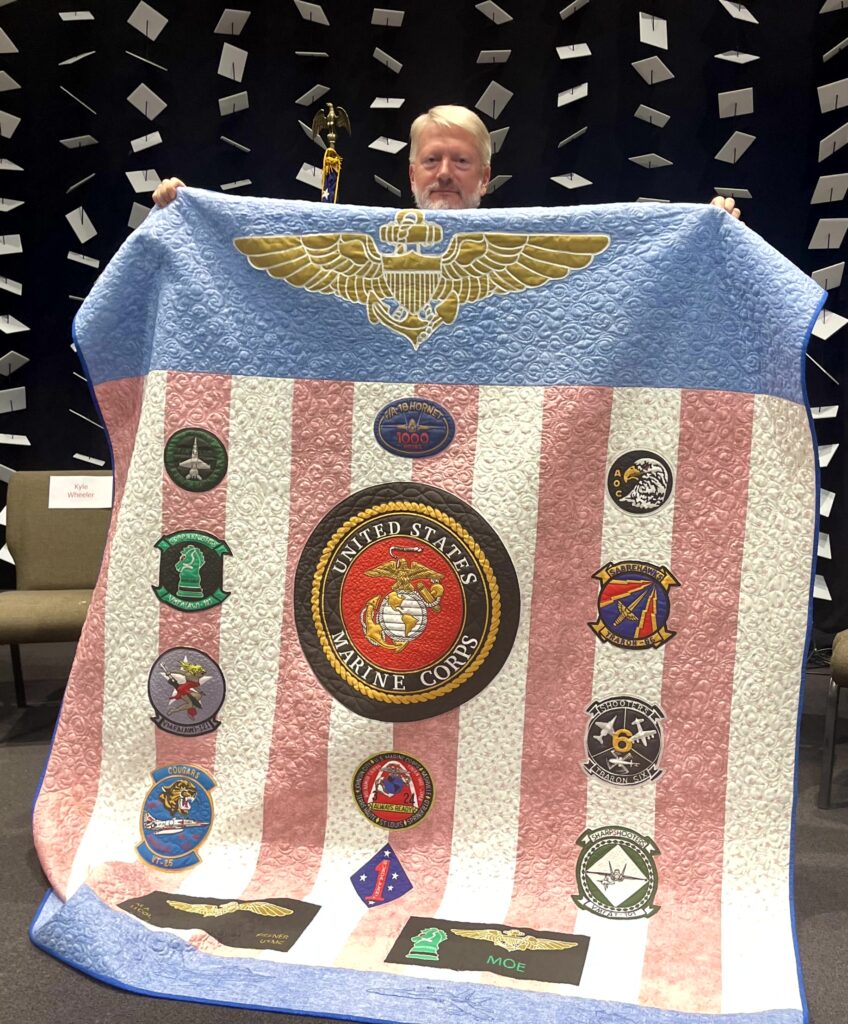
Briefly, let me explain this quilt. It is a simple patriotic background of vertical stripes of red and white. Across the top and bottom are two horizontal strips of blue. The true features of the quilts are the flight patches, flight suit name tags, the golden wings and USMC emblem appliqued onto the quilt top. Each of these symbols define my husband and his time in the Marine Corps, first as a pilot and later as a Forward Air Officer. I asked him for his patches and got to work.

VT-25 Patch

Step One – Trace the Elements

Fortunately, by this time I had learned enough about Illustrator to know that I needed to draw each individual element in order to layer them to look like a patch. I’ll use “Bombing Betty” as my example. The easiest way for me to do this was to use my iPad and a very cool and expensive drawing app called, “Procreate”.

I took a photo of each patch and began tracing the elements. As you can see on this patch there are different colors – beige for her legs, arms and face, red for her dress, etc. So I traced them all separately, based on their color and what layer they would be. For example, the background is grey, the white star is next, Betty’s left leg is behind the bomb, her dress is in front of it and her hair is on a layer on top of her face and so on.

Bombing Betty Patch

Keep in mind, I had no idea if this scheme of mine was going to work!

Next, Vectorize and Colorize with Illustrator

I developed each patch, one at a time. I sent each file via email to my computer where I opened it into Illustrator.

Undoubtedly, you may be wondering why I didn’t just take photos of the patches. Because the patches were between two to six inches in size, photos would have become pixilated (distorted blurry) when made very large.

However, vectors (which is what Illustrator is for) can be any size – even as large as the 22-inch Marine Corp Emblem in the center of the quilt and look as crisp as the four-inch patch. So I changed each element into a vector shape, then colored and layered them until they resembled the patch. I got approval for each patch from my husband as I went along.

Spoonflower to the Rescue!

Furthermore, all of this work was dependent upon the printing of the fabric. Having designed fabric for a few years now, I was relatively sure I could eventually get a good result, but I wasn’t sure how many printings it might take to get it right. So, my next step was export each patch as a high resolution photo and arrange them on two artboards, to mimic two yards of Cotton Poplin. I sent the files to Spoonflower and waited for the results.

YATZEE! BINGO! CORNER ON RYE! (a family favorite called PIT)
valor quilt design patches
The first artboard to send to Spoonflower. Notice all those details in the 3/24 patch above (with the Arch)!

Fusible Applique – the truly easy part!

The first printing was a success! Fortunately, once I received these two yards of fabric I could breathe a sigh of relief. Everything looked great. The color and vibrancy were spot-on. Next, I proceeded to make fusible applique out of each patch. I use a very lightweight fusible that quilts beautifully and is barely there. So you quilters know the rest of the story here…almost!

One More Valor Quilt Design Tool – Design Doodler

On the bottom blue strip of the background, I added outline embroidery of the aircraft my husband flew in the Marine Corps. I wanted to add this part of his story to the quilt, but not in a way that took away from the patches. So simple outlines in blue worked perfectly.
Matt at the cabin

Admittedly, I’d been wanting this software for two years, and this quilt was the perfect excuse! However, Design Doodler is SO easy to learn and SEW much fun, I recommend it to anyone with an iPad and an embroidery machine! You truly DOODLE and it works out the stitching! Notably, John Deere, Deere’s Embroidery Legacy, so it is a top-quality product. Check out the YouTube videos and start playing with the full app today!

Last But Not Least: VALUE!

You may have noticed that the background of this quilt is lighter than most patriotic fabrics on the market. Yep, you guessed it – I used the reverse for the entire background. I made the binding with the RIGHT side of the blue fabric. Had I used the right sides as the background, the patches may have gotten lost. And I wasn’t going to take that chance! I did make sure I found just the right red, so that it would read as red and not pink. Learn more about using both beautiful sides of fabric.

Be happy to learn and willing to fail.

Finally, I shared this valor quilt design adventure because I hope to remind each of you that you can never learn too many things, take too many notes, or try too many new things. You never know when it might all come together one day for something you never dreamed of doing! I’m glad my husband likes his quilt. That’s what’s most important.

matts valor quilt design
Love you, Hon!

Great Color Value Test for Fabrics

Home » Quilting Techniques

Estimated reading time: 5 minutes

Do you want to know the easiest (yet most dependable) way to do a color value test for BOTH sides of fabric? You’re in the right place!

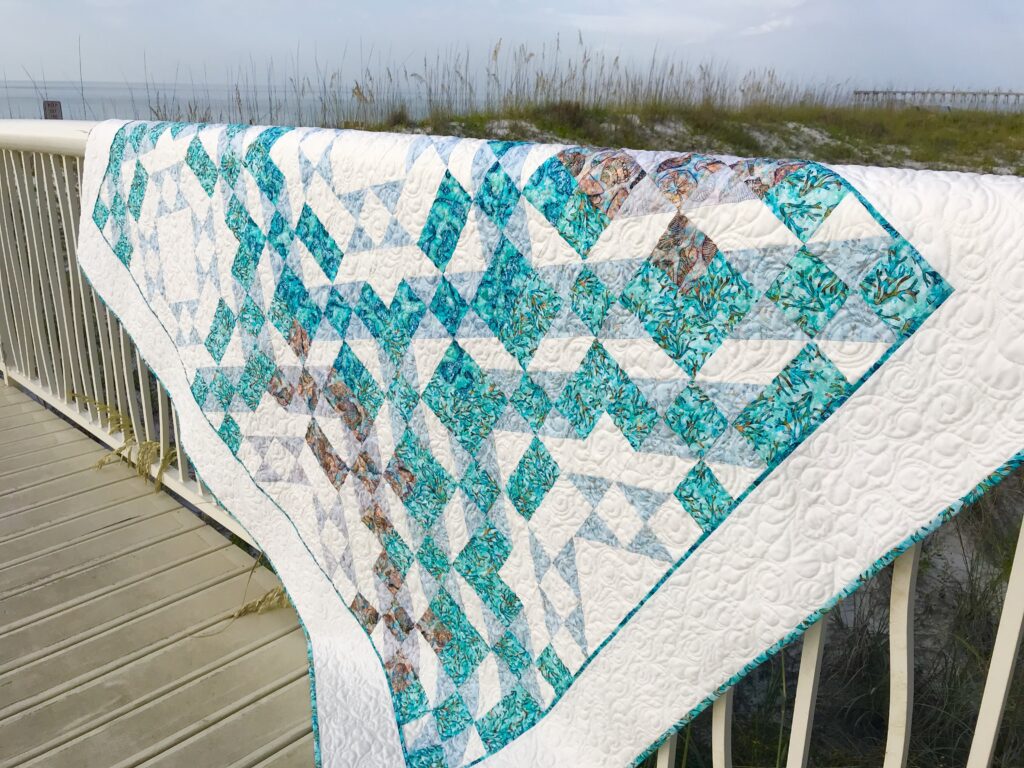
Treasures Quilt Pattern
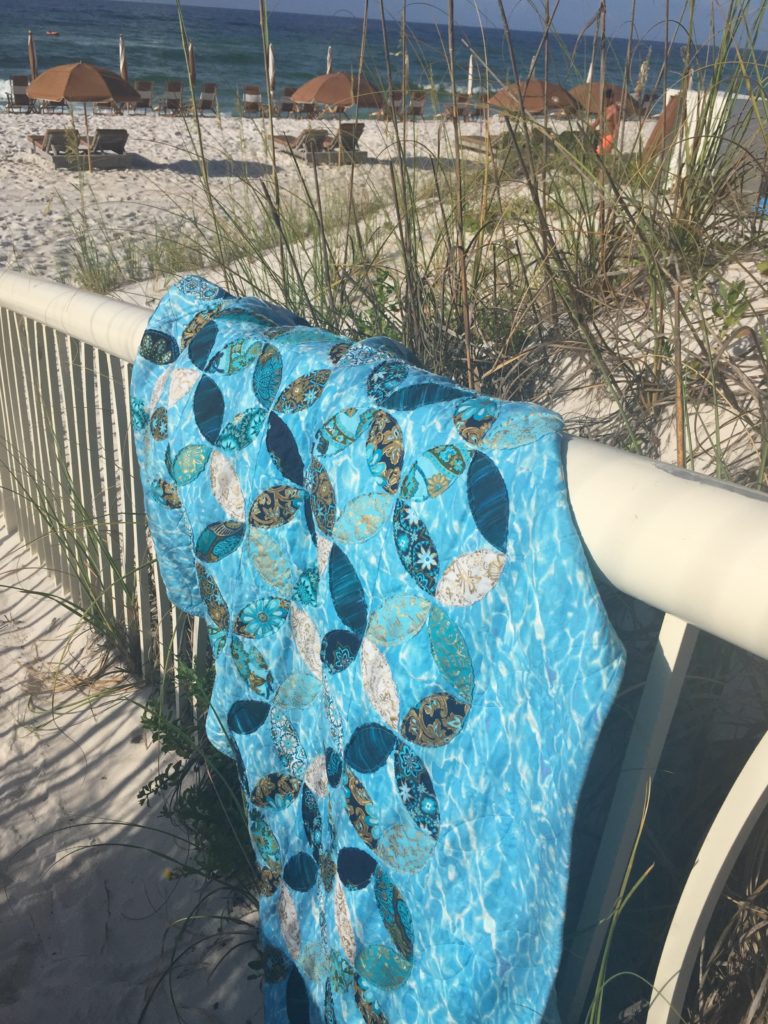
Treasures at the beach with hazy, natural lighting.

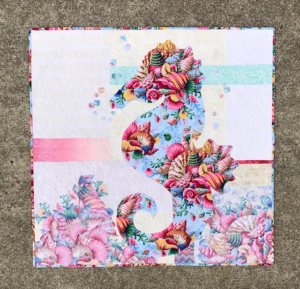
Let’s use the quilt above as an example. It’s call Treasures. This quilt is made with both sides of three fabrics with a soft white background fabric. Let’s pretend your are choosing fabrics for this quilt.
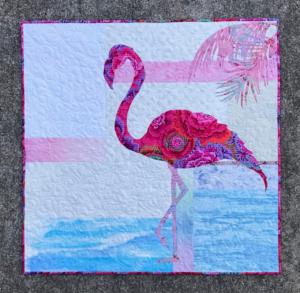
Both sides of each of the printed fabrics need auditioning.
However, not only will you audition both sides of each fabric with itself. You also need to test both sides of each fabric with each other and with your background fabric. Of course, this isn’t difficult. But some methods for a color value test are better than others. Here’s why.

The lighting plays a role.

The lighting conditions where you find the best fabric may be less than fantastical or even realistic. Inside lighting can drastically change the way a fabric looks. However, few fabric shops would be thrilled about us taking their fabric for an outing into natural sunlight.

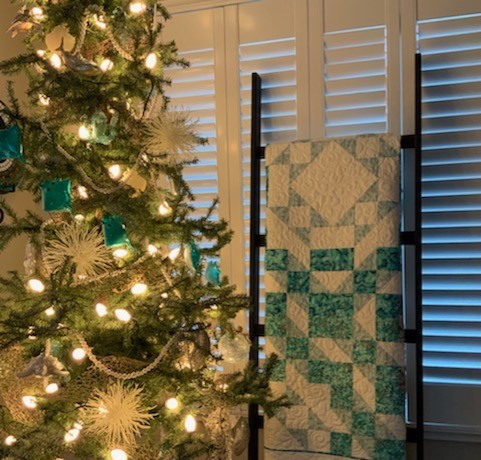
Image of Coastal Christmas Decorations
Treasures displayed with a coastal Christmas theme.

The space you have for testing fabrics makes a difference.

For instance, with some methods you need distance from your fabrics and they need to be hanging vertically on a design wall. Another alternative may be to use a ladder to get high enough so that you can look down to view them on a table or floor. This could be a bit awkward.

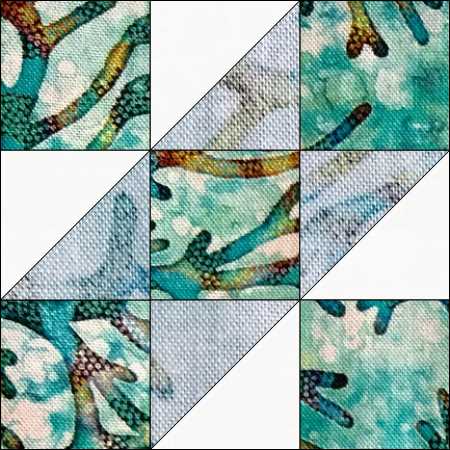
Image of Quilt Block showing difference in color value test
Treasures is made with two versions of the Contrary Wife block. This is the “dark” version.

Therefore, while the methods of using a “testing block”, a door “peep hole”, or simply squinting your eyes may work well enough in your home, they aren’t reliable or easy methods to use when you are shopping for fabrics at your local quilt shop.

Perhaps you want to just take a chance, buy the fabric, and test it at home…I’m just gonna say, “Noooooo!” I’ve tested hundreds of fabric values and I still get stumped sometimes! You can quote me on this:

Colors can be tricky, but VALUE tells the truth.

Karla Kiefner

(My workshop students know.)

What’s a quilter to do?

Pull out your phone. You likely keep it with you anyway. It’s your best tool for the color value test. Here’s why:

Limited space is okay when you use your phone camera.

Simply open your optional bolt of fabric enough to turn a neat corner down, revealing both sides of the fabric. Lay it flat on top of the display of bolts in front of you or on a nearby cutting table. Hold your phone above the bolt, centering and leveling it as best you can, extending your arm as high as possible. Now reach up with your other hand (or use your thumb if you are real good at this) to tap the button, taking a picture. Indeed, it make take a time or two to get a level photo, but you’ll soon get the hang of it.

You can crop your photo, if needed.

While it’s not totally necessary, I prefer to crop distractions out of my photos so that I’m not seeing my feet or surrounding fabrics. To do so, use the edit tool that appears when you are looking at your individual photo.

You can adjust for less-than-optimal lighting.

Next, take a look at your photo to see if the colors look similar to what your eyes see in real life. If not, use the edit function again to make the photo closer to what you see. It doesn’t have to be perfect. Each phone camera is different, so you’ll soon learn if you need to lighten your photos or change with coloring, or use your photo as is.

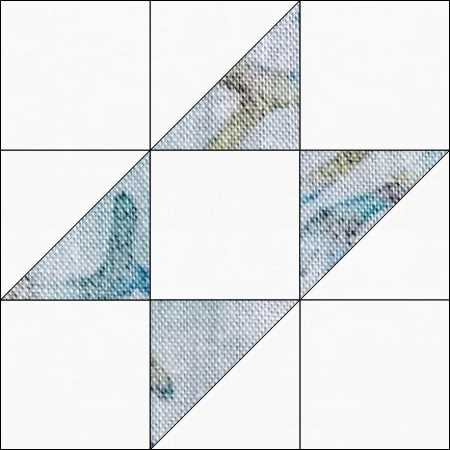
The “light” version of the Contrary Wife block. Notice that the REVERSE is used for the same elements (half-square triangles) in both blocks.

Finally, to do your color value test, change your photo to black and white!

You might have a setting called noir or mono. Choose either of these to remove the color from your photo. Now look at your fabric. For this quilt, you need there to be a significant difference between the RIGHT and the REVERSE sides. Unlike one of the applique patterns, you don’t need to test each element (like flowers) with other elements (like a vase) in your quilt. There simply needs to be a good contrast.

After auditioning the printed fabrics with the color value test, audition them WITH your background fabric.

Oftentimes, when you find a line of fabrics with beautiful REVERSE sides and the contrast you need, you can make quick work of choosing which ones you want in your quilt because the contrast is similar in them all. The three I used in my Treasures were like that.

Lastly, make sure your REVERSE is still a darker value than your background fabric. That’s usually quite easy. Exceptions to that may be if you are usually a digitally printed fabric with an unusually light REVERSE.

Auditioning fabrics with this color value test is SO easy! It makes choosing fabrics FUN.

Be sure to watch Treasures on YouTube and SUBSCRIBE!

Shop more than 50 quilt patterns that use both beautiful sides of fabric in my Etsy Shop!

Quilting Resolutions

Are UFOs, PIGS, or WIPs a part of your New Years Quilting Resolutions?

UnFinished Objects, Projects in Grocery Sacks, and Works in Progress can weigh a quilter down if she or he isn’t careful!

Maybe you could use this easy binding technique to get some of your projects out of the way and off your mind. The Lickety-Split Quilt Binding makes that last big step go quickly and looks smart!

When I have “git-er-done” quilts on my quilting resolutions list, this is my go-to technique. This technique provides a 2 1/4″ or a 2″ binding (for mini quilts) options for those quilts that don’t require a hand-turned binding. See this original binding method here – it finishes a larger than 2 1/2 inch size binding.

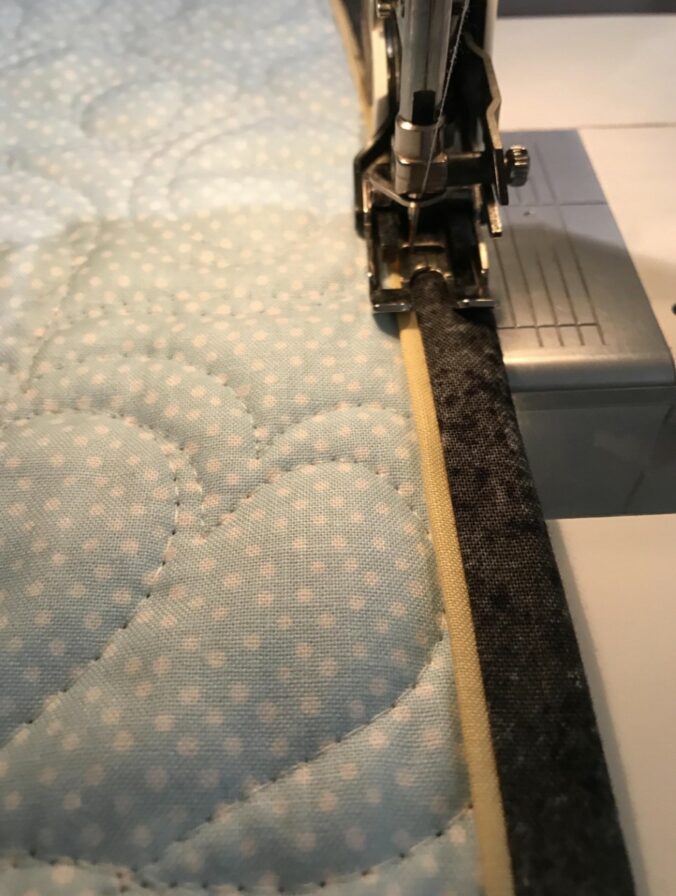
What’s nice about this machine stitched binding is that it gives your quilt a tiny burst of contrasting color between the quilt and the binding, appearing to be piping or a “micro-flange”. This also gives your needle a perfect nesting line for stitching on.

Image of Quilting Resolutions

How to:

2 1/4 ” binding: Cut main binding strips 1 1/4″ width and cut the accent strips (piping look) slightly larger at 1 1/2″ width.

2″ binding: Cut main binding strips 1 1/8″ width and cut the accent strips (piping look) slightly larger at 1 3/8″.

Simply cut your strips, sew them end to end and press like normal binding. Do this for both sets of strips. Then, with right sides together, sew your long strips, press the seam to the binding color.

With the seam facing down, align the edge of the binding along the edge of your quilt and stitch a scant 1/4 inch seam (or smaller than your final stitch seam. Lastly, using bobbin thread that matches your backing and upper thread to match the accent, turn your binding to the front of your quilt and stitch in the ditch between the two fabrics. You might use a seam guide and adjust your needle position to a comfortable spot.

And just like that – your binding is finished – Lickety Split!

Here’s to your health, happiness, and many finished quilts in 2020!

Need a new project? Shop more than 40 patterns at Creative Bee Studios that use BOTH beautiful sides of your fabric!

Quilt Fusible Web in a Pinch

Estimated reading time: 4 minutes

I first fell in love with light-weight fusible web when I used it with the Leaves Galore rulers.

Water Colours was made with Misty Fuse, a nearly weightless fusible web.

Image of Quilt with fusible web
Water Colours

Misty Fuse is a paperless fusible web.

First, Misty Fuse is paperless. Like a thin spiderweb of glue, it is nearly weightless. It is so soft, your machine won’t even know it is there! Neither will the loved ones who snuggle in your quilt.

However, because there is no paper on this fusible, I feared it couldn’t be used for tracing templates. I do a lots of fusible applique which require tracing templates. In fact, about half of the more than 50 quilt patterns I’ve designed use templates.

Soft Fuse is my favorite paper-backed product.

Soft Fuse is a paper-backed fusible web that is also very lightweight. Although any lightweight fusible will work, I recommend Soft Fuse in my classes and workshops. Even with large applique, your quilt feels softs to the touch. In addition, with a light pressing, it is possible to remove and re-position your applique if needed.

Transferring Designs with Mistyfuse Fusible Web

If you’re in a pinch and caught without your trusty paper-backed product, here’s what you can do!

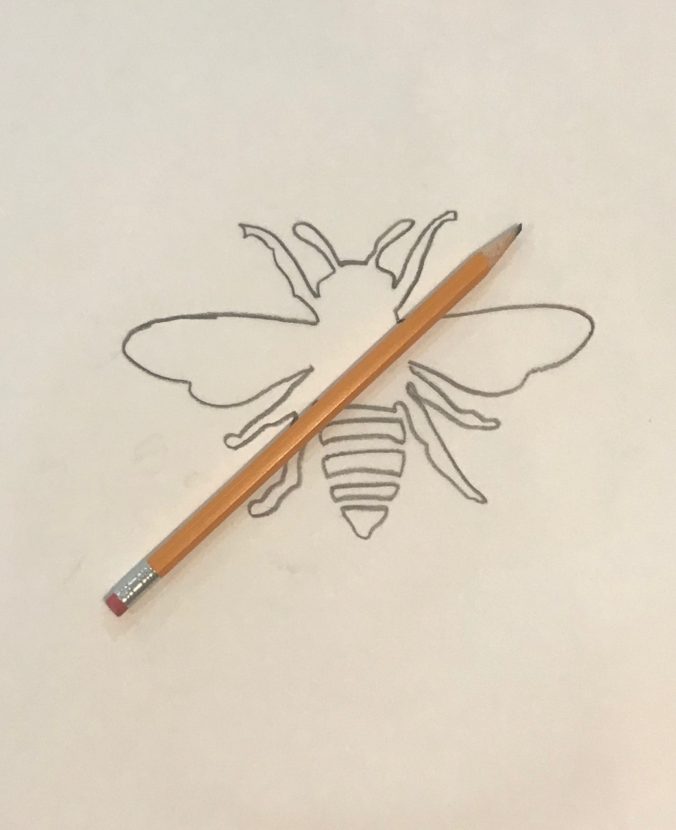
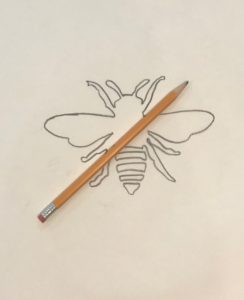
  • First, draw or trace your design with lead pencil on to parchment paper. You need to make your tracing dark. I use a #2 lead pencil.
  • Then cut a piece of Mistyfuse large enough to cover your design.
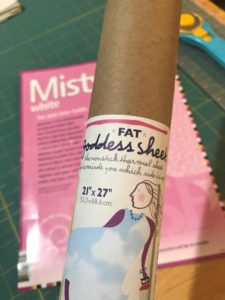
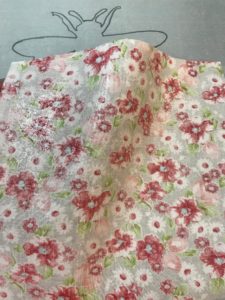
  • Using a protective sheet (I used a Goddess Sheet), press the Mistyfuse to the wrong side of your fabric. The Goddess Sheet gives the Mistyfuse a sheen so you can see where it is on your fabric.
  • After the fabric cools, place it with the fusible side up on a hard surface. Cover it with your, design side down, on your fabric and trace the design with a hard pointed object like a stylist tool.
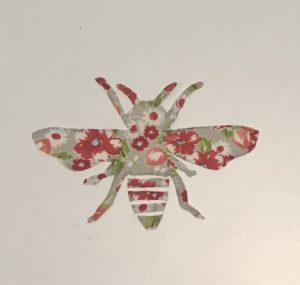
  • Cut your design on the lines.
Image of Bee Tracing for Fusible Web
Image of pressing sheet for fusible web
Mistyfuse on Fabric

Tips for use paperless fusible web.

Remember to trace onto the REVERSE side of your fabric (unless you are using BOTH beautiful sides).

The lead markings transfer much easier onto the Mistyfuse than they do directly onto fabric.  The finer your pencil, the finer your lines. A finer lead will give you a more precise drawing.

This is a great fusible alternative for tracing a template!!Image of Fabric Bee

Enjoy YOUR quilting journey!

Tips for Half-Square Blocks

Estimated reading time: 5 minutes

Half-square triangle blocks are easy to make.

However, these tips for half-square triangle blocks can really help the beginning quilter to understand how and why you need to square your units or blocks accurately. I know they helped me!

There are lots of techniques for making these blocks. This one describes how to make them individually versus mass-produced, in case you don’t need 200!

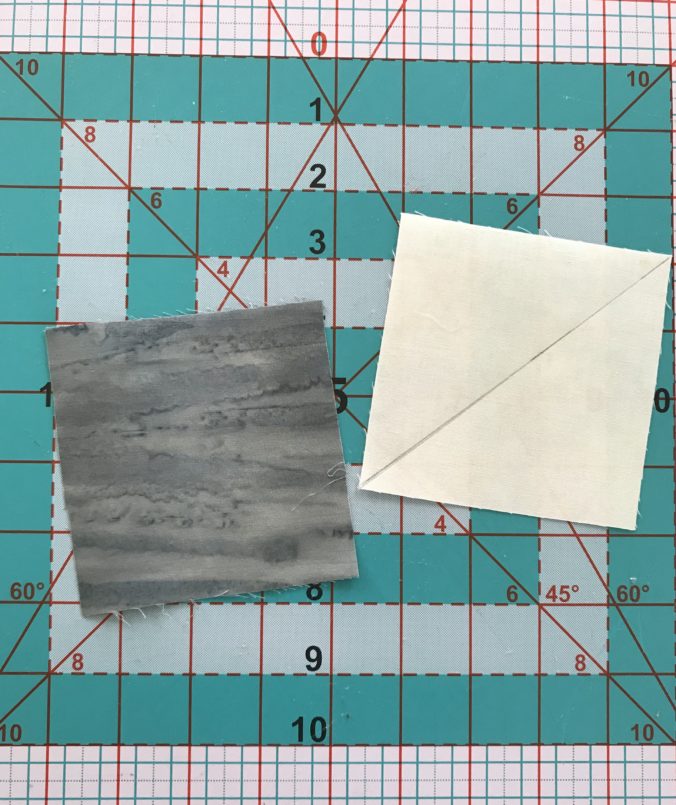
Start your half-square triangle block with two squares.

Image of Two Fabric Squares

For example, shown above are two 4-inch squares of fabric. One is a dark gray batik. The other is a soft white.

The block we need will be 3 1/2″ (before sewing to other units). The actual “finished” block size will be 3 inches. Therefore, above you see two 4-inch squares. Draw a diagonal line, corner to corner, on the reverse side of the lightest fabric.

Draw a diagonal line from corner to corner on the light square.

While it doesn’t really matter which fabric you choose, you’ll follow this line as a guide for stitching. Just make sure you can see your marking well.

Stitch on both sides of the marked line.

Layer your squares with the marked one on top; I’ll say “right sides together”. However, remember that if you are using BOTH beautiful sides of fabric in a half-square triangle block, you’ll want your “intended fronts together”. This means BOTH right sides will either be facing down or facing up.

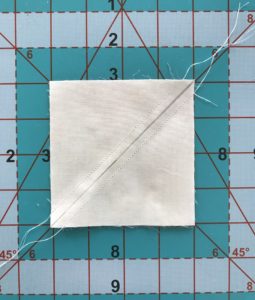
Next, stitch from corner to corner, 1/4 inch from the drawn line.

Image of Block with Stitching

Make great time by chain-stitching.

If you have lots of these units to make, try chain-stitching them. First, have your squares marked and paired, ready to stitch. Second, stitch on one side of the line on each set, without cutting threads in between. Thirdly, turn the string of them to repeat the stitching on the other side of the line.

Cut on the center line.

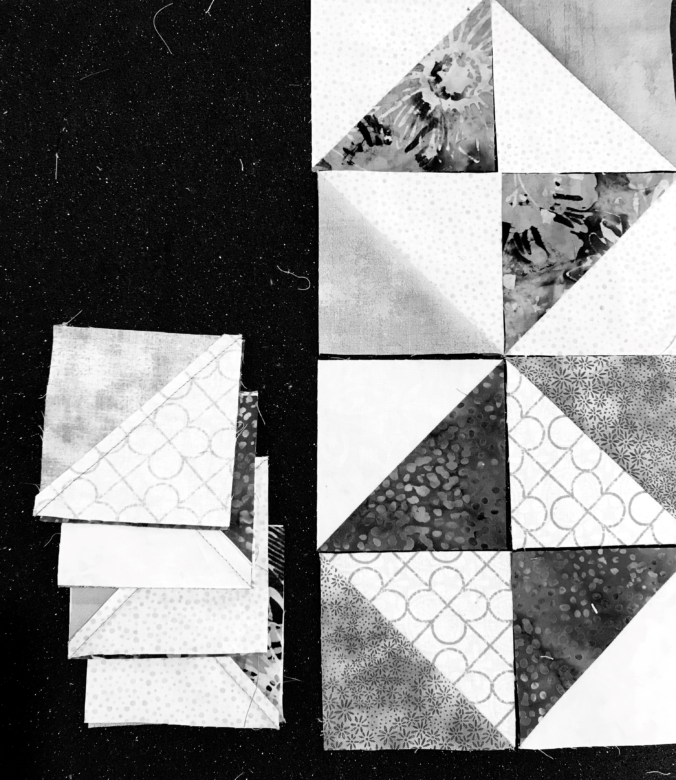
Separate the units by snipping the threads. See “Two Purple Tools for Quilting” for a great cutting tool. Press to the darker fabric. The block should be larger than 3 1/2 inches and have threads and tails (or ears) on them as shown below.

Image of Block and Ruler

Use a squaring ruler with a 45 degree line.

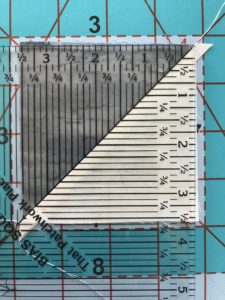
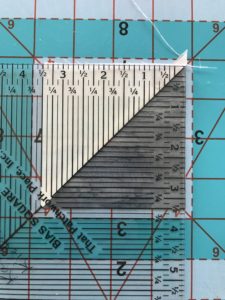
Using any ruler with a 45-degree line, place that line along the diagonal seam of your block and so that the over-all size after you trim the first two sides is still slightly larger than 3 1/2″. Notice the extra fabric outside of the 3 1/2″ marks?

Don’t trim the first two sides at the 3 1/2 inch mark.

Trim the first two sides slightly larger than 3 1/2 inches. This will allow you to get the most accurate finished unit with a perfectly aligned diagonal seam.

Image of Last Cut for Block

Next, spin your half-square triangle block around and line up the trimmed sides directly on the 3 1/2″ marks. Trim the last two sides.

I AM from the Show-Me State!

Perhaps most new quilters would figure out on their own not to make the first trim at exactly 3 1/2 inches, but I needed a kind teacher to show me why I shouldn’t so that with the first trimming cuts.

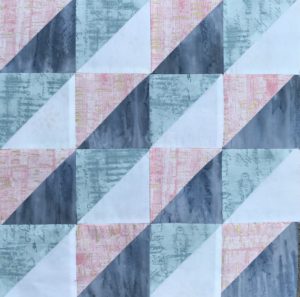
If you are making the River Heritage Block-of-the-Month Mystery Quilt, you are probably figuring out that there are a lot of half-square triangle blocks  in the design.

Here is a the Trail of Tears block, featuring all half-square units.

SHOP more than 50 quilt patterns that use BOTH beautiful sides of fabric!

SUBSCRIBE to my YouTube Channel HERE!

Favorite Binding Tool

Estimated reading time: 3 minutes

My favorite binding tool isn’t made for binding.

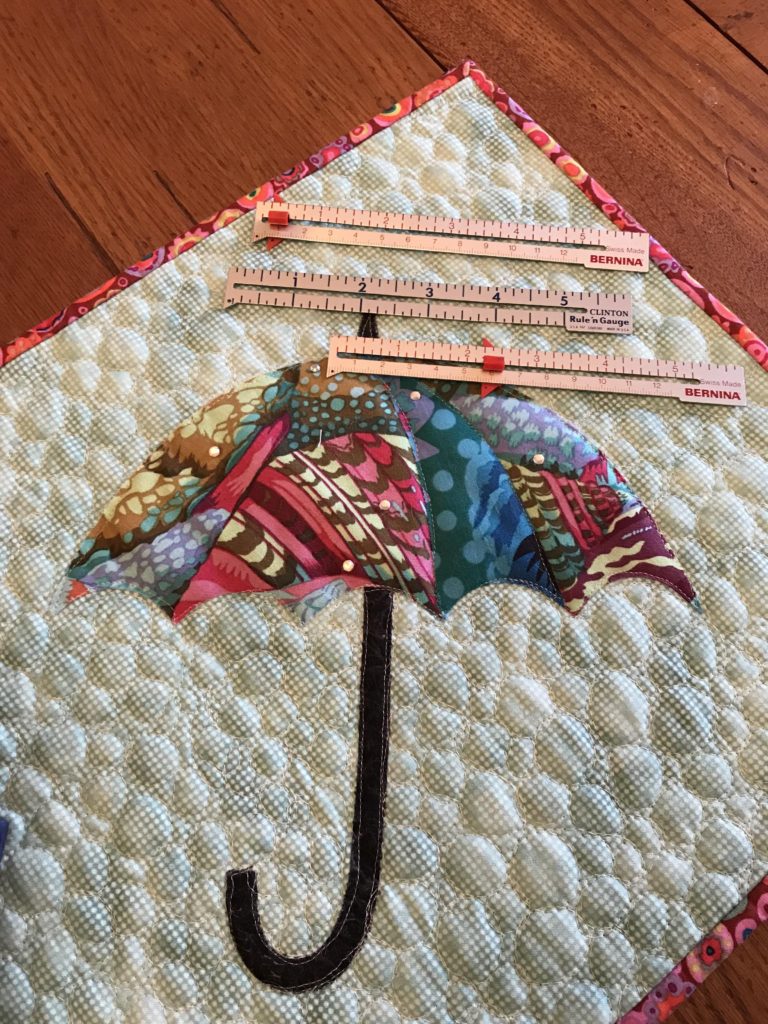
In fact, my favorite binding tool is more of a seamstress tool, really. I’m not even sure what it is called. It’s a ruler and a gauge. There are several reasons I keep this tool right next to my machine at all times.

Movable Marker

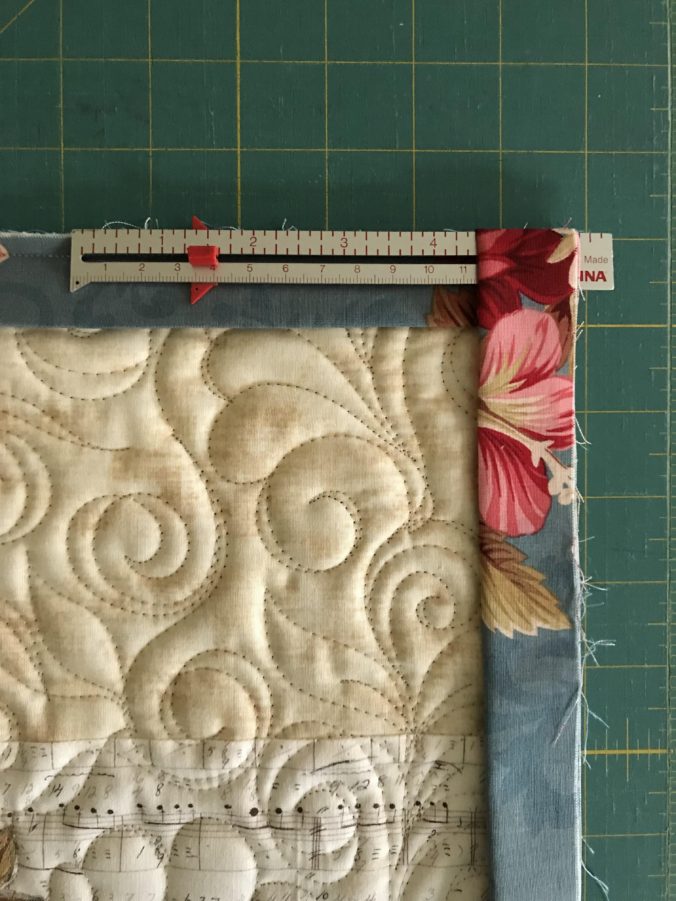
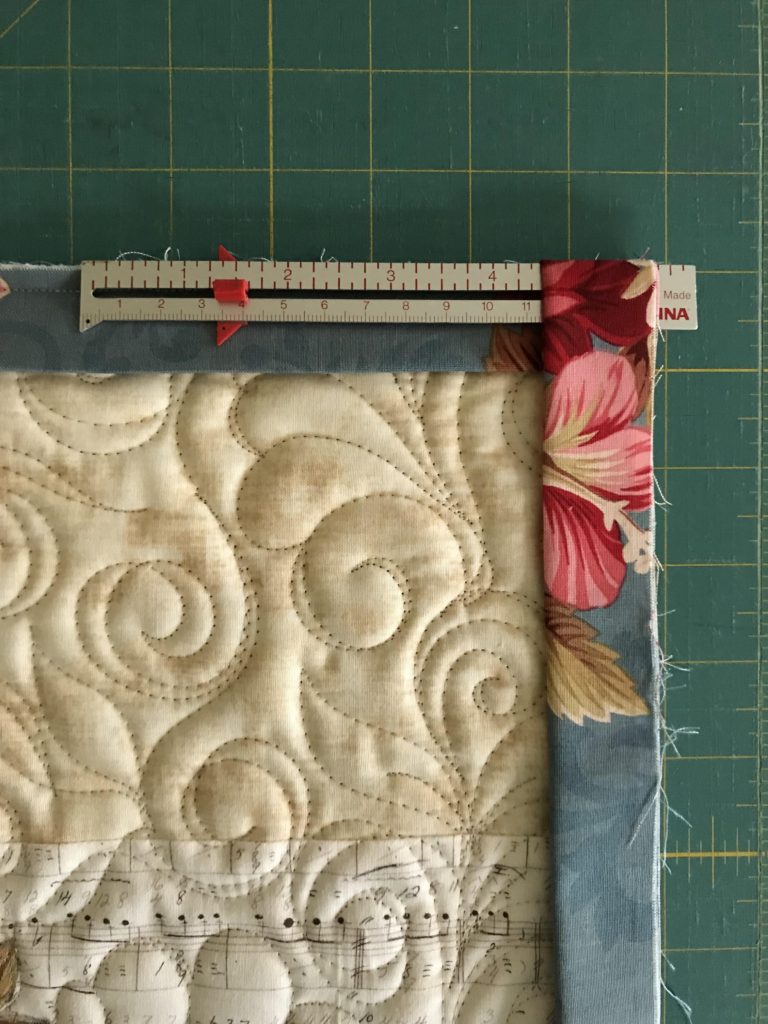
Firstly, most of these types of tools have a marker that slides across the measurements. It’s snug enough that when you set it at, say 1/4 inch, it stays. The extended points above and below the ruler aid in measuring seam allowances.

Since it is important for finer quilt bindings to have the back and front of the binding to be equal size, this marker helps “gauge” the size you need your seam allowance to be.

Additionally, the market can assist you to know when to stop stitching at the corner. Just match the marker to your seam allowance!

Thin, straight edge.

Secondly, these rulers/gauges are very thin. In addition the top has a nice straight edge. Together, this makes for a great corner folding tool for your binding application. Furthermore, thicker rulers add bulk to the folded binding. This can cause looseness in the binding corner fold.

Image of favorite binding tool

Happy Endings

I recall my early years of quilting when I’d refer to my Happy Endings book each time I came to that part of the quilt-making process. Making a quilt took me so long that I’d forget how to do binding by the time I came around to it again! Even though I understood the technique, there would be so much time in between bindings, that I couldn’t remember how to do it. 

Image of Quilt Binding

The test of time.

While trying to get the end my stitching to the exact size of my seam allowance, I’d use this familiar tool which I’d inherited from my mother-in-law and mostly used by her in garment construction.  One brand calls it a “Rule ‘n Gauge”. In addition to providing a precise measurement, I use the straight edge of this little tool to give me a perfectly square fold for my binding corners. While any straight edge will do, this favorite binding tool is readily available and has that has passed the test of time. 

The tradition stands.

In conclusion, after making more than 50 quilt patterns (that use both beautiful sides of fabric), I no long have to look up how to attach quilt binding! I use the Rule ‘n Gauge each and every time!

Before you turn that binding, try adding prairie points! It’s a fast, easy way to hang your quilt! Learn more HERE!


Enjoy your quilting journey!

For more quilting tool ideas, see Totally Cool Quilting Tools and Take One: Cool Tools for Quilters and Better Bias Binding.

Chain-piecing a Quilt Block

Estimated reading time: 5 minutes

The Benefits of Chain Piecing

As a new quilter, the method of chain piecing seemed magical to me! Not only was I surprised by the time savings, I really liked how soothing this technique made my stitching time.

Firstly, when piecing a sampler quilt (for example, the River Heritage Block-of-the-Month Mystery Quilt), chain piecing individual blocks can save you time and help you stay organized.

Chain piecing is a great technique for all quilters to know.

Secondly, since we have all levels of quilters participating in the free mystery quilt offered here, I decided to share a technique with our newer quilters in mind.

Moreover, chain-piecing is something seasoned quilters do without thought. I remember the lightbulb going on when I was first taught to chain-piece.

My approach to this method.

Actual chain-piecing is not nearly as hard as describing it in words.

me (author)

Have you ever given road directions to someone and said, “It’s not nearly as confusing as it sounds.”? That’s how describing chain-piecing is. Hand’s on, it’s easy to grasp. In words, it seems confusing. Take it a step at a time the first few times and soon you’ll be chain-piecing without even thinking about it.

Here’s how I approach chain-piecing an individual block.


Image of Quilt Block
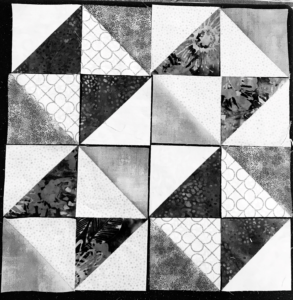
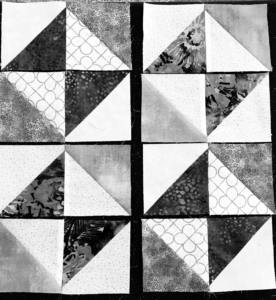
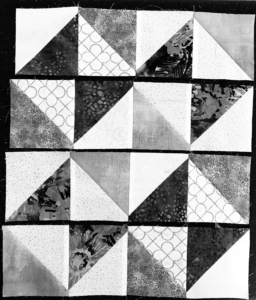
This quilt block is made of four rows and four columns.

The goal when chain piecing is to do as much continuous sewing as possible.


Image of Chain Piecing a Quilt Block
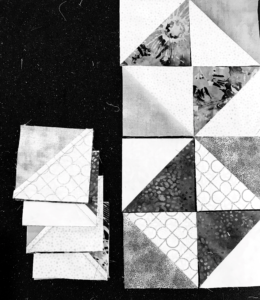
Turn Column 2 onto Column 1, RST.
  • Cut and prepare block pieces. Sample shows all half-square triangle units (HST).
  • Arrange block pieces according to block design.
  • Notice your columns and rows. Here there are four columns and four rows. The unit on the top left is in Row 1 and Column 1.
  • Turn each HST in Column 2 onto the HST to the left, in Column 1, right sides together (RST).
  • Likewise, turn each HST from Column 4 onto the HST to the left, in Column 3, RST.
  • Stack the Column sets to move to your machine for stitching, taking care not to lose their proper order.
  • Starting with the top set ( the unit from Row 1, Columns 1 & 2), stitch down the right edge with your normal 1/4 inch seam allowance.
  • In the same fashion, feed all of your units, one after another into the machine without clipping their threads. A machine with a knee bar makes this easier, but it is not necessary.
  • Trim threads. (See a great thread cutter here, made specifically for chain-piecing.)
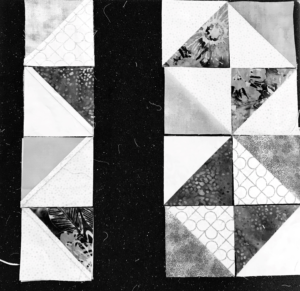
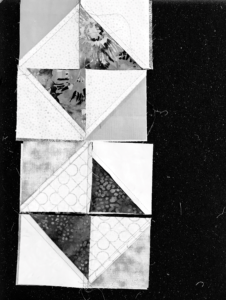
  • Press according to pattern. Arrange the units again in proper order You should have two columns.
  • Similarly, turn Column 3/4 Units onto Column 1/2 Units. Stitch, trim & press. You are now left with four completed rows.
  • Finally, stitch the rows together.

Organization and order is essential.

Image of Layered Block Sets
Layer the sets from the bottom up to take to your machine.

The Progress.

Granted, the process of chain piecing may seem never-ending. However, once you’ve constructed the rows, your progress really shows itself.

Image of Chain Piecing Technique
Now you have two columns.
Image of Chain Piecing Technique
Turn Column 2 onto Column 1 and stitch.
Image of Block Rows
Rows 1 is at the top and Row 4 is at the bottom.

Trim and Square

Importantly, remember to square and trim your block after it is pressed.

Enjoy your quilting journey!

See and shop more than 50 quilt patterns that use BOTH beautiful sides of fabric!

Image of Flamingo Quilt
Fiona Quilt Pattern

Yakity Yak – Let’s Talk Backs

Quilt backing doesn’t have to be boring.

Lots of quilters use leftover fabrics from their stash to piece together a quilt backing. Initially, that was my intention with this pieced backing. I needed to add enough random fabrics to “stretch” the gray Stonehenge backing!

Afterthoughts.

By and large, quilt backing is an afterthought for me. Until now, all of my excitement and energy is focused on the quilt top. My brain can’t handle more decisions while I’m mastering the creation on the front of the quilt! However, when the top is finished, I want to quilt it immediately.

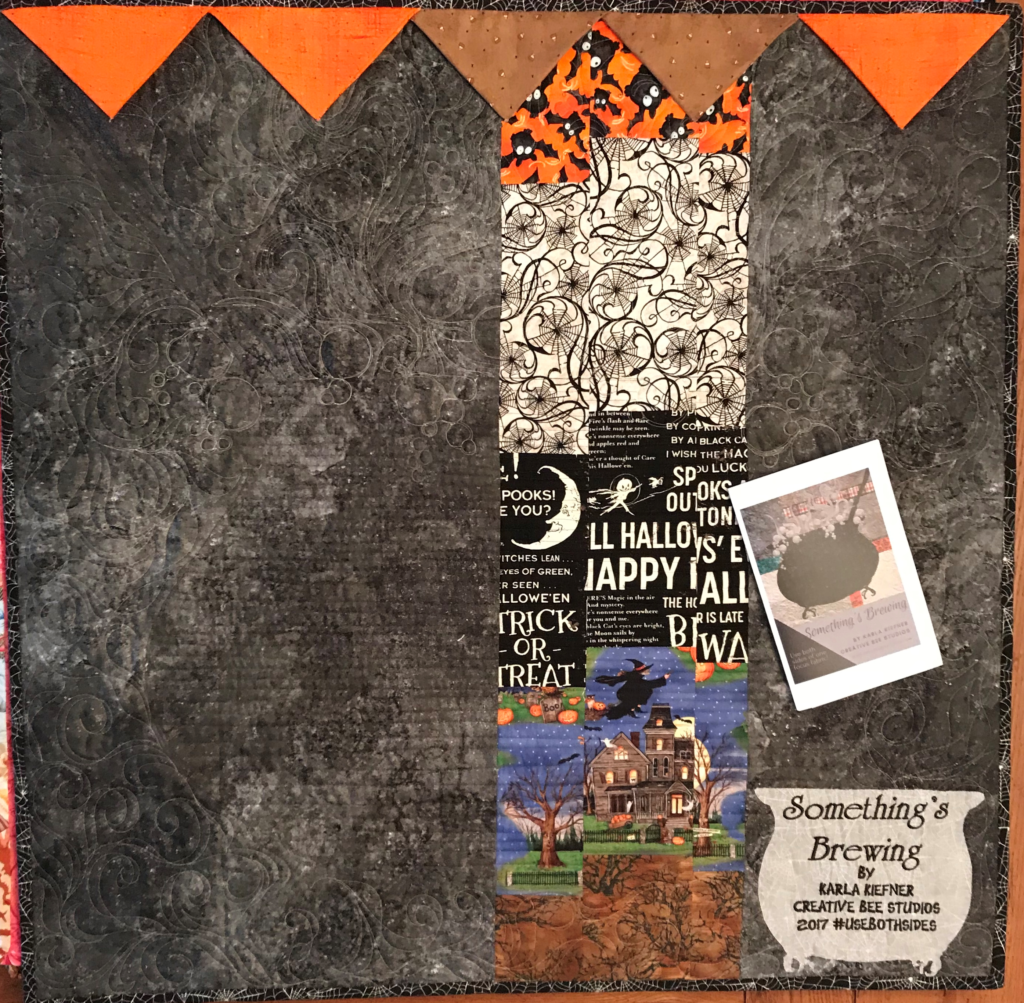
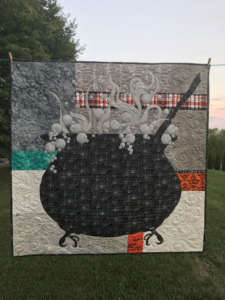
Something’s Brewing

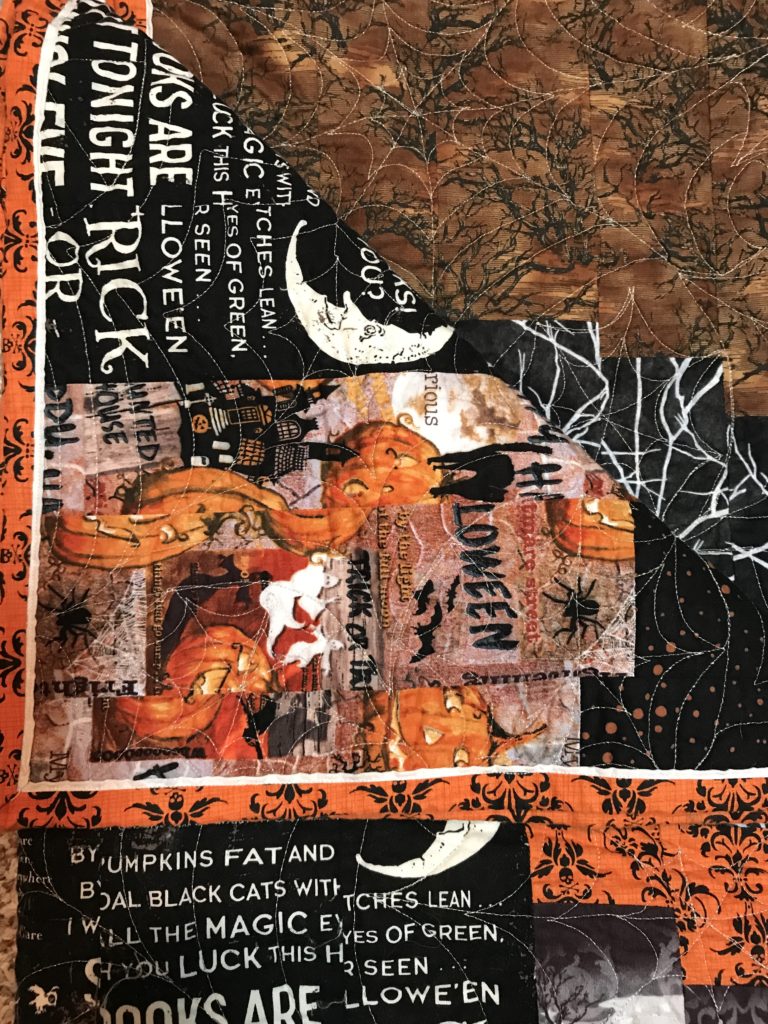
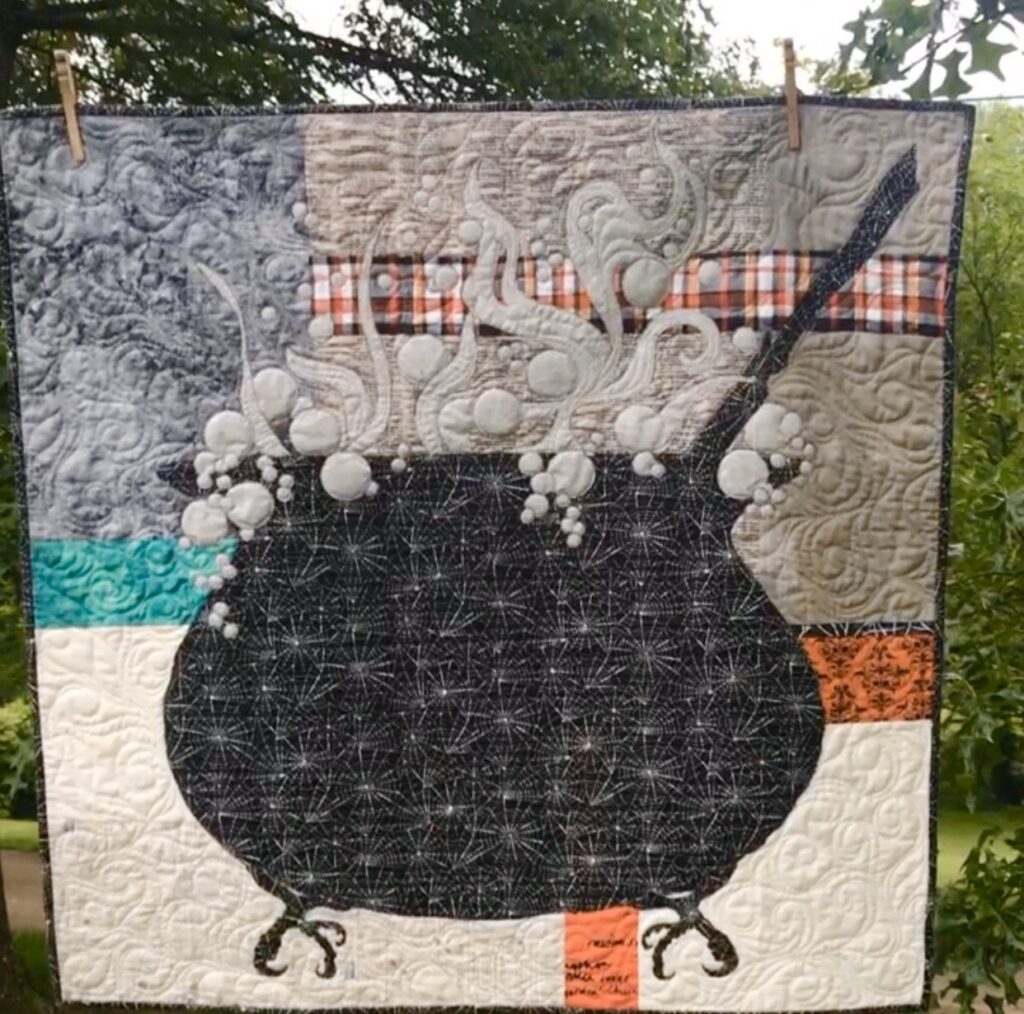
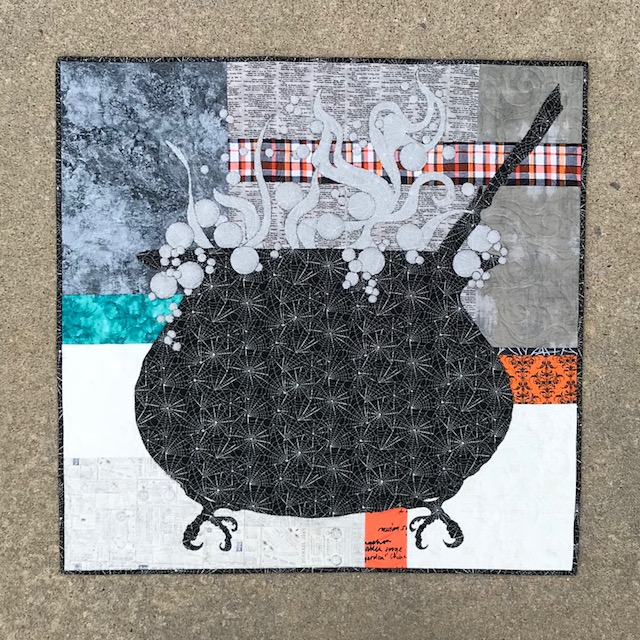
Incidentally, such was the case with Something’s Brewing. This quilt features a huge cauldron that has bubbles and steam simmering over it’s sides. Also, there’s a crooked broomstick and, my favorite, honey buzzard claw feet. Moreover, one focus fabric makes all of these things, plus the binding! That is to say, it is made with both spooky sides of one focus fabric! See How to Use Both Sides for more info!

image of something's brewing quilt

Various spooky background fabrics.

Furthermore, notice the very VARIED background fabrics in this quilt. This background is made from eleven radically different fabrics, including batik, Stonehenge, glitzy plaid, spiderweb, and more. Moreover, there’s even a fabric with William Shakespeare’s Macbeth! It’s such spooky fun!

Why should the front have all the fun?

Although I had pieced my quilt backings before, it had never dawned on me to “instant bargello” my backing! While searching for a single Halloween print to add to my yardage, I found numerous smaller cuts of very fun fabric.

Image of Quilt Back

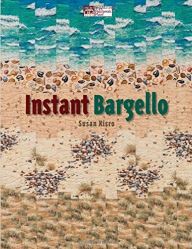
Instant Bargello to the quilt backing rescue!

Instant Bargello by Susan Kisro is one of my favorite quilting books.Image of Book I’ve made several fun and fast quilts using this book as a guide. I decided this technique would allow me to use small pieces of fabric to make a fun quilt backing. I grabbed some scraps and did three little columns of that technique which gave me enough width for the backing. It was fun and fast!
Prairie Point Hanging Method

Even the Prairie Point Hanging Method got a splash of Halloween fun! The two brown ones have tiny candy corn on them. This was some old Debbie Mumm fabric which I’d inherited from my mother-in-law. I love using little bits of her fabric in my quilts.

Label Fun

Finally, when preparing this quilt to hang in Hancock’s of Paducah for AQS Quilt Week, I brewed up another little cauldron for the label. Incidentally, this cauldron was made from the REVERSE!


Have fun with your backs!

To summarize, if you have to make a quilt back, why not make it fun?

Enjoy YOUR quilting journey!

SHOP more than 50 quilt patterns that use both beautiful (or spooky) sides of fabric!

Fabulous Quilting Tools

Here are the three best quilting tools!

Are these the three best quilting tools EVER, in the whole world? Okay, maybe not. However, if you are making quilts using fusible applique or even broderie perse, THESE ARE THE THREE BEST

Anyone who quilts knows you gotta have tools…and the right tools can really make quilting fun!

I’ve been sharing  tips of the trade when it comes to working with value and auditioning fabrics for my latest patterns, which use both sides of one focus fabric.  Now I’m going to share the three top tools I’ve found and grew to love while making these patterns.

(drum roll)

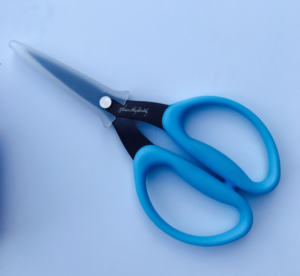
Karen Kay Buckley Scissors

Image of Scissors

They cut like a dream. The edges are serrated which makes them seem to grab and hold on to the fabric as you cut, rather than pushing it away from you. I have made many of these #usebothsides quilts and cut many, many paper-fused appliques with them – and quickly, too. They cut today as well as the first day I bought them. I highly recommend them. They make cutting enjoyable, even under deadlines. I use the blue handled size.

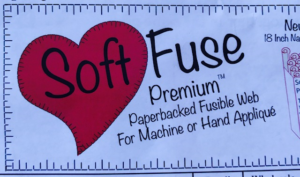
Soft Fuse Premium

A few years ago, I wandered upon Misty Fuse. I liked that it looked almost like a spider-web and, once fused, it felt like it wasn’t even there. It works great for projects where you use rulers or die cutters and you don’t need to trace patterns–because there’s no paper on which to draw.

Image of Logo

Enter…Soft Fuse Premium , a paper-backed, but thin, web-like fusible which quilts like a dream. Soft Fuse  doesn’t make your applique stiff or hard to manage and it quilts like a dream (kinda like Karen’s scissors cut). I highly recommend it.

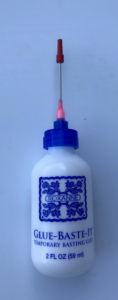
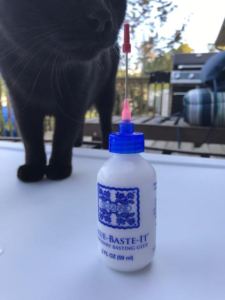
Roxanne Glue-Baste-It

Temporary Basting Glue

Image of Glue Bottle

Last, but not least, Glue-Baste-It with this micro-applicator tip is the bomb–and life-saver when it comes to whipping out quilts! This has saved me many times! It gets into tiny places, dries clear (really, it does, except maybe on Lame – but how often do you applique with that?), and it  lasts forever! I still have a teeny, tiny bottle from 15 years ago (from the Sewing Basket) by my machine and it still works great (but doesn’t have this fancy applicator tip).  So, why do I need this product? When I’m cutting flowers for Colorful Petals or Colorful Wings, I don’t cover  my entire piece of fabric with fusible but I might see a flower I really want in my quilt. Rather than set it aside, I keep it in my pile and put a dot or two of Glue-Baste-It on it when I place it on my quilt. It holds the flower in place just as though it was fused, until I quilting it down. Likewise, if I’m quilting a long the edges  of my applique and find a spot not adhered fully, I don’t plug in the iron and wait for it to heat up to reheat the fused fabric -I just dab a dot of this glue and keep on stitching! It really is a great product to have on hand.

Do you NEED these products to make #USEBOTHSIDES quilts?
Image of Three Quilts
Colorful Petals Quilt Patterns
Image of Three Quilts
Patterns available at etsy.com/shop/CreativeBeeStudios
Image of Cauldron Wall Hanging

Nah, but having cool tools is part of the game of quilting, right? If nothing else, put them on your wish list for Christmas!

Speaking of Christmas…the countdown is on and a new pattern is coming SOON! Stay Tuned.

What’s your favorite quilting tool or product? Let me know!

Never miss a post or a new pattern reveal! Sign up below. Visit: www.etsy.com/shop/CreativeBeeStudios today!

Outtake:

Image of Cat
This is Mungojerrie (named after a cat in the musical, CATS), checking out the Roxanne’s.

Using a Design Wall as a Palette

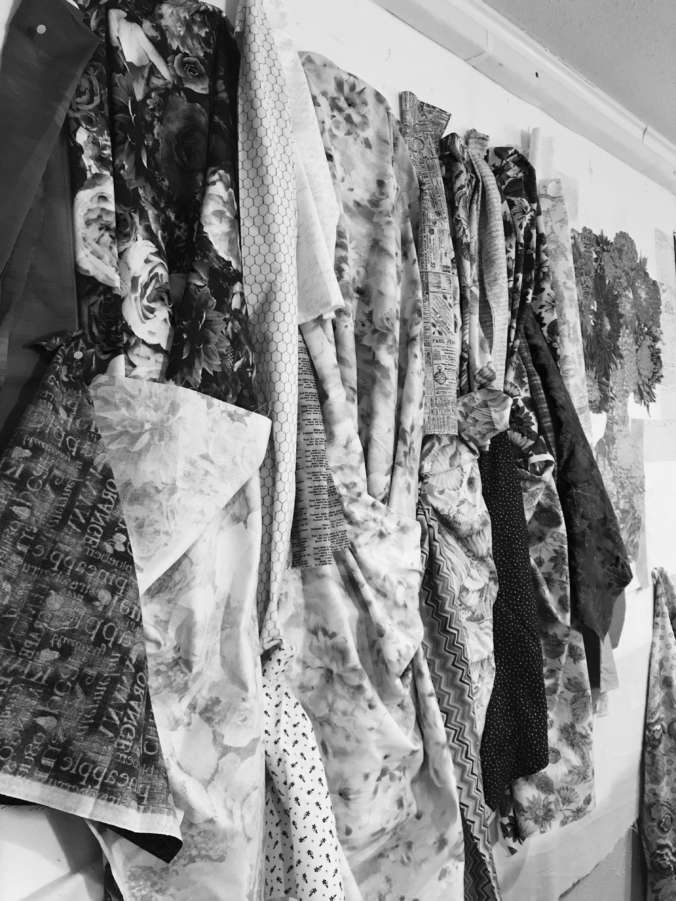
When you pin fabrics to your design wall, you can step back, get perspective, see how a fabric reads at a distance, and most importantly observe the values.

Granted most quilters don’t audition fabrics for four quilts all at the same time, but in this case, having four new designs waiting to be created made me realize how much more I like auditioning fabric on the wall rather than on the table or floor.

Plus, it’s much easier to take that black and white picture for observing value when the fabrics are in front of you! See The Tricky Traits of Value.

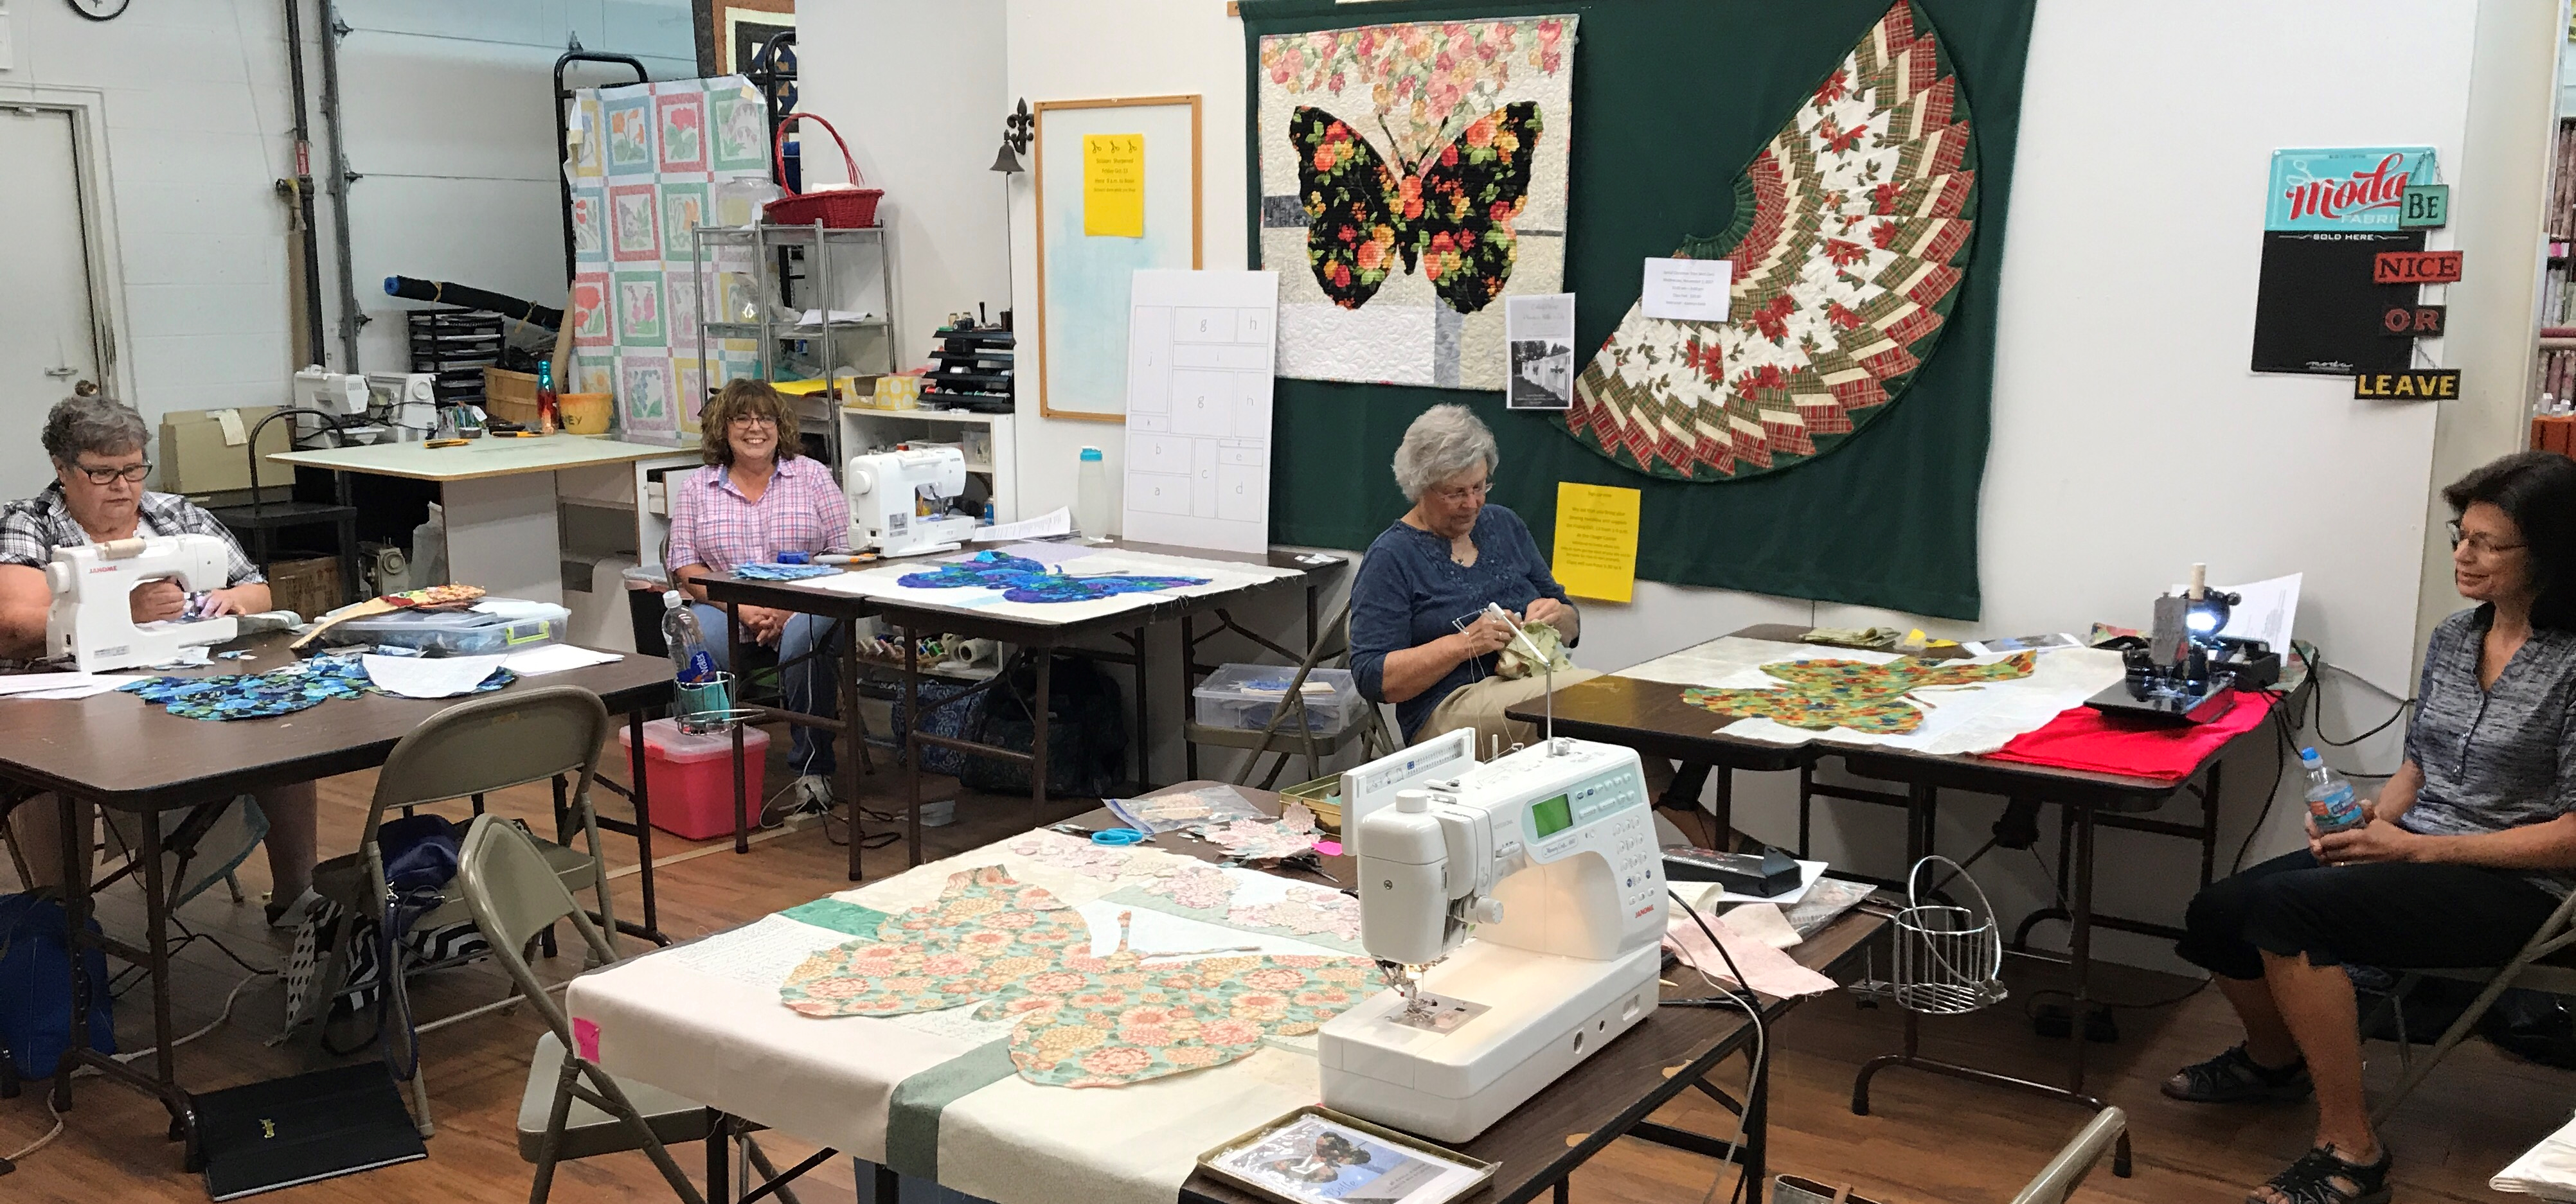
This past week was the kickoff of classes for Colorful Wings (click here for patterns) and I can’t wait to see the eleven finished quilts. In the meantime, my next post will give you sneak peek on how completely unique each of these winged-girls (and boy – yes, we had one boy) are! Image of Classroom

A big thanks to all of the eleven students who took the challenge to #usebothsides!

Shout out to The Golden Needle for hosting Colorful Wings.

Shop for Phoebee, Belle, and Lily from the Colorful Wings pattern series and Rose from the Colorful Petals series at www.etsy.com/shop/CreativeBeeStudios.

How do you audition your fabrics? Do you use a design wall? Please comment below.

Sign up below to get posts sent to you!

« Older posts