Page 11 of 21

Exploring Quilty Box

I’ve been intrigued by Quilty Box (click here) for some time now.

The combination of

a) them featuring Tula Pink and

b) me learning about the first-time discount was what it took for me to finally subscribe. I want to share my discovery with YOU!Image of Box

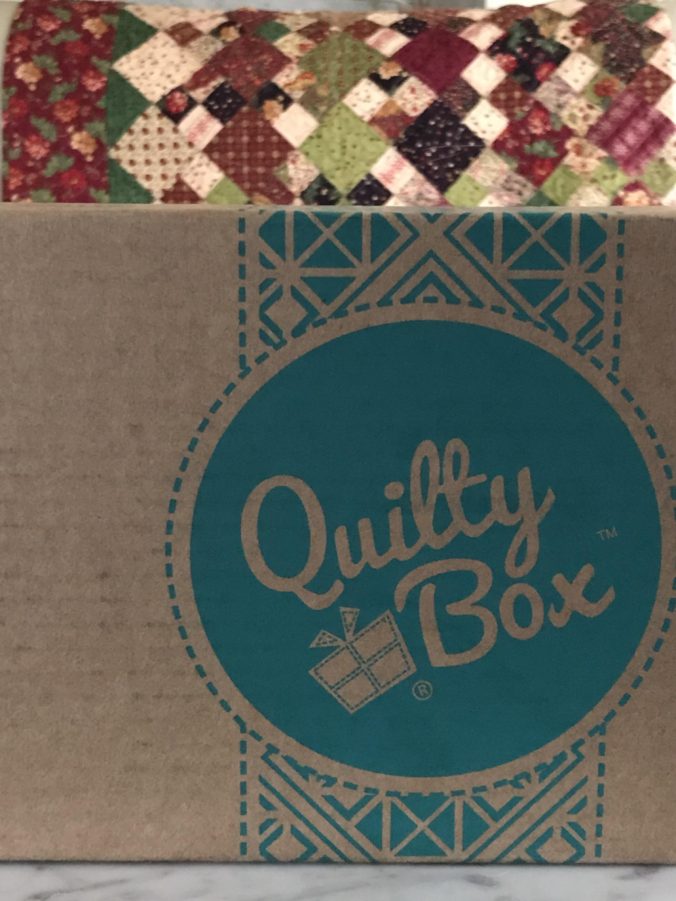
I remember as a teenager subscribing to a make-up club. It was so fun to get different products in the mail to try each month. I figured, what could be better than make-up? Fabric, patterns, notions, thread, and more, all mailed in a cute little teal and brown box and delivered to my mailbox!

Options: They state there is a Quilty Box for everyone – and there is!

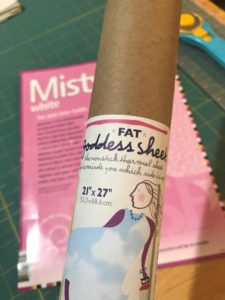
Classic:  This is the original box which features a different artist each month, 2 yards of fabric, a spool of thread, pattern,  one or two notions or tools, and a mini-magazine. The price is $48.00 but if you prepay, you can get discounts on that monthly rate.

English Paper Piecing: In partnership with PaperPieces.com, this box includes a pack of 5 x 5″ fabrics, thread, templates and paper pieces for the pattern, and a mini magazine. This starting price is $34.99 with discounts applied for prepayment.

Mini: Inside this little package you’ll find a full-sized pack of 5 x 5″ fabric and a small spool of thread, the mini-magazine, three patterns, a mini-pattern, and an English paper-piecing pattern all for $23.99 (with discounts for prepayment).

First-time discount? Receive $10 off your first box!

So what are my thoughts about Quilty Box?

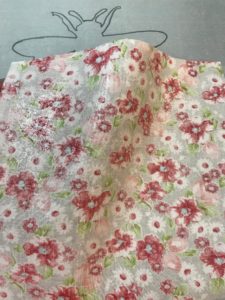
I loved it! It was so fun to get in the mail. I saved my box to open until I could give it my full attention! My box came with eight fat-quarters of Tula’s new line. This was especially fun because when we heard her speak this fall in Paducah, she explained how she designed that line of fabric. Also inside my box was Aurifil thread, a cute pattern for zippered pouches which I would actually love to make, zippers for the bags, and large piece of Soft and Stable for the bags. The Bundles of Inspiration magazine is high-quality and  I’m looking forward to reading it cover-to-cover. It features an article about Tula, several patterns, history and how-to’s for English paper piecing, and more!Image of Box Contents

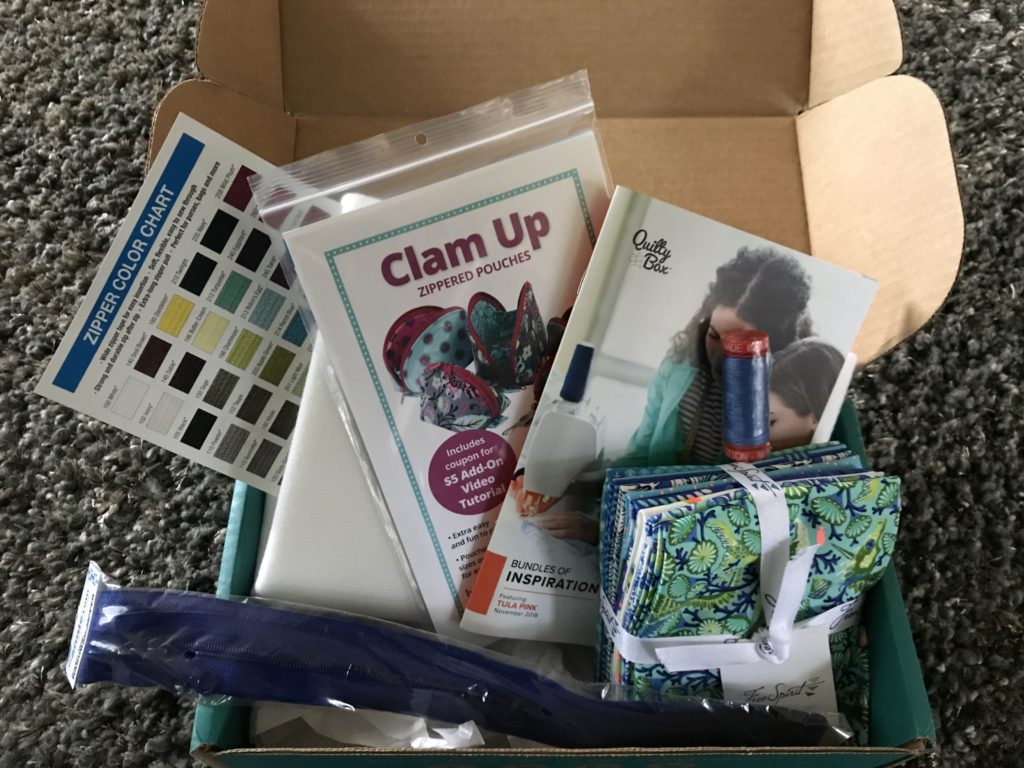
Need a gift for a quilter friend? Send them a Quilty Box!

Shipping is free in the USA.

One thing you need to know about Quilty Box is that your order begins an automatic subscription. You can easily and promptly cancel your subscription with a simple email to [email protected] . I did it and received an email confirmation of the cancellation immediately.

So why did I cancel my subscription? ONLY, ONLY, ONLY because I am already overwhelmed with projects, new patterns designs, my Etsy shop, and my teaching/program schedule! If I were wanting a fun way to treat myself, get inspiration, and learn about the latest in the industry, I’d definitely continue my subscription!

By the way, I hereby reserve the right to order Quilty Box again!

 In fact…maybe (on behalf of my readers), I should really order at least one of each TYPE of Quilty Box – so I can report back, of course. What do you think?

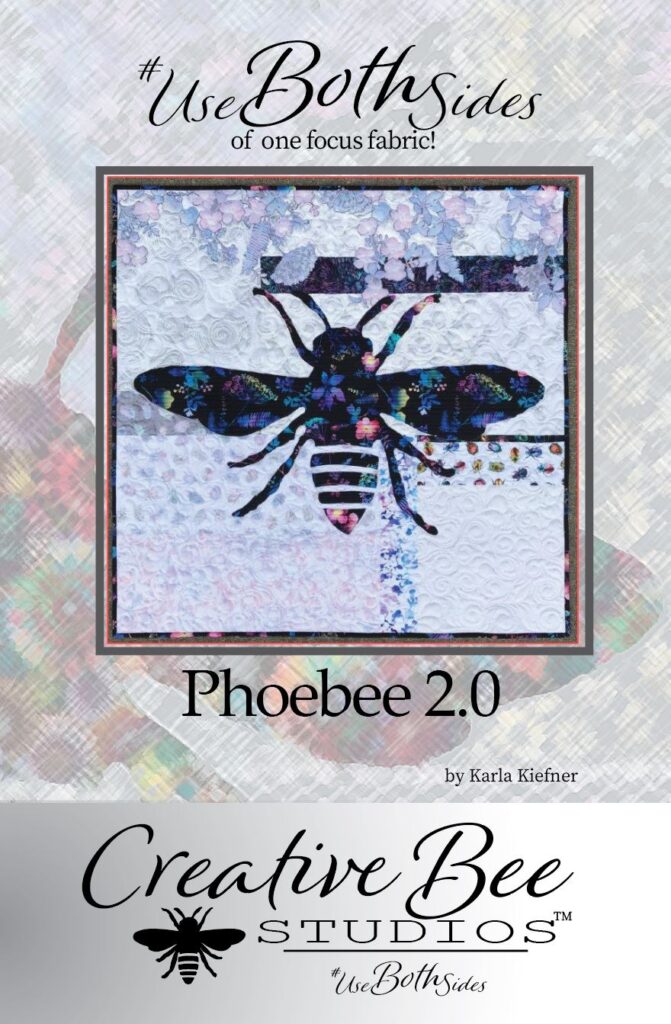
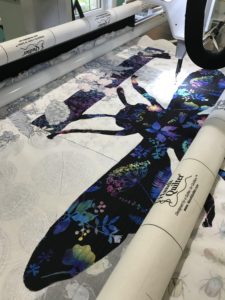
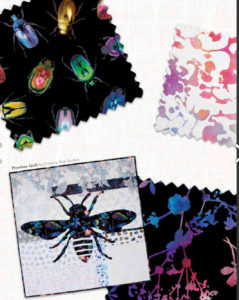
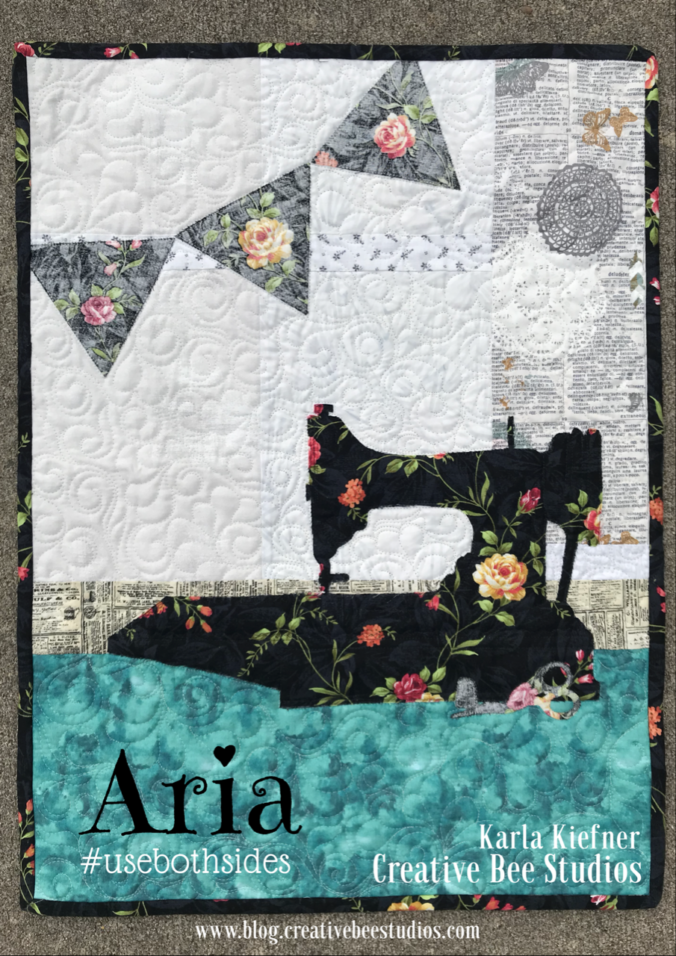
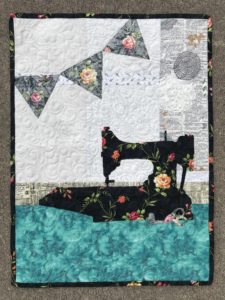
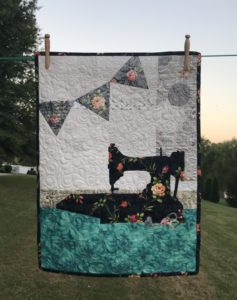
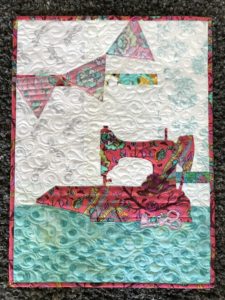
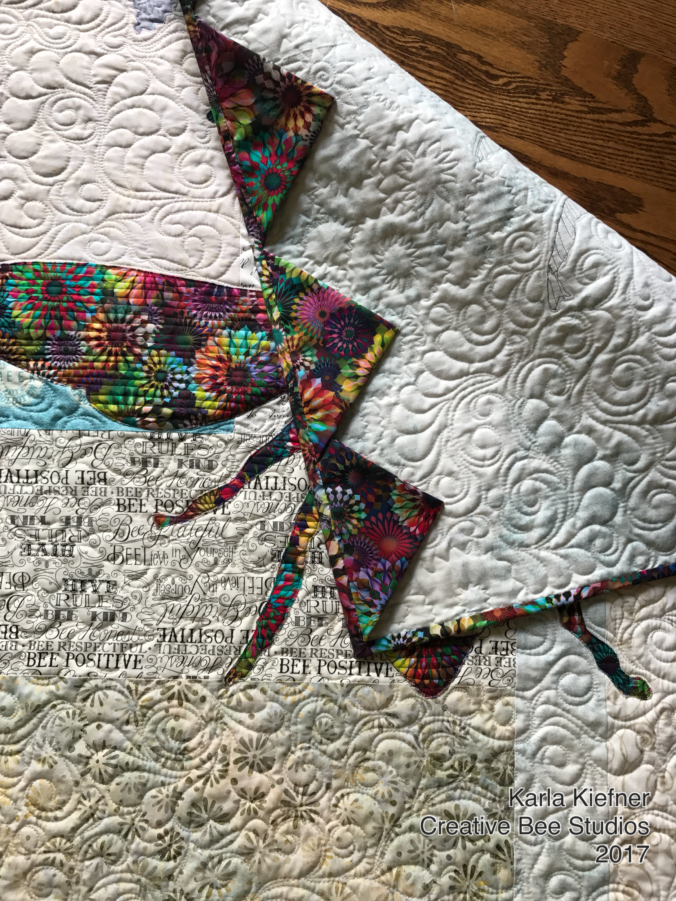
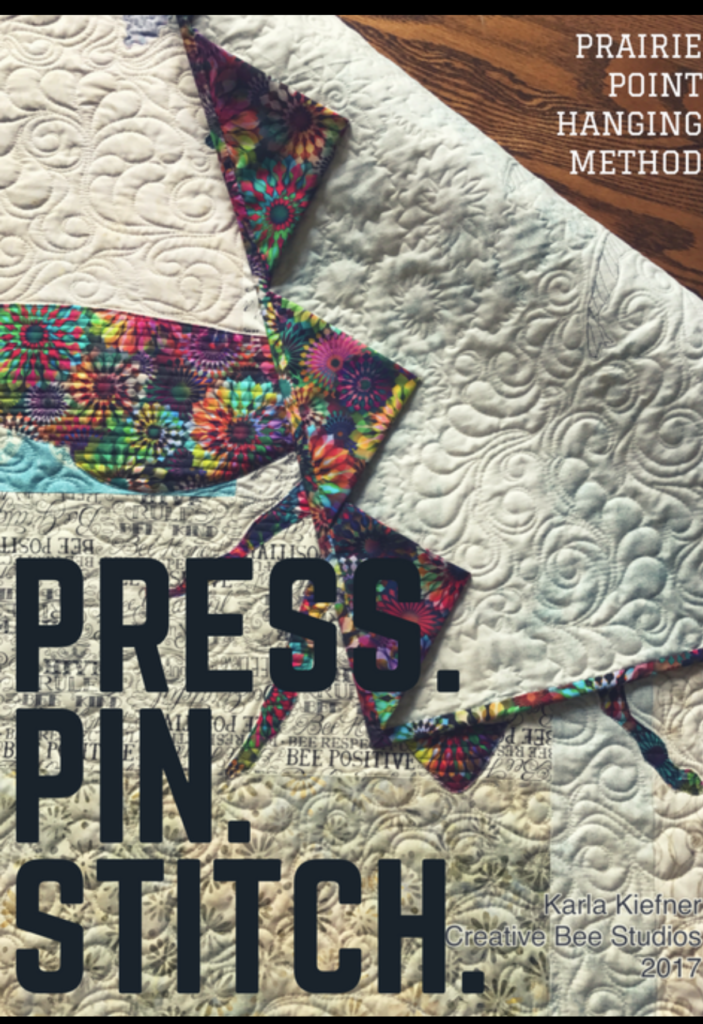
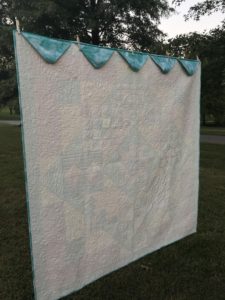
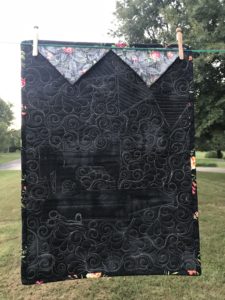
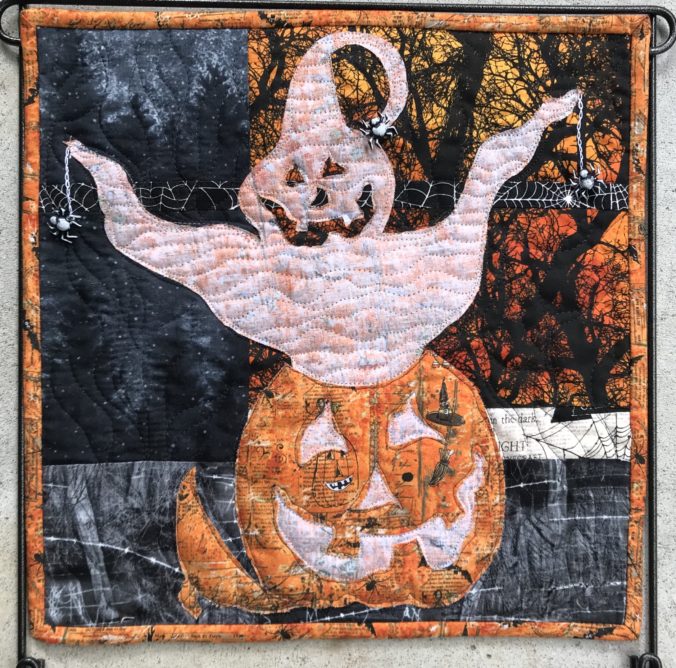
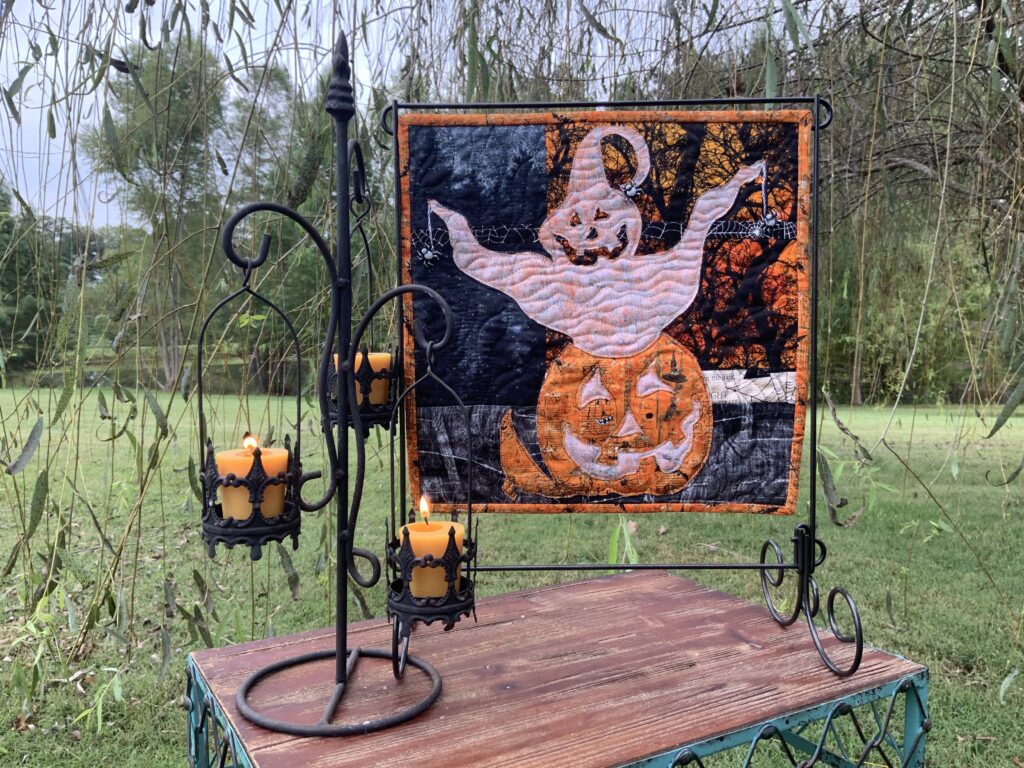
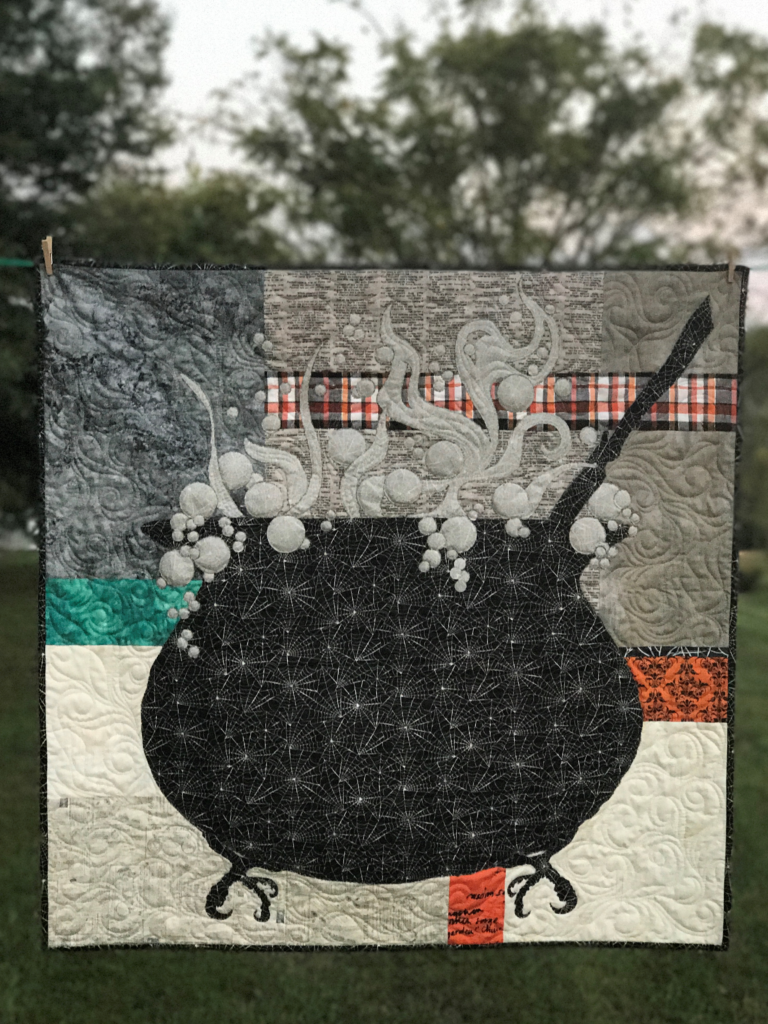
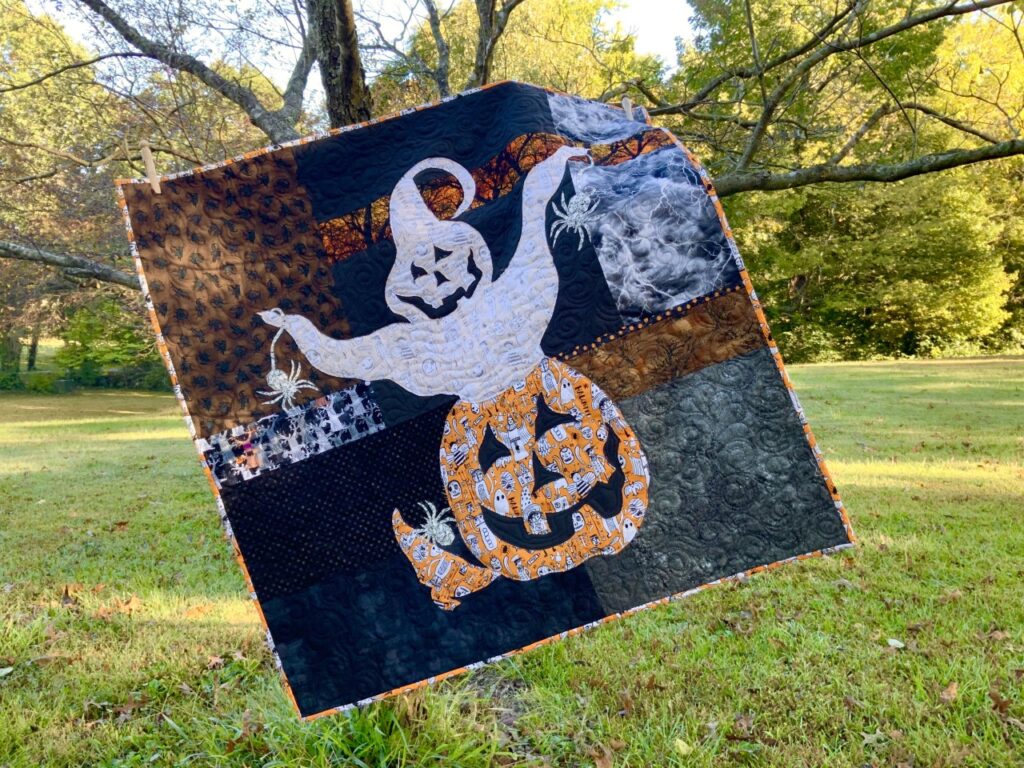
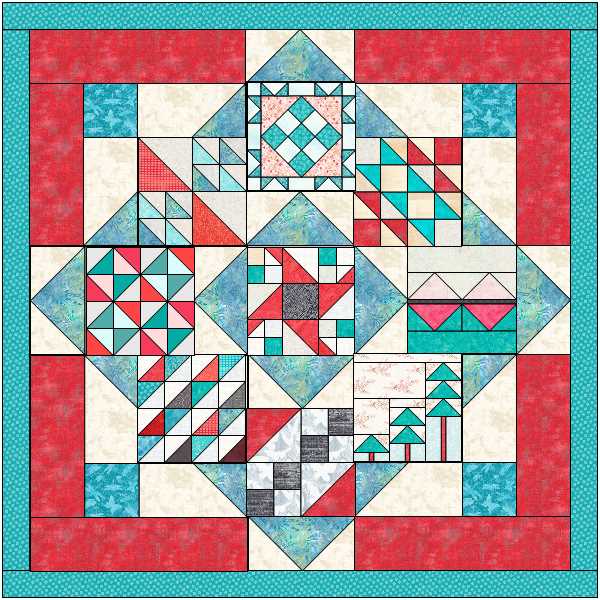
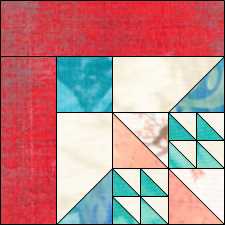
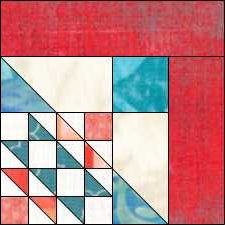
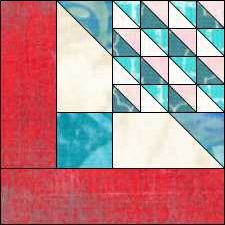
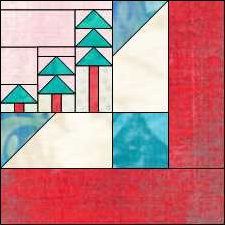
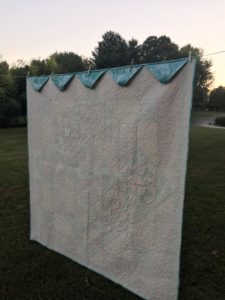
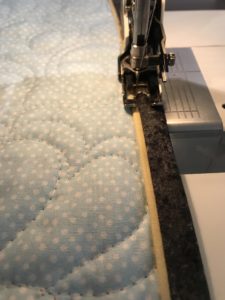
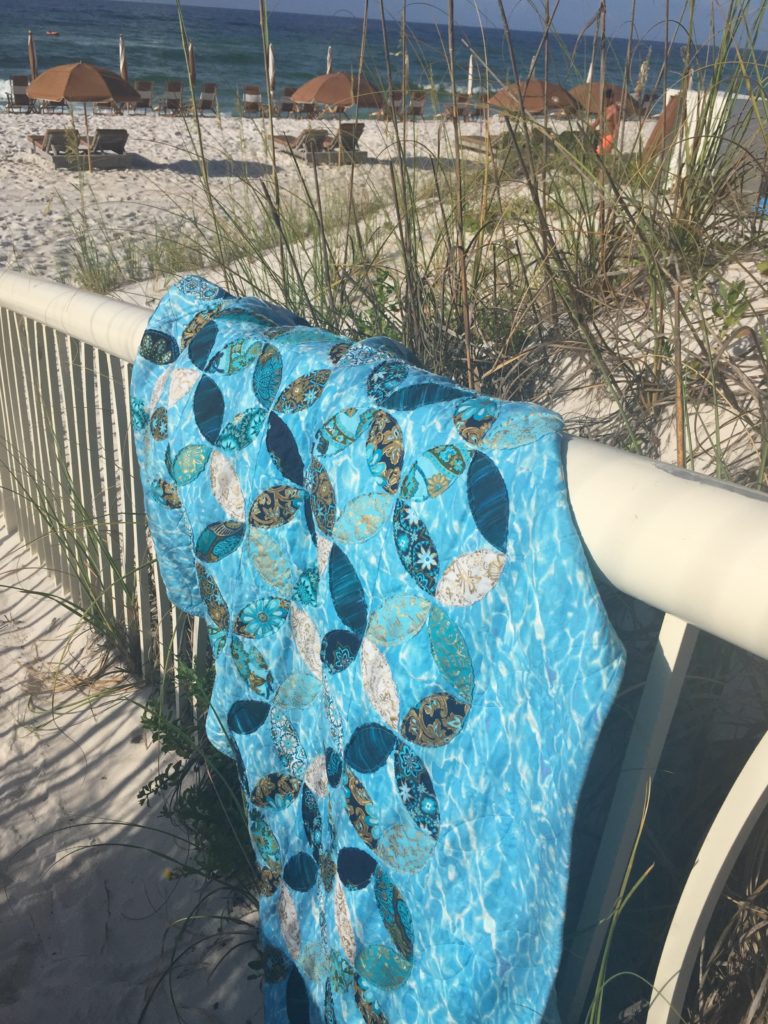
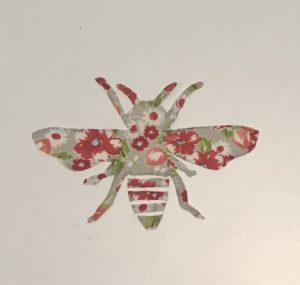
Here is my Tula Pink version of Aria (expressive music heard in opera – she’s a “singer”…) Quilt Patttern. See Vintage Machine Quilt Pattern for more information.Image of Pink Sewing Machine

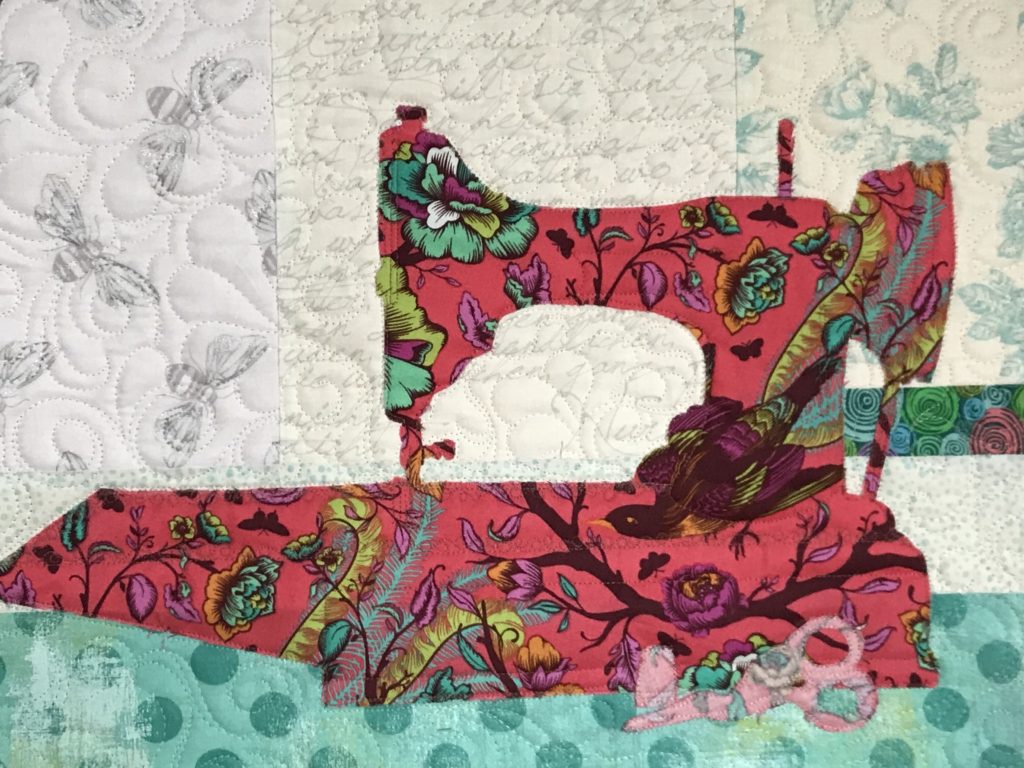
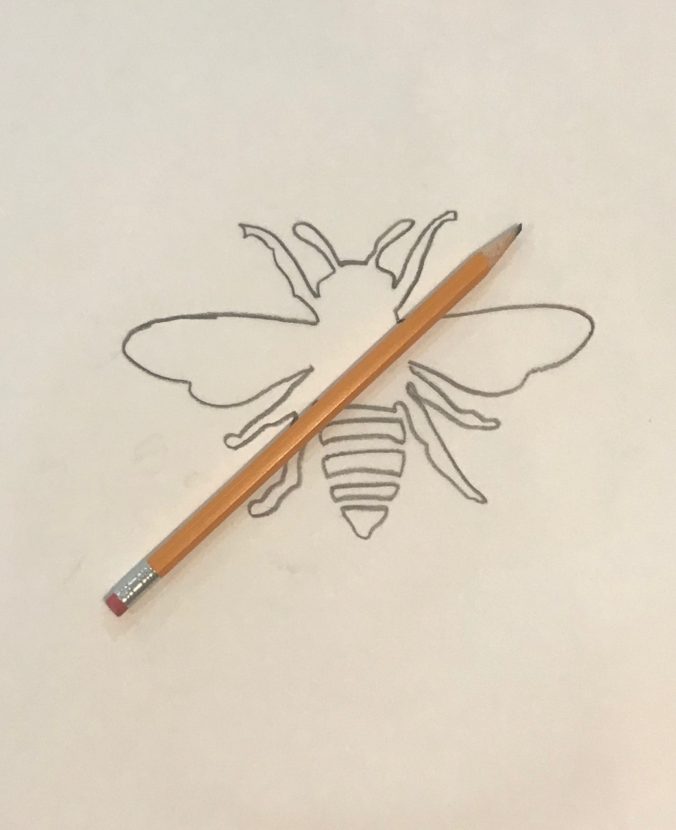
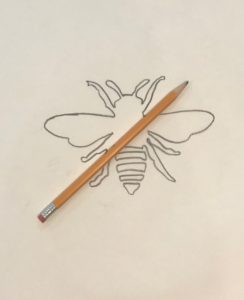
Shop Aria and 22 more #usebothsides patterns  in my  Creative Bee Studios Etsy shop.


Phoebee Goes to Market!

Estimated reading time: 4 minutes

This is the story of how Phoebee for Hoffman began.

Phoebee, designed for Hoffman California Fabrics, was my first experience designing a pattern for a fabric company. I’d wondered for a few years what it would be like to collaborate with a fabric company. I never dreamed it would be this fun!

Starting on August 3, at 3:47 p.m., I opened two packages of 21 fabrics  from Hoffman California Fabrics company. 

Image of fabric to make Phoebee for Hoffman
Fabrics from Hoffman California Fabrics.

First and foremost, for the next six hours, I auditioned “Phoebee for Hoffman” fabrics trying to get just the right mix of color, contrast, values, and feel that would be worthy of this new line by Hoffman California Fabrics.

Well, Electric Garden rocks! Vibrant color with a soft, contrasting reverse side was just the recipe I needed. I flipped several backgrounds to their reverse as well, so they wouldn’t compete with the bee or flowers. The next step was cutting out Phoebee and her flowers.

Image of Quilt on Clothesline
Image of Phoebee Quilt
Image of Phoebee for Hoffman

I slept on this mix so I could get a fresh look the next morning. Yes!

Immediately, I began fusing and quilting (on my Handiquilter Avante) right away. Next came the prairie point hanging method, binding, label, photos, writing and producing the pattern, and Phoebee was flying to California on Tuesday, August 7th!

Image of Quilt in Frame
Image of Back of Quilt

My new friend in California let me know Phoebee for Hoffman arrived safely!

Image of Phoebee at Quilt Market
Phoebee 2.0 in the Hoffman booth at market!
Image of Electric Garden
Phoebee 2.0 pictured in the Projects Catalog

Quilt Market in Houston was a big debute for Phoebee. I was fortunate that several kind quilter souls saw her hanging in the Hoffman California Fabric booth and shared their pics with me on Instagram! Thank you, friends! 

In addition to quit shops across America, I am shipping Phoebee 2.0 patterns to a very fun quilt shop in Canada!

See more quilt patterns designed for Hoffman California Fabrics HERE!

Original Phoebee and Phoebee 2.0 quilt patterns are available in my Etsy Shop HERE.

Image of Bee Quilt
Phoebee Quilt Pattern

Catch The BUZZ! FOLLOW on Instagram, Facebook and Pinterest!

Enjoy your quilting journey!

Vintage Machine Quilt Pattern

Aria ahr-ee-uh: expressive music often heard in opera.  (She’s a singer!)Image of Sewing Machine Quilt

Aria is a fun little quilt pattern that you can make using both sides of one focus fabric.

Wondering how to choose fabrics for the Aria Quilt Pattern? Think about your florals fabrics. Or, how about feathers? She is a featherweight, after all. You could also use sewing notions motifs. Maybe you want a machine covered in sunflowers! Or consider larger prints like Tula PinkKaffe Fassett Collective. The possibilities are endless for making this the cutest little machine you own! So shop your stash. Pull out your fabrics and look at both sides.

The Aria quilt pattern sewing machine and binding are made from the front of the focus fabric. The pennants, little scissors, and thimble are made using the reverse side of the same focus fabric!

Someday (dreaming now), I’d like to own a beautiful turquoise featherweight, preferably purchased in person from Roxanne’s A Wish and A Dream shop in California!

In conclusion, I was drawn to this lovely, sweet floral fabric for this machine. It has sweet roses and leaves. Of course, the reverse side passed my audition test, which is all about value.Image of Quilt Hanging Outsides

Choosing backgrounds for this little wall hanging is the most fun. You can really mix it up here!

Wanna jazz things up? Check out this Tula Pink version! LOVE.Image of Pink Sewing Machine Quilt

Find the Aria quilt pattern and #usebothsides of your fabric! Etsy shop: HERE.

Subscribe below for weekly posts! Visit Creative Bee Studios  and follow me on Instagram, Facebook, Twitter, and Pinterest!

New-Prairie Points for Hanging Quilts

Estimated reading time: 3 minutes

Use prairie points to easily hang your quilts.

Use simple prairie points instead of a long fabric tube to hang your quilts. The number you need will depend on several things: the size of the quilt and how you will hang it.

First, fold a few squares.

To make prairie points, cut squares. Fold them in half, diagonally and press. Fold them again, diagonally and press. That’s it! You just made them! The size and number you will need depend on your quilt size and how you will hang it.

For best results, run a stitch about 1/8th inch from the raw edges of the prairie points to hold them together.

Next, baste the prairie points onto your quilt.

Align your prairie points across the top edge of the back of the quilt. Distribute them evenly, with the outer points at least an inch from the sides.

Baste the points, using a seam allowance smaller than your binding seam allowance.

Finally, make a few hand stitches.

Lastly, you will stitch the points to your quilt by hand, with a doubled-tread. Take care not to stitch through the front of your quilt. About four stitches in each is enough to secure your points.

When your binding is complete, your quilt is ready to hang!

For sizes and to review the complete method, see Hang Quilts Using Prairie Points  and Prairie Point Hanging Method

Image of quilt with prairie points.
Prairie Point Hanging Method shown on Phoebee.
  • Use an even number of prairie points to hang a quilt from a single point.
  • Generally, consider 8- inch squares. Try larger ones for larger quilts and vice versa.
  • All the Creative Bee Studios patterns provide the size and number of points needed for each pattern.
  • Pressing well helps keep the points orderly.
  • Trim any uneven edges before attaching the points to your quilt.
  • For use with unusually large rods (like in a quilt show), hand stitch your points about an inch higher than they reach when flat. This will allow some added room for the large rod and help the quilt hang flat.

In addition to using scraps for Prairie Points, I like to use the REVERSE side!

Try using the reverse side to tone them down or provide interest on the back of your quilt! #usebothsides

Image of Back of Quilt
See the front of this quilt and new pattern in the next post!

Follow on Facebook and Instagram and pin on Pinterest!

Enjoy your quilting journey!

Jacq O’Lantern Quilt Makes a Happy Boo!

This happy little ghoul is popping right out her top like a jack-in-the-box!

This little ghoul is named Jacq O’ Lantern. She’s the first mini quilt pattern designed to use both sides of fabric.

Jacq O’ Lantern is sew much fun to make!

First of all, Jacq O’ Lantern is a pint-size lesson about value.

Secondly, when you learn how to make this little ghoul, you’ve already learned the easy tricks for using value! Use the Tricky Traits of Value (click here for more info) to make any of the my patterns that use both spooky (or beautiful) sides of fabric!

Jacq O’ Lantern finishes at 12 inches square, perfect for the table-top quilt stands.

Side note: I was never real big on Halloween decorations when our kids were little. We didn’t avoid Halloween, but I just didn’t want to spend money on decorations when we could spend it on Christmas decorations instead. So…why is it I LOVE Halloween fabric so much? It’s a mystery.

Or…maybe it’s not such a mystery! One of my favorite scenes to draw as a kid was a witch on a broomstick. (I only had a couple of drawings I liked to do – over and over. One was a beach scene with a palm tree-are you surprised? ) This witch always had a long chin that jutted out and a big ole wart on her curved nose. Maybe these Halloween fabrics take me back to my childhood or something. Several of my favorite quilts and projects are Halloween themed. I’m sure you seen them before but, well, ’tis the season!

Here are more fun Halloween themed quilts:

Below is Something’s Brewing. The steam and bubbles are made from the reverse!

Notice the honey buzzard claw feet?

Want to make a larger little ghoul? To use up more of those fun, spooky fabrics, here is Jacq O’ Lantern XL!

Lastly, here are some other fun Halloween projects I’ve enjoyed in the past.

Image of Punch Needle
Black Kitty Punch Needle
Image of Instant Bargello Quilt
Instant Bargello Quilt


As you might have guessed, there’s a reason for the different spelling of this pattern. In short, our youngest daughter’s name is Jacquelyn. We’ve always had nicknames for her such as JacqJacq, Jacq, Da Jacinator  (at the age of two she could “destroy” a room in minutes), Jacqity Jacq (don’t talk back), and, of course, Jacq O’ Lantern.

See Jacq O’Lantern and all her friends HERE in my Etsy shop, Creative Bee Studios! 

Quilt Author Meets Hallmark Christmas Movies

I just love it when two of my favorite things come together! Best-selling quilt author Marie Bostwick’s book, The Second Sister, is being filmed now as a Hallmark Hall of Fame movie! Image of The Second Sister Book

The movie is titled, “Christmas Everlasting” and premieres November 24th at 7 p.m. central.

While I enjoy a number of  quilt-themed (and not) books and series, I’ve often referred to Marie as “My Favorite Author” – mostly because her witty comments and clever nicknames for her family members are endearing and inspiring. (I’ve often thought we could be best friends if we were neighbors, but in reality, I’m one of many fans who exchanges about two minutes of conversation with her once a year (if I’m lucky) at book signings.)Image of Signed Book

Of course, I love her books, even those not completely engrossed in the quilting themes and I read each one more than once! I suspect Christmas Everlasting will be another staple during the holiday season!

Click here to read here about her “on set” experience!  Image of Patti LaBelle and Marie Bostwick

How cool is it that she made quilted gifts for the actors? See more pics and posts on Marie’s Facebook page! (Yes, that is Patti LaBelle!)

Image of Marie and Actors with QuiltImage of Marie Bostwick and Tatyana AliHere’s a list of some of my faves by Marie Bostwick:

Standalone Books:

The Second Sister

The Promise Girls

            Just in Time

Cobbled Court Quilt Series:

A Single Thread

A Thread of Truth

A Thread So Thin

Threading the Needle

Ties That Bind

Apart at the Seams

Too Much, Texas Series:

Between Heaven and Texas

From Here to Home

Marie has also written three historical novels and three novellas in Fern Michaels Christmas Anthologies.

Mark your calendars and hit “record”!

Subscribe below to get a weekly post delivered to your email. Stay tuned for more #usebothsides reveals!

Shop patterns HERE!


River Heritage Mystery Quilt Reveal

Estimated reading time: 6 minutes

River Heritage Mystery Quilt Reveal!

The long awaited mystery quilt reveal for the River Heritage Block of the Month Quilt is here!

image of river heritage reveal
The Mighty Mississippi River at dusk. Photo by Anastasia Gonzales.

The sunset over the Mississippi River is your final clue that the mystery has ended.

First, let’s take the mystery out of this right away. Here is a digital photo of the grand layout of this quilt. As you know, the monthly block patterns have each had a connection to life by the river. Finally, it’s time to take all of those wonderful blocks and set them in this really fun, fast design.

Image of Mystery Quilt Reveal
River Heritage

In addition, Watch for the River Heritage quilt on YouTube! SUBSCRIBE today!

Most importantly, be assured as you look at this mystery quilt reveal, that this quilt goes together quickly and easily! It’s sew much fun.

Firstly, let’s review the blocks you’ve made starting at the center top and moving clockwise.

The nine blocks.

  • Eagle’s Nest
  • Hovering Hawks
  • Lighted Bridge
  • Tree Line
  • Railroad Crossing
  • Trail of Tears
  • Port and Starboard
  • Flock of Geese
  • The center-most block is Paddle Wheel
Image of Mystery Quilt Reveal River Heritage

Click here for printer-friendly River Heritage Setting Instructions: River Heritage Setting Instructions

Image of Eagle's Nest Block
Eagle’s Nest/North
Image of Rail Road Crossing Block
Railroad Crossing/South
Image of Port and Starboard/West
Port and Starboard/West
Image of Lighted Bridge Block
Lighted Bridge/East

In addition to getting the full pdf instructions, browse through these images of the mystery quilt reveal. You’ll see how simply and easily this quilt goes together.

Image of Flock of Geese block
Flock of Geese/Northwest
Image of Hovering Hawks block
Hovering Hawks/Northeast         
Image of Trail of Tears block
Trail of Tears/Southwest
Image of Tree Line Block
Tree Line/Southeast

Image of Back of Quilt
Prairie Point Hanging Method

Furthermore, the Prairie Point Hanging Method is included in the quilt finishing instrucitons.

Obviously, I used the Prairie Point Hanging Method for this wall hanging. It’s the best kept secret and a mystery quilt reveal of its own! However, instructions for this wonderful hanging method are included in all 50+ of my Creative Bee Studios patterns!

River Heritage Takes a Ribbon!

Image of Quilt with Ribbon
River Heritage takes Third Place at the show!

In conclusion, I hope you’ve enjoyed making River Heritage! I was pleasantly surprised to find a beautiful ribbon on my quilt this weekend at our local quilt show!

Of course, I’d love to see your finished quilt! Please share your quilt pictures on Facebook and Instagram using the hashtag: #riverheritage in your post!

Last but not least, most of the blocks in this quilt are classics, found in many books and other sources. I created Paddle Wheel, Tree Line, and Lighted Bridge are blocks to fit our theme and the setting. Moreover, the setting is adapted from the book, Circle of Nine by Janet Houts & Jean Ann Wright. I love this book and recommend it (available on Amazon)!

This has truly been an adventure! From coming up with a theme, choosing and creating blocks, traveling to get photos and learning about my river heritage, it’s been quite a journey.

Karla

Finally, thank you all for joining me on this journey. I hope you love your River Heritage!

You might not be a quilter if…

Estimated reading time: 4 minutes

Which is it, a quilt or a blanket?

Are you buying a quilt or a blanket? Troublemakers on social media sites seems to go through phases where they like to confuse the unaware buyer.

Buyer’s beware…

Oftentimes, companies will promote products that show in our Facebook, Instagram, or Pinterest feeds based for things or subjects we like and follow. Sometimes social media learns these details when we simply talk in front of our phones. (I’ve had things show in my feeds that I’ve only THOUGHT about – how’d they do that?)

A popular trend for a while was what appeared to be beautiful appliqued quilts for sale. Not only were these “quilts” were priced was too low. Furthermore, they were way too pretty to be true.

You and I know the difference between a quilt or blanket!

While they are marketed as quilts, how does a non-quilter know if they are buying a quilt or a blanket?

First, the biggest clue for you or I is based on the fact that we KNOW the amount of work and time it takes to make one of these works of art. Mass production is highly unlikely. If fact, for many of us, an intricate quilt like one of these is a “one and done”!

Beware of themed quilts.

These people like to prey on unsuspecting parents or grandparents. For example, they might feature a quilt with a music theme. If one’s child or grandchild is into music, it’s an easy sell!

What was my next clue?  THEY CALLED THEM BLANKETS!

Furthermore, which is it, a quilt or a blanket? In the photo you see what appears to be intricately appliqued quilt. Their mistake: calling it a blanket!

You likely won’t get either!

The problem is they are fake companies stealing real quilters’ pictures and using them to cheat other people. It’s unfortunate. Quilters need always be aware that their photographs can be hijacked.

Image of quilt or blanket meme

Next clue: $59

You couldn’t buy the fabric for a quilt (or maybe a blanket, these days) for $59!

Last Clue: Selling MANY different quilts (or blankets)!

It’s amazing (and kinda sad) how many people respond excitedly to these posts by tagging their friends and loved ones. You can read the comments to see how many people are tagging others to show them this great buy. One such post which was being massively shared was for brilliant pieced, appliqued, and quilted musician-themed quilt of a cello – all for $59!

The personal story behind the quilt or blanket dilemma.

It’s been a “thing” in my family for years that when one of them asks me to pass them the blanket, I stand up and yell, “They’re quilts, not blankets!” (like Harry Potter, only with a pretend wand). Then, I add, “I am not a Blanketer!”

Karla

I’ve recently joined a pattern-maker group and, sure enough, they are suggesting you search these sites to see if these companies have stolen your pictures. (I have no idea what you do if that happens.)

What to do about the sites?

I try to report the company, when allowed by Facebook. I also comment on the post that the company is a fraud. The only other thing I know to do is to tell as many people as I know not to fall for something that looks too good to be true.

By the way, even if you ask for a blanket in my house, your’e going to get a quilt!

SHOP more than 50 patterns that use BOTH beautiful sides of fabric!

SUBSCRIBE to Creative Bee Studios on YouTube!

Stitch One, Curl One.

Estimated reading time: 5 minutes

Here are some fitness ideas for quilters who want to combat sore shoulders and other complaints commonly caused by repetitive movement.

First, we likely all agree that we are often driven by goals…goals to get our projects FINISHED, that is! Let’s explore some ideas for how to continue to work through our aches and pains with these fitness ideas for quilters.

Quilting MuscleImage of Machine Stitching on Binding

Initially, as a new quilter, I got real excited about setting up my sewing work space. I didn’t trust my instincts. However, I had already mastered the art of buying quilting books, so I bought the latest title on the topic.

I devoured that book, studying every picture and reading every word. I set up my sewing space just like the author suggested.  I really liked how productive I could be  in my little sewing station, everything within reach…until I started to hurt.

Consequently, I began looking for fitness ideas for quilters, because I had found that the more I stitched, the less I like it. I had to take breaks.

I’m not saying there was anything wrong with the suggestions for optimum quilting output. They just didn’t work for me…or my back.

Image of goals for fitness ideas

Mostly, I tend to keep lots of tension in my shoulders and upper back.  Improper chair height, table height, poor posture (very me) are all contributing factors for tension in the upper back area. But I had noticed some changes in the lower half of my body, too. Maybe it was just the aging process–or was I just sitting on my backside too much? 

The first of the fitness ideas involves your iron. Move it!

Granted, I may lose a few minutes of stitching time walking to and from my ironing board, but that’s okay because that little walk gives me a chance to reach up, stretch backwards, and roll my shoulders. Sometimes that’s all it takes to keep me from stiffening up over a day of stitching.

Think of extra movement as a chance to stretch, instead of wasted time.

Therefore, I no longer have everything within reach. It’s a different mind-set, really. Now I try to think of the extra movement as an opportunity to rev-up.

Secondly, consider fitness ideas like “creative movement”.

Whether you are getting up to press seams, cut fabric, or grab lunch, try to throw in some steps you don’t normally do. How about a side-to-side step? Or step-touch (like walking down the aisle for a wedding). Sometimes when I am loading a quilt on my long-arm, I move from one end to the other by doing small plies or squats. Now I’m not talking about deep, hurt-your-knees- or-lose-your-balance kind of movements, but small movements that wake your body up and warm up some cold muscles.

Find fitness ideas that YOU enjoy.

If you like creative movement, take a look at this set of dvd’s: Body Groove. Admittedly, I only do this video when no one else is home, but it’s quite fun! I can’t say it’s a hard work out, but it’s so enjoyable and freeing that I look forward to that time every day! These are simple movements to music (not aerobics) that you do at your own ability level.

Next, turn on a tracker.

As much as I talk back to my fitness tracker some days when it fusses at me to move, it really helps me to realize how sedentary my life can be.  Your phone may work to track your steps, also. The down side to tracking steps is when you forget to take your tracker off it’s charger and feel like you’ve wasted all of those steps you took (crazy)!

Stitch One, Curl One…or something like that.

I keep a small free weight (a full water bottle works, too) near me so that when I take a break I can do a few bicep curls, shoulder presses, or tricep curls just to keep the blood moving and my muscles awake.  I feel like my brain works better, too, when I am more aware of my whole body while I’m stitching.

Image of Creative Bee with Fitness Ideas
Please keep in mind that I am a quilter, not a doctor or trainer. Please don’t hurt yourself. Seek medical advise before starting any exercise program.

Discover how to use BOTH beautiful sides of fabric.

SHOP more than 50 quilt patterns that use BOTH beautiful sides of fabric!

Enjoy YOUR quilting journey.

Quilt Fusible Web in a Pinch

Estimated reading time: 4 minutes

I first fell in love with light-weight fusible web when I used it with the Leaves Galore rulers.

Water Colours was made with Misty Fuse, a nearly weightless fusible web.

Image of Quilt with fusible web
Water Colours

Misty Fuse is a paperless fusible web.

First, Misty Fuse is paperless. Like a thin spiderweb of glue, it is nearly weightless. It is so soft, your machine won’t even know it is there! Neither will the loved ones who snuggle in your quilt.

However, because there is no paper on this fusible, I feared it couldn’t be used for tracing templates. I do a lots of fusible applique which require tracing templates. In fact, about half of the more than 50 quilt patterns I’ve designed use templates.

Soft Fuse is my favorite paper-backed product.

Soft Fuse is a paper-backed fusible web that is also very lightweight. Although any lightweight fusible will work, I recommend Soft Fuse in my classes and workshops. Even with large applique, your quilt feels softs to the touch. In addition, with a light pressing, it is possible to remove and re-position your applique if needed.

Transferring Designs with Mistyfuse Fusible Web

If you’re in a pinch and caught without your trusty paper-backed product, here’s what you can do!

  • First, draw or trace your design with lead pencil on to parchment paper. You need to make your tracing dark. I use a #2 lead pencil.
  • Then cut a piece of Mistyfuse large enough to cover your design.
  • Using a protective sheet (I used a Goddess Sheet), press the Mistyfuse to the wrong side of your fabric. The Goddess Sheet gives the Mistyfuse a sheen so you can see where it is on your fabric.
  • After the fabric cools, place it with the fusible side up on a hard surface. Cover it with your, design side down, on your fabric and trace the design with a hard pointed object like a stylist tool.
  • Cut your design on the lines.
Image of Bee Tracing for Fusible Web
Image of pressing sheet for fusible web
Mistyfuse on Fabric

Tips for use paperless fusible web.

Remember to trace onto the REVERSE side of your fabric (unless you are using BOTH beautiful sides).

The lead markings transfer much easier onto the Mistyfuse than they do directly onto fabric.  The finer your pencil, the finer your lines. A finer lead will give you a more precise drawing.

This is a great fusible alternative for tracing a template!!Image of Fabric Bee

Enjoy YOUR quilting journey!

« Older posts Newer posts »