Category: How To (Page 4 of 6)

Image of Karla on YouTube

Learn how to use both beautiful sides of fabric…and MORE!

Firstly, learn how to use both beautiful sides of fabric, discover the nuances of value, choose focus and background fabrics!

It’s all about value.

From blog posts to YouTube videos, you can learn about more than 50 quilt patterns that use both beautiful sides of fabric.  Discover the nuances of value and what to look for when auditioning and choosing fabrics for Karla’s patterns AND all your future quilt projects.

When you learn how to use both beautiful sides of fabric, it’s almost like doubling your stash!

In addition, find fun quilting tips and how-to techniques to help you complete your quilting projects quickly and easily. Also, Karla shares her favorite quilting tools, rulers and more. You’ll learn about some unusual ones, too!

A variety of topics.

As well as learning how to use both beautiful sides of fabric, you can learn how to choose color themes for quilts, how to do broderie perse, or how to chain-piece a block. Also find guides to purchasing fabric on Spoonflower, merchandise on RedBubble,  and quilt patterns on Etsy.

Guild programs and classes.

Finally, you can learn about Karla’s classes and programs that teach quilters how to use both beautiful sides of fabric. Moreover, you’ll “meet” some quilt guilds along the way. When you see quilters’ progress on class projects, you get a good look at how different focus fabrics can create completely different quilts, even when the quilters use identical quilt patterns.

Start your journey of learning here!

Traveling Quilts

Estimated reading time: 6 minutes

Traveling with quilts is part of my life.

Technically, I’ve had one traveling quilt in an actual show that toured the AQS circuit for a year. That was exciting!

Mostly, I’m talking about taking quilts with me when I travel.

First, do you travel with quilts? Guilty! I take quilts on vacations, retreats, and even short hotel stays. I like to have them around for warmth and beauty. Maybe I’ll take one along to bind, to photograph, or to just enjoy.

Putting my own quilt on a strange bed makes me feel more relaxed.

This wasn’t my idea, though. A long time ago, I roomed with a friend at quilt retreat who always brought one of her quilts along. I loved seeing which quilt she’d bring to decorate her bed. When I started bringing quilts, I found I rested easier the first night, because I’d claimed that bed as my own with my signature quilt. I decided Donna had a great idea; I never apologized again for packing a quilt!

Traveling quilts hit the guild meeting circuit!

I have the pleasure from time to time to share my story and quilts with quilt guilds during their membership meetings. These trips usually require about 50 quilts. In addition to the large trunk show, I integrate a power point presentation to make sure everyone has a front row seat. It’s lots of fun. Most especially, I like meeting all the new quilters and watching how each guild operates.

One such pleasure was with the PUPS (Pickin’ Up the Pieces) Quilt Guild in Cordova, Tennessee (near Memphis).

I find it fascinating to see the differences between different quilting groups. Size alone can change the dynamics of a group. Meeting location is another factor. Personalities of the members can change how a guild operates. What seems to be constant, though, among all guilds is that the love of quilting, creating, and discovering new opportunities outweighs any of the challenges brought to a group of women (with a sprinkling of men).

Below are a few memories from my visit with the PUPS guild.

Show and Tell
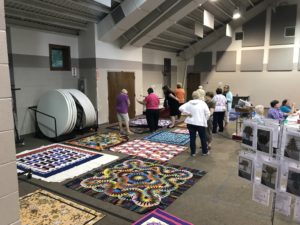
Image of Traveling Quilts
Image of Show and Tell Quilts

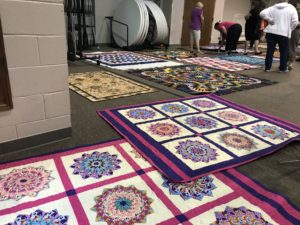
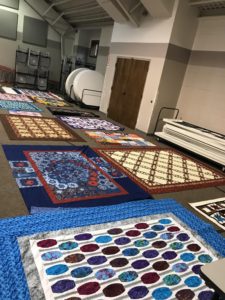
The large auditorium allowed the quilts to be on display on the floor!

As you can see in the photos, this was a fantastic way to get a close-up view of each work of art! And just look at those fantastic quilts!

Interestingly, the guild had a master list of projects that the members had registered earlier in the year. When a show and tell item from that list was completed, that quilter got credit for the completion and was entered into a drawing for retreat funds (money)! How cool is THAT?

Look at all this SHOW AND TELL from only 22 members present!!! I really liked being able to go around and look at each quilt closely during the break!  However, I did later find out that this particular meeting was their LAST CHANCE to complete those projects and that may have contributed to their prolific quilting!

Talk about traveling quilts! These quilters put on one heck of a show and tell!

Image of QuiltsImage of Patterns

Block-of-the-Month

Myself having been in charge of Block-of-the-Month for my guild in the past, I was surprised when their quilters showed up with their blocks dutifully completed for that month and laid them in a pile on a table. This guild had a different way of handling their BOM program. The PUPS gals collect those blocks and make them up into quilts for their community. It’s a really nice way to help the community while quilters  learn new techniques.

Virtual Retreats

I thought this sounded like loads of fun! You just pick a weekend (pretty far in advance for planning purposes). Choose your projects, your favorite jammies, and snacks and have your own retreats at home – but shared with pictures and videos on the guild Facebook page!

Prep for traveling with quilts.

Finally, though I try to be over-prepared, I’m always a bit nervous before giving a presentation. While everything went off without a hitch, I was thankful that I didn’t know who they had just hosted! Thankfully, I didn’t know before I got to town that I had SUCH BIG SHOES to fill.

Marie Bostwick had spoken the month before. Had I known that, I would’ve driven there a month earlier! Thankfully, it didn’t sink in until the next day that I was following that awesomeness. I’m pretty sure Marie and I would be besties, if she actually knew me!

You’ve got competition, Ree Drummond, Pioneer Woman! (Click here to learn how to have Ree as your best friend!)

A big shout-out and thank-you to the PUPS Quilt Guild for their hospitality!

Wondering about the 50 quilts? Click here for my Etsy Shop!

Enjoy traveling with your quilts and enjoy your quilting journey!

Check out Spooky Quilts-A-Brewing for some bubbly quilt class fun!

Visit Home Sweet Home to see class projects on display where I was raised!

See Heartland Quilts for more class projects.
Chain-piecing a Quilt Block

Estimated reading time: 5 minutes

The Benefits of Chain Piecing

As a new quilter, the method of chain piecing seemed magical to me! Not only was I surprised by the time savings, I really liked how soothing this technique made my stitching time.

Firstly, when piecing a sampler quilt (for example, the River Heritage Block-of-the-Month Mystery Quilt), chain piecing individual blocks can save you time and help you stay organized.

Chain piecing is a great technique for all quilters to know.

Secondly, since we have all levels of quilters participating in the free mystery quilt offered here, I decided to share a technique with our newer quilters in mind.

Moreover, chain-piecing is something seasoned quilters do without thought. I remember the lightbulb going on when I was first taught to chain-piece.

My approach to this method.

Actual chain-piecing is not nearly as hard as describing it in words.

me (author)

Have you ever given road directions to someone and said, “It’s not nearly as confusing as it sounds.”? That’s how describing chain-piecing is. Hand’s on, it’s easy to grasp. In words, it seems confusing. Take it a step at a time the first few times and soon you’ll be chain-piecing without even thinking about it.

Here’s how I approach chain-piecing an individual block.


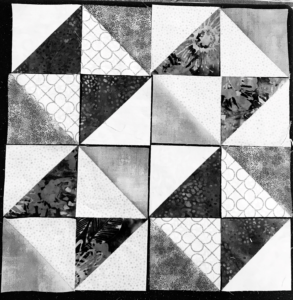
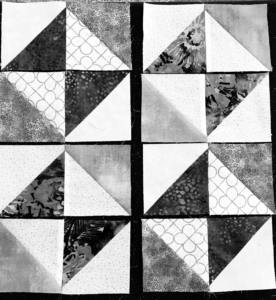
Image of Quilt Block
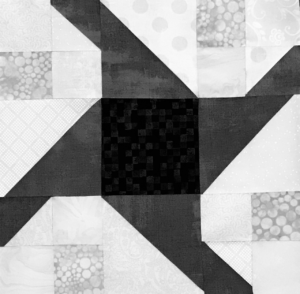
This quilt block is made of four rows and four columns.

The goal when chain piecing is to do as much continuous sewing as possible.


Image of Chain Piecing a Quilt Block
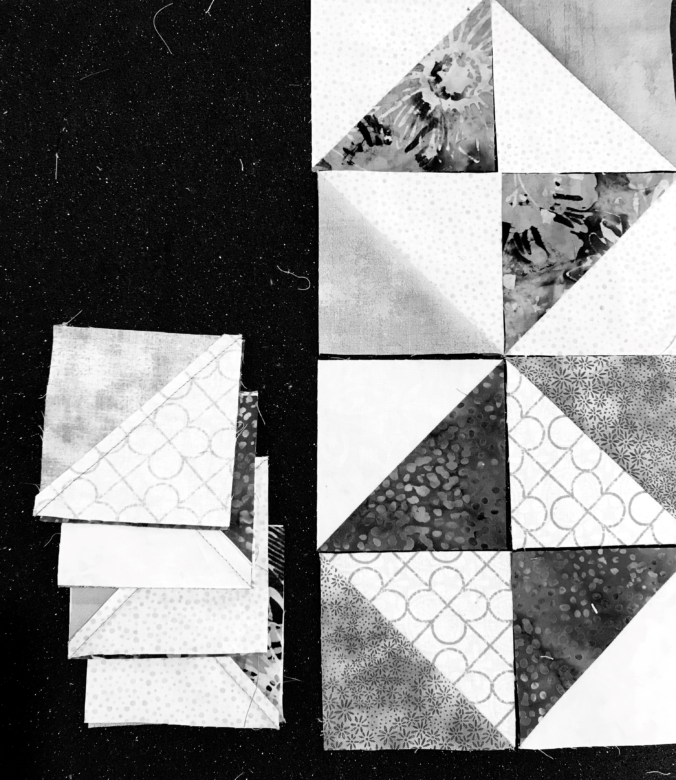
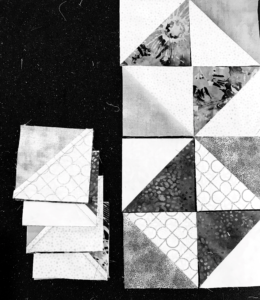
Turn Column 2 onto Column 1, RST.
  • Cut and prepare block pieces. Sample shows all half-square triangle units (HST).
  • Arrange block pieces according to block design.
  • Notice your columns and rows. Here there are four columns and four rows. The unit on the top left is in Row 1 and Column 1.
  • Turn each HST in Column 2 onto the HST to the left, in Column 1, right sides together (RST).
  • Likewise, turn each HST from Column 4 onto the HST to the left, in Column 3, RST.
  • Stack the Column sets to move to your machine for stitching, taking care not to lose their proper order.
  • Starting with the top set ( the unit from Row 1, Columns 1 & 2), stitch down the right edge with your normal 1/4 inch seam allowance.
  • In the same fashion, feed all of your units, one after another into the machine without clipping their threads. A machine with a knee bar makes this easier, but it is not necessary.
  • Trim threads. (See a great thread cutter here, made specifically for chain-piecing.)
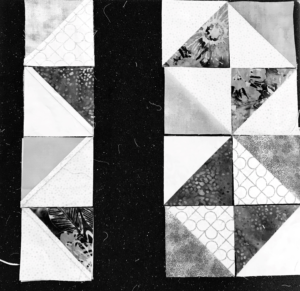
  • Press according to pattern. Arrange the units again in proper order You should have two columns.
  • Similarly, turn Column 3/4 Units onto Column 1/2 Units. Stitch, trim & press. You are now left with four completed rows.
  • Finally, stitch the rows together.

Organization and order is essential.

Image of Layered Block Sets
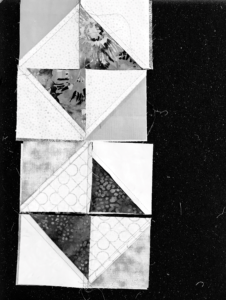
Layer the sets from the bottom up to take to your machine.

The Progress.

Granted, the process of chain piecing may seem never-ending. However, once you’ve constructed the rows, your progress really shows itself.

Image of Chain Piecing Technique
Now you have two columns.
Image of Chain Piecing Technique
Turn Column 2 onto Column 1 and stitch.
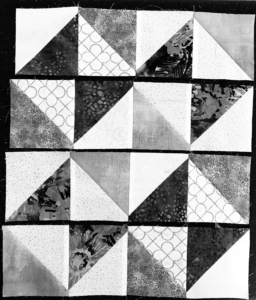
Image of Block Rows
Rows 1 is at the top and Row 4 is at the bottom.

Trim and Square

Importantly, remember to square and trim your block after it is pressed.

Enjoy your quilting journey!

See and shop more than 50 quilt patterns that use BOTH beautiful sides of fabric!

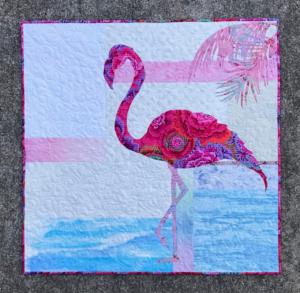
Image of Flamingo Quilt
Fiona Quilt Pattern

Yakity Yak – Let’s Talk Backs

Quilt backing doesn’t have to be boring.

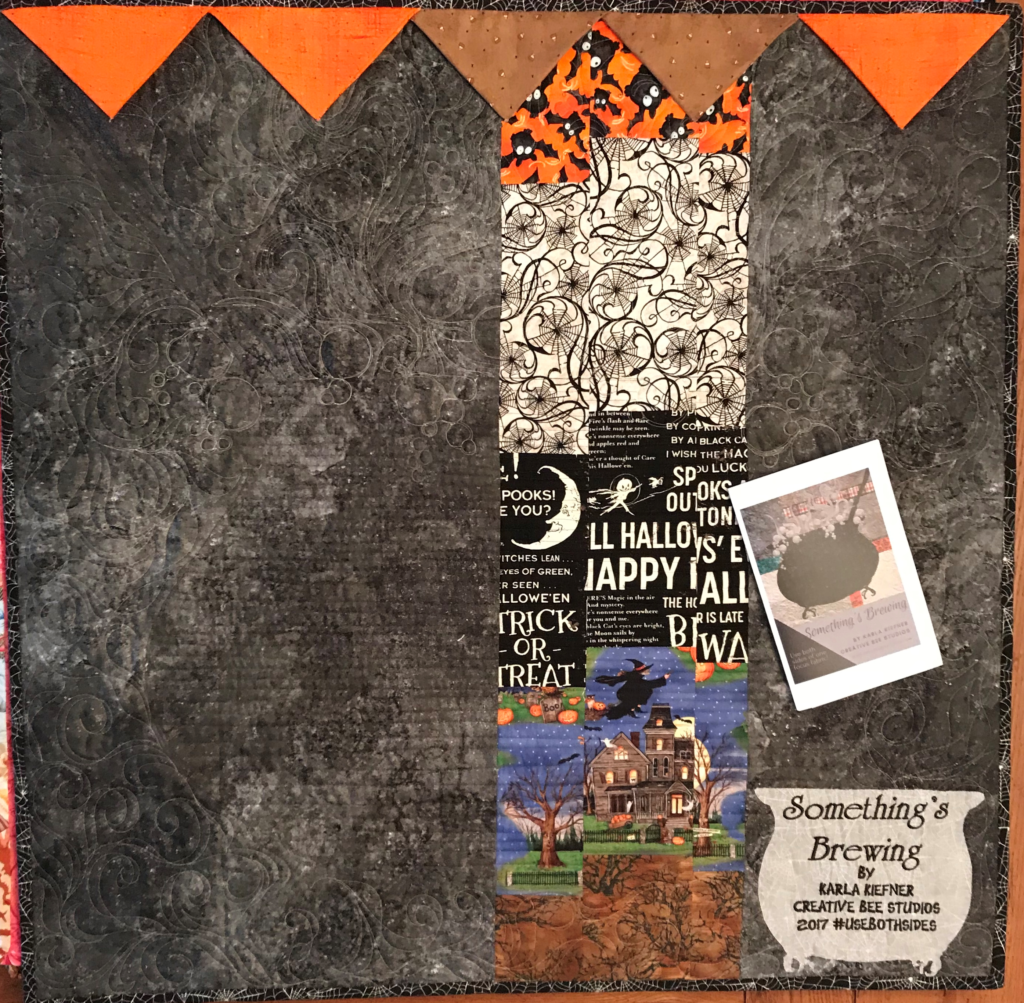
Lots of quilters use leftover fabrics from their stash to piece together a quilt backing. Initially, that was my intention with this pieced backing. I needed to add enough random fabrics to “stretch” the gray Stonehenge backing!

Afterthoughts.

By and large, quilt backing is an afterthought for me. Until now, all of my excitement and energy is focused on the quilt top. My brain can’t handle more decisions while I’m mastering the creation on the front of the quilt! However, when the top is finished, I want to quilt it immediately.

Something’s Brewing

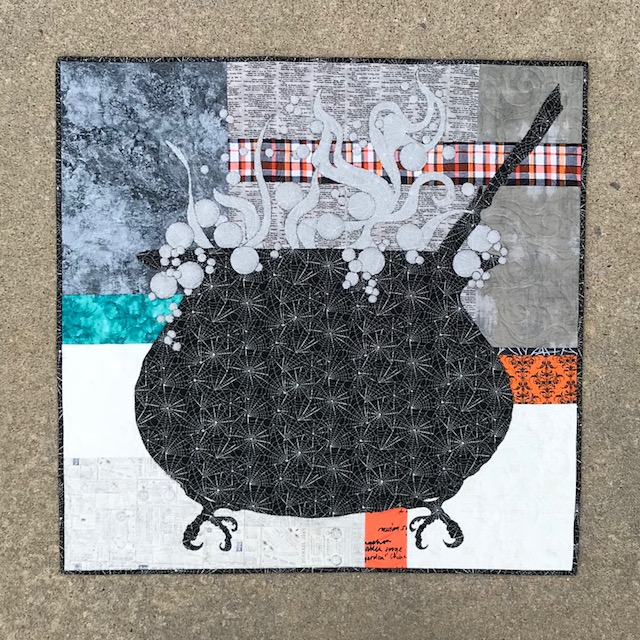
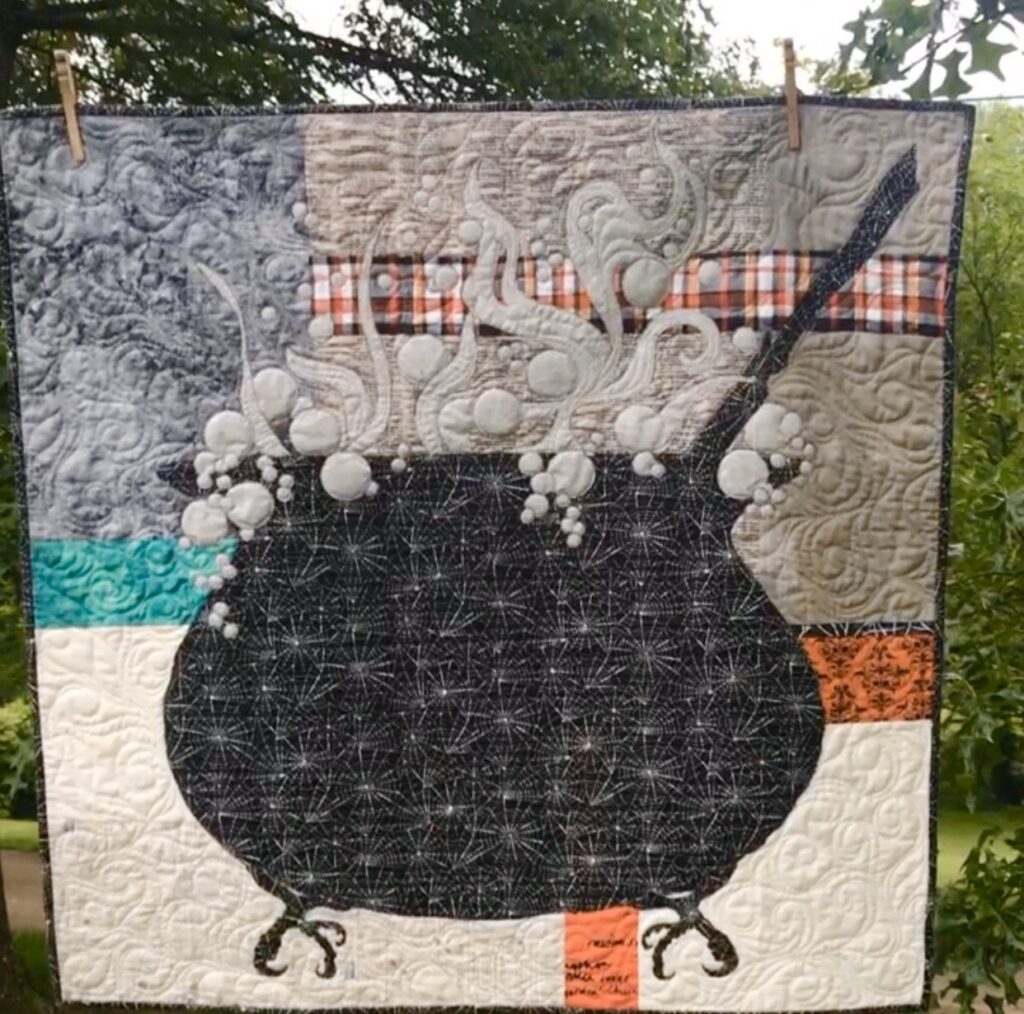
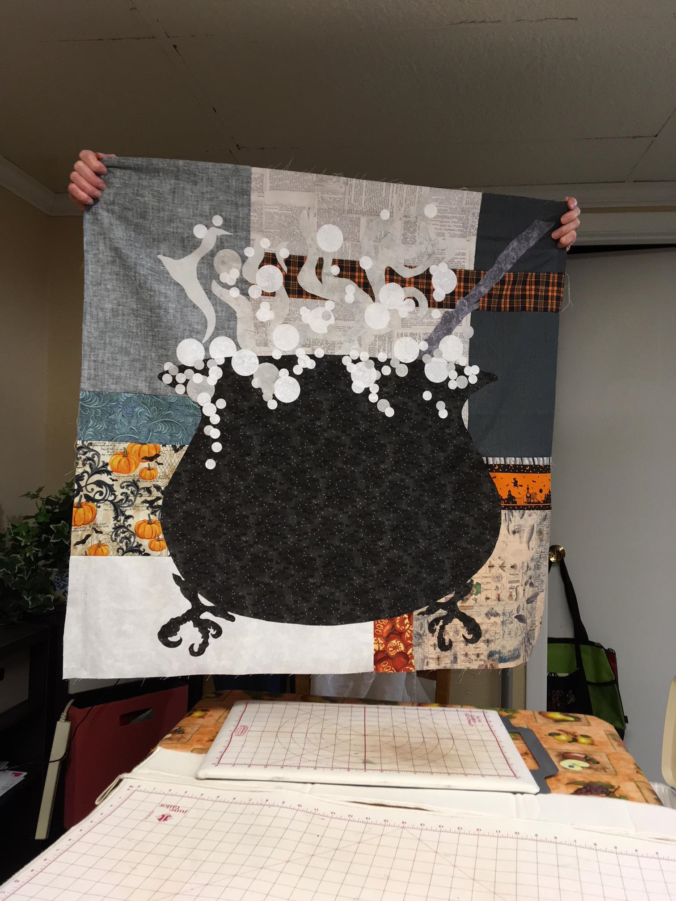
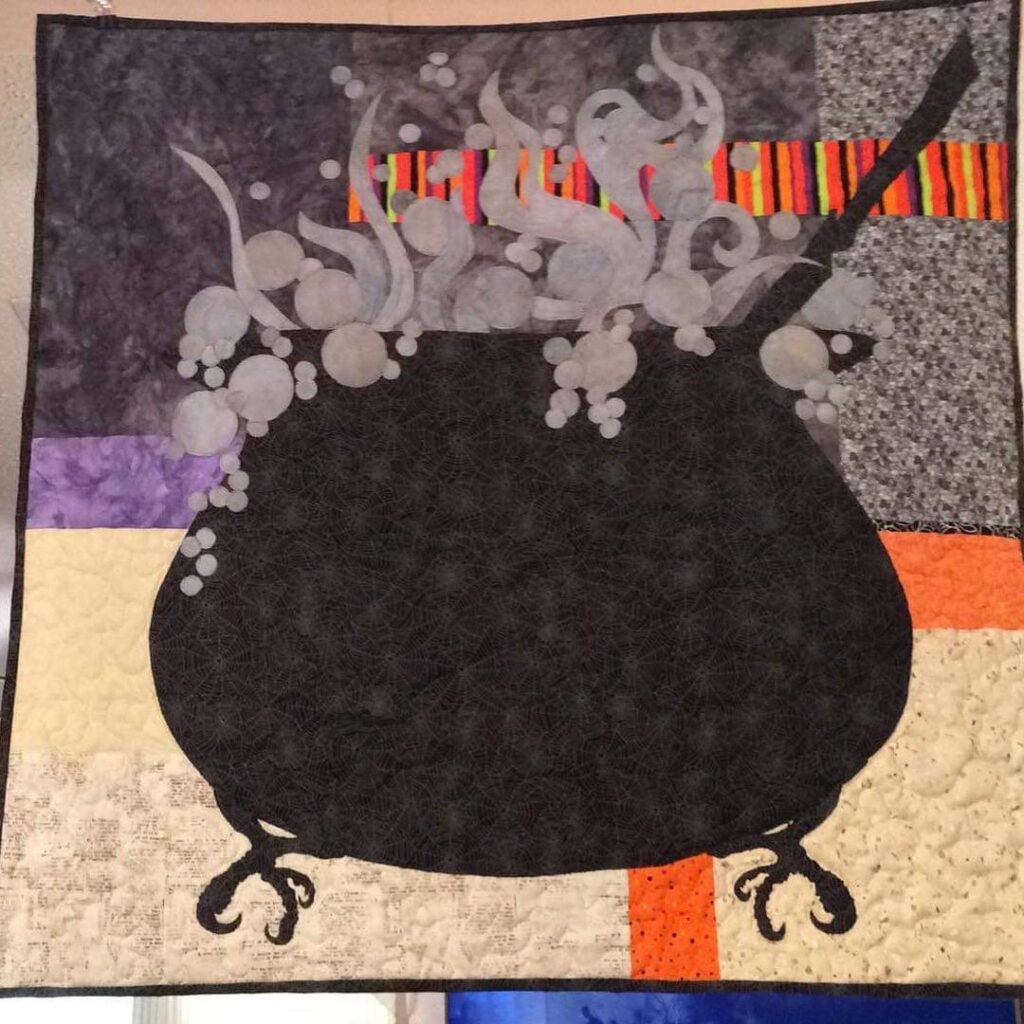
Incidentally, such was the case with Something’s Brewing. This quilt features a huge cauldron that has bubbles and steam simmering over it’s sides. Also, there’s a crooked broomstick and, my favorite, honey buzzard claw feet. Moreover, one focus fabric makes all of these things, plus the binding! That is to say, it is made with both spooky sides of one focus fabric! See How to Use Both Sides for more info!

image of something's brewing quilt

Various spooky background fabrics.

Furthermore, notice the very VARIED background fabrics in this quilt. This background is made from eleven radically different fabrics, including batik, Stonehenge, glitzy plaid, spiderweb, and more. Moreover, there’s even a fabric with William Shakespeare’s Macbeth! It’s such spooky fun!

Why should the front have all the fun?

Although I had pieced my quilt backings before, it had never dawned on me to “instant bargello” my backing! While searching for a single Halloween print to add to my yardage, I found numerous smaller cuts of very fun fabric.

Image of Quilt Back

Instant Bargello to the quilt backing rescue!

Instant Bargello by Susan Kisro is one of my favorite quilting books.Image of Book I’ve made several fun and fast quilts using this book as a guide. I decided this technique would allow me to use small pieces of fabric to make a fun quilt backing. I grabbed some scraps and did three little columns of that technique which gave me enough width for the backing. It was fun and fast!
Prairie Point Hanging Method

Even the Prairie Point Hanging Method got a splash of Halloween fun! The two brown ones have tiny candy corn on them. This was some old Debbie Mumm fabric which I’d inherited from my mother-in-law. I love using little bits of her fabric in my quilts.

Label Fun

Finally, when preparing this quilt to hang in Hancock’s of Paducah for AQS Quilt Week, I brewed up another little cauldron for the label. Incidentally, this cauldron was made from the REVERSE!


Have fun with your backs!

To summarize, if you have to make a quilt back, why not make it fun?

Enjoy YOUR quilting journey!

SHOP more than 50 quilt patterns that use both beautiful (or spooky) sides of fabric!

Seven Ways to Use Both Sides of Fabric

Estimated reading time: 4 minutes

Get inspired to use both sides of fabric!

First, get a glance at seven (of now more than 50) quilt patterns made with both beautiful sides of fabric, right here, right now! Fun announcements included below!

The girl who started it all…Phoebee.

Learn how Phoebee inspired the start of using both sides of fabric HERE.

Firstly, Phoebee’s focus fabric has a lot to say! However, it doesn’t completely define this quilt! Look at that eclectic group of background fabrics! It’s all about value. I love how Phoebee gets her life and vibrancy from the very flowers (REVERSE) she’s pollinating.

Belle and Lilly join the party.

Image of Butterfly Quilt
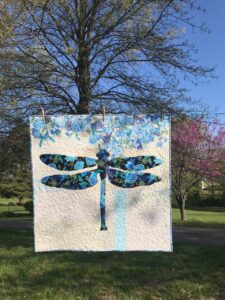
Image of dragonfly quilt made with both sides of fabric

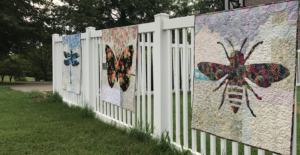
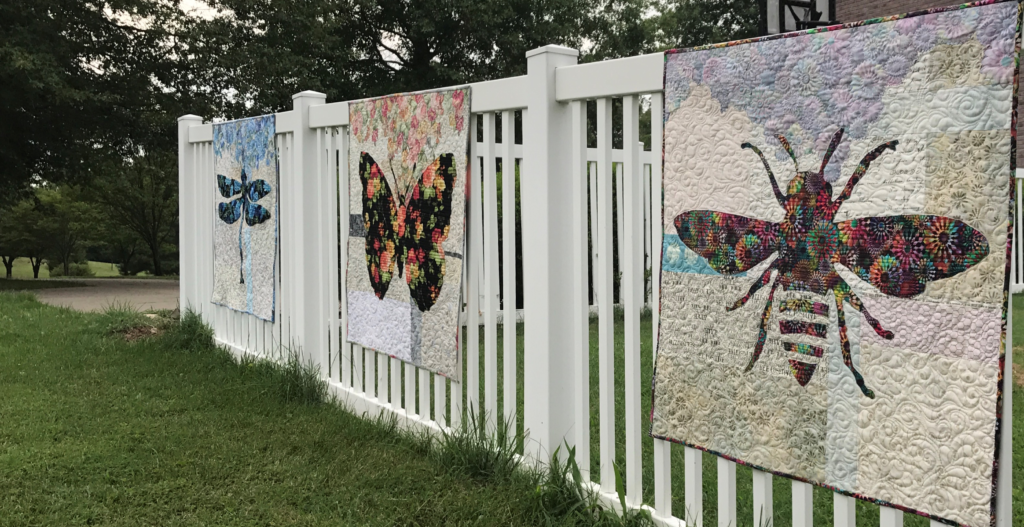
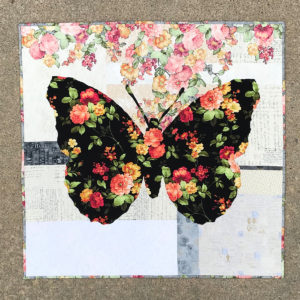
Soon after Phoebee was born, Belle and Lilly came to life. In the same fashion as Phoebee, these two gals were made with both sides of floral fabrics. Their contrasting genre of fabric give them each a unique style.

Additionally, I taught numerous classes of this Colorful Wings collection.

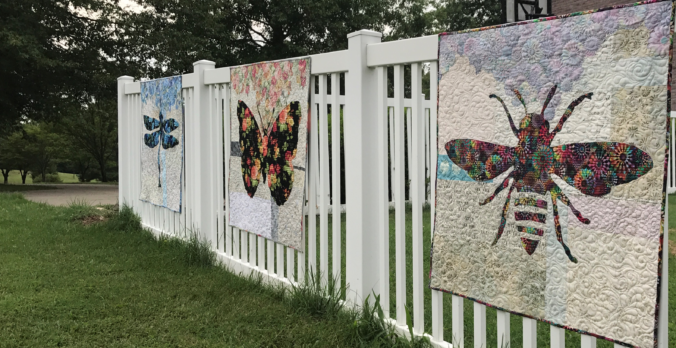
Image of Three Quilts on Fence
Phoebee, Belle & Lily

Value is key when you use both sides of fabric.

Read Mysterious Values.

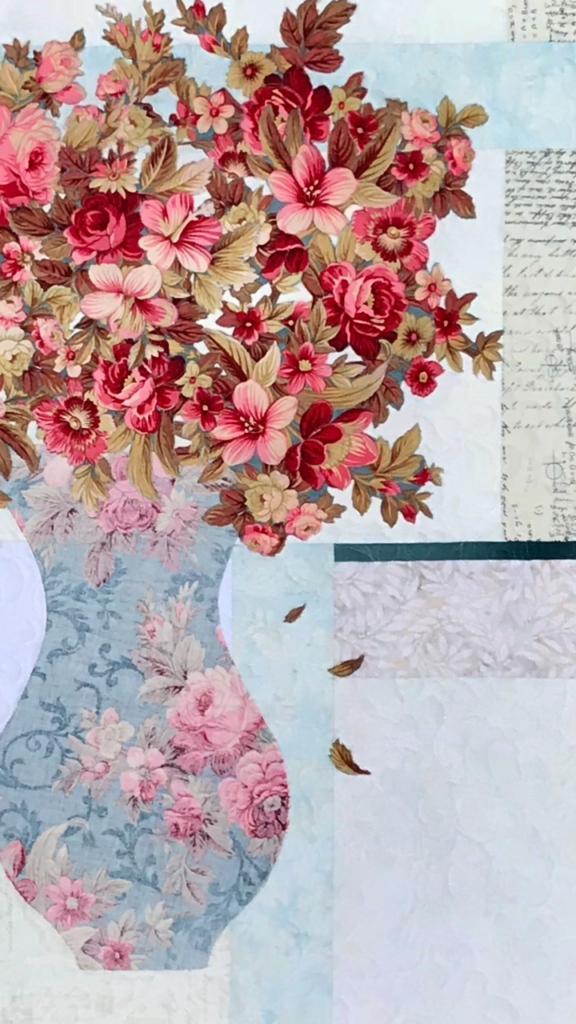
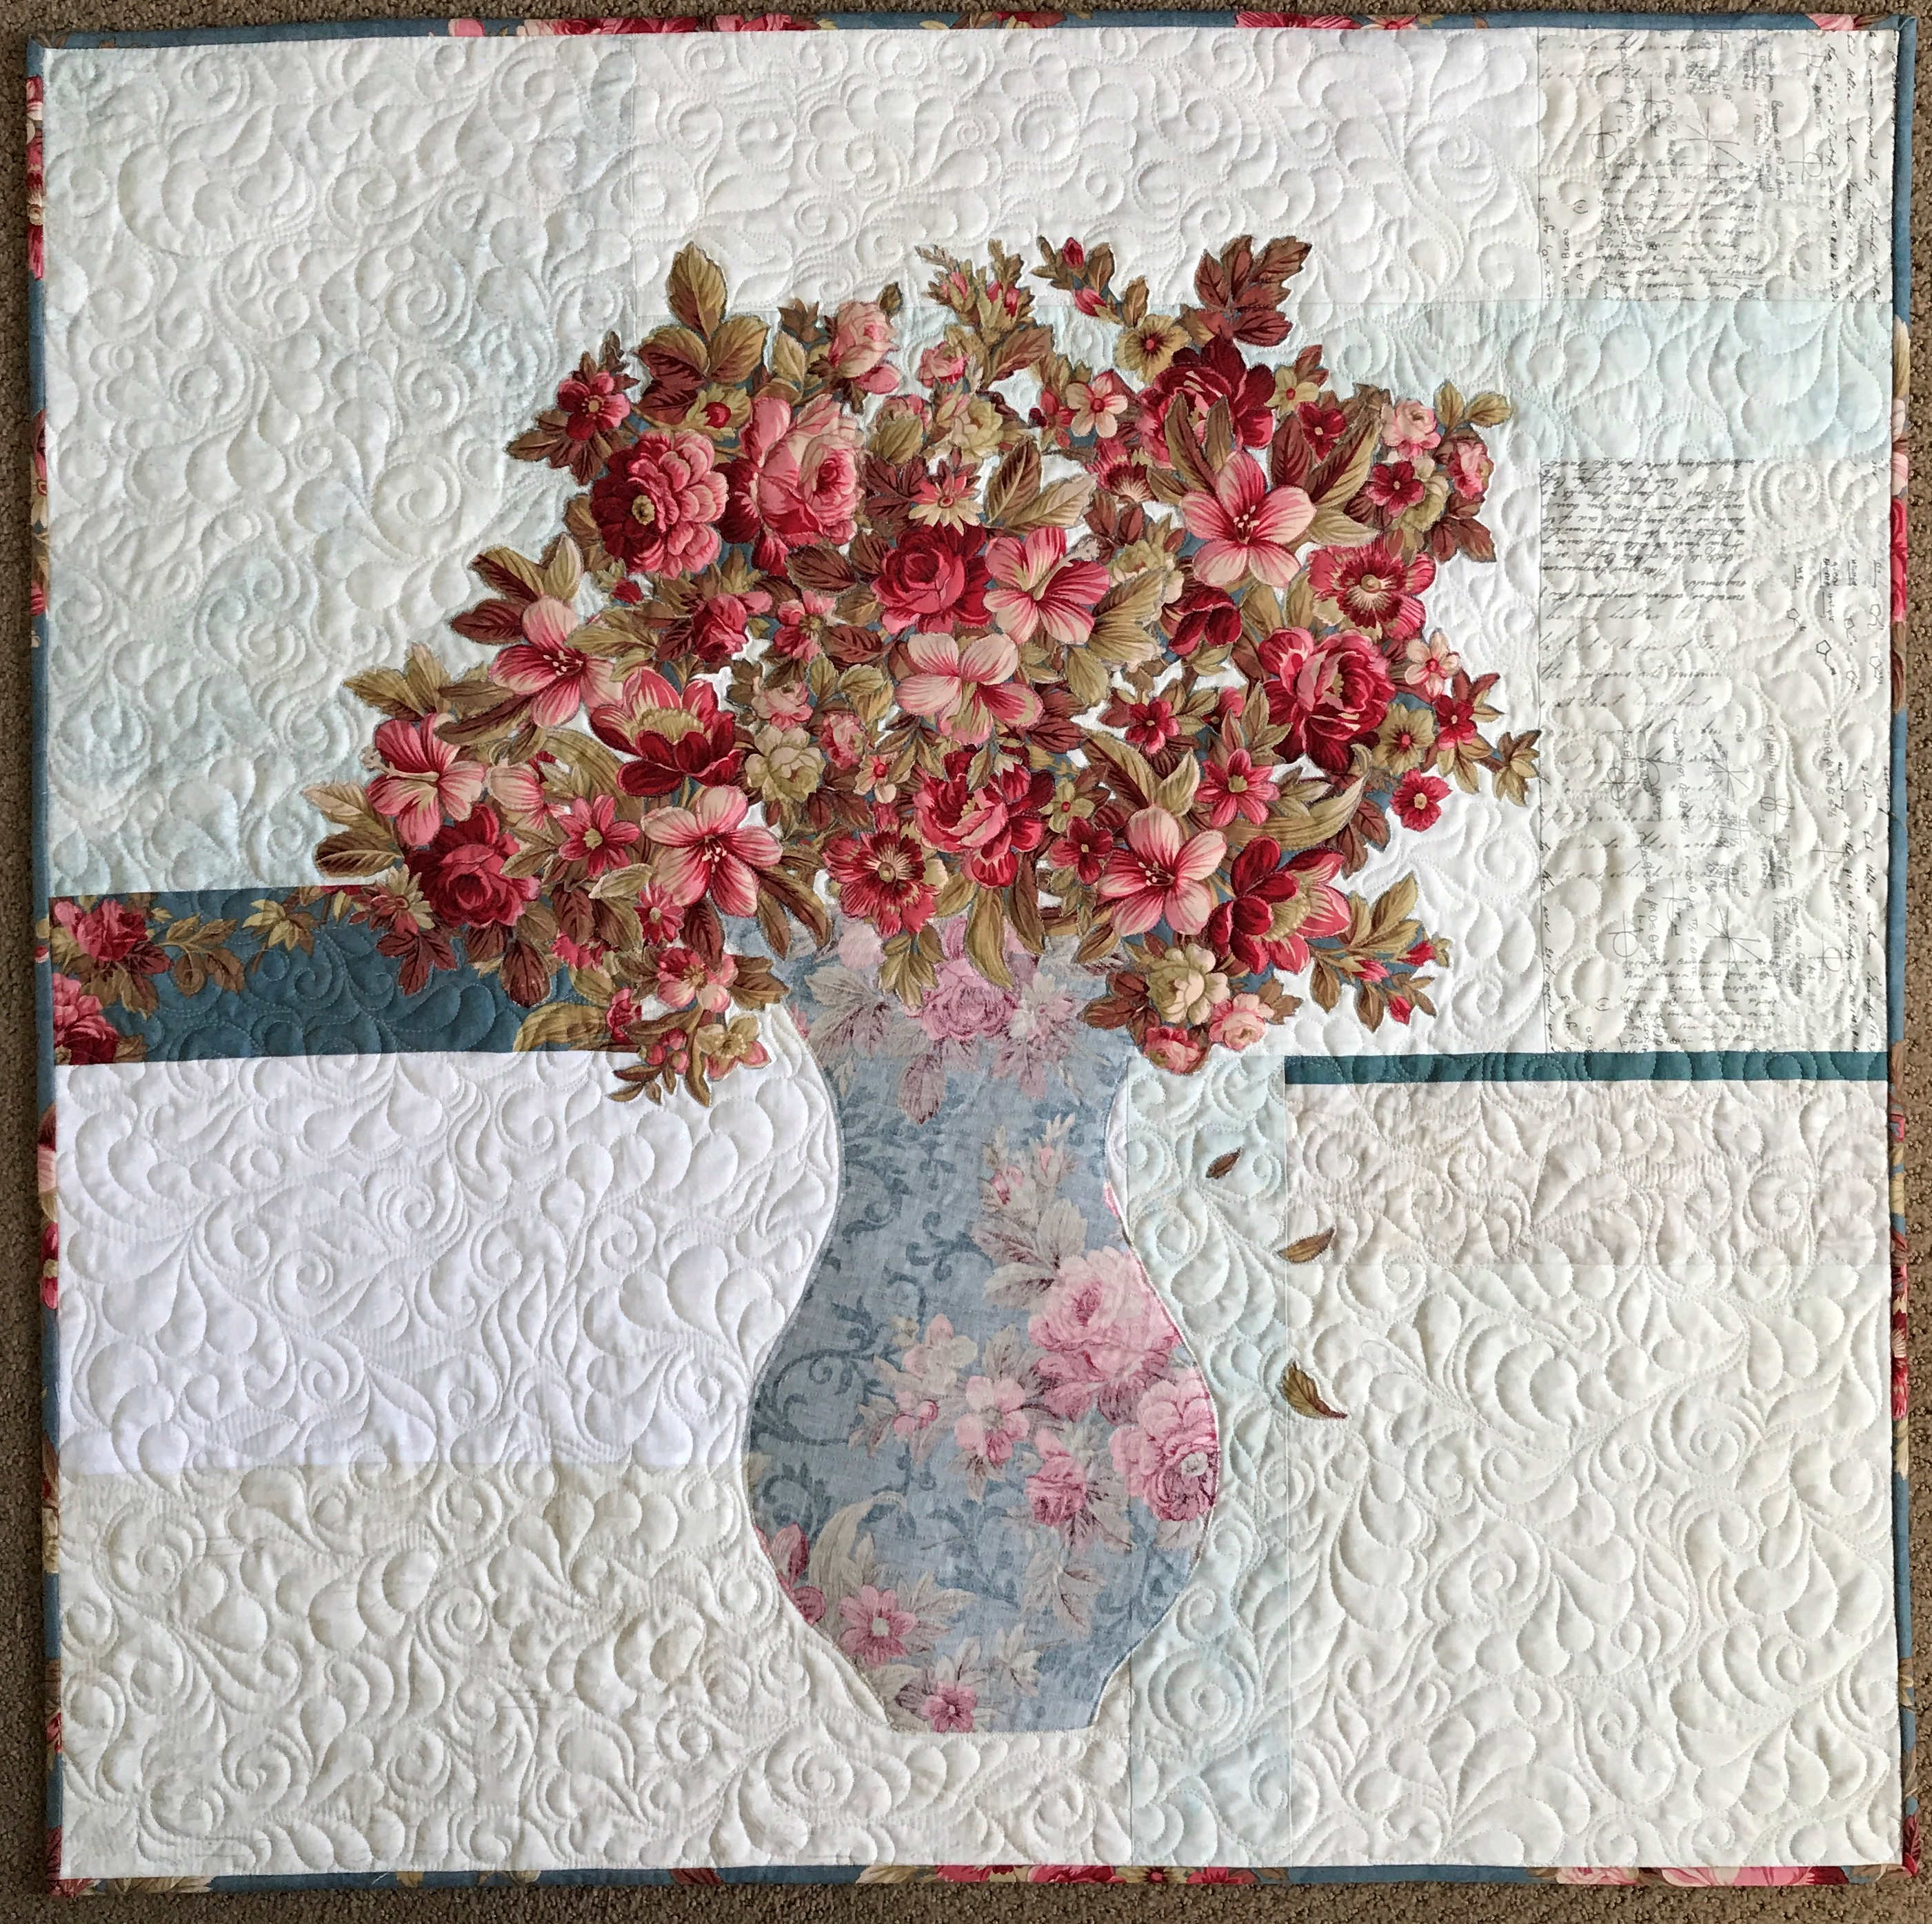
Rose was the first pattern in the Colorful Petals series.

image of both sides of fabric for Rose

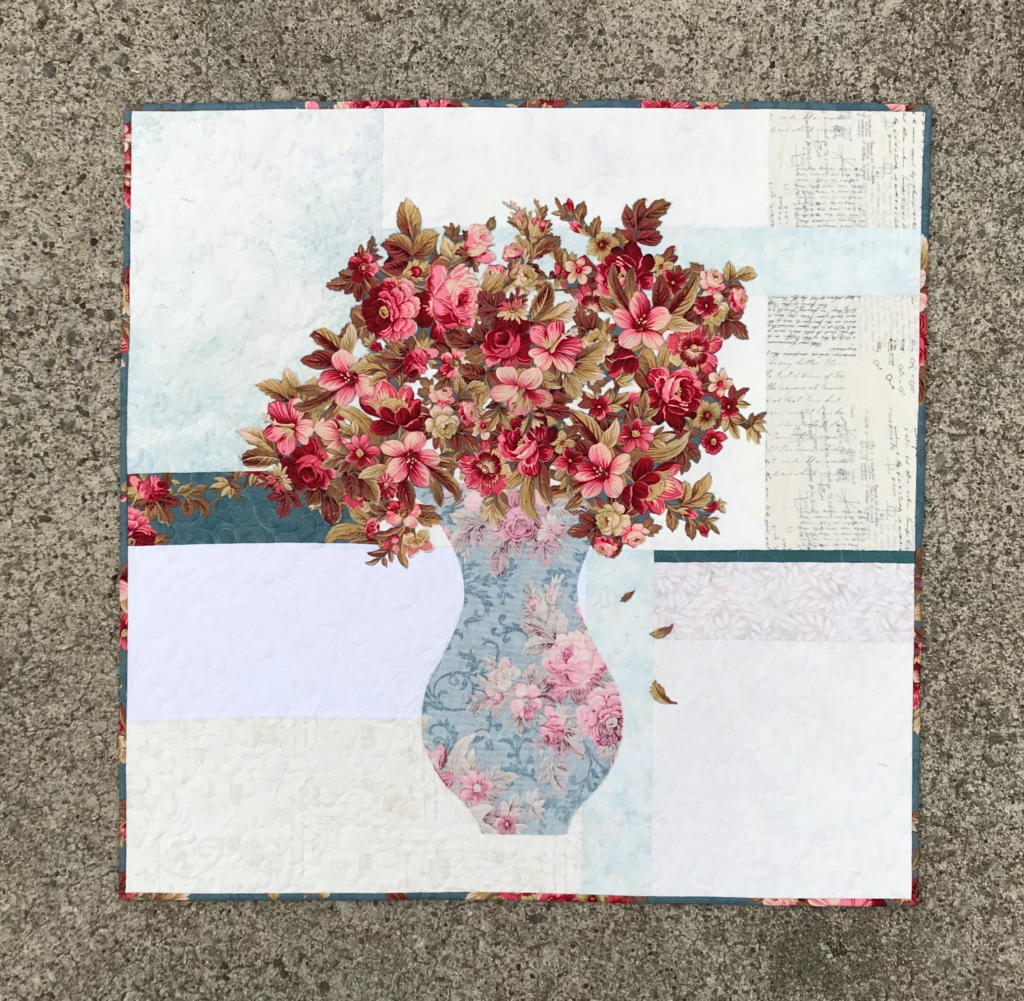
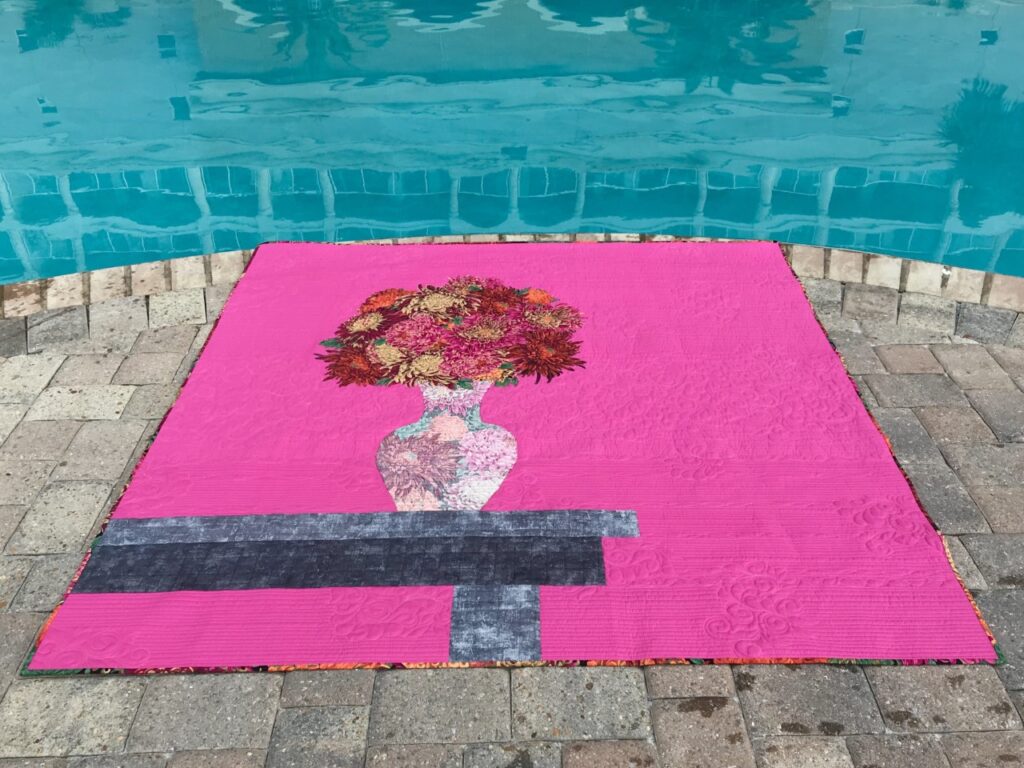
Interestingly, I found Rose’s focus fabric in Branson, Missouri, as I raced through the shop. I quickly pulled out bolts to look at the reverse sides of fabric, while my husband waited in the car. This fabric by Red Rooster was an instant winner! Notice the secondary scroll design that shows on the vase? It’s gorgeous on the REVERSE.

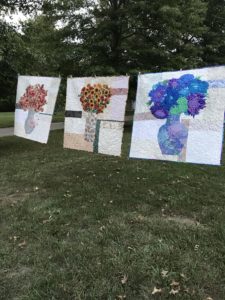
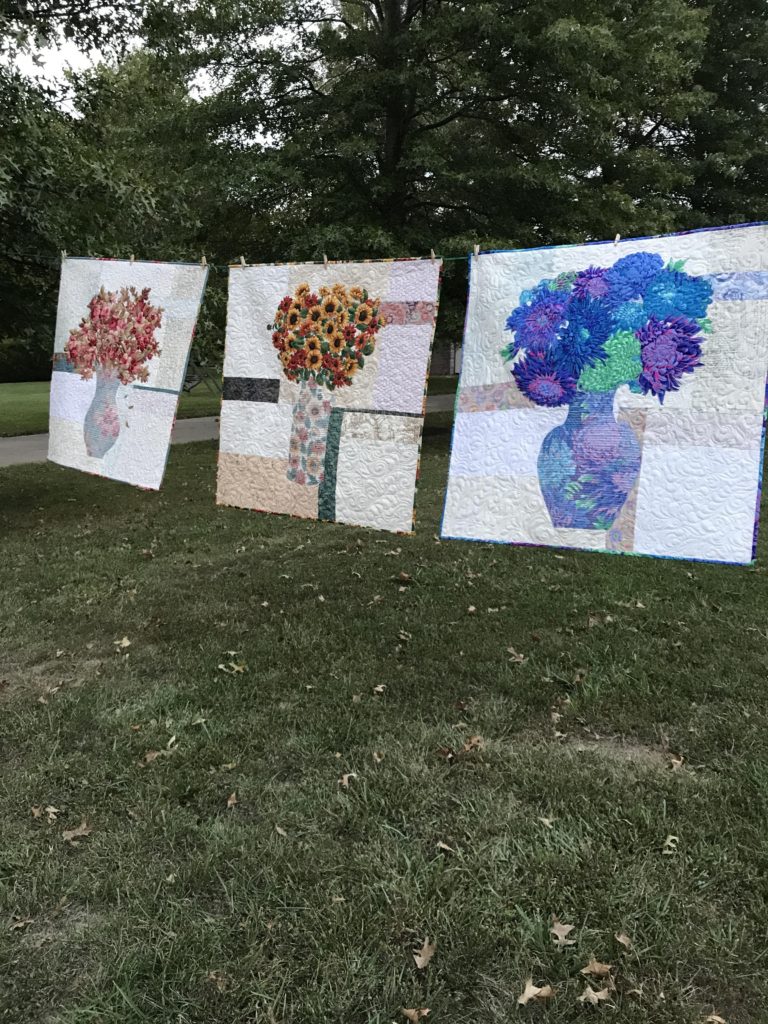
Both sides of floral fabric for more bouquets.

Image of Three Quilts
Colorful Petals Quilt Patterns

Creative Bee Studios Etsy Shop

Launched, Fall 2017

More fun with both sides of Sally fabric!

Eventually, I began shipping patterns all over the United States and to Canada!

Creative Bee Studios use both sides of fabric quilt patterns have been featured in AQ Magazine, Hancock’s of Paducah, Connecting Threads, Nancy’s Notions, and quilt shops across America!

Learn more

In conclusion with this overview of the past year, thank you all for your support.

Enjoy your quilting journey!

Quilt Retreat Checklist

Estimated reading time: 3 minutes

Get your retreat packing on!

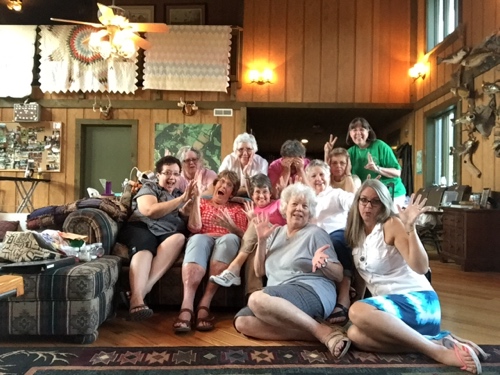
Image of Quilters
Read HERE about this Jonas Bluffs Retreat!

Here’s a quick quilt retreat packing list to make your prep easier and your quilt retreat fun!

Firstly, one must remember the basics.

You need friends, fabric, food, and laughter on the top of your packing list.

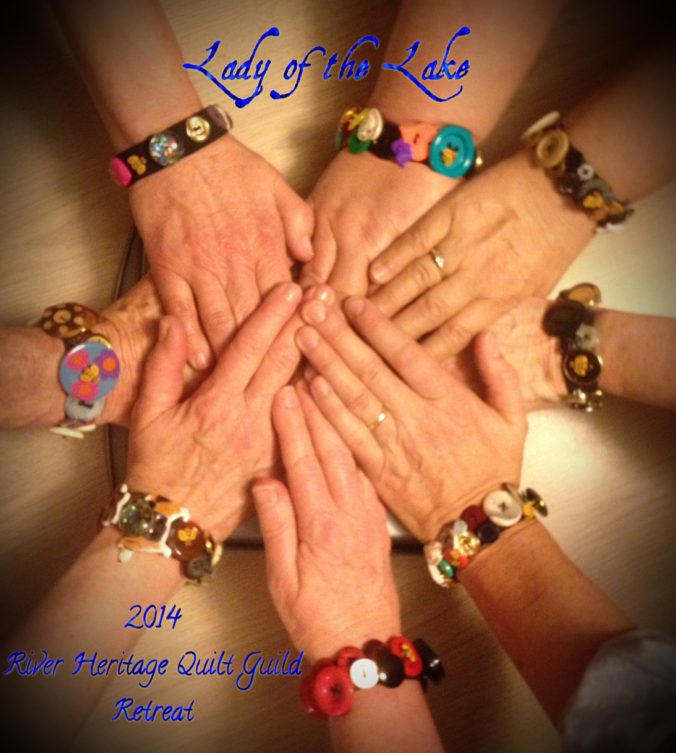
Here’s a quilt retreat checklist from a cabin called Lady of the Lake.

Secondly, it’s important to anticipate your particular retreat needs. The accommodations, schedules, and cabin mates can make a big difference in your experience and your packing list! Therefore, I’ve decided to share the list as one example of how we do quilt retreat at Kentucky Dam Village, Lady of the Lake style!

Lady of the Lake Cabin Style Retreat Packing

Mostly, we would have eight lovely ladies in one cabin. We each set up our work station, stitch a lot, eat a lot, share a lot, and laugh a lot. We schedule our meals and each person provides in some way, either meals or supplies.

As the years went on, we learned we didn’t need to prepare to great detail as we did in the earlier years. For example, planning only one large meal a day and allowing the later days in the event to be determined made our packing and planning much easier. Not only did we not have nearly large amount of food to pack, we had less to get rid of at the end of the retreat.

Additionally, less meal planning allowed us to change our plans as the week went on.

Quilt retreat packing list.

Hope you get some use from this list and a little insight to dynamics of the Lady of the Lake gals.

  • Sewing machine with electrical cord, foot pedal, manual, extra light bulb, bobbins, Q-tips for cleaning lint.
  • Seam ripper, scissors, Seam ripper, scissors, rotary cutter and blades, rulers, cutting mat, iron, pressing surface, tables, electrical cords, extension cords, extra lighting, fabric spray, pins, hand-work supplies, guild directory, ¼” guide and 3M removable double-stick for guide on machine.
  • Personal Items: pajamas, preferred drinks, snacks and food for meals not planned, rice bag for sore muscles, massager for neck and shoulders, comfortable clothing, walking shoes, jeans for shopping trips, jacket/sweatshirt, overnight bag/products, Advil, pain relief lotion.
  • Additional: paper, pencil, electrical strips, charger cords, tape, table cloths (for design boards), cleaning wipes, pest strips.
  • Snacks, drinks, paper products, coffee and filters.

Supply List Printer Format

SHOP more than 50 quilt patterns that use BOTH beautiful sides of fabric!

The Quilting Forecast

Estimated reading time: 4 minutes

An interesting quilting forecast abounds when raindrops on Rose, quilted umbrellas,  and Mary Poppins connect.

This quilting forecast is looking good. Fortunately, rain doesn’t usually dampen a quilter’s spirits. In fact, a little forced inside time can do wonders for sewing production, right?

Traveling to my home town to introduce my patterns to the local guild, I am careful to keep the raindrops off of Rose! I’ll be teaching a large workshop for the Memory Makers Quilt Guild soon. This is their first look at what’s ahead!

The Quilting Class Forecast

Six or more quilt designs are the choices for the large workshop.

The quilters get to choose from a number of designs, including Phoebee, Belle, Lilly, Rose, Kate, and Emily. The quilting forecast for this group is creativity!

The Memory Makers may have a small membership, but they are large on participation and creativity.

A memory maker for me.

Born and raised in this small town, I have fond memories of simpler times. We rode bikes all over town (sans highway 61- not allowed). I worked summers at the swimming pool, start as “bag girl”, becoming a life guard, and even managing the pool one summer. As teenagers we “rode around”. There were homecoming snake dances around the square in route to the big bonfires. The cracked sidewalks and uneven pavement I rode over and over seem etched in my mind.

Moreover, I am honored and fortunate I can go back to my home town to share my quilts with friends.

However, with the wet weather forecast for this week, I’ll be doing my best to keep the raindrops off of Rose and all her friends!

Umbrella Table Runner

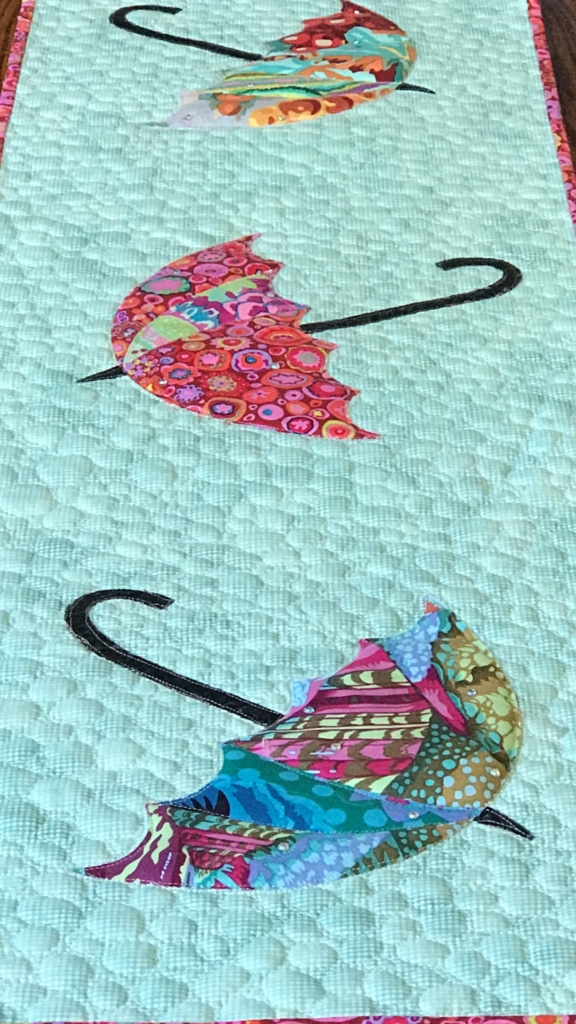
It seems fitting to break out the umbrella table runner today with the forecast of a rainy week ahead. This quilting forecast is CUTE!

Image of Quilted Table Runer

Undoubtedly, this is a fast, fun project. We are talking about a single background fabric, just a few cuts of scrap Kaffe Fasset fabric, and the Accuquilt umbrella die! Coupled with pebbled quilting and you’ve got a perfect table runner for a wet forecast. See Raindrops on Roses to see a few of my favorite things from the AQS Quilt Show in Paducah.

Furthermore, umbrellas always remind me of a favorite book, movie, and musical:

Mary Poppins, of course! Like shifts in the wind, the music, the magic, and the meaning of this beloved story is a favorite. The umbrellas in the runner above seem like they could be pulled right out of Mary’s carpet bag!

Quits and Musicals

Our youngest daughter, Jacquelyn, played the role of Mrs. Banks in her final college show. Apart from the Mary Poppins show, I’ve made a number of quilts to commemorate her various roles in musical theatre. One such quilt was for her role as Laurey in OKLAHOMA!, shown below.

Click HERE to see  “Sweet Dreams…of You” and the quilt commemorating Jacq’s role as the legendary Patsy Cline and  Click HERE to see “One…Singular Sensation” which features a fantastic quilt binding tip and Jacq’s role as Cassie in A Chorus Line.

SHOP more than 50 quilt patterns that use BOTH beautiful sides of fabric!

One Easy Way to Conquer Color

Estimated reading time: 3 minutes

Image of Quick Trip Quilt
Tropical Trip by Karla Kiefner, Quick Trip Pattern by Eleanor Burns

Choosing color for quilts can be a daunting task.

Color for quilts is a common theme in the quilting book industry. Without a doubt, there are countless books on color theory.

Access to books on color for quilts isn’t my problem.

Unfortunately, wrapping my brain around the content in those books IS my problem! I wish I knew how many books there are which explain how to use color in making quilts. I also wish I knew how many times I looked at the color wheel. I know it, read about it, and studied it. However, going from page to fabric doesn’t seem to work for me!

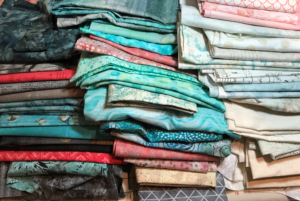
Image of Fabric Stash

Color for quilts is in the details.

Many books about color go into great detail explaining the principles for mastering color for quilts. You can learn about:

  • hue
  • color
  • intensity
  • warm and cool
  • harmonies of triadic, analogous, split-complimentary, double-complimentary
  • complementary colors
  • and MORE!

Summarily, there are whole books of very small print, explaining everything you’d ever want to know about color for quilts!

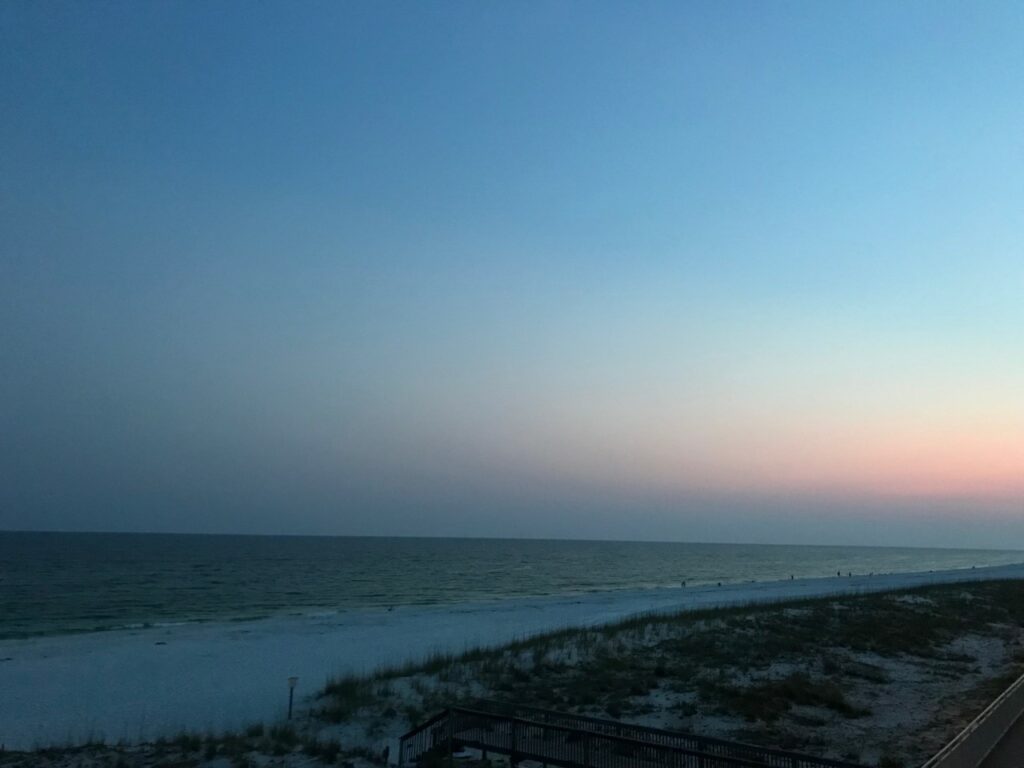
Image of sunset for color for quilts

But they don’t work for me.

Likely, the reason is because I’d rather be making a quilt! But there is one thing I have learned about reading about choosing color for quilts: I have never been inspired by what I’ve read!

Look around you.

For me, I do better by “studying” nature. Sometimes its from a picture and sometimes it’s from real life. Either way, I find that nature, whether its a single flower, a landscape view, or a beach at sunset has perfect coloring. Furthermore, its inspirational!

Monochromatic by Nature

Read more about using nature as you color guide in Monochromatic by Nature.

Check your self with color charts and books.

Nevertheless, I am not recommending throwing color theory out the window. Instead, I prefer to use it to evaluate my choices AFTER I’ve been inspired with a color scheme. Color theory for quilts is obviously good and important information. I just want to learn about it while holding fabric!

SHOP more than 50 quilt patterns that use BOTH beautiful sides of fabric!

I will admit I am very much a color person. Color can evoke emotions in me that seem just a little over the top — I REALLY, REALLY love some and REALLY don’t care for others. Maybe you are like that, too? 

Mysterious Values

Estimated reading time: 5 minutes

Learn how to overcome the mysteries of value. It’s easy!

Value can be a head-scratcher. Learn the simple tip for how to conquer fabric value!

To begin, you need to come to terms with the fact that fabric values change, depending on what is next to them. Initially, I was resistant to this!

When separating your fabrics for a new quilt project, you might wonder how to know which fabrics go where!

Image of Fabric Stash How to determine fabric value
Darks, mediums, and lights.

Undoubtedly, it’s about more than piles of darks, mediums, and lights. The key is to learn how to measure their value.

I learned a valuable (wink) lesson when I stumbled upon the nuances of value when using both sides of fabric. See my design story HERE.

Up to this point, my method for separating values didn’t account for what those fabrics were next to. Consequently, two very cool Bonnie Hunter quilts I made (and still love) never displayed the secondary pattern her designs are known for. What did I do wrong?

Test your values.

How can a fabric value change, you ask? While the value of the fabric itself doesn’t physically change, how you see that value is affected by what is near it. Let me explain and then give you a simple way to test your values…

My Light looks too dark when I use that light of a Medium!

confused quilter

The three piles of fabrics shown above are my selection for the free River Heritage Mystery Quilt Pattern I am designing for my quilt guild. Darks, Mediums, Lights. This should be straight forward.

However, when you place, for example, a darker Light and a lighter Medium next to each other, they suddenly look similar in value. Color can make it difficult to determine value.

So how do you remove color from fabrics you are auditioning?

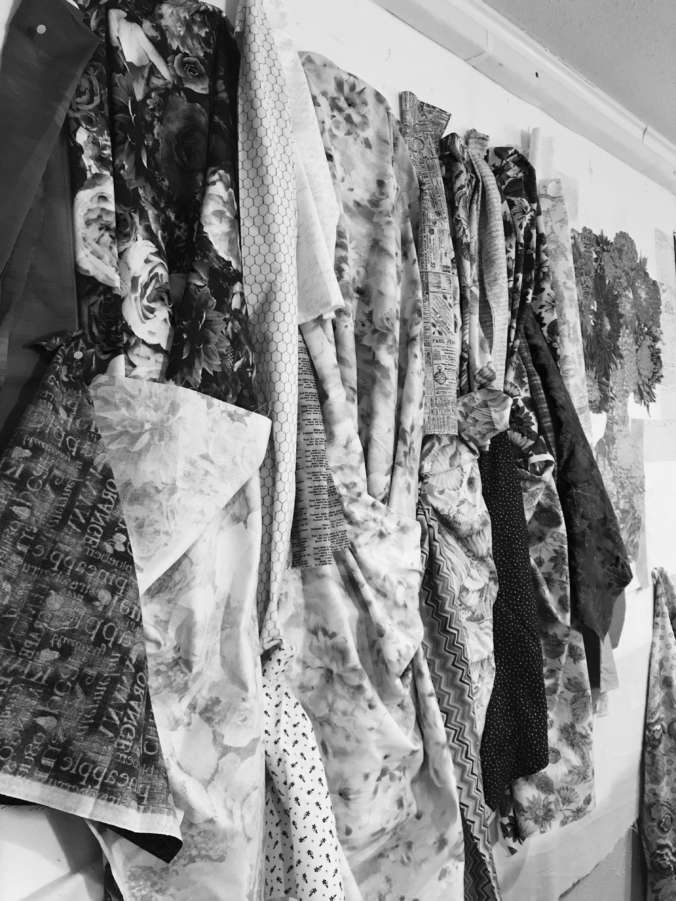
Take black and white photos. I learned this by testing values of both sides of fabric. Each pattern I design that uses both beautiful sides of fabric comes with a detailed guide for auditioning fabrics for that quilt project.

Also, read more here about The Tricky Traits of Value!

The best way I have found to truly see the value of a fabric is to take a black and white picture.

How to use black and white image
Check your values by taking a black and white picture.

If you are in one of my classes, you see that I don’t give any opinions about fabric options without seeing a black and white photo first. Even with years of experience looking at both sides of fabric, I can still be tricked by color! Quilters seem to have lots of fun with the process of auditioning and choosing fabrics. Oftentimes, they help each other and end up trading fabrics to get just the right mix for their project.

So grab your stash and your camera !

Now you know the how-to tip for determining value. Why not have fun practicing on a quilt made with BOTH beautiful sides of fabric!

How to use both sides of fabric in bouquet quilt.
Kate’s Bouquet is made with both beautiful sides of two fabrics. It’s all about value!
Image of Three Quilts
More than 45 patterns that use BOTH sides – SHOP HERE!
Image of Quilt with Bee.
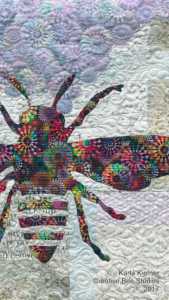
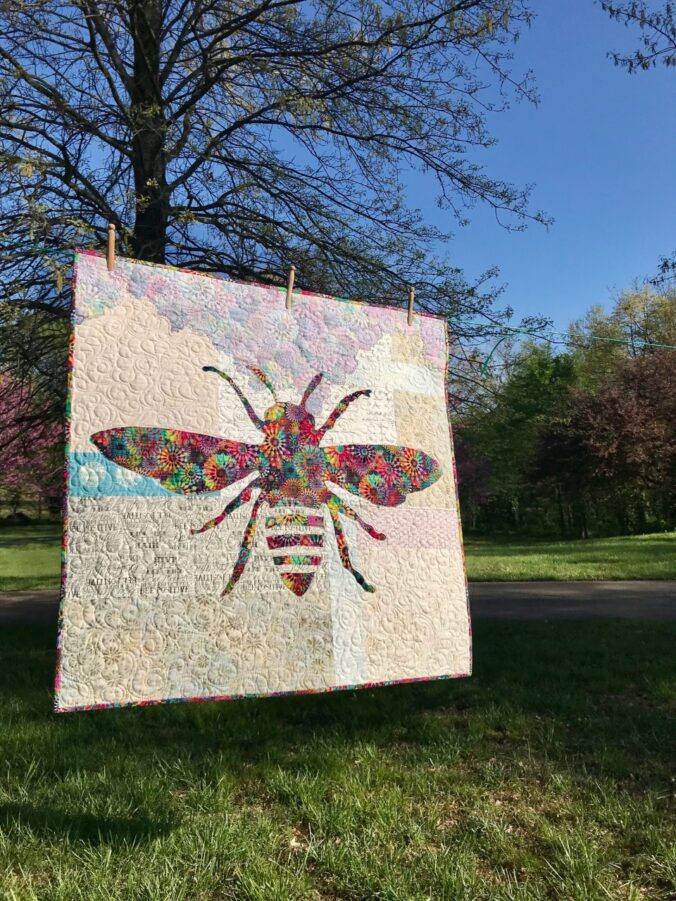
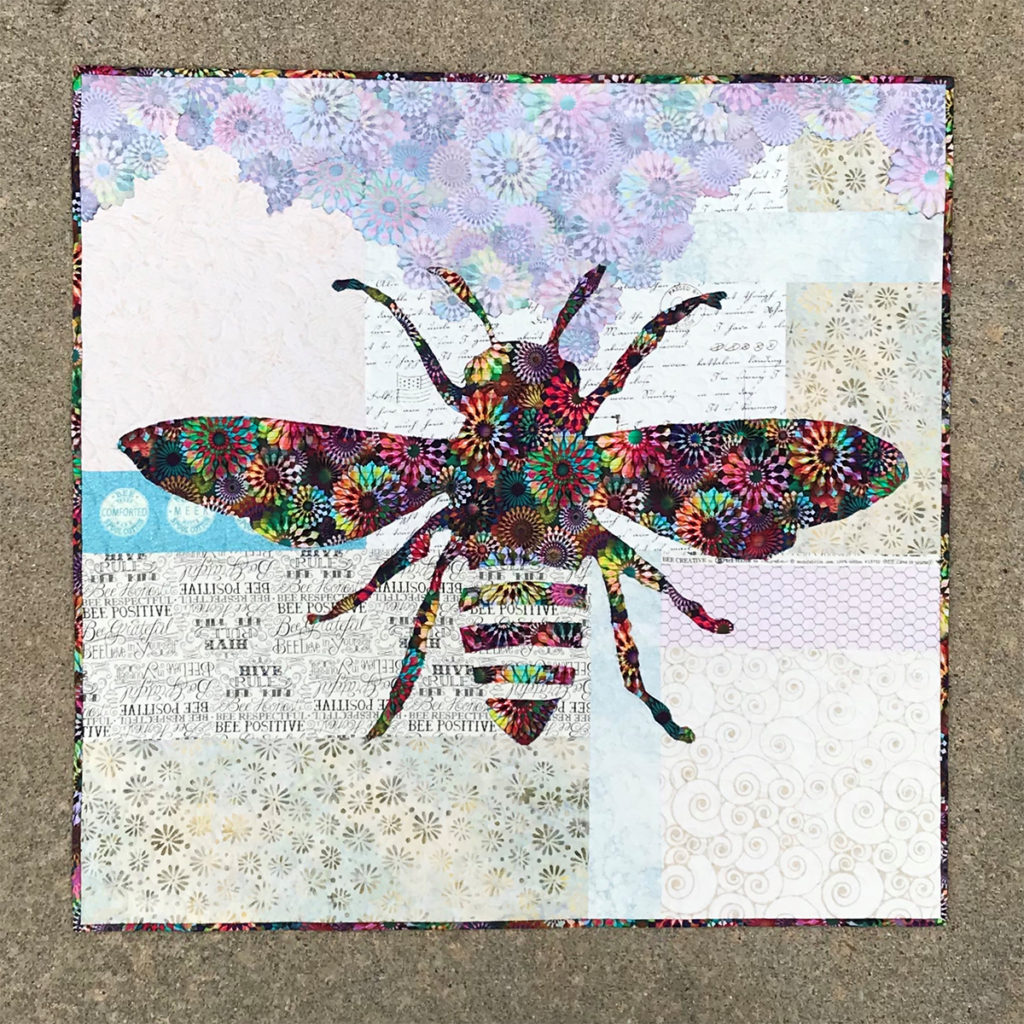
Phoebee was designed using both sides of a focal fabric.

As you can see above, Phoebee’s focus fabric is strong enough to accommodate even medium background fabrics.

Have fun playing with value and enjoy your quilting journey!

Spooky Quilts A-Brewing

Estimated reading time: 3 minutes

Creativity abounds in these Halloween quilts made by workshops and by pattern customers!

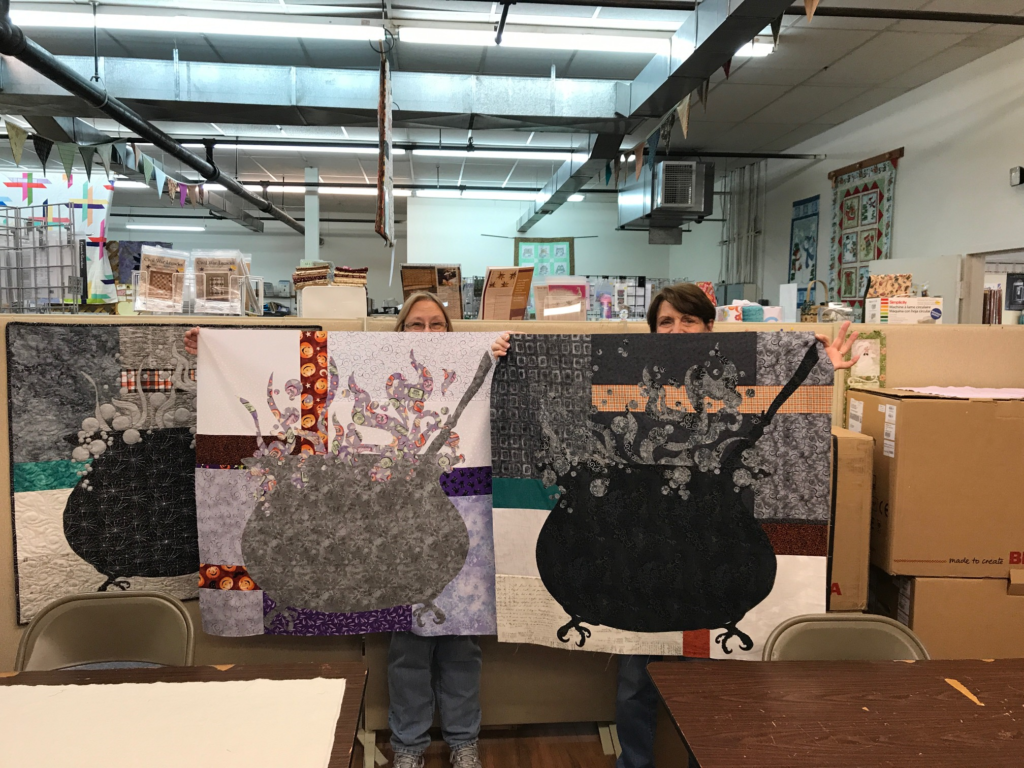
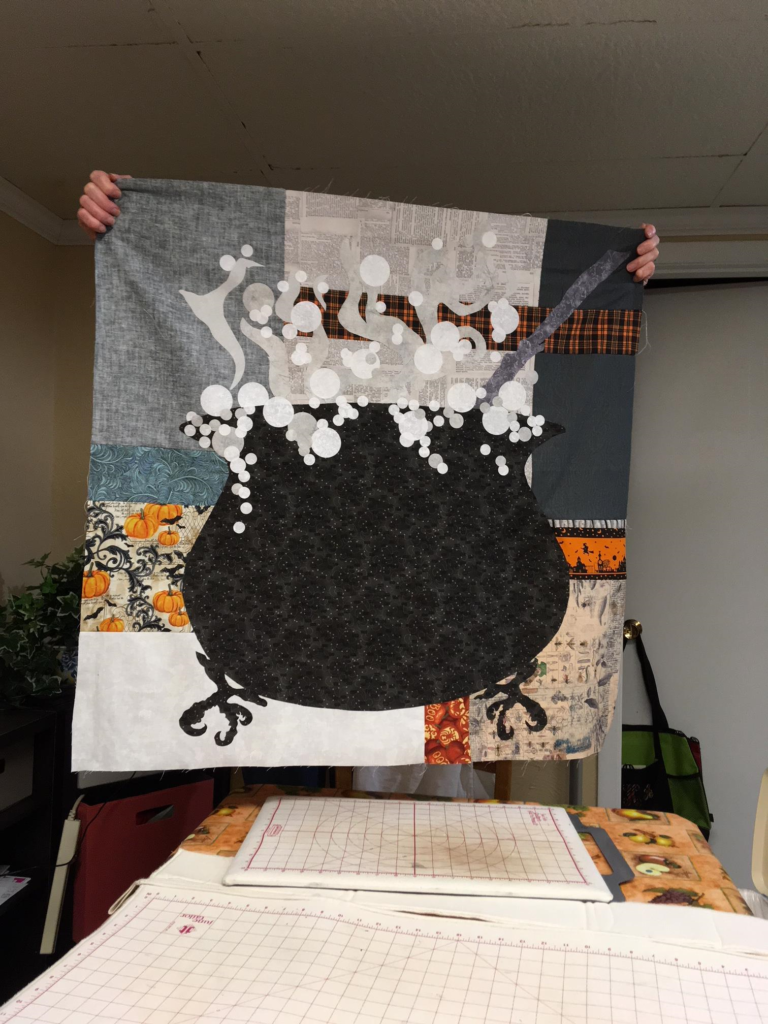
View the variety of background and focus fabrics used in these Halloween quilts.

Creative Cauldrons

First, each quilter chose a focus fabric for their individual cauldrons, auditioning BOTH sides of the fabric.

There are lots of fun Halloween fabrics on the market every year. When choosing one for your cauldron, be sure to audition BOTH sides! You learn how in the Something’s Brewing quilt pattern.

Image of Cauldron QuiltsImage of Cauldron Quilt

These quilters use BOTH spooky sides to stir up trouble!

While the focus fabric is key, background fabrics play a key role in providing interest and sparkle to the quilts. Secondly, these cauldron creators auditioned their possible background fabrics. Variety of fabric genre adds interest to the background. The accent strips are used to pull your eye through the quilt.

If the value is right, use it in your Halloween quilts!

I encourage students to check their values when auditioning fabrics, but be bold with their choices!

If you like a fabric and the value is right, use it! Don’t worry if it’s a little wild or out of your norm.

Karla
Image of Halloween Quilt

As well as checking the values of the backgrounds fabrics, students watch how those fabrics work with their focus fabric. Notice that the lower half is a lighter value and the cauldron really stand out.

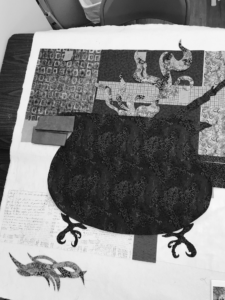
Black and White Image of Cauldron

Quilt-makers of these Halloween quilts evaluate the value of their background fabrics as they relate to the front AND back of their focus fabrics using black and white pictures.

image of show quilts
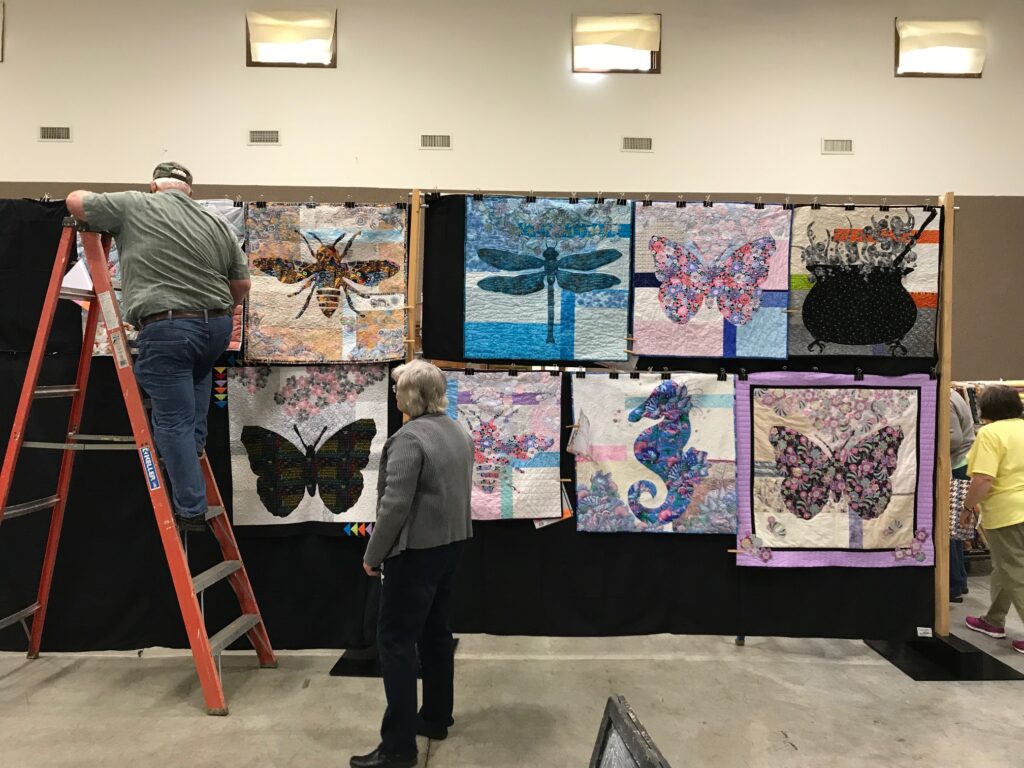
Something’s Brewing from Memory Makers class in their quilt show.

SHOP Something’s Brewing  Quilt Pattern.

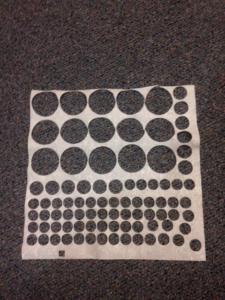
Bubble-making is easy when you use Accuquilt or Scan N Cut to make them! Here is the sheet from bubbles made in record time – less than 7 minutes–on the Scan N Cut!

Image of Cut Fabric

Learn more about the Something’s Brewing Wall Hanging.

See Sweet Pumpkin Applique Pillow for another fun fall project!

Need a yummy meal for busy crafting days? See A Delicious Quilting-Day Soup for You!

A Colorful Quilt Class

There’s something really fun about watching eleven ladies take one pattern (Phoebee, Belle, or Lily) and make it their own. The trick to these patterns is auditioning the fabrics – which can actually take more time than putting the top together! They did a fantastic and creative job of fabric selection and color/value placement of all the elements (background pieces, accent strips, and both sides of the focus fabric).

In addition to making these beauties, we had tips, door prizes, a mini-trunk show and lunch.

To not reveal their quilts before completion, I’m just going to give you an “in-progress” peek at the variation in these winged-girl quilts:Image of Phoebee Quilt in Progress

Image of Belle Pattern in ProgressImage of Lily Pattern in ProgressImage of Belle Pattern in Progress Image of Lisa's Belle Pattern in Progress Image of Lynnore's Belle Pattern in Progress

Image of Marla's Belle Pattern in Progress Image of Nancy's Phoebee Pattern in Progress Image of Paige's Phoebee Pattern in ProgressImage of Mary's Belle Pattern in ProgressImage of Merle's Belle Pattern in ProgressGreat job, friends!

Now let’s get looking to #usebothsides of your focus fabric to make some beautiful bouquets!

Rose uses the reverse of her focus fabric for the vase and the front for the bouquet and binding.

Image of Flower Bouquet Quilt

Rose quilt pattern is available at etsy.com/shop/CreativeBeeStudios

Check your stash-do you have any beautiful “wrong-sides” to use?

Sign up below to learn more about upcoming patterns and get quilting tips, musings and more right in your mailbox (about once a week).

« Older posts Newer posts »